I have been working on this pattern for quite some time and it is a doozy! It has been a monumental challenge for me to get this pattern down on paper. Along with many life events this year (retirement, wedding, moving into a rental home, grand baby, home building, a second up-coming move…), I was trying to squeeze in a pattern or two. I found that I could seek solace in the knitting part of the project, but sitting down to write the pattern and make the corresponding videos was a chore.
As my faithful readers may recall, I made the original poncho about two years ago and was waffling about writing a pattern. You can read all about that in this post:
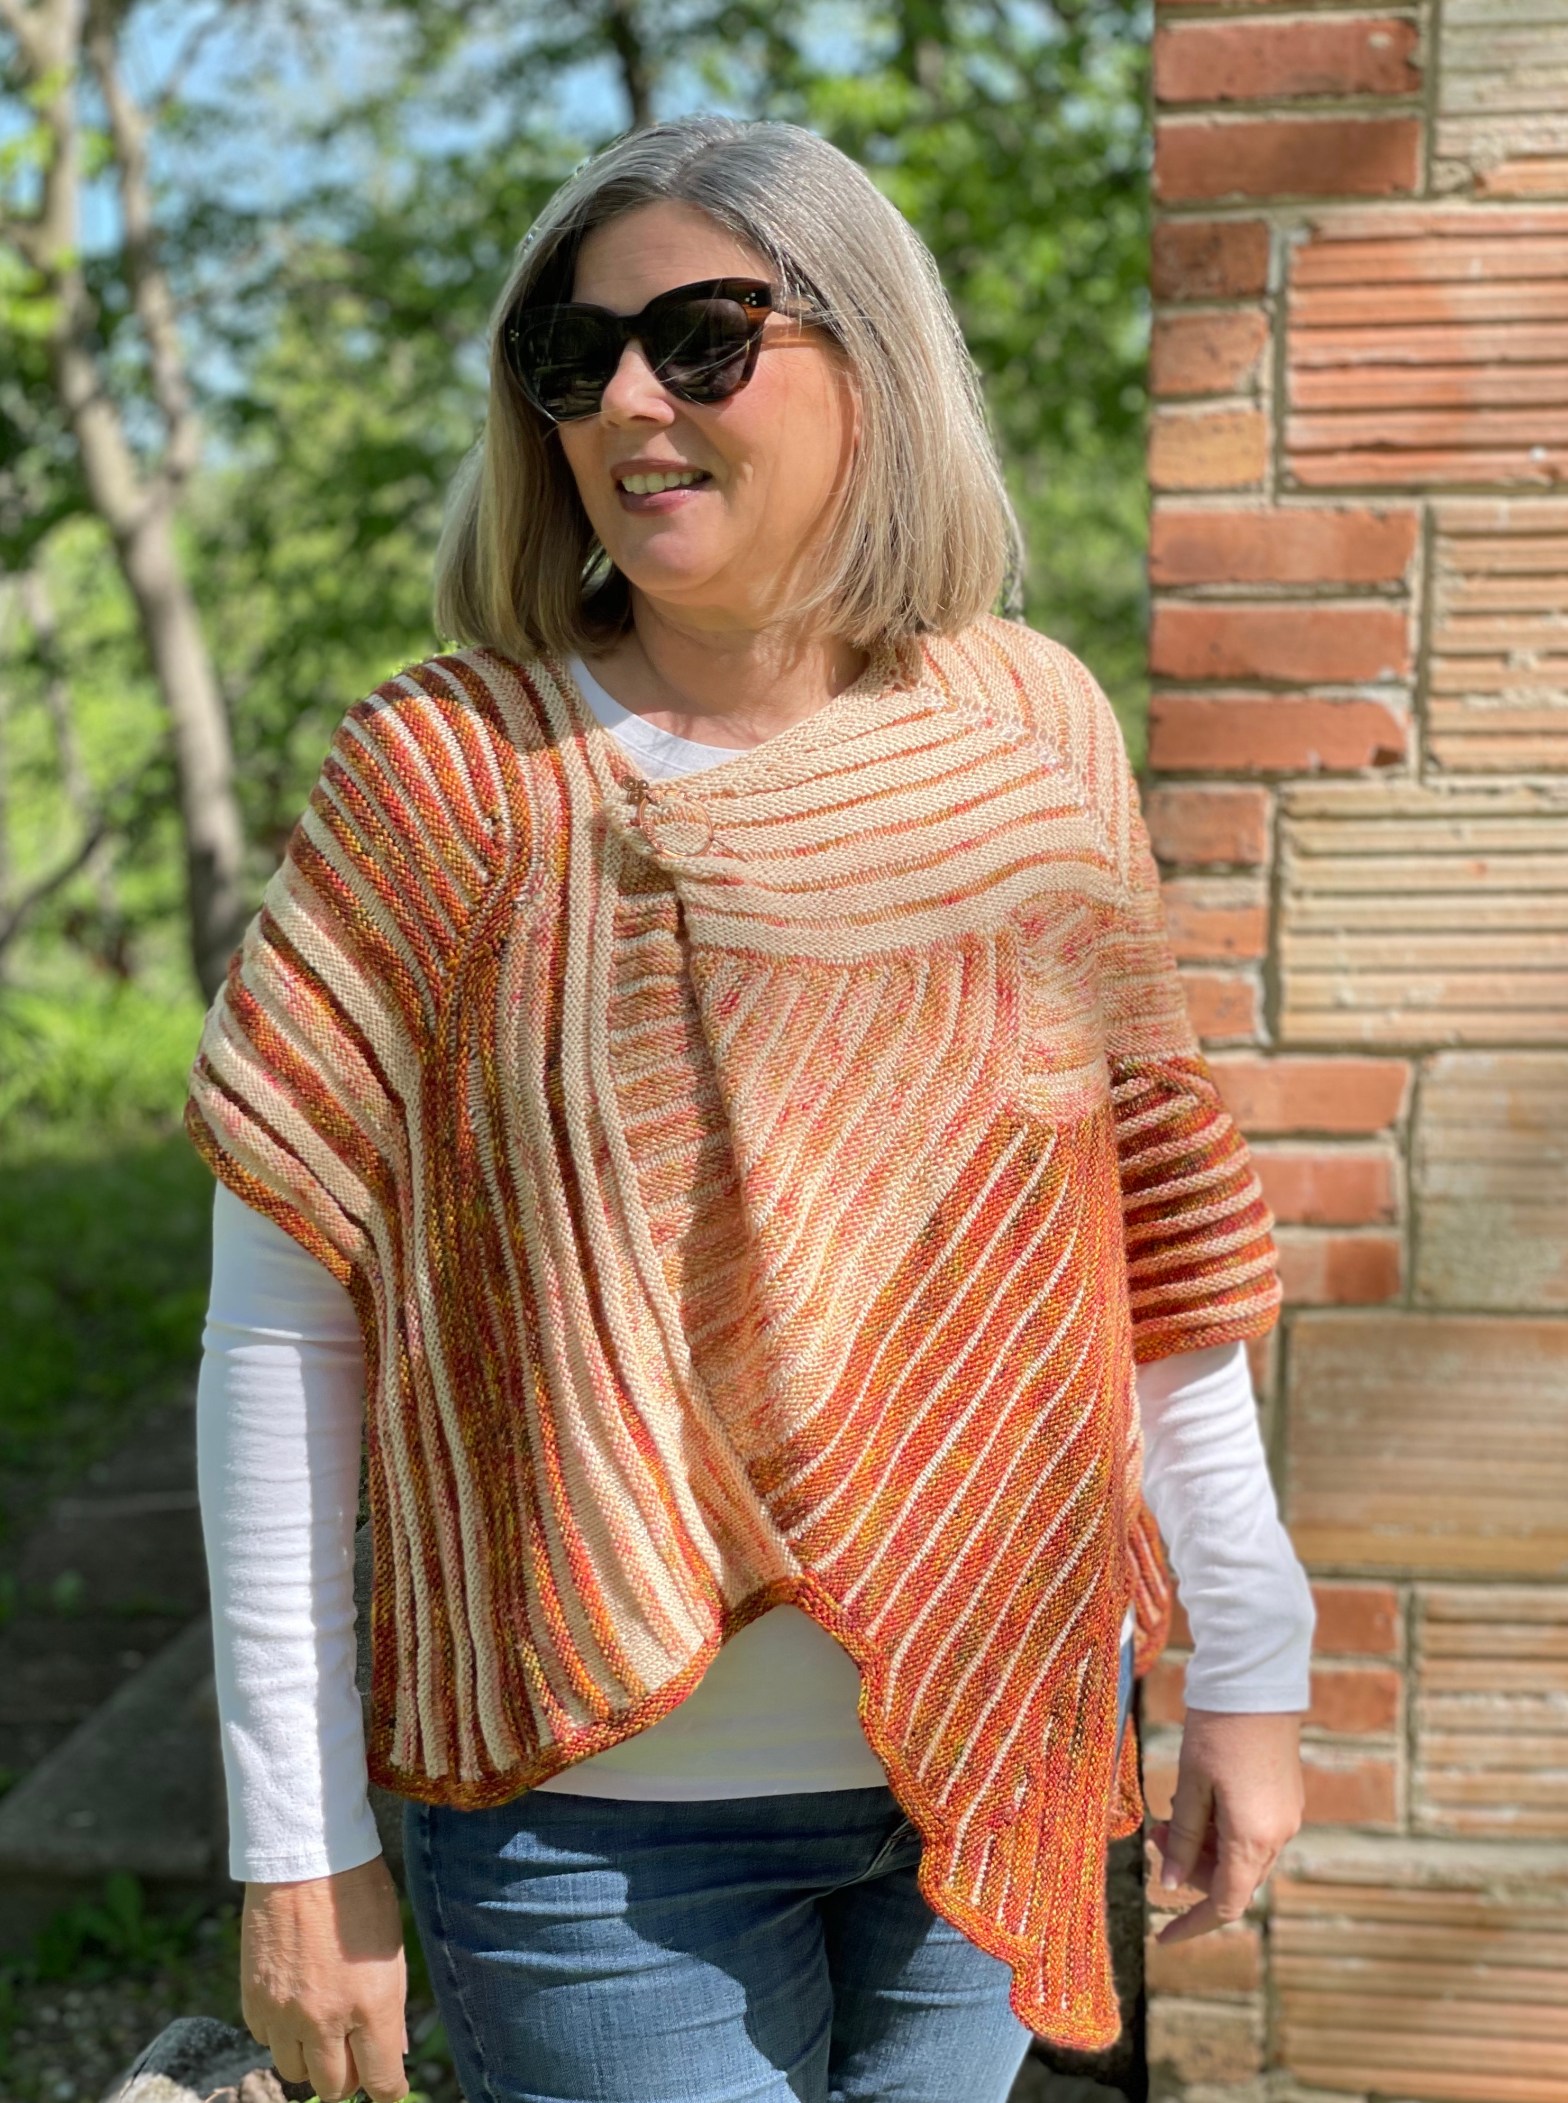
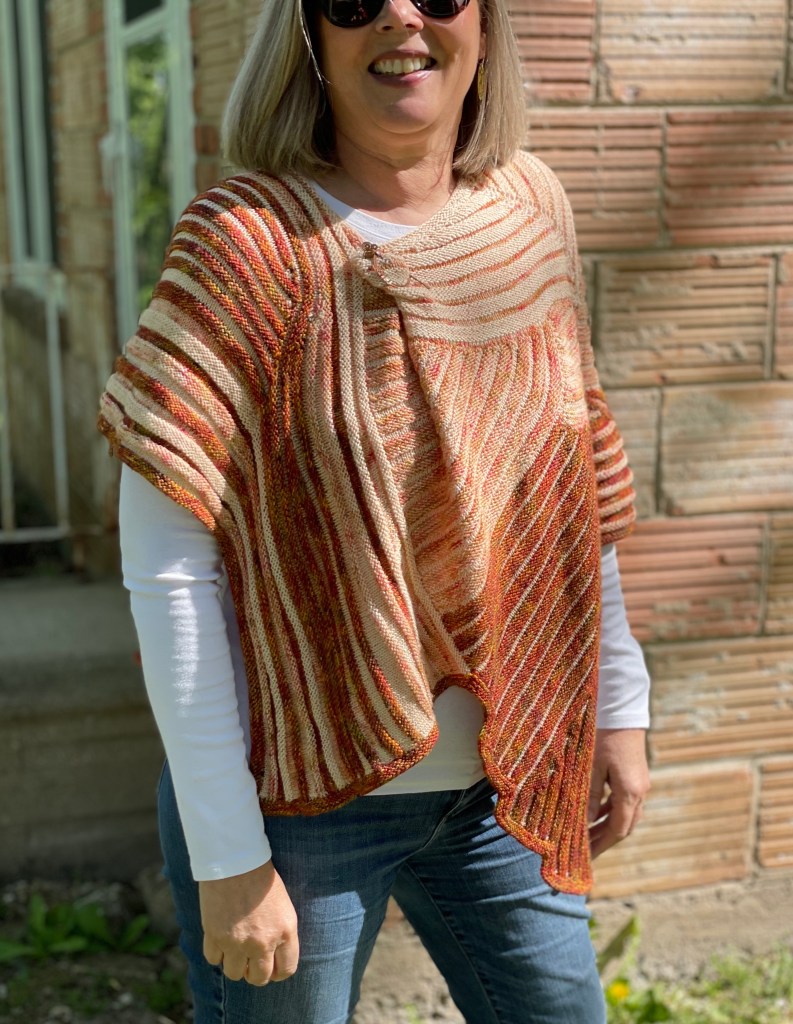
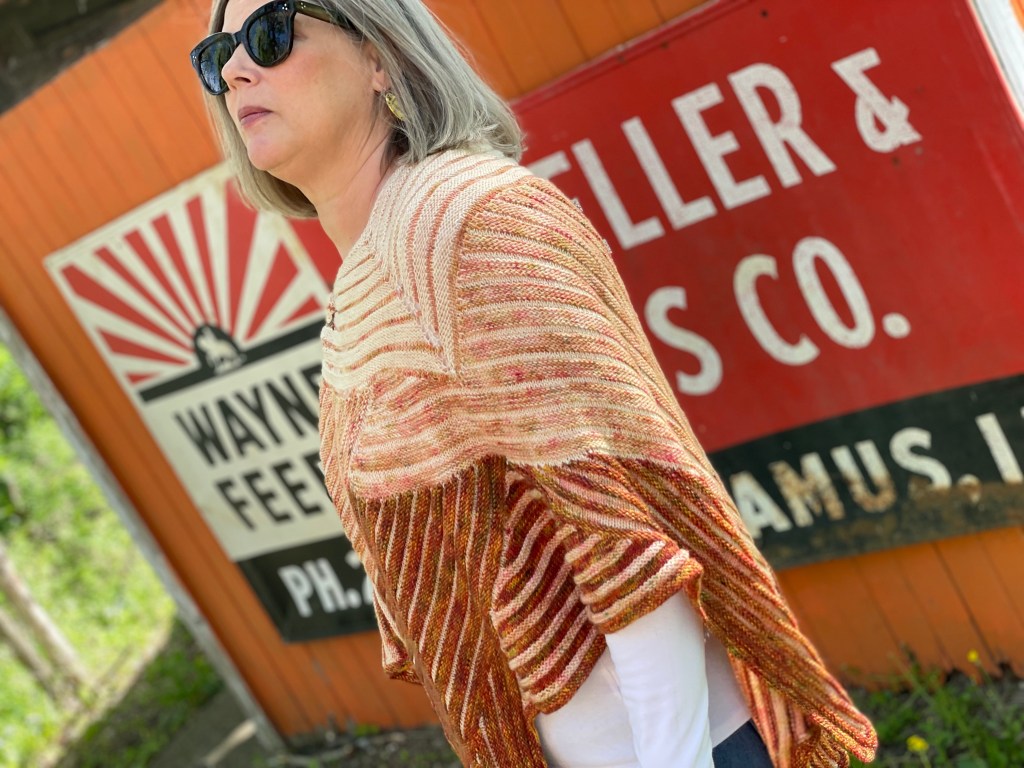
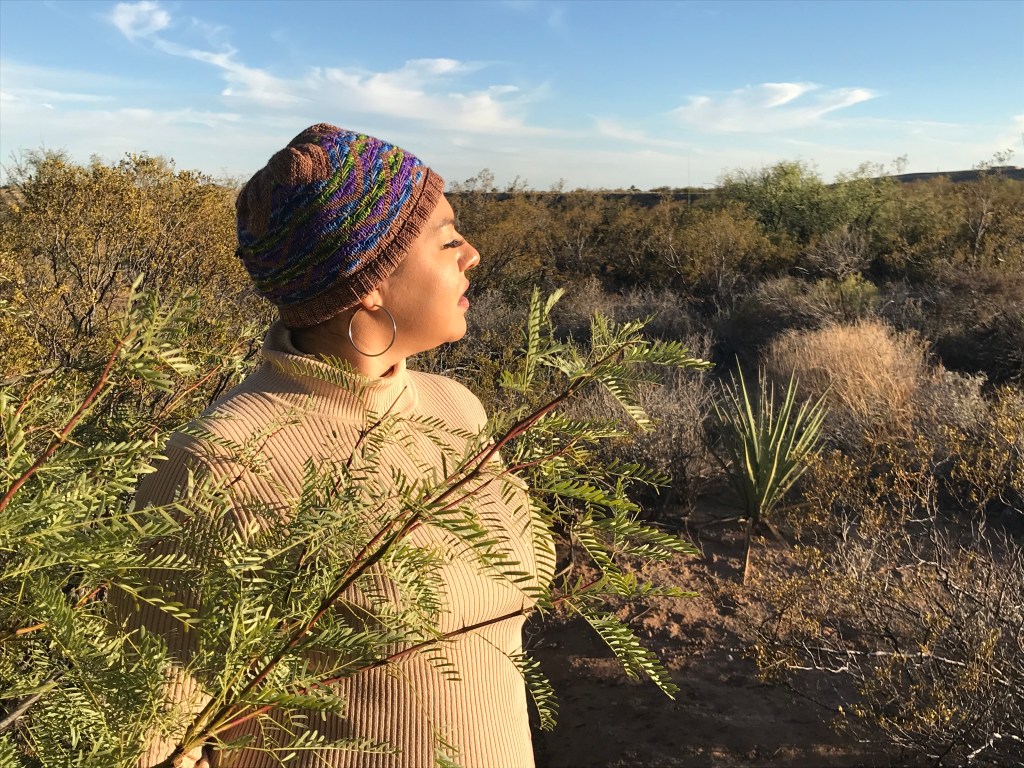
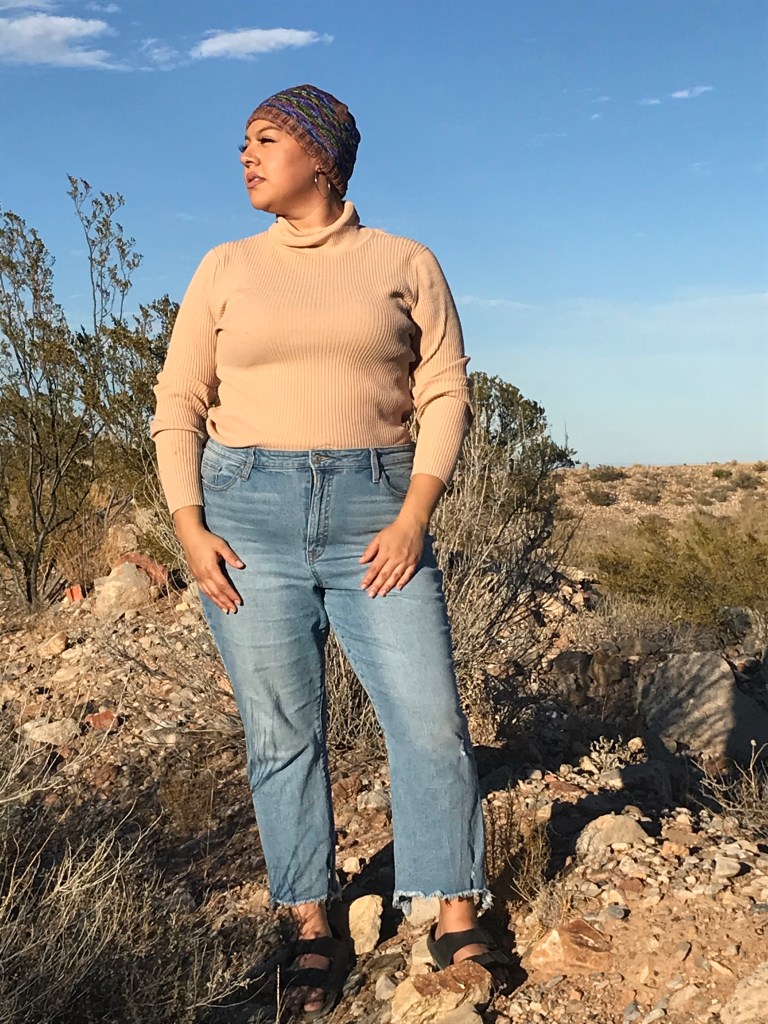
Once I committed to making a pattern, I had to knit up a second piece using my desired yarn (Leading Men Fiber Arts, Diva) and a new color palette. I chose earth-tone oranges as a homage to my recent hiking excursion in Upper Antelope Canyon (a slot canyon in Northern Arizona). We visited in September 2021, and it was amazingly beautiful! The gallery below are some of the photos I took during our guided tour through https://adventurousantelopecanyon.com/. Our tour guide Irene was awesome!
Scenes from Upper Antelope Canyon, Rattlesnake Canyon, and Owl Canyon.
My thinking was that while I was knitting the second piece, I would write the pattern, make the charts, and create the videos I needed. I thought that this would be straightforward since this piece is made in sections, aka modular knitting. I began writing the directions for each section, making the corresponding charts, and making the videos while working on the knitted piece.
But early on in Section 3, I decided to make some formatting changes to the charts and needed to edit the pattern for sections 1 and 2 a bit. Those decisions made all the videos obsolete. Ugh. Since I didn’t want that to happen again, I worked through the remaining sections of the pattern, charts, and completed the knitting without making any new videos.
I was paralyzed on this project for a long while after I realized that I would have to remake the videos–it was the one thing I could willfully ignore for awhile–but now I think I’m finally in a better place to forge ahead.
I now have a very rough draft of the pattern and (hopefully!) better charts, and aim to make the promised videos as I work through yet a third poncho. As I was telling a close knitting friend, “The answer is always more yarn.”
I’ve started poncho #3, and I have annotated the pattern draft where I need to insert the videos. [Note: it’s a little more challenging now as I don’t have a dedicated quiet space in the rental house. You might get to hear/see John as well as Lucie and Crash in these videos.] In the meantime, if you are interested in helping me work through the pattern, test knit, or joining in as a KAL, let me know in the comments. I’ll be running the test knit through this site (not Ravelry for now), simply because it is so much easier to add videos here rather than at Ravelry.
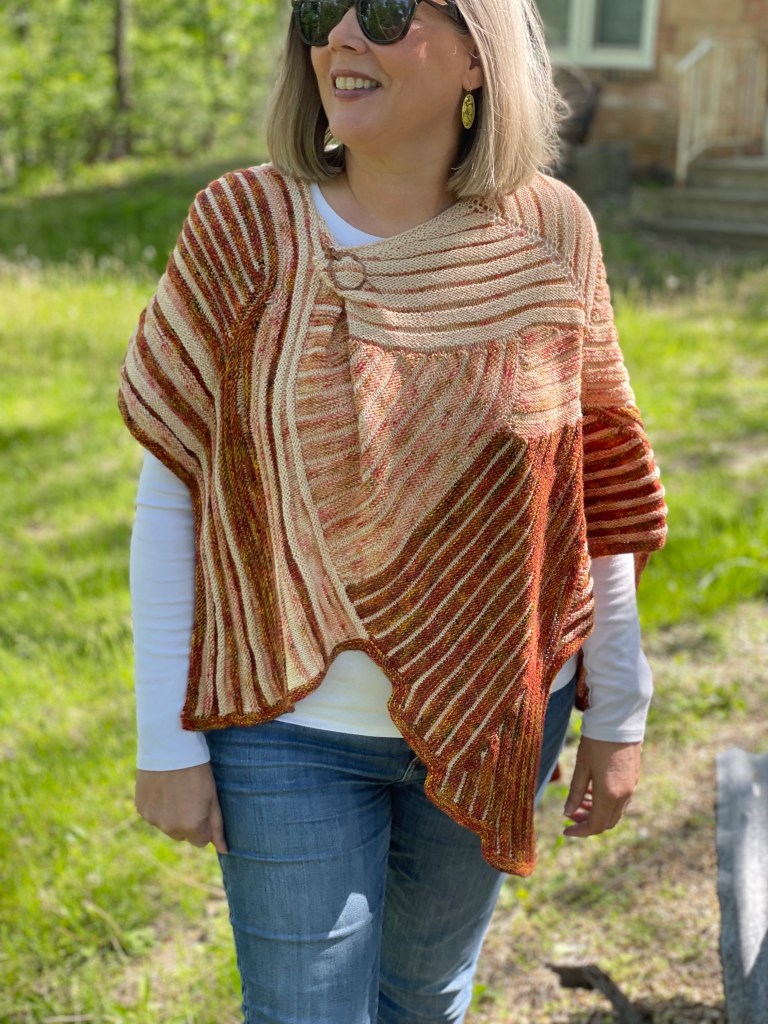
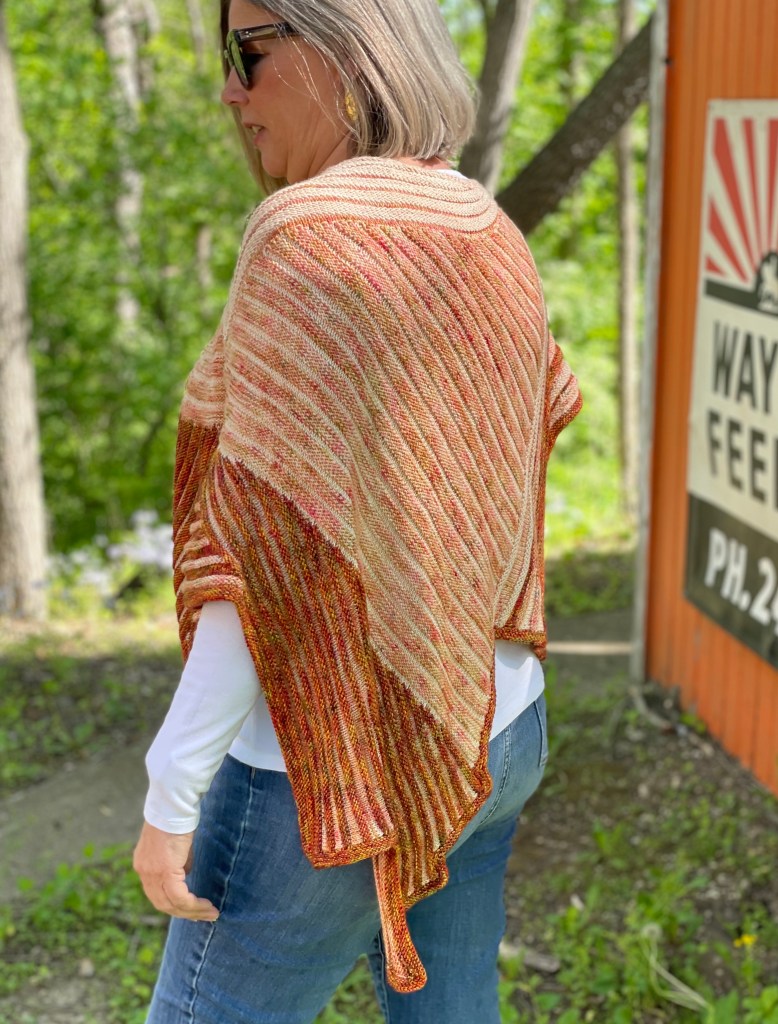
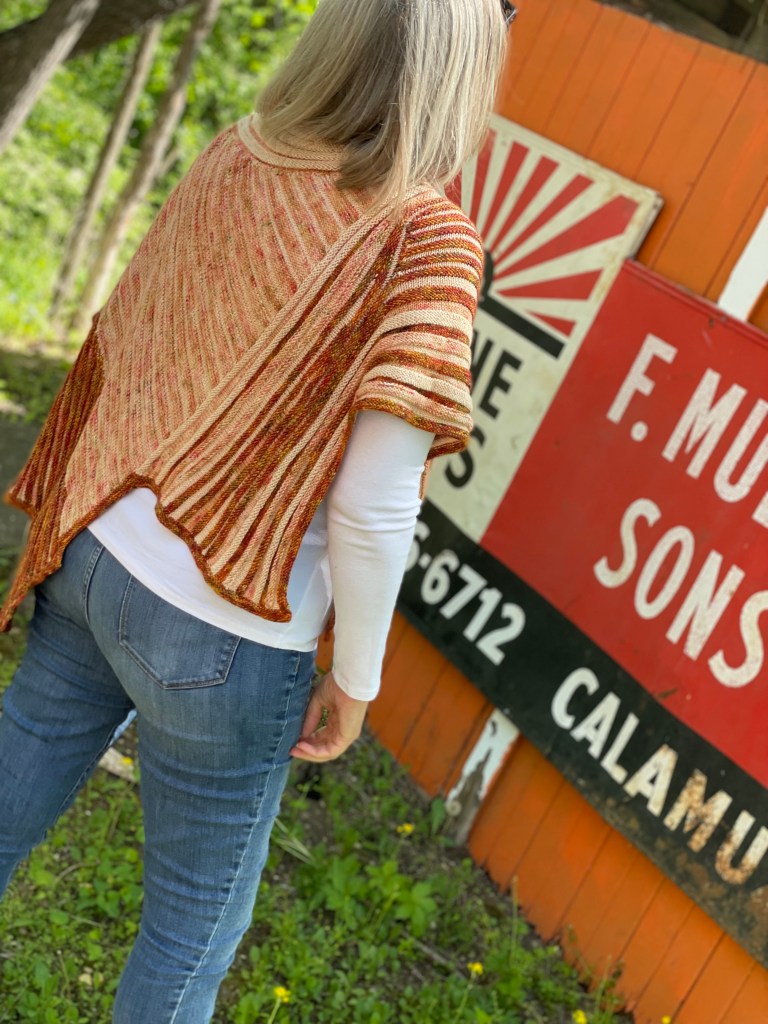
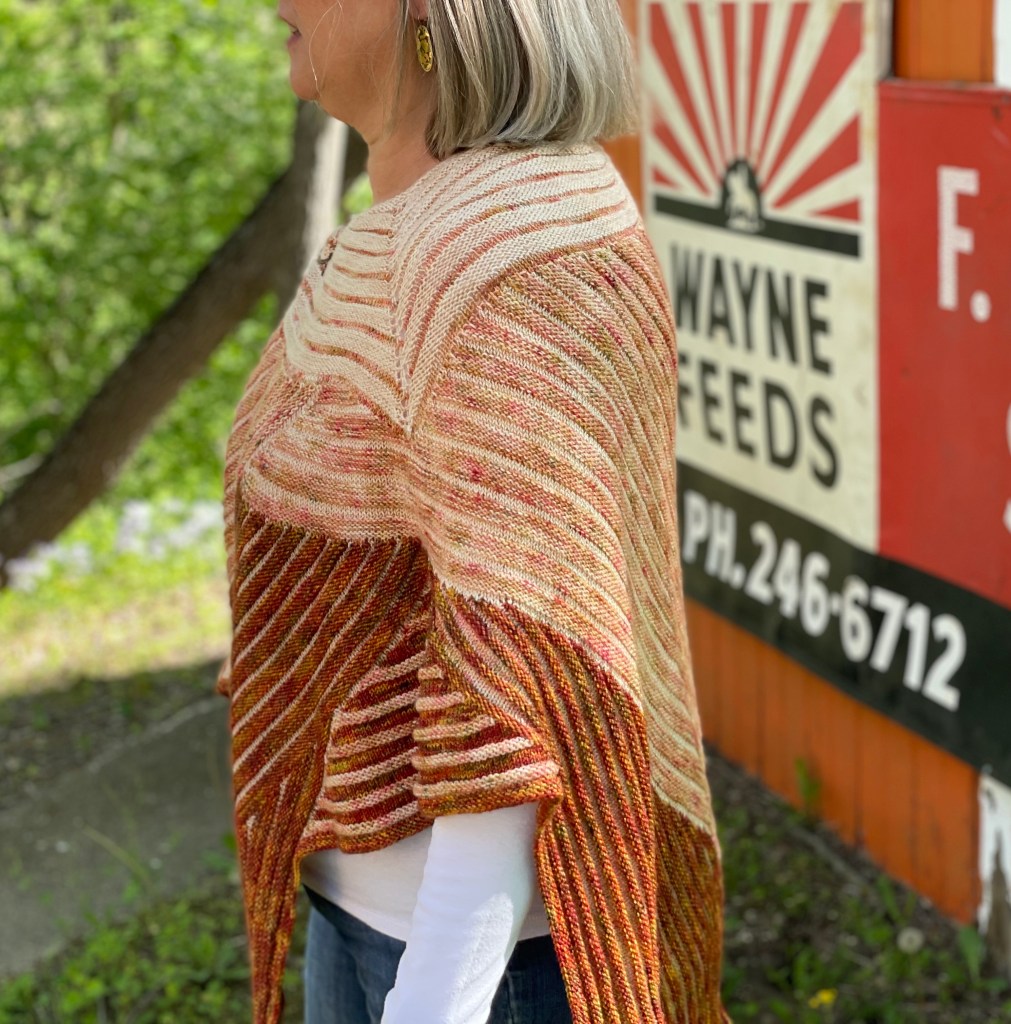
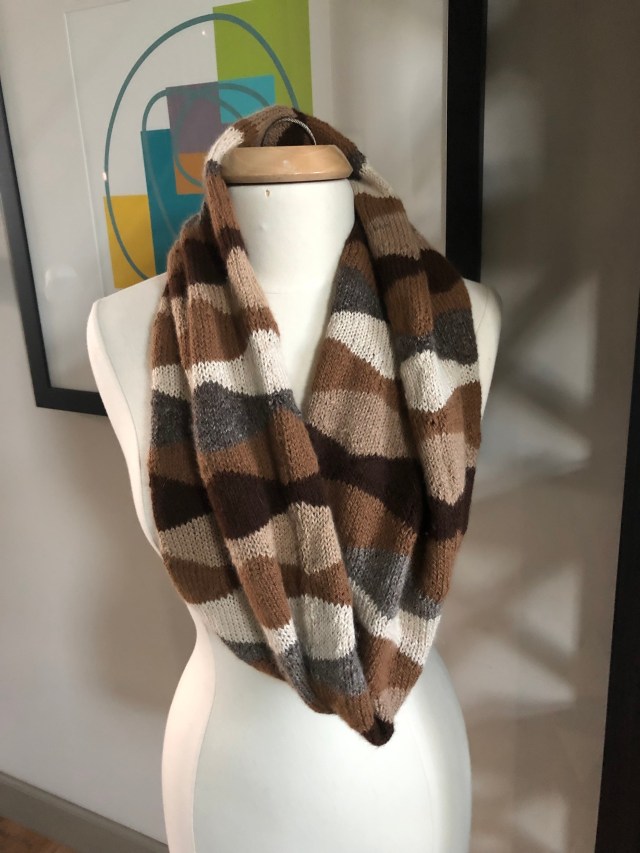
Photos of my completed Antelope Canyon Poncho are shown below.
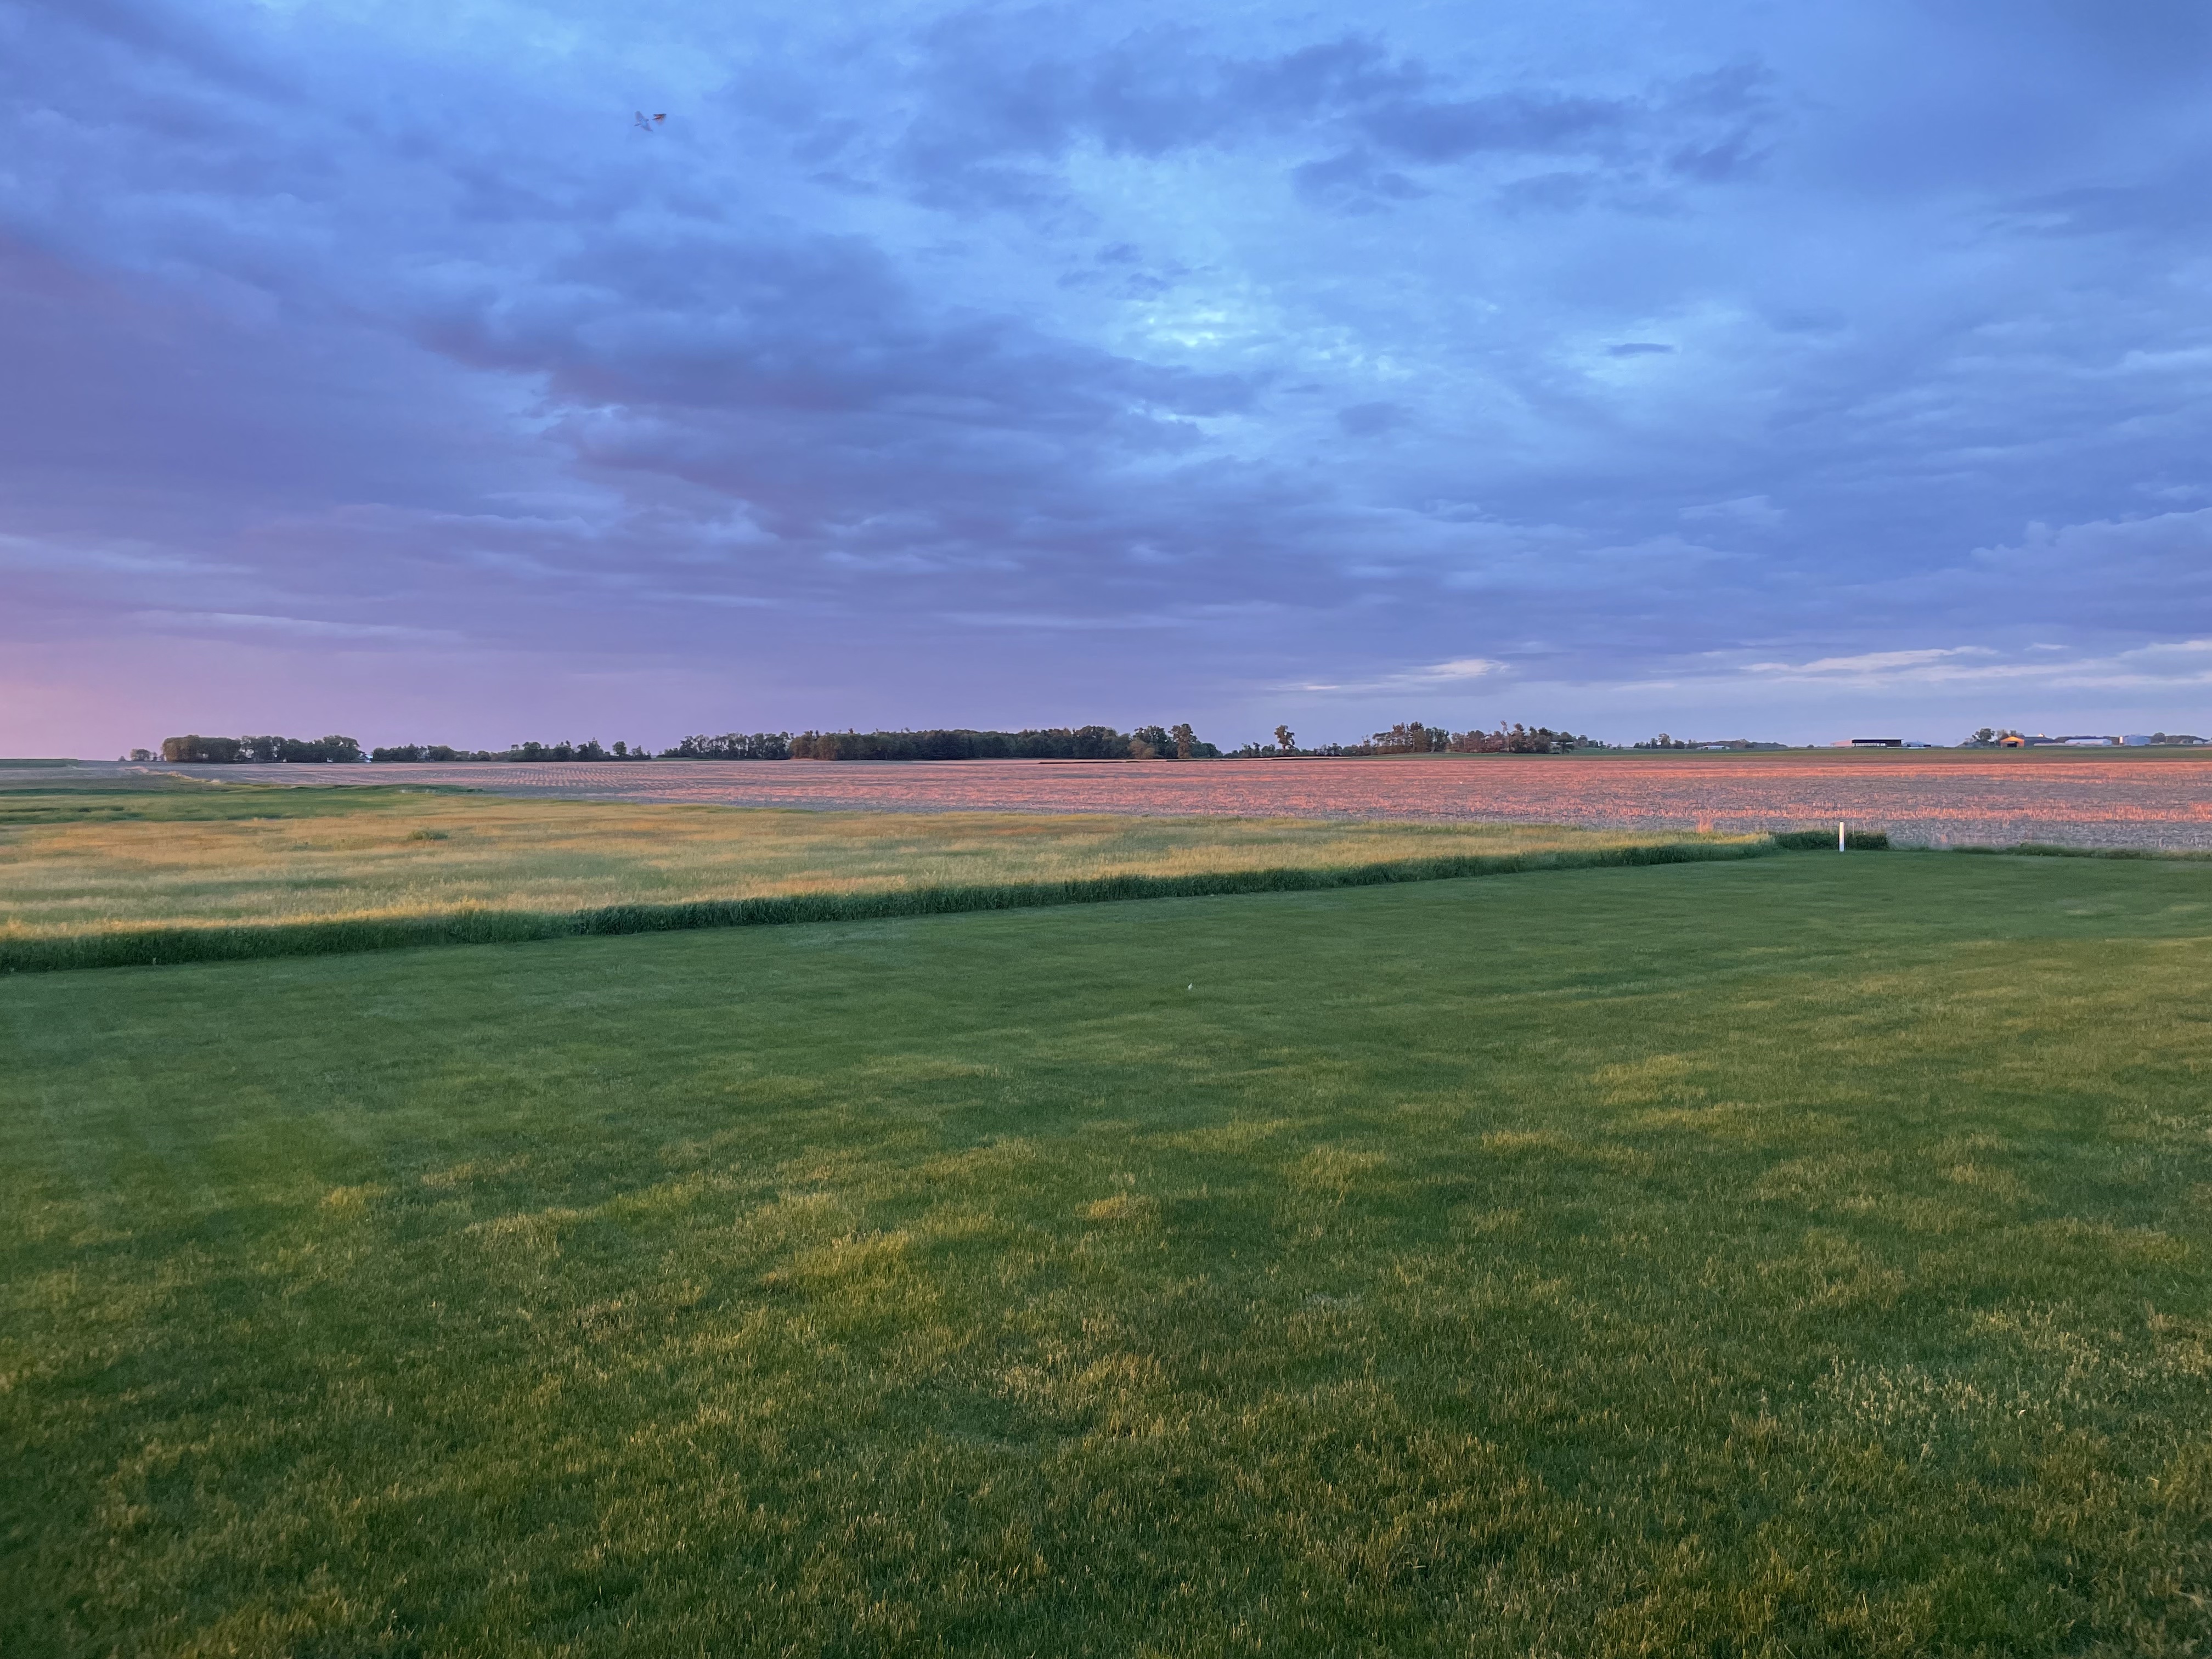
One of our many recent life changes has been a move to rural Iowa. We’ve been anticipating this change for a few years now and so far, I am loving it! We are renting a home temporarily while our new home is being built. We can see our build site from the back patio of our rental home, and it’s been great fun to watch the progress.
I’ve taken some time to get settled in to a new routine. We visit the build site every morning and evening to see what has changed. We hike around the property looking and listening to birds and watching for deer. The bird sounds have been amazing! I use the Merlin app to identify birds by their calls and it has been a game-changer for my enjoyment of birding. We’ve heard and seen pheasants, pelicans, eagles, sand hill cranes, orioles, red-winged blackbirds, dickcissels, turkeys, meadowlarks, indigo buntings, wrens, grosbeaks, woodpeckers, and more.
The views below are from the back deck of our rental home. Behind the lawn there is a huge meadow of long grasses. It looks like velvet when the wind blows across it. I’m eagerly anticipating watching the lightening bugs from that deck.
I hope to begin gardening next year, once we have a larger place to store equipment and have chosen an appropriately sunny site. I’ve got my compost bin ready to deploy as soon as we can find a level place for it and it won’t get disturbed by construction.
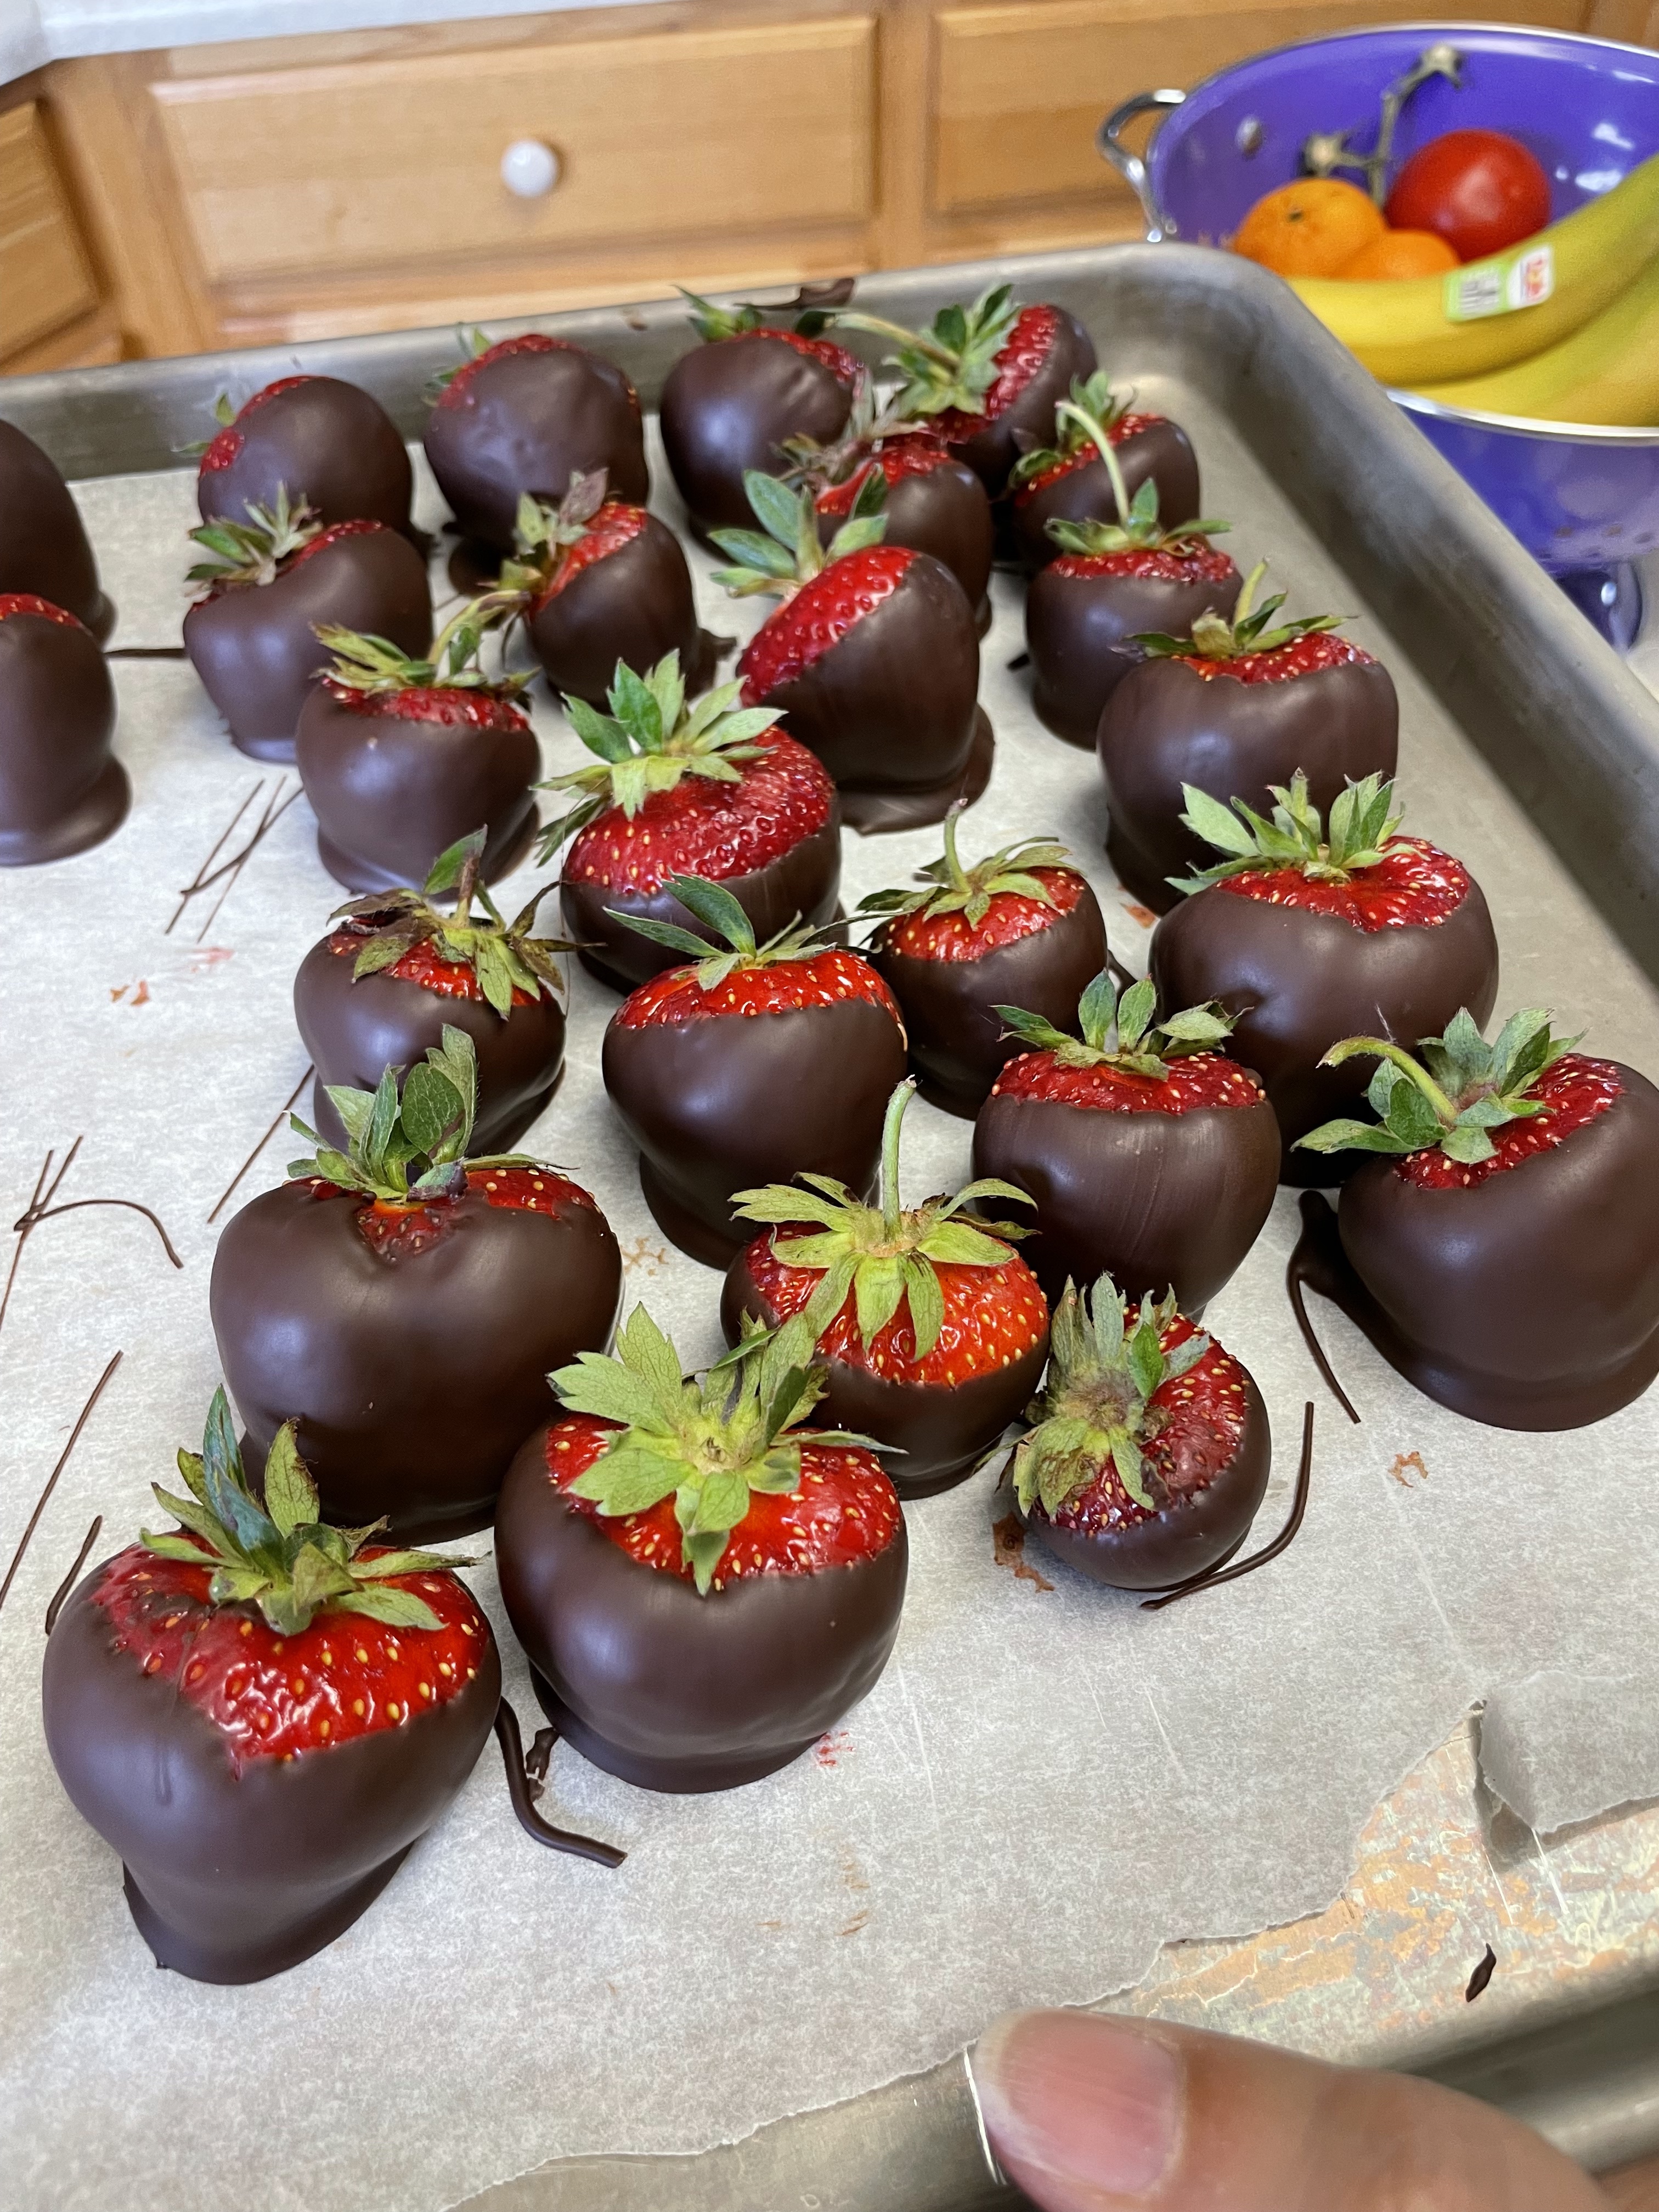
This week I found a nearby strawberry patch (Annies Acres Strawberries) and got some freshly picked strawberries. Oh, my! The difference between local, fresh and those from the grocery store is incredible. We purchased just enough for fresh strawberries on ice cream, yogurt, and some chocolate-covered strawberries. I promised myself that I would make freezer jam next year.
NOTE: If you purchased this pattern before 6/16/2022, there is a BO6 missing from the beginning of Row 313. The pattern has now been updated through Ravelry.
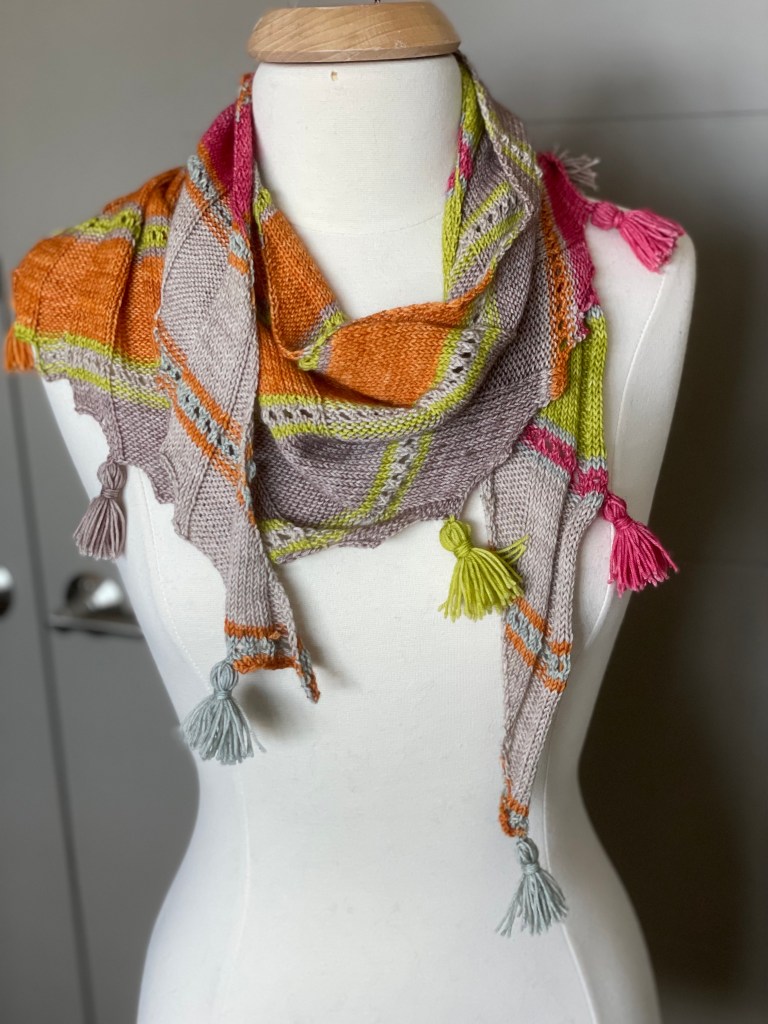
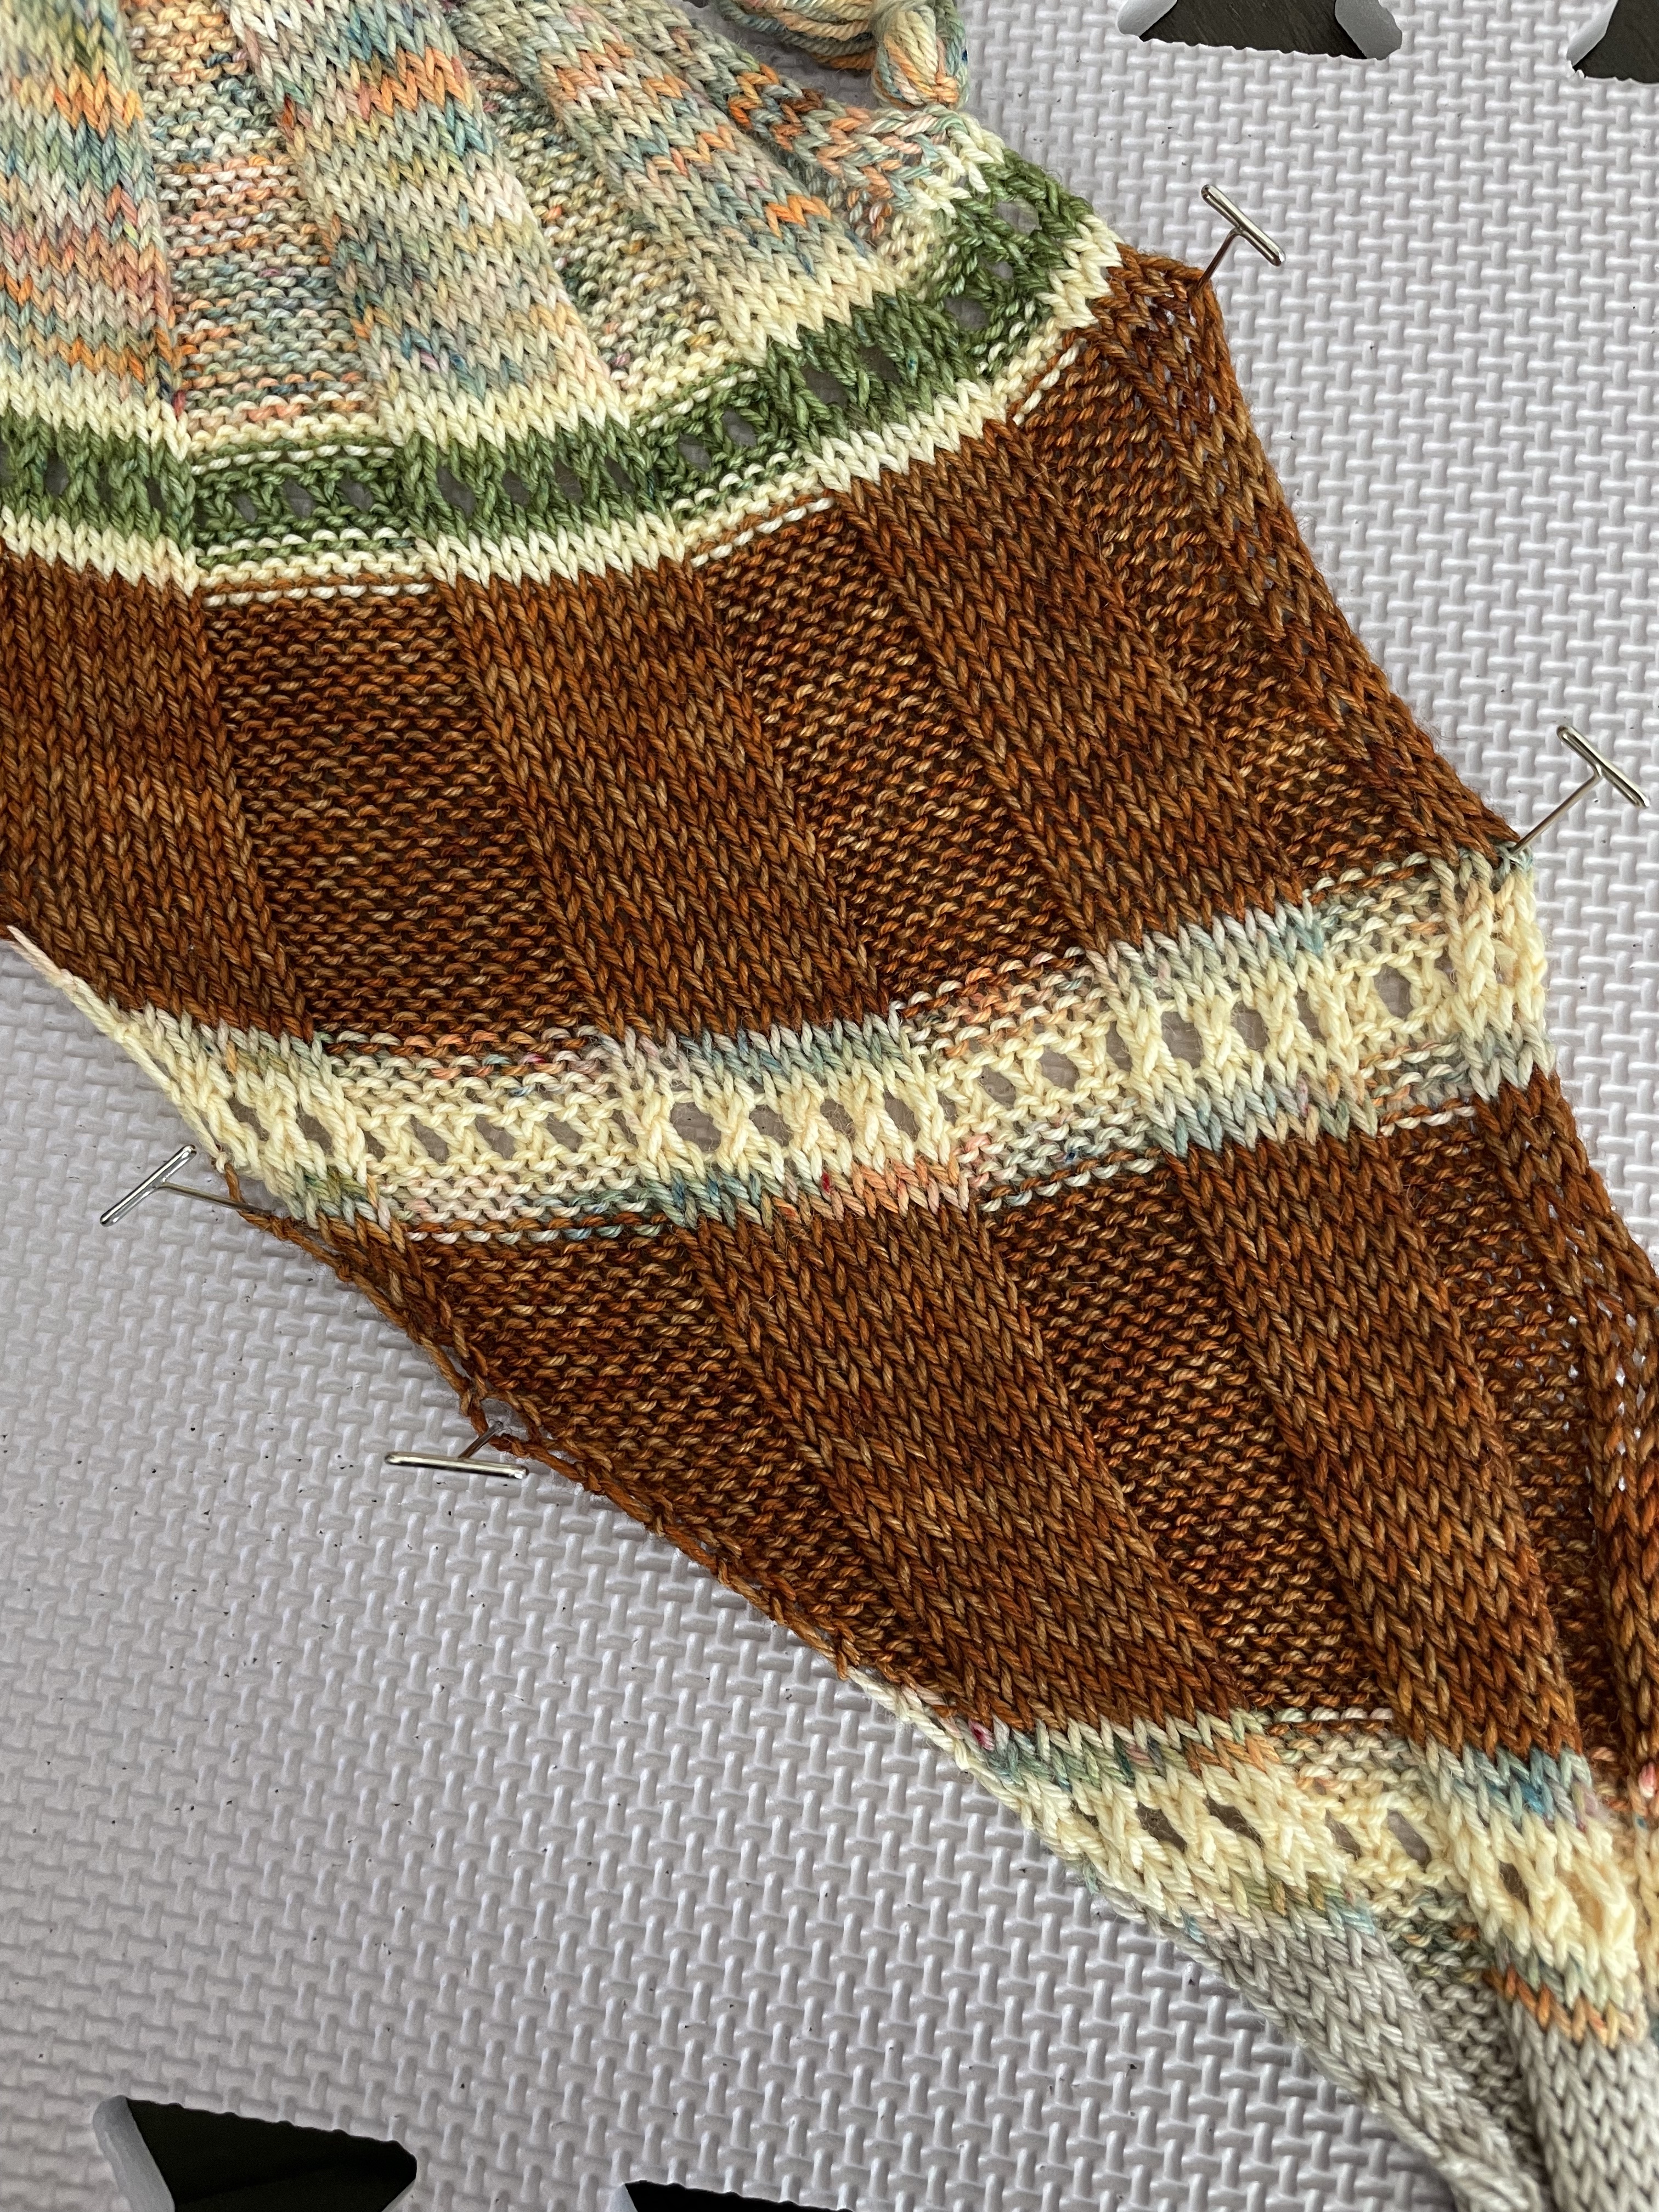
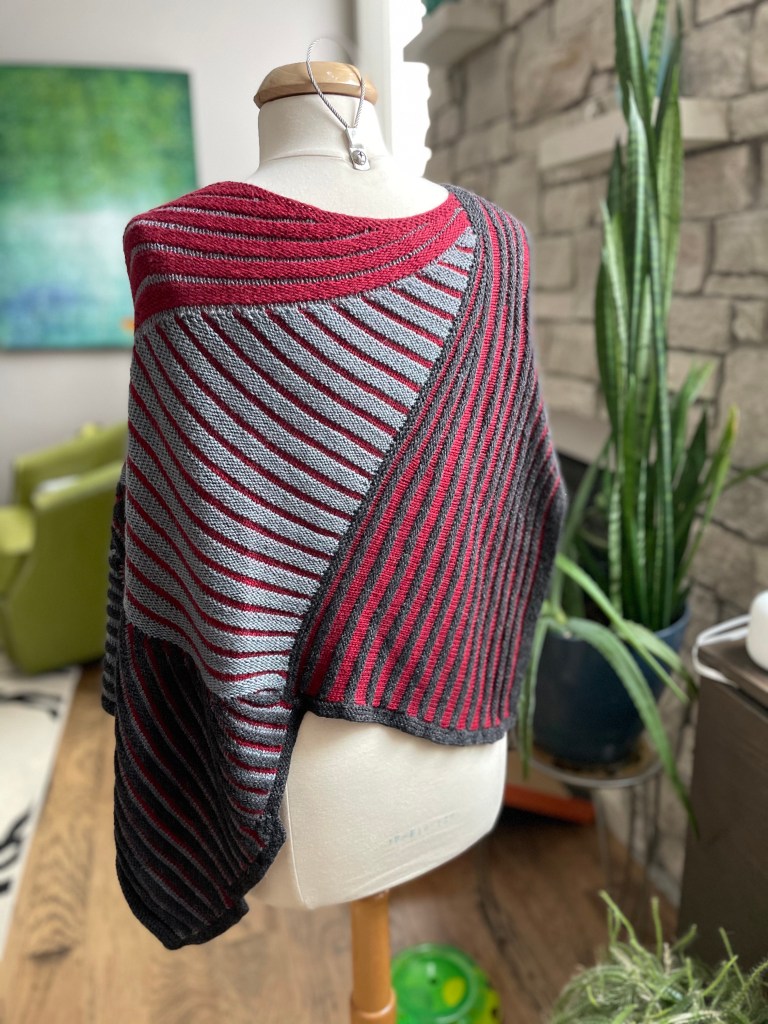
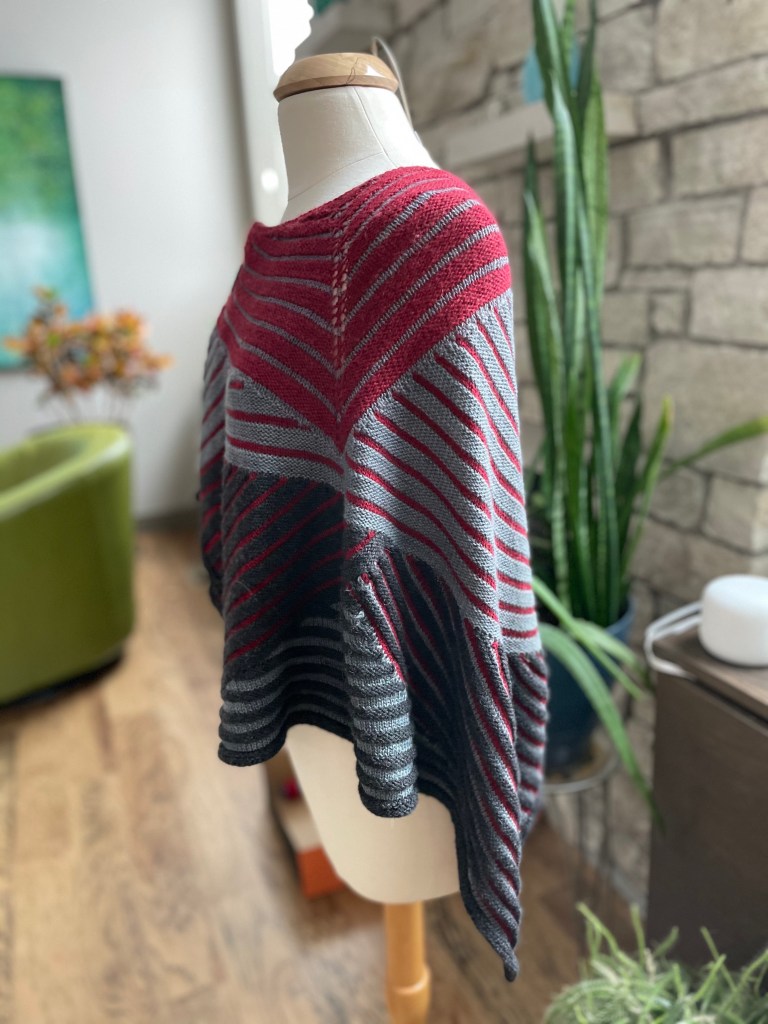
Overview: This small, asymmetric, crescent-shaped shawl is reversible due to the alternating sections of stockinette and reverse stockinette stitches. The overall construction consists of three distinct patterns: the shape, the texture, and the color.
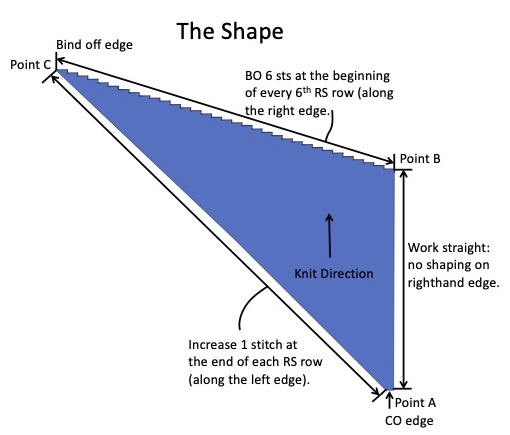
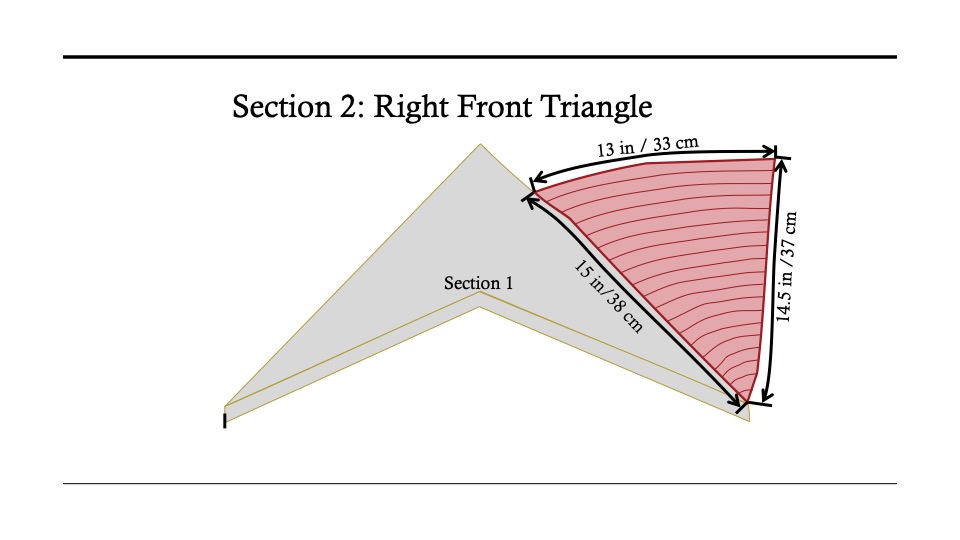
First, the triangular shape of the shawl is constructed by increasing one stitch at the end of each right side (RS) row (from Point A to Point C on the schematic below). I used a YO increase between the last two stitches of every RS row for these increases. The top edge of the triangle (Point B to Point C) is constructed by binding off a small number of stitches (6 sts) at evenly spaced intervals (every 6th row). The right edge of the triangle (Point A to Point B) is worked straight (without shaping).
A Yarn Over (YO) is worked between the last two stitches on every right side (RS) row.
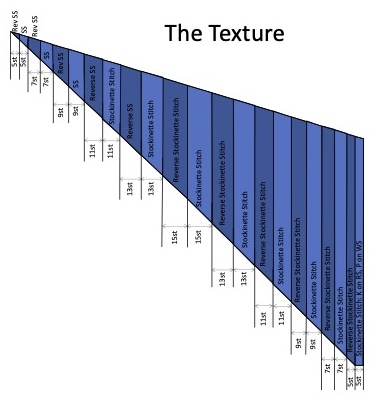
Second, the texture of the fabric is a large rib pattern. Each row from point A to point B begins with 5 stockinette stitches (K on RS, P on WS). As the increases occur, stitches are worked in the rib pattern, alternating sections of stockinette and reverse stockinette stitches. The sections of stockinette and reverse stockinette get larger and larger until they are each 15 stitches wide, and then they reduce back to 5 stitches.
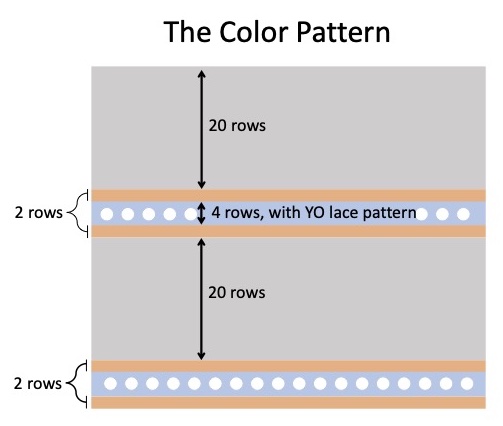
Finally, there is a striped color pattern: 2 rows of color 1, 4 rows of color 2 in simple lace pattern (YO, K2tog or YO, P2tog), 2 rows of color 1, 20 rows of color 3.
Blocking and Finishing
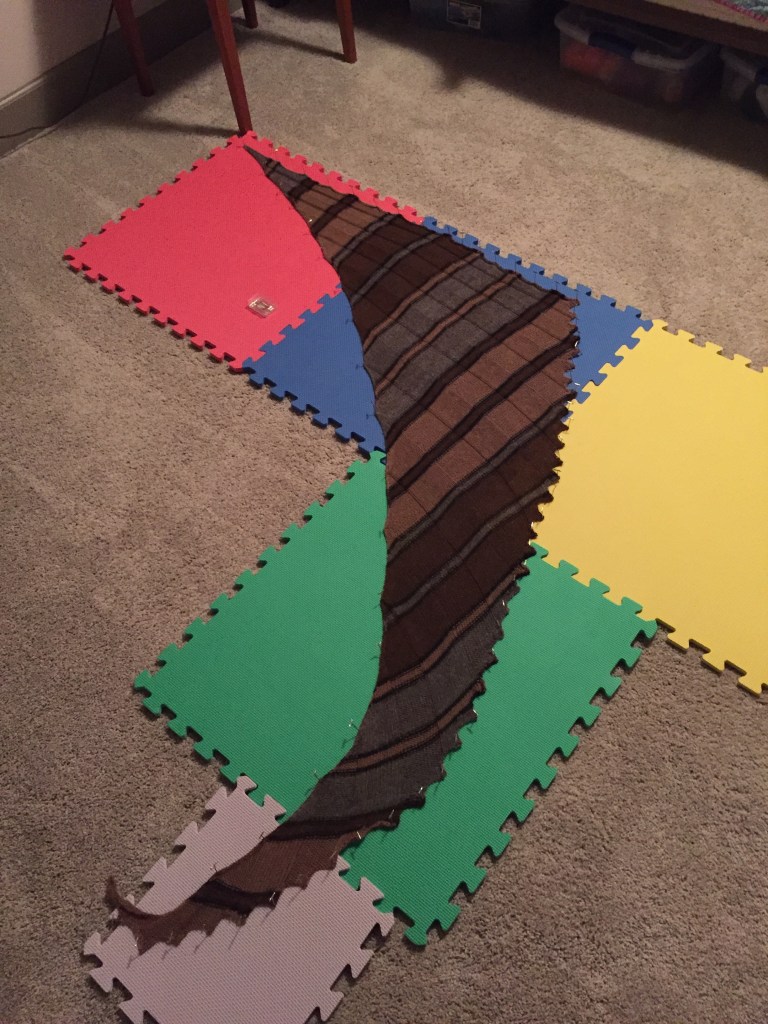
To block, I soaked the shawl in a no-rinse wash (Eucalan or Soak) for about 30 minutes. I like to soak for at least 30 minutes to ensure that all the fibers are wet and have expanded. The wet fibers are relaxed and allow any wonky stitches (too loose or too tight) to slide past each other. Blocked knitting always looks more even than unblocked knitting. Once thoroughly wet, I gently squeeze out as much excess water as I can, then wrap in a towel and apply pressure to squeeze out more water.
I pinned each of the bound off corners, down the straight edge, and along the increase edge. Alternatively, you could use blocking wires along the straight and curved edges. Blocking wires should eliminate the slight puckers generated by the pins. These typically disappear quickly after the pins are released, so I don’t worry about them.
After the shawl has completely dried, it’s time to grab a glass of wine, put on your favorite show/podcast/audio book and weave in those ends. There are many ends! I tend to clip the yarn for every color change because I can’t seem to remember to carry it along the edge. And, once you begin the bind off edge, it’s more challenging to carry the yarn. So I embrace the weaving in ends by indulging in another activity that enjoy!
The weaved ends along the straight edge are generally hidden by the gentle curvature of the first 5 knitted stitches. I try to hide the woven ends as much as I can along the bound off edges.
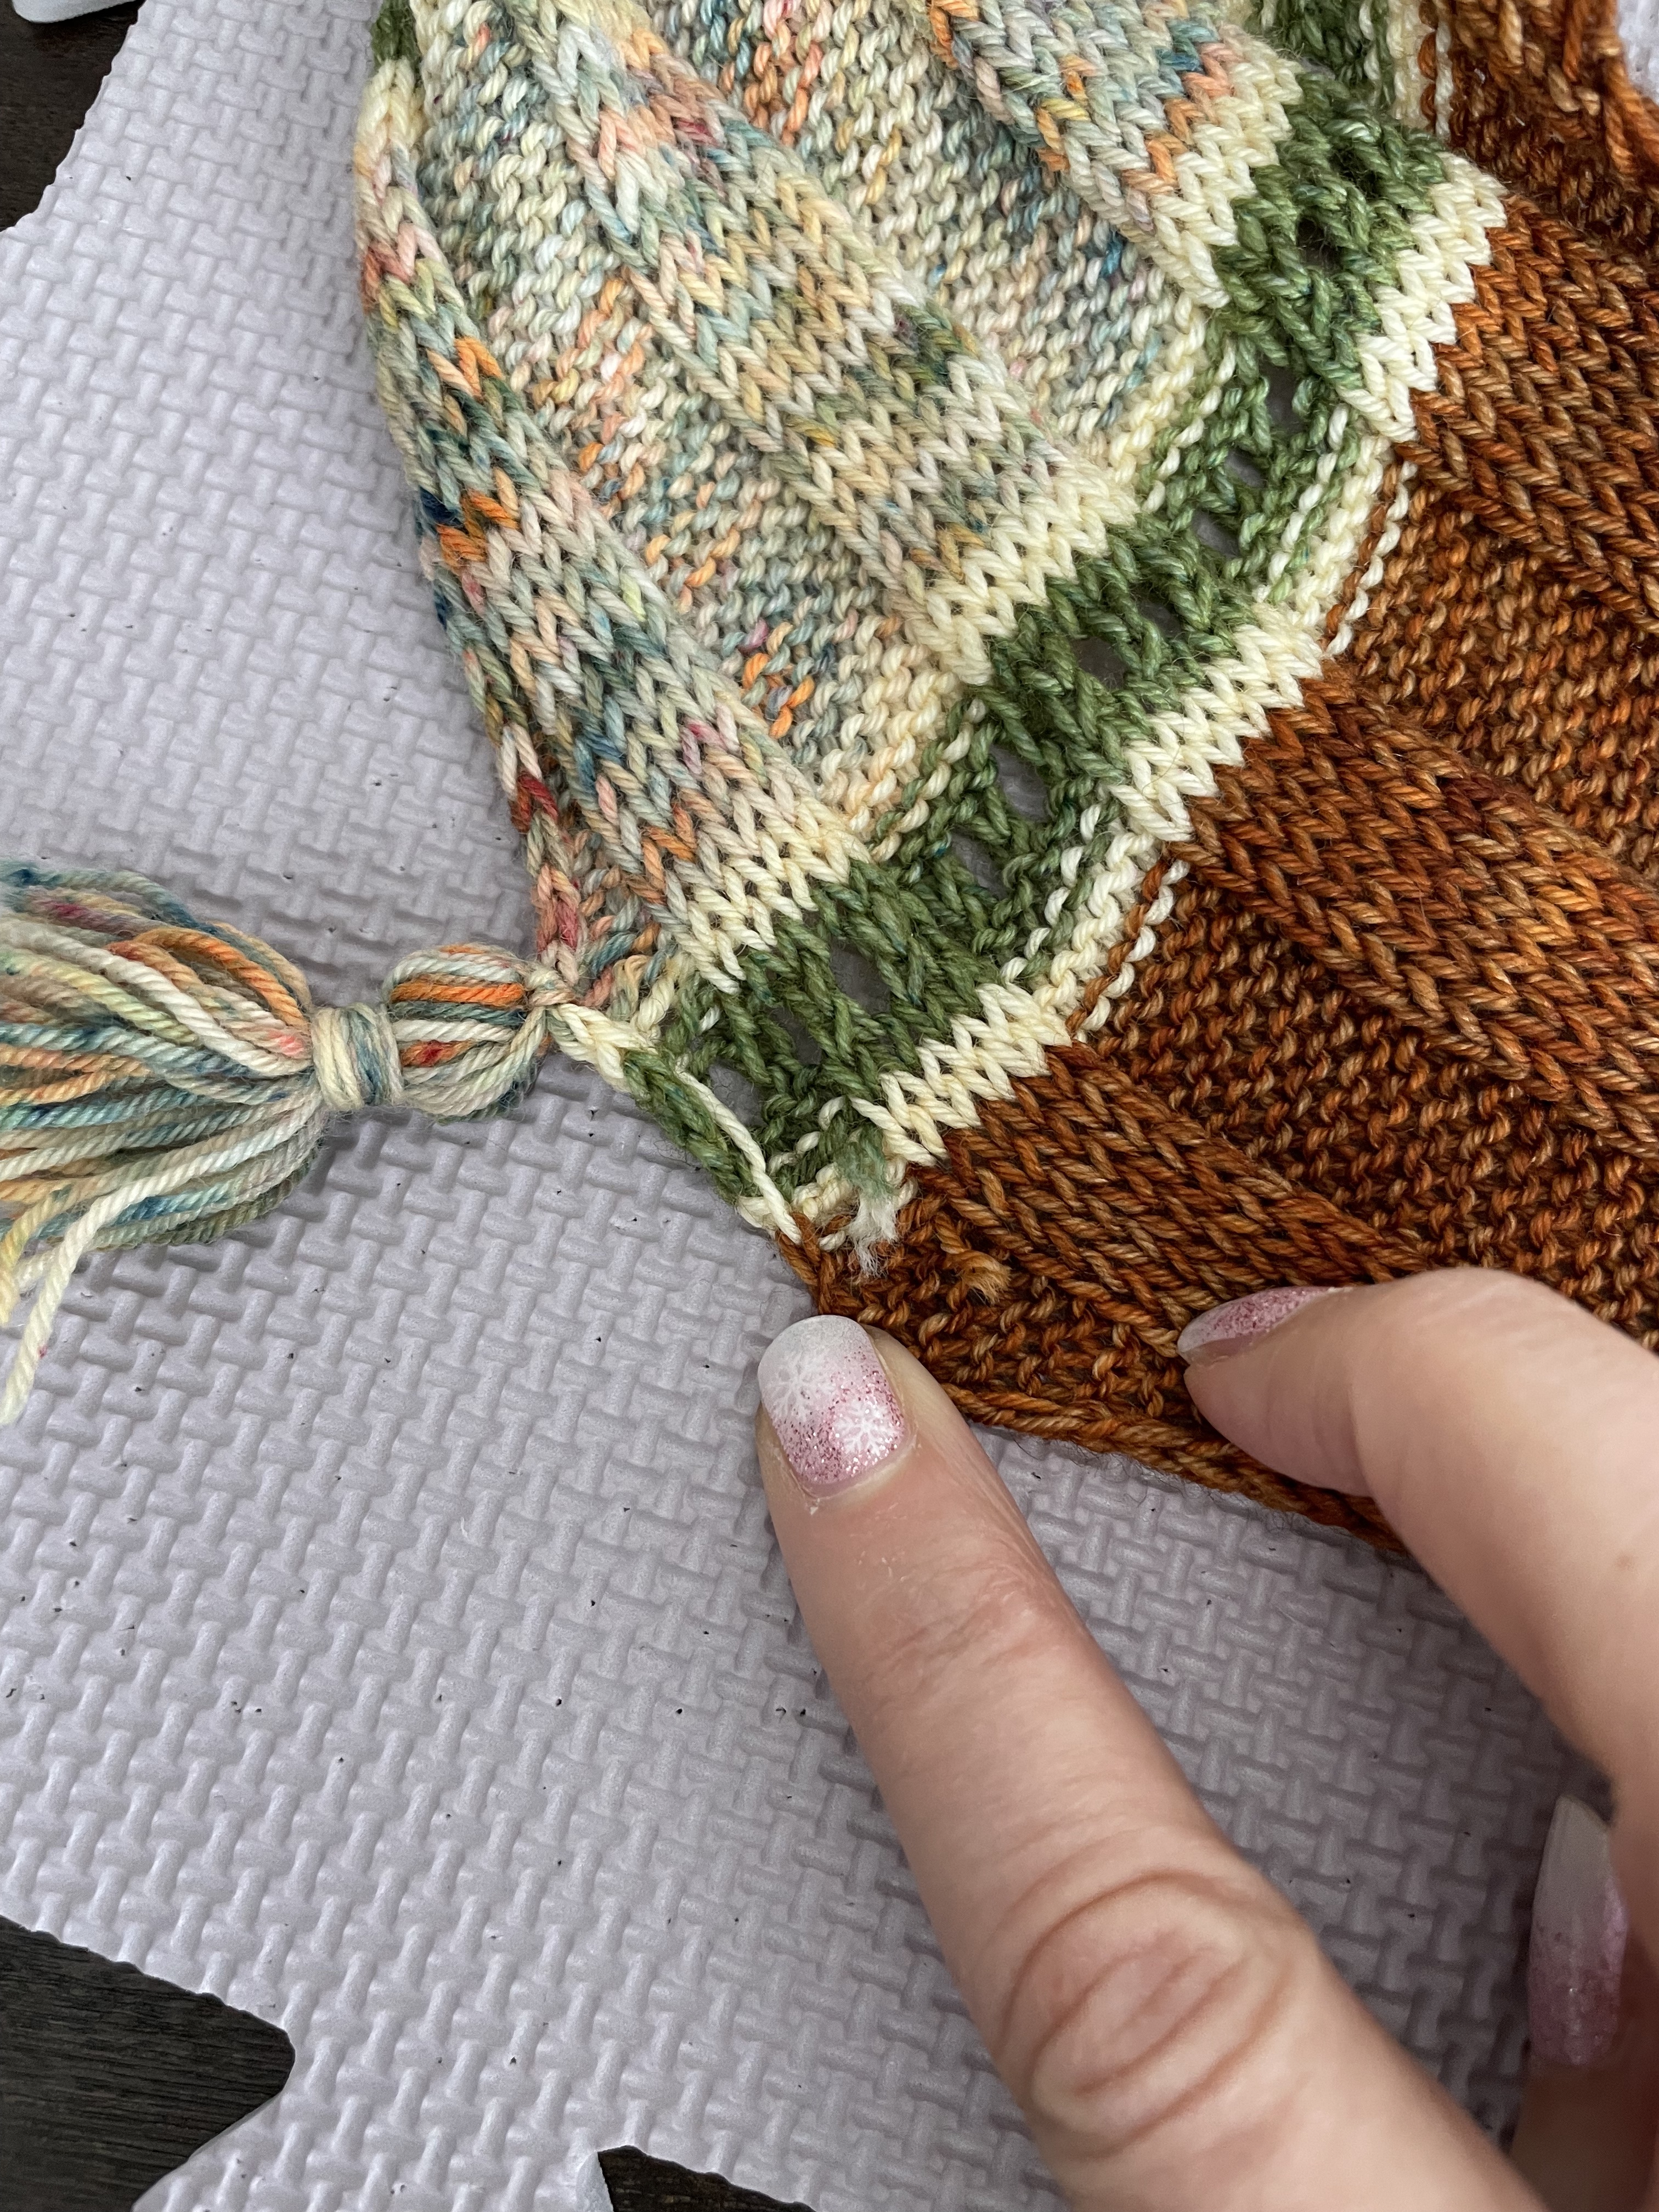
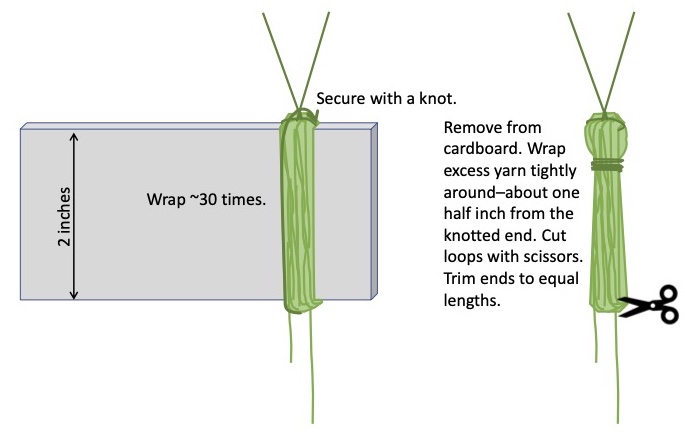
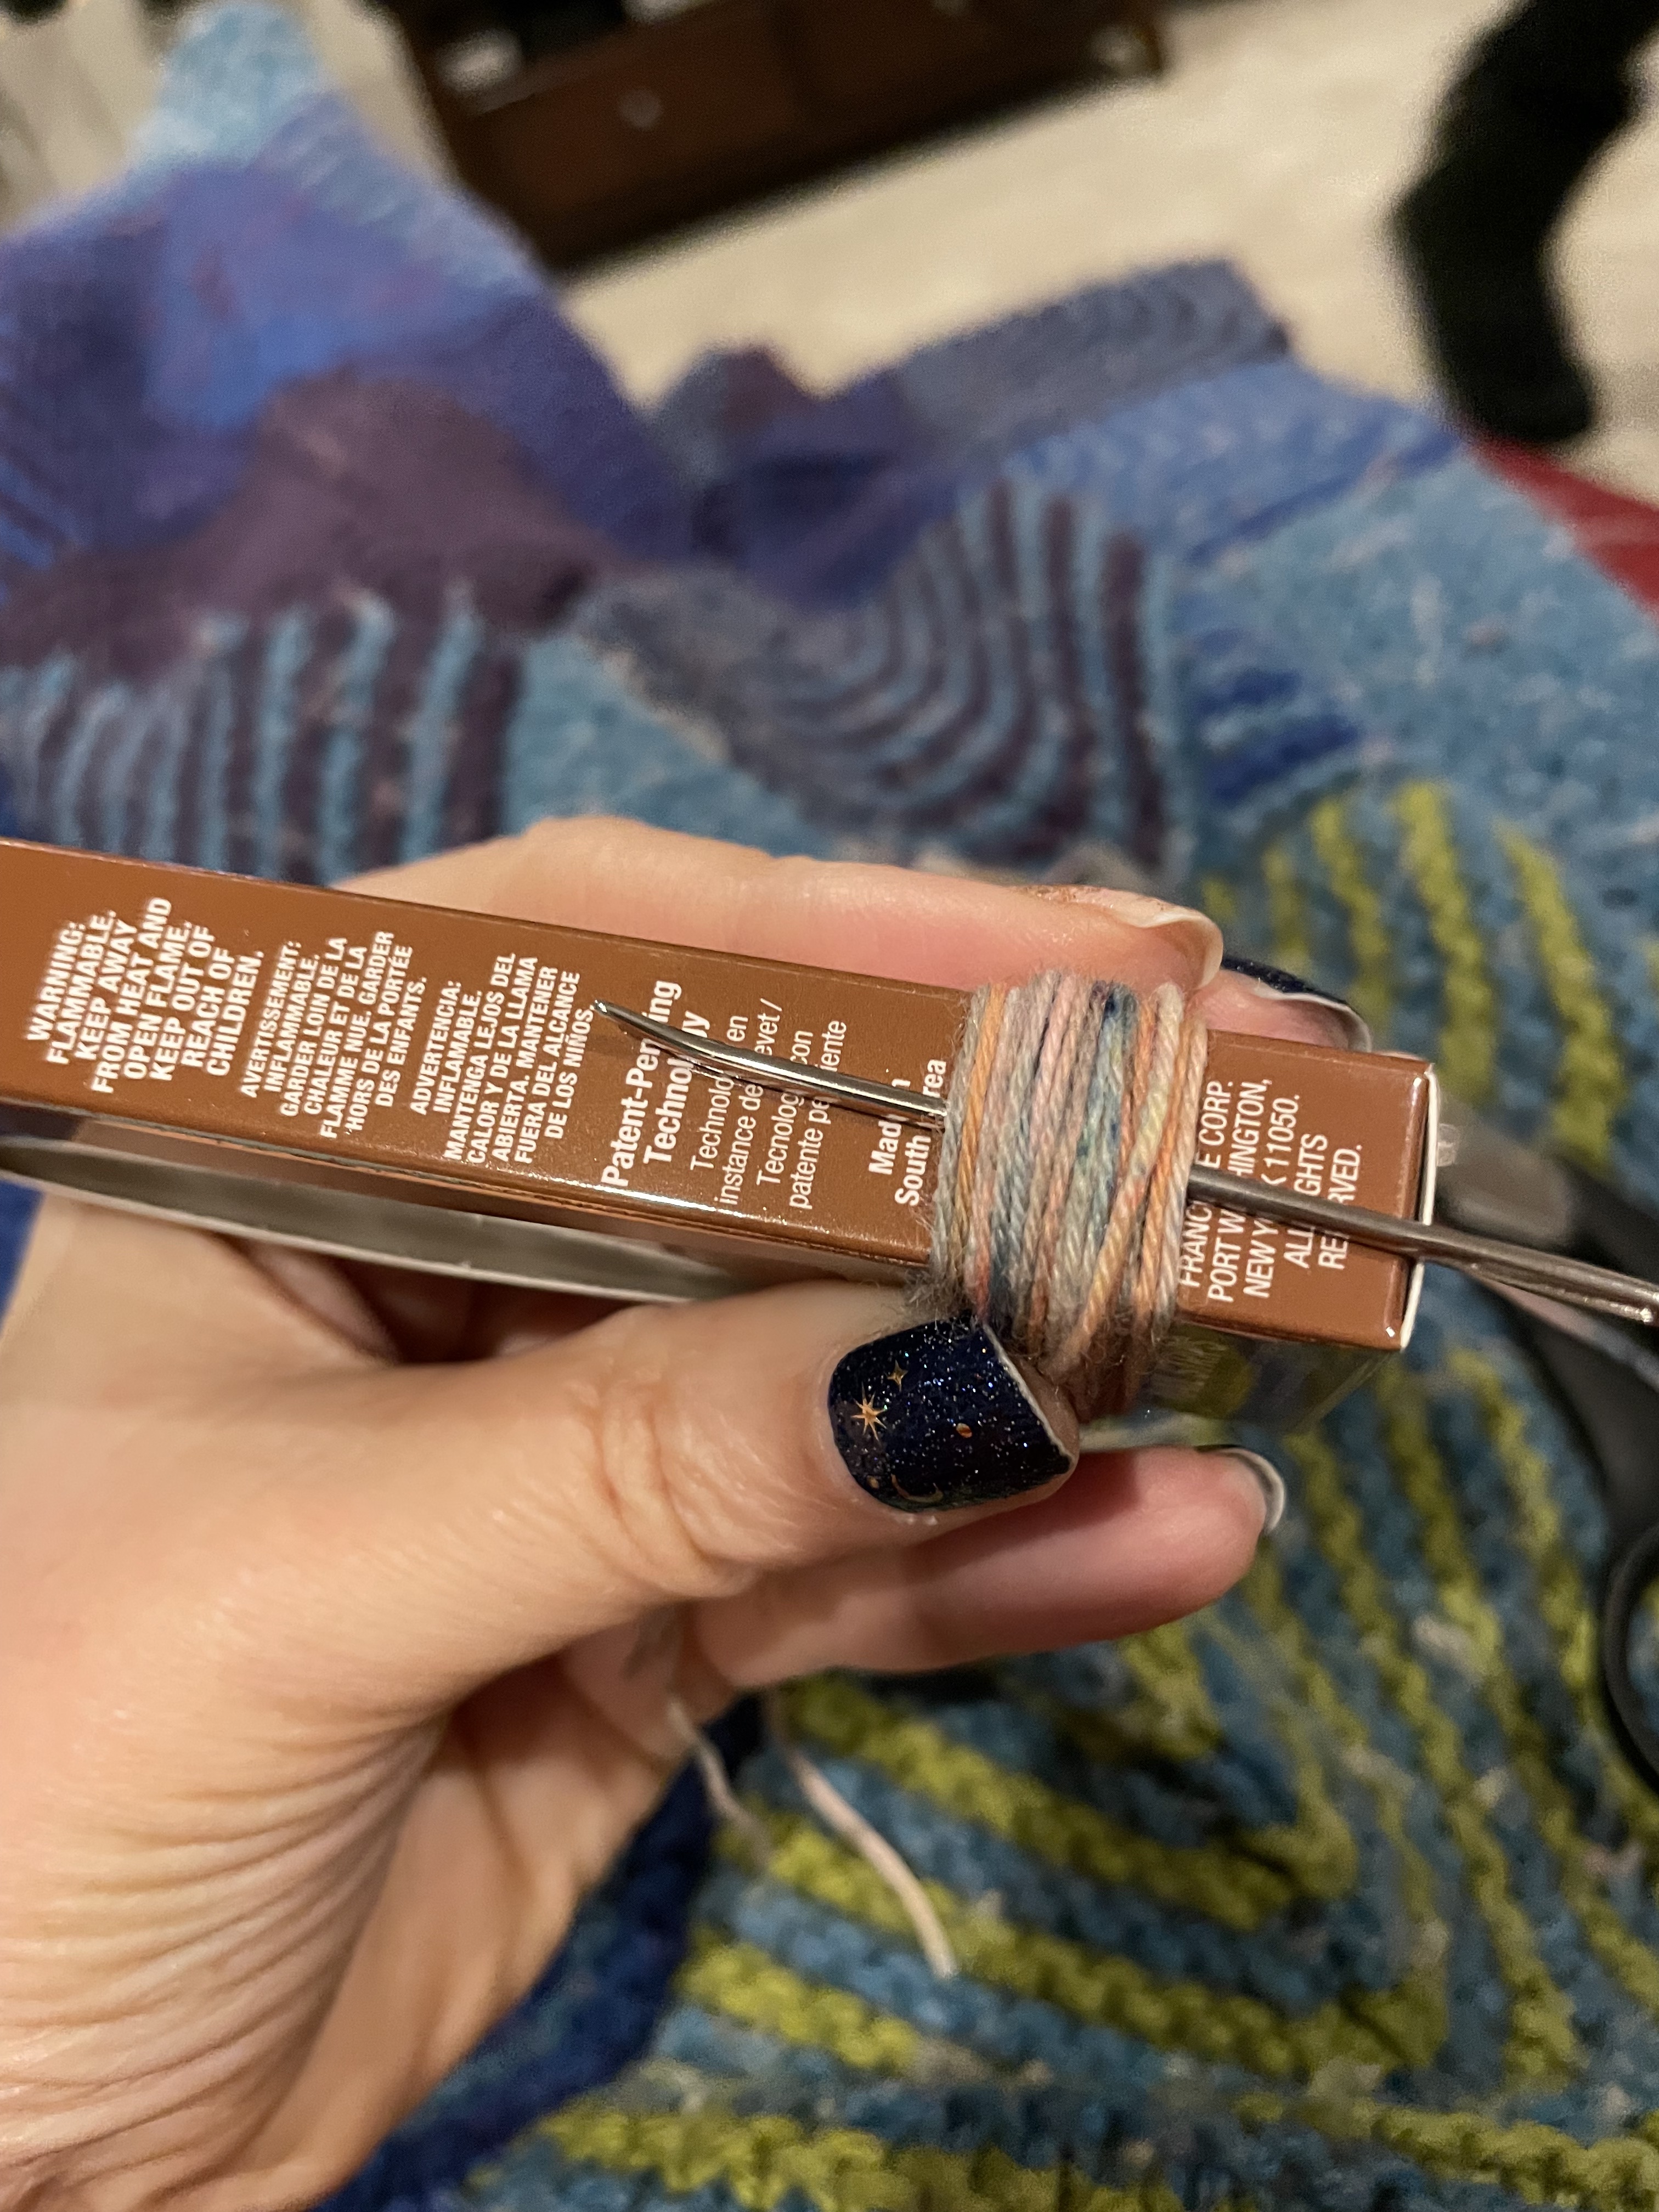
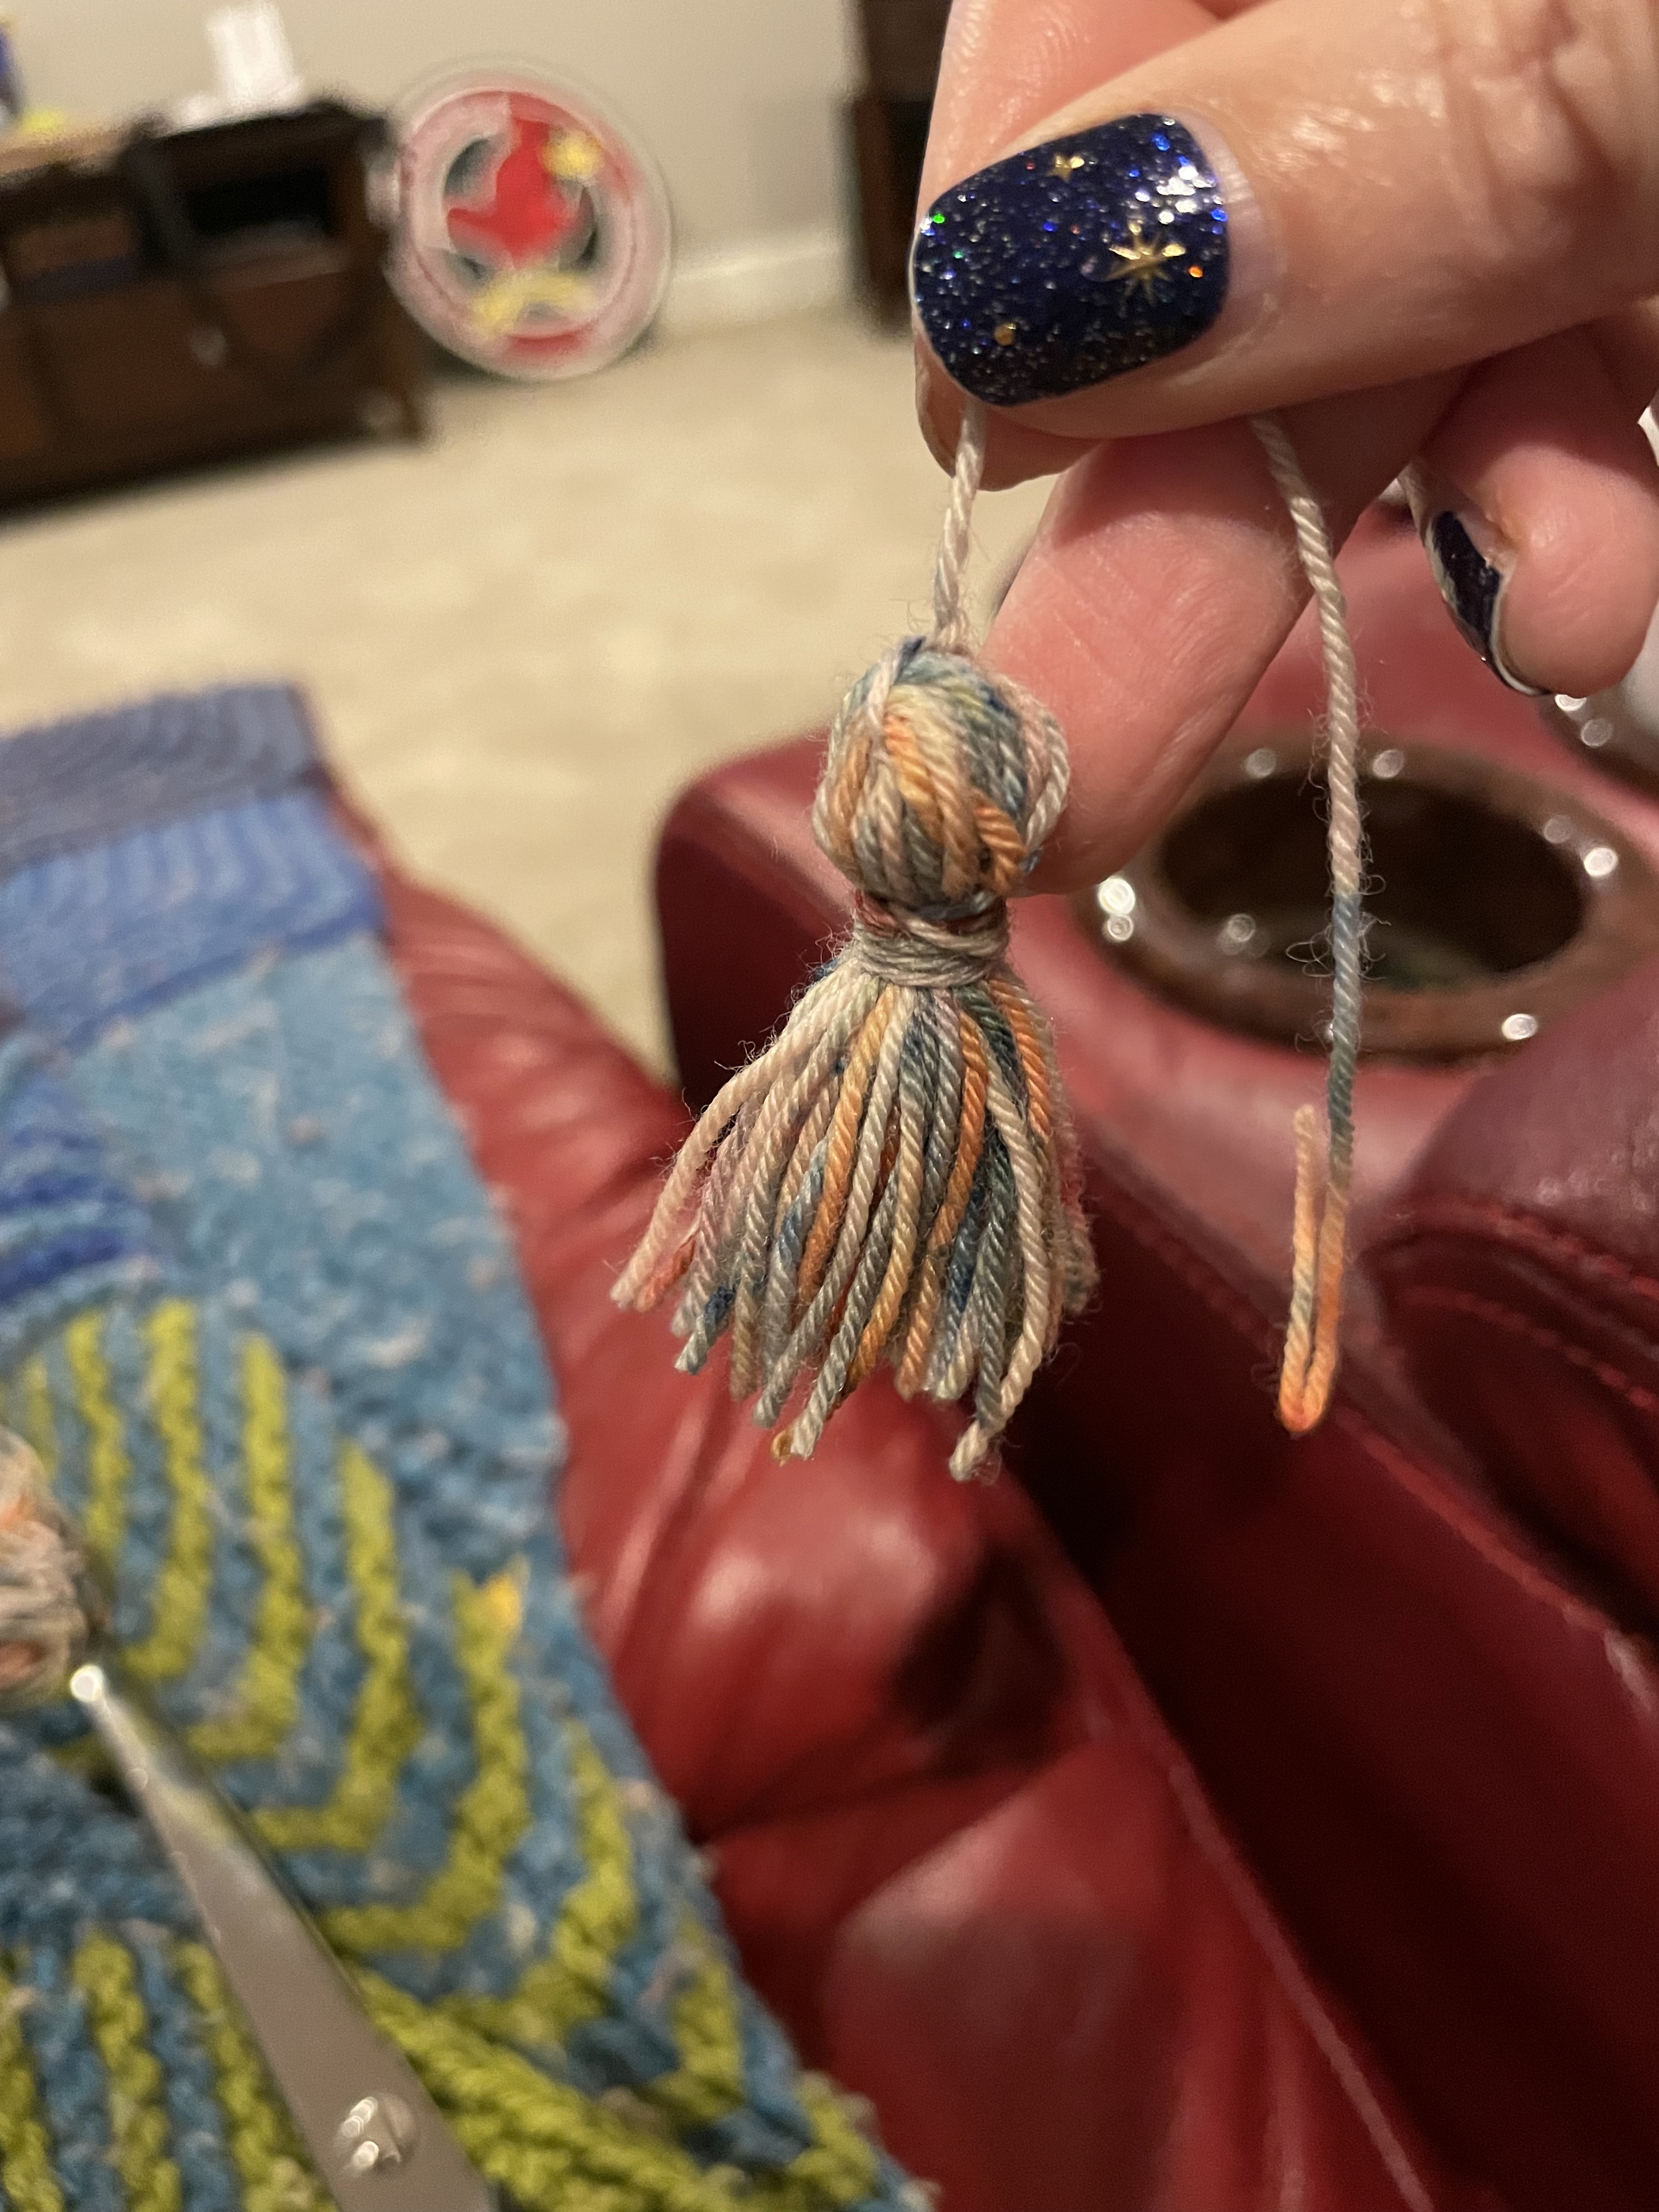
Last, I used the excess yarn to make the tassels. I have very little of one color left, so I used the other five colors to make the tassels. To make the tassels, I wrapped the yarn around a small box about 30 times. I secured the top with a knot, removed from the box, and tightly wrapped the strands together close to one end. Then I clipped and trimmed the ends and attached the tassels to the shawl.
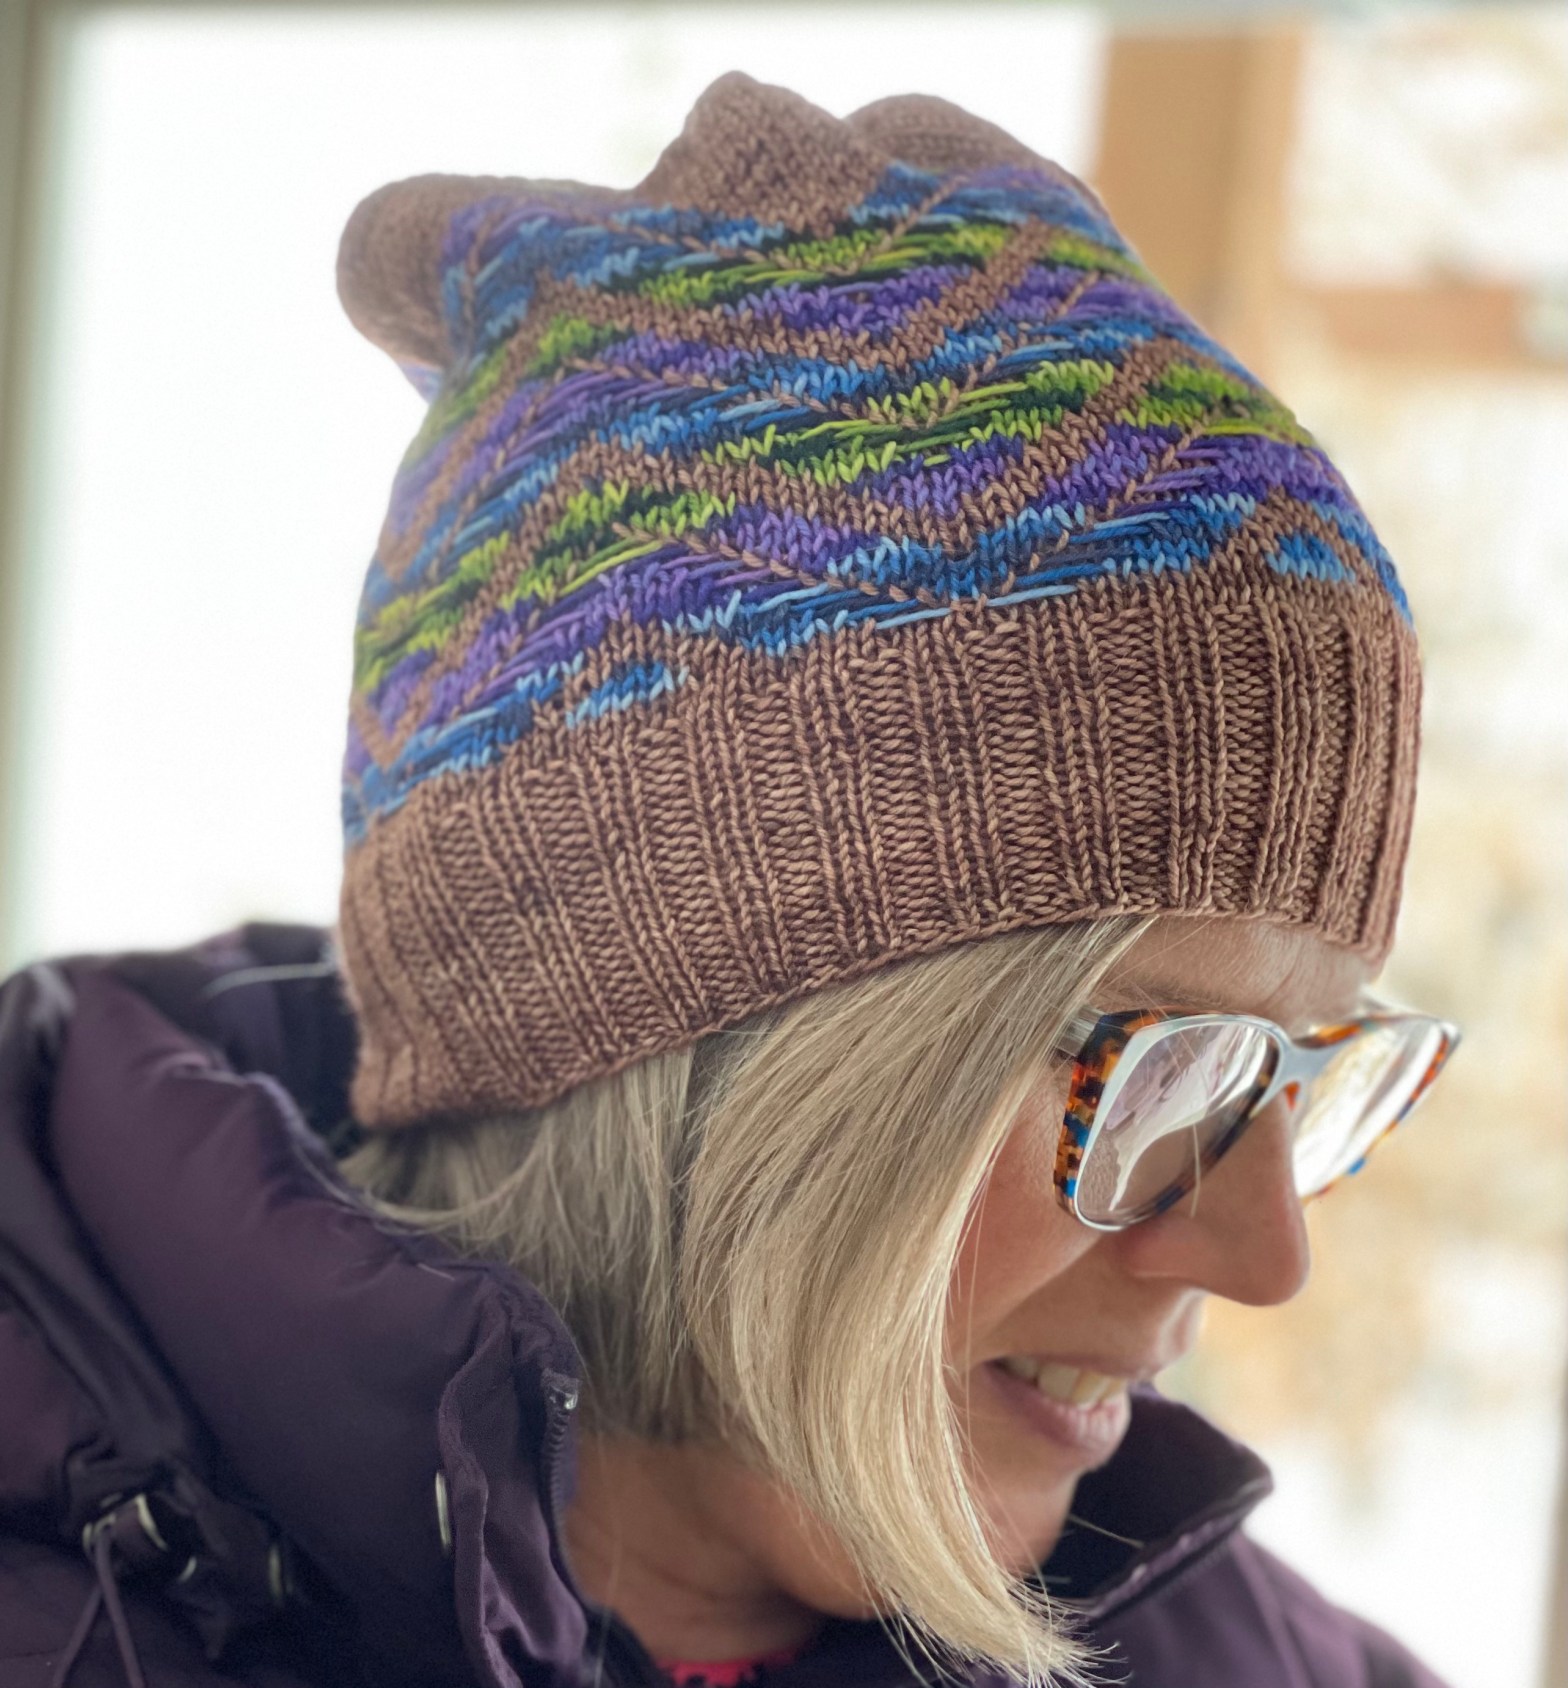
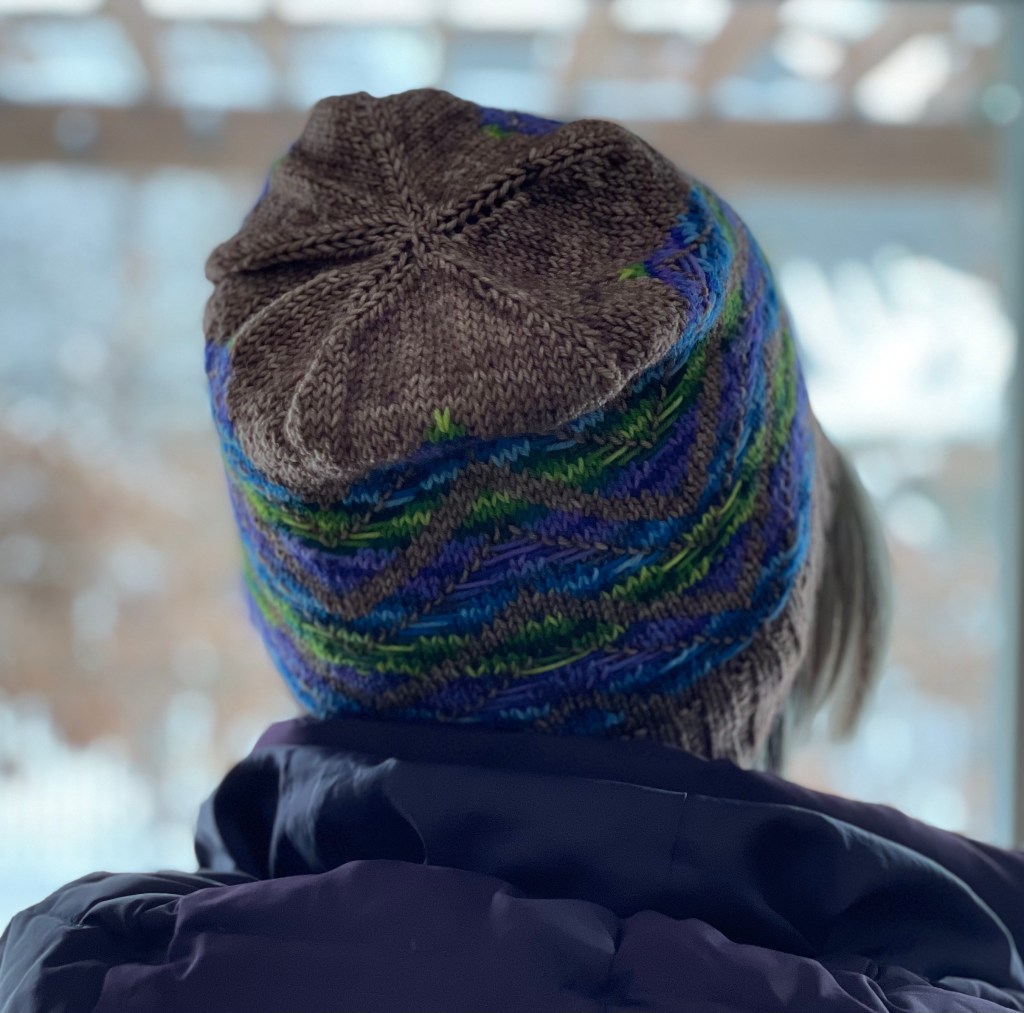
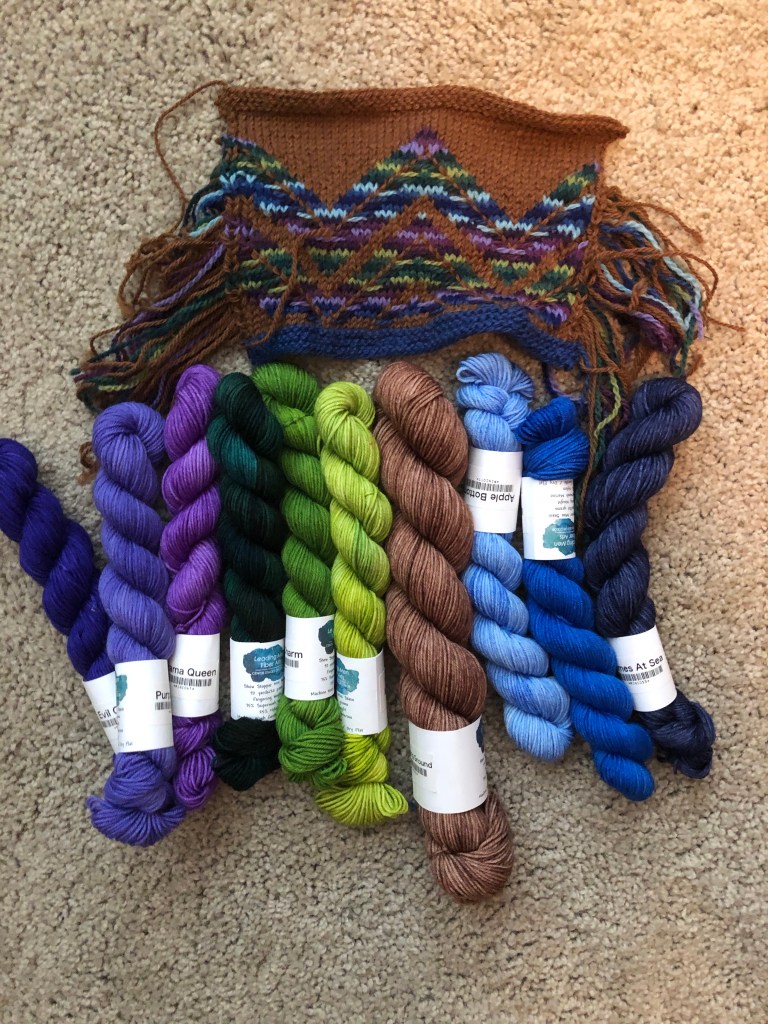
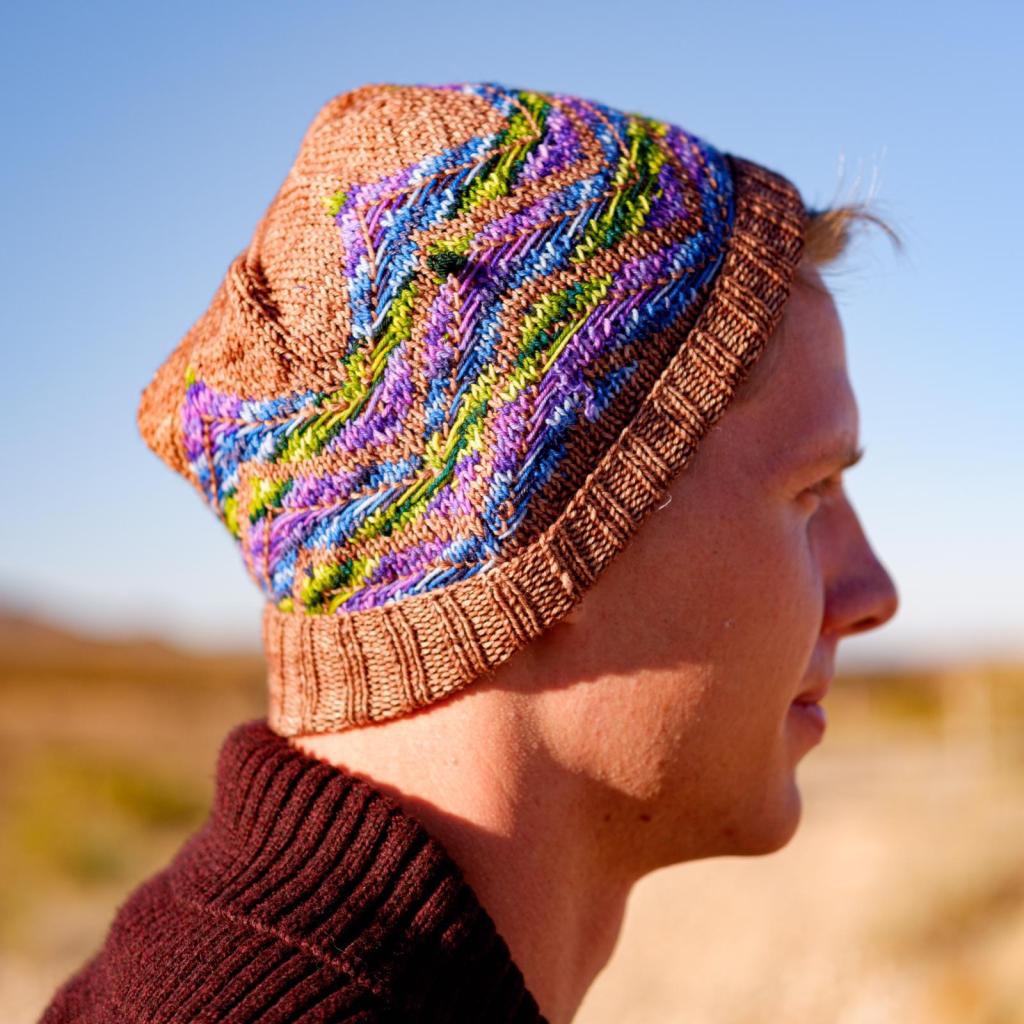
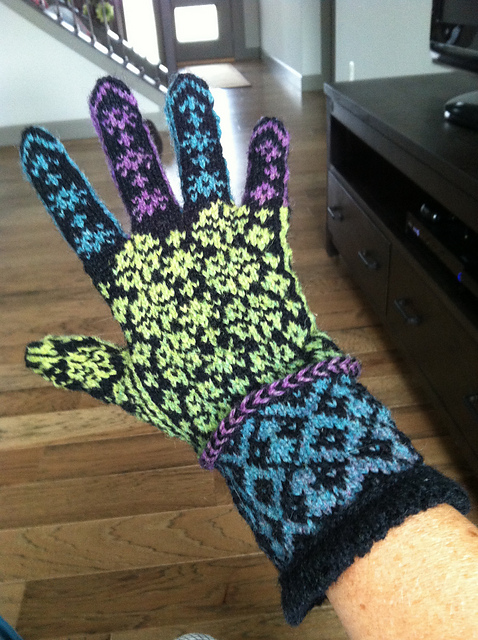
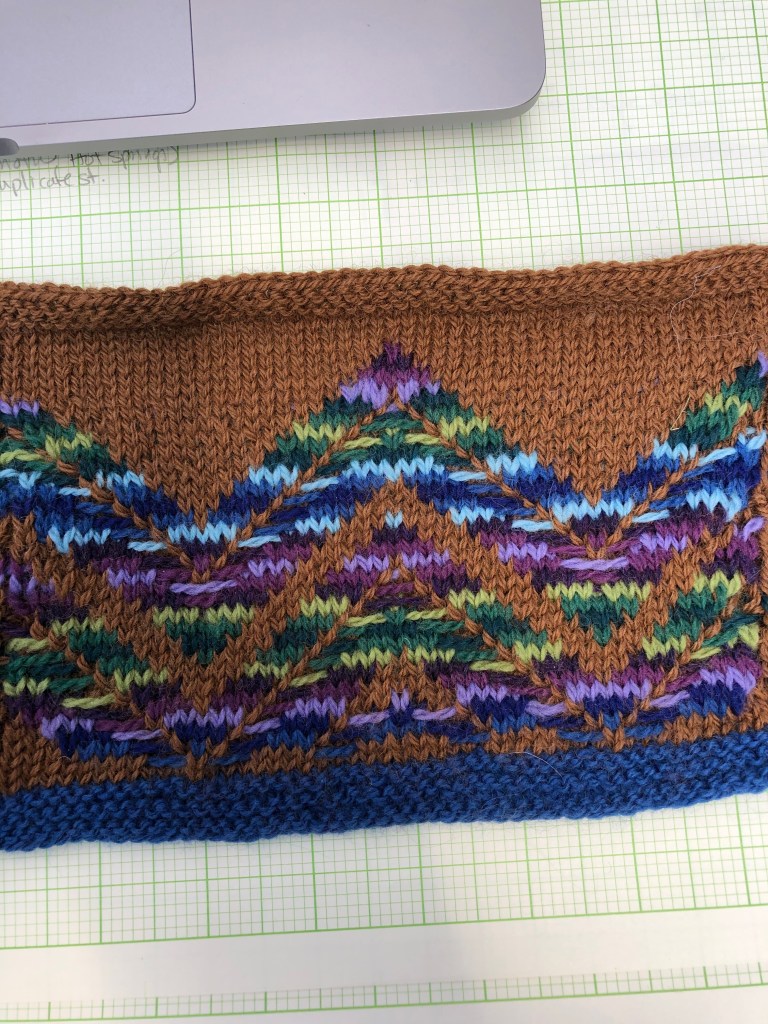
This hat pattern is now available through my Ravelry design site. I wanted to design a pattern that incorporated some visible floats as part of the design. The photo below shows the swatch design I finally ended up with. It reminds me of southwestern woven blankets, so I named it Kaibab, after the Kaibab National Forest in northern Arizona. The hat is made with hand-dyed sock yarn from the Leading Men Fiber Arts Studio, so it makes a nice, stretchy, lightweight hat. Just the perfect amount of warmth for a cool spring or fall evening.
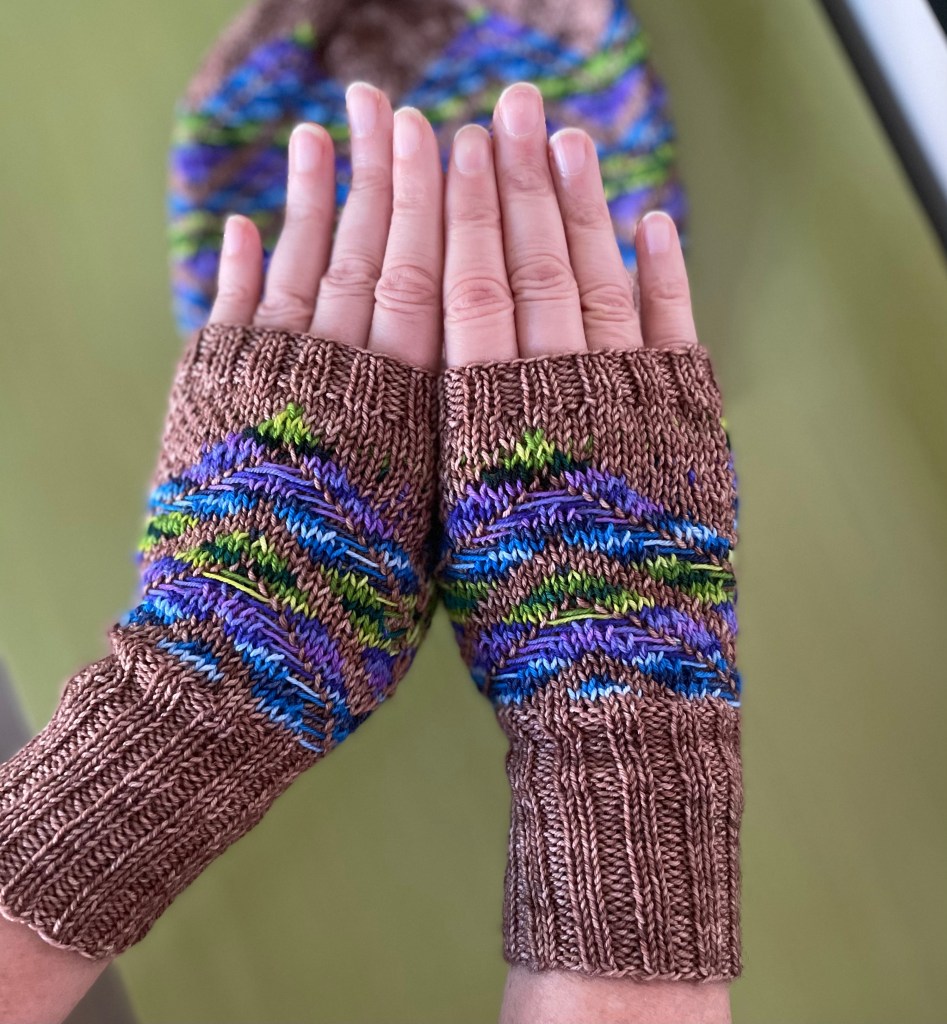
There are a lot of colors in this hat, which makes knitting it from scratch a bit spendy. But if you buy from scratch, you will definitely have enough of the contrast colors to make a few pairs of mix-and-match color socks afterwards. Alternatively, if you are a sock knitter, you might already have enough colors in your stash already. With 20g of each contrast color, I had enough yarn to make the hat, the mitts, and a pair of gloves and still have plenty left over for a pair of fun striped socks.
Do you like having left over yarn? I do, because I like to have lots of colors handy for testing color combinations for future projects. The swatch above was made with leftover bits of yarn and a good first to test the color combination.
There are some trick and tips for making these accessories in the videos below. The first video shows how to work the “with float in front” stitches. The second video shows how to work the increases for the thumb gusset, and the third video shows how to begin rounds 12, 13, and 14. Each of these rounds begins with the float in front.
How to work the With Float In Front (WFIF)
How to work the increases for the thumb gusset
How to work the WFIF at the beginning of the round.
Technique I used for rows 12, 13, and 14.
I sent the hat to El Paso to get some southwestern-themed fun photos. Thanks to my models for taking the time and energy to get these great shots for me!
Whew! It’s been awhile! I’ve been staying home and trying not to contribute to the pandemic, while still trying to maintain my sanity. Knitting, of course, has played a large role in my quest to remain sane. Christmas presents are finished and I’ve even had some time to work on some things for myself. I still have several projects on needles and patterns in various stages of draft–from rough notes to taking and editing the photos. Plus, I’m still having new ideas that just need to be knitted, or at the very least, scribbled onto paper so that I can remember them when I have more time (HA!).
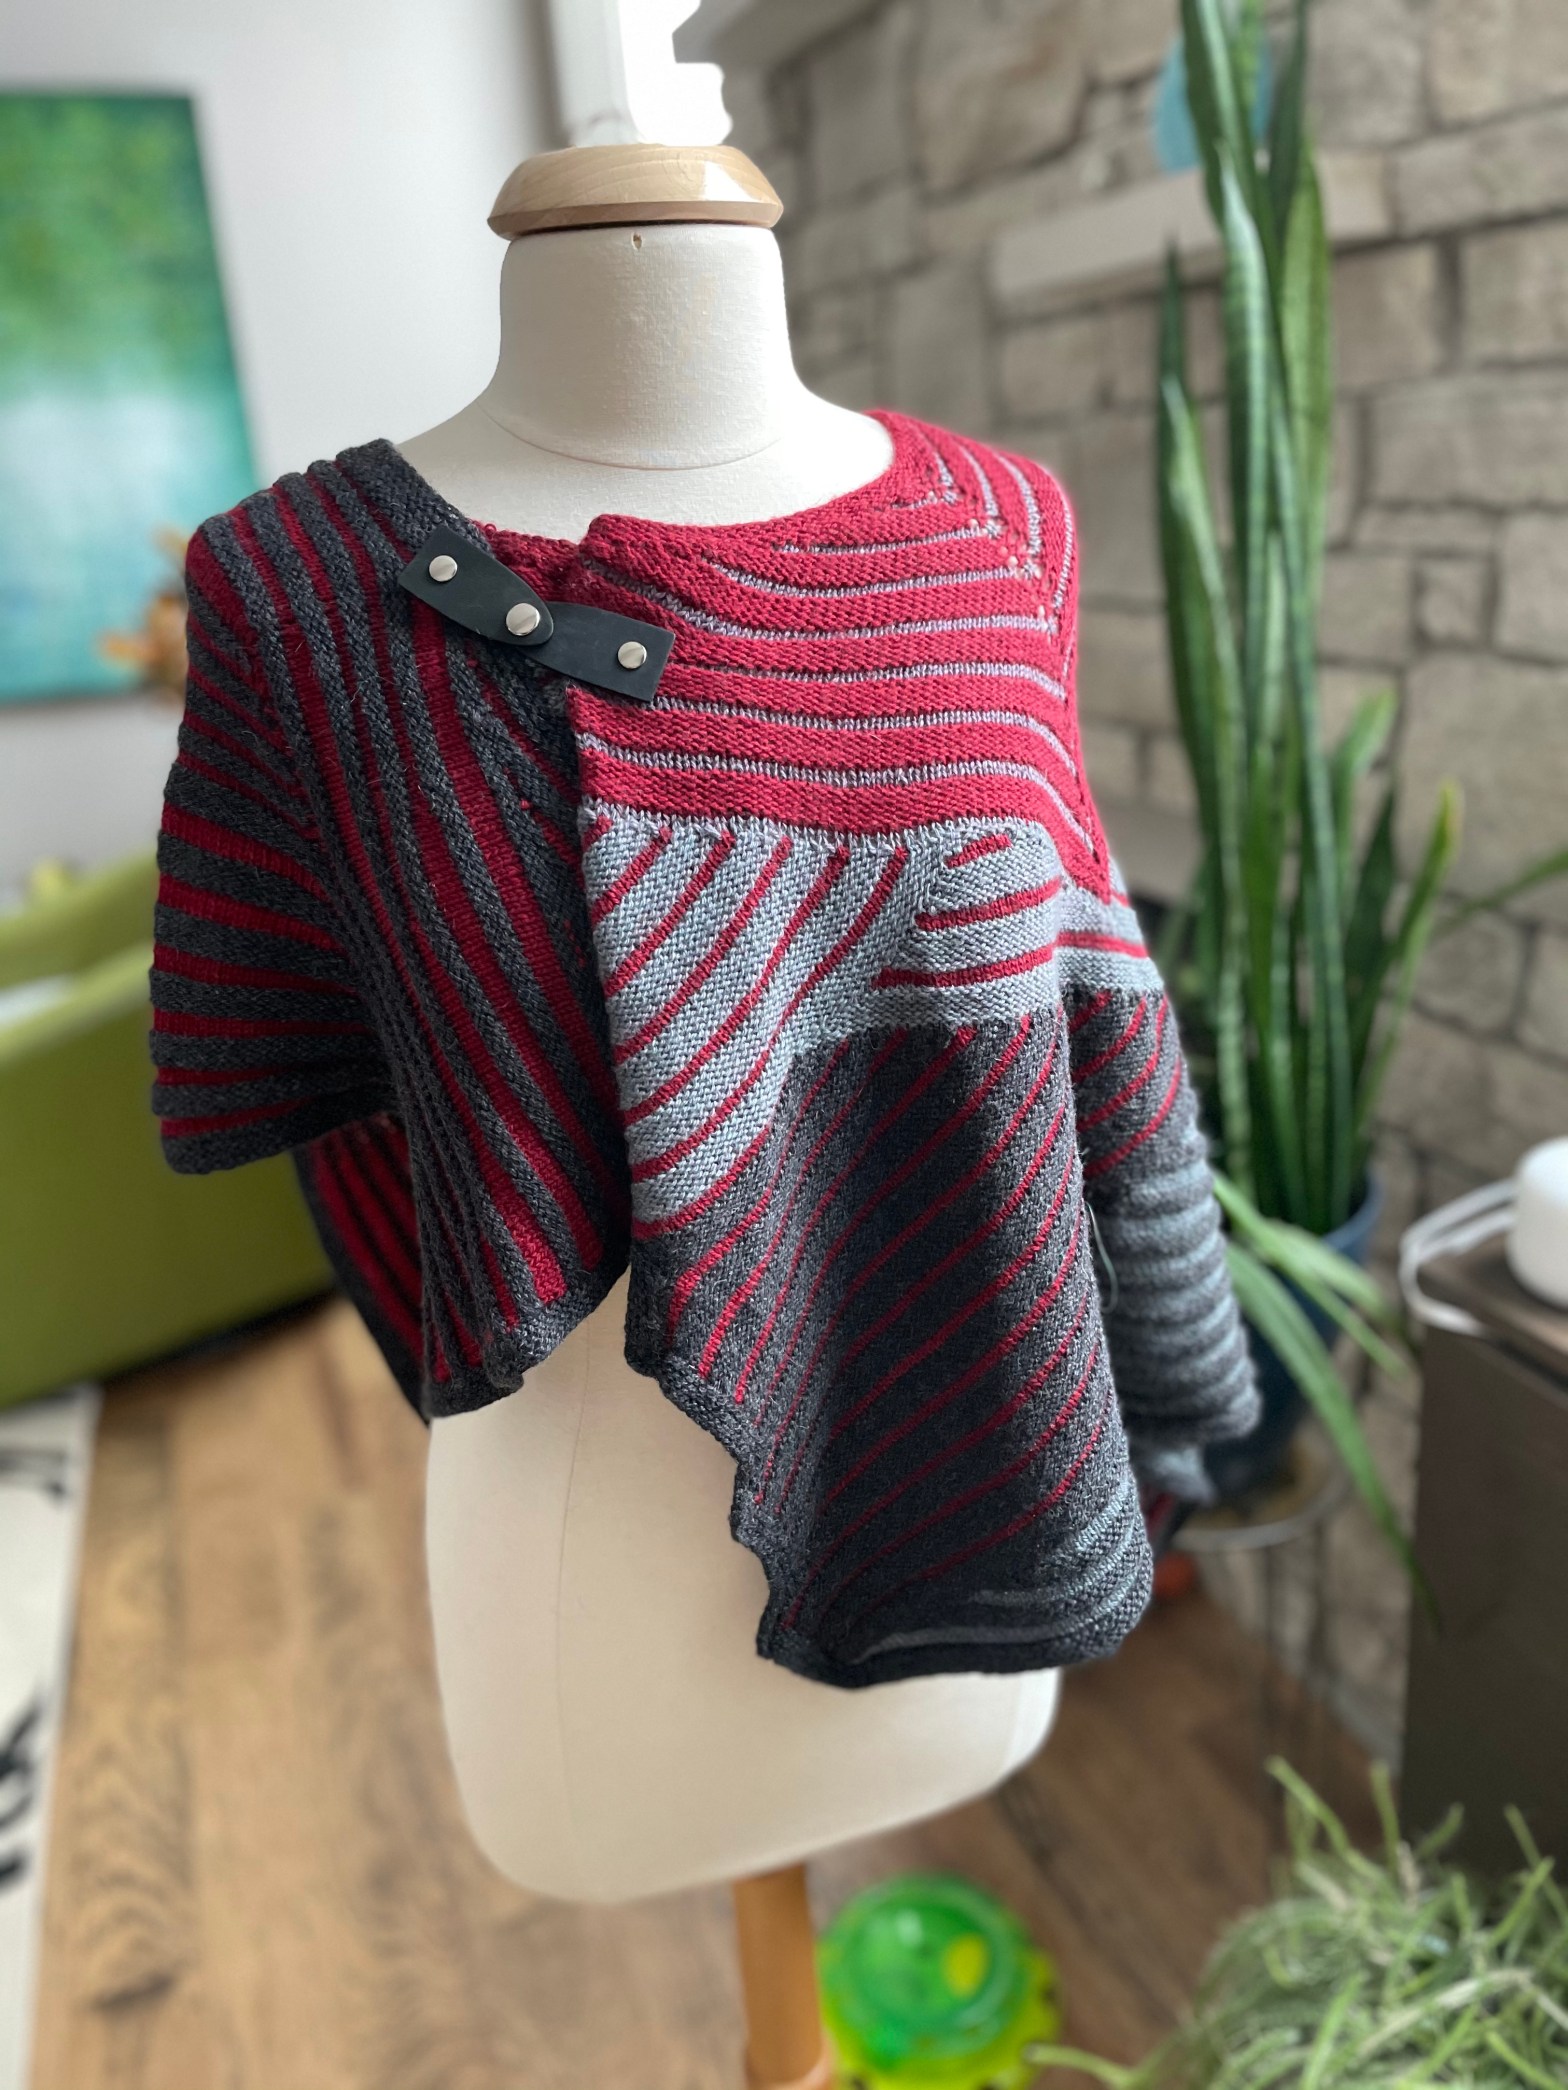
I did work on something completely new over my holiday break. I call it free style knitting, because it only began with a crude plan and I modified (heavily!) as I worked through the project. I made many spontaneous decisions as I was knitting, and I took careful notes, but I’m afraid that I would need to made a second one to actually write the pattern. It’s definitely an eye-catching and fun piece to wear, even if it never gets written into a pattern. I wear it over a tunic with leggings (pandemic wardrobe!), so it’s super comfortable, non-restricting, and warm in a wool/yak fiber mix.
My inspiration for this wrap was based on my memories and photos of the lava formations from trips to Hawaii Volcanoes National Park. The name of the wrap is Pahoehoe. Pahoehoe lava is a characterized by overlapping ridges and ripples. I took a helicopter tour of the volcano area when I first visited the Big Island. The bright red lava was only clearly visible in the crater, then once it flowed away, it appeared silver, with just a hint of the bright red peaking through. I don’t have very good photographs of the pahoehoe lava that I saw, but there are some excellent fair use professional photographs available through the United States Geological Survey (USGS.gov).
Photo from the USGS.
Photo from the USGS.
Photo from the USGS.
Photo from the USGS.
Photo from the USGS.
Photo from the USGS.
Photo from the USGS.
Photo from the USGS.
Photo from the USGS.
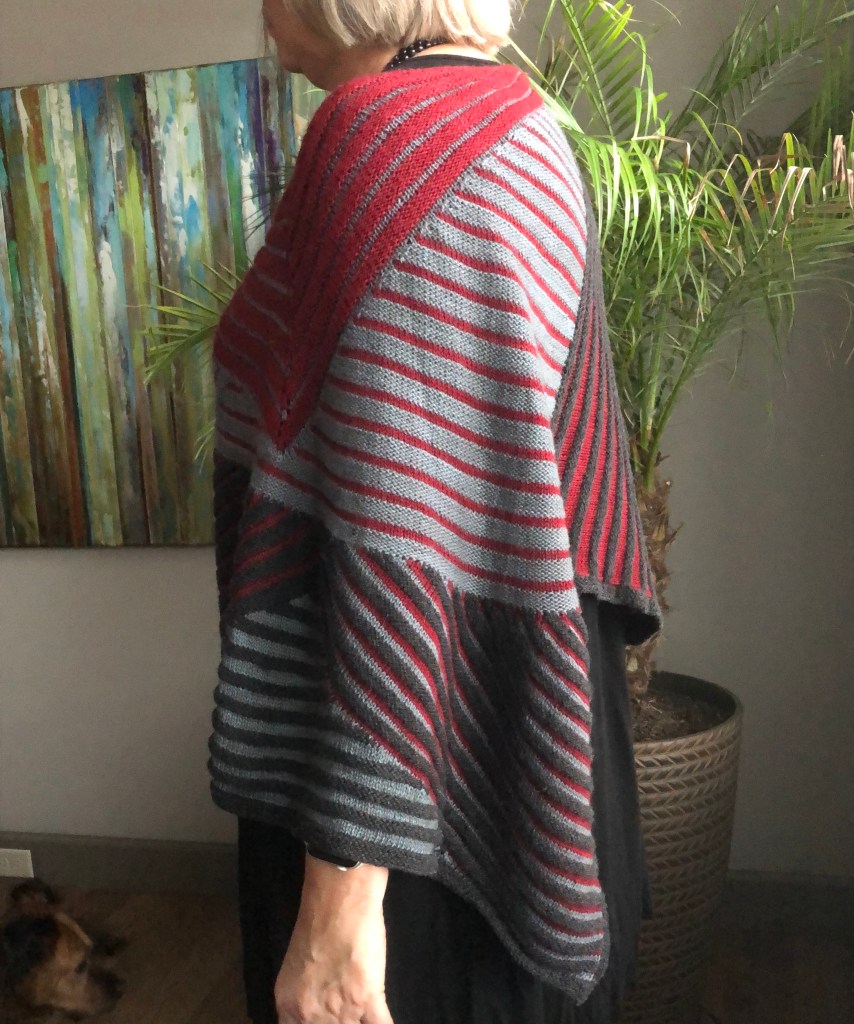
This wrap has lots of short rows, forming its shapes and angles, and giving it an asymmetry, with few straight edges. The alternating rows of stockinette and reverse stockinette stitches give an undulating texture to the overlapping shapes. My original intent was to have this be a rectangle, but then I lost interest in keeping track of the many short rows–an opposing short row is required to keep things square–so I just embraced the shape of the flow, and made it all asymmetrical. After all, there aren’t many straight lines in nature.
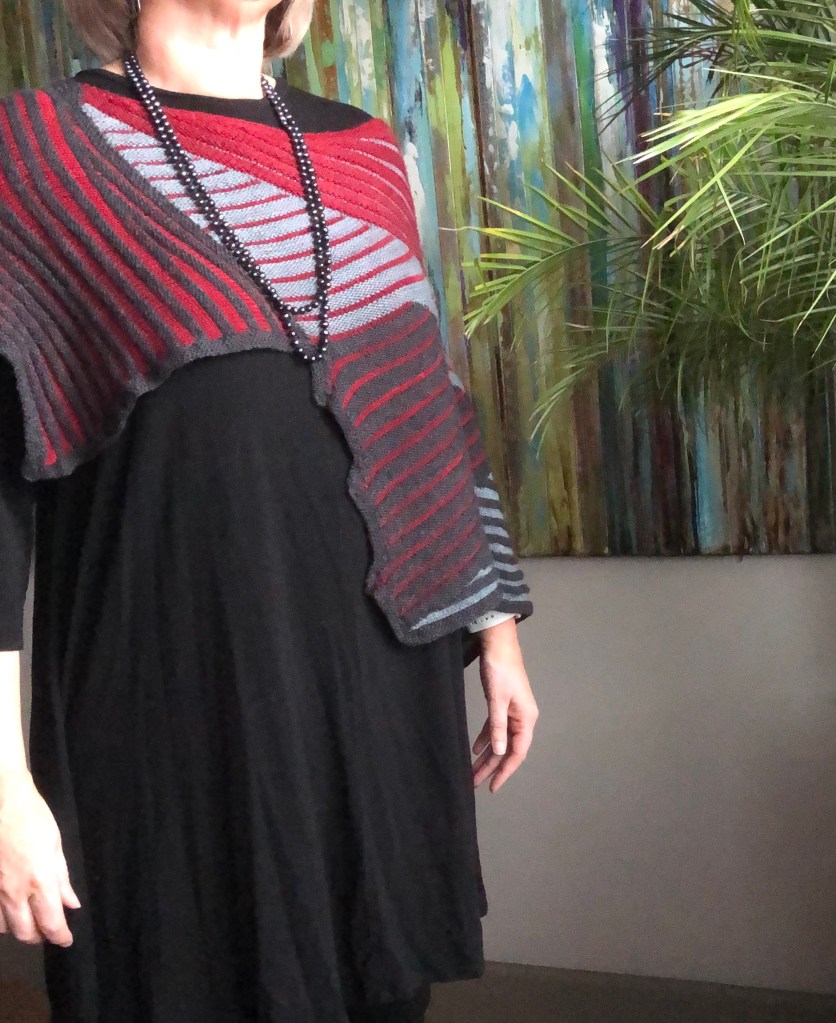
The red (hot lava) is concentrated at the neck and then visible peaking out between the reverse stockinette ridges. The wrap changes color from red to silver-gray to charcoal gray at is gets farther from the neck, imitating the color changes as the lava cools into basalt rock.
Yarn used: Reywa Fibers, Harmony–a delightful 50:50 mix of yak and wool fiber making it lightweight, warm, and soft. I purchased this yarn at the Knit on Pearl yarn shop in Jackson, WY after visiting Grand Teton National Park.
Notice the shades of silvers, grays, and black in the photos above. I didn’t quite match the color of the molten lava with the red yarn, but I was limited in my color choices in yarn. I think it is not an easy task to mimic that glowing orange-red-hot color! And, let’s face it, the cooler red tone of the yarn that I used is a bit more wearable–at least for me.
It’s definitely a funky little one-of-a-kind wrap, but I like how it turned out. It’s a good set of colors for me, and gives me lots of fond memories of my travels to the Big Island of Hawaii.
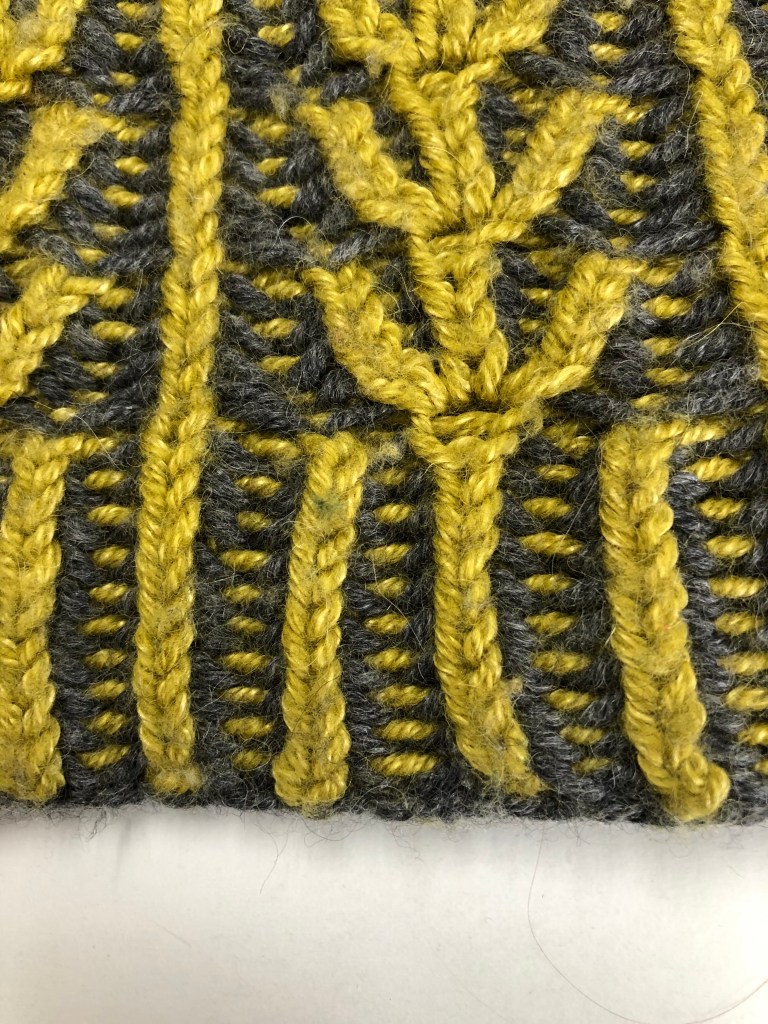
I have another class coming up at the community college – Brioche Knitting. The next post will be the password protected materials for that class. In the meantime, here is a brief introduction to brioche knitting.
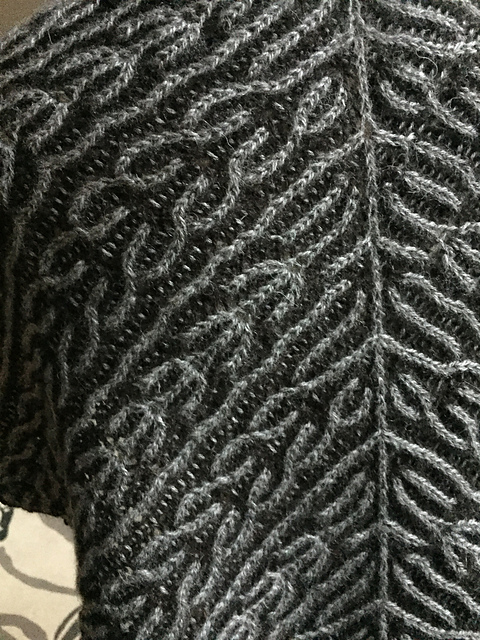
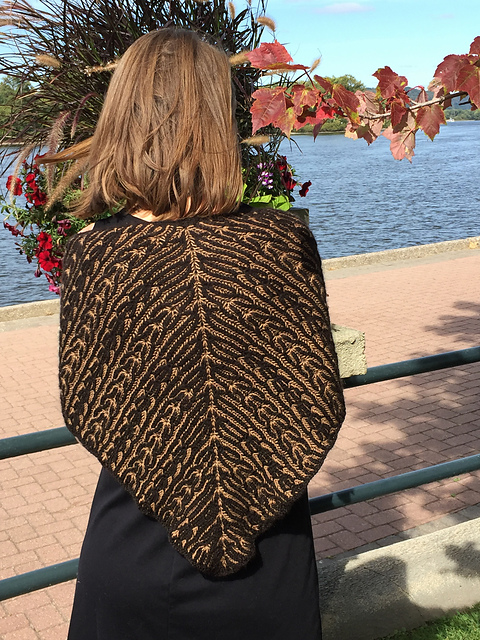
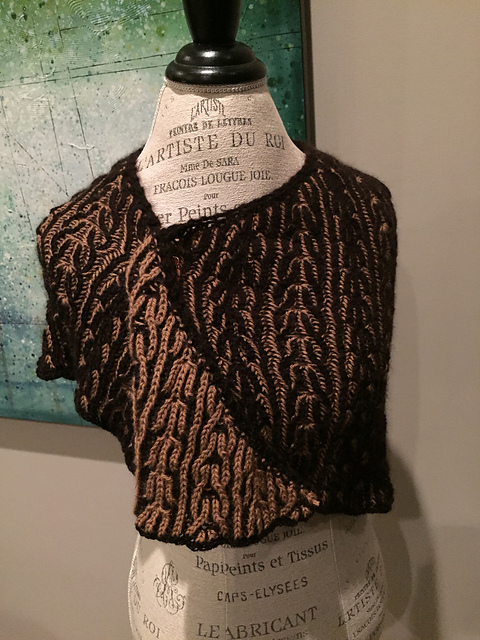
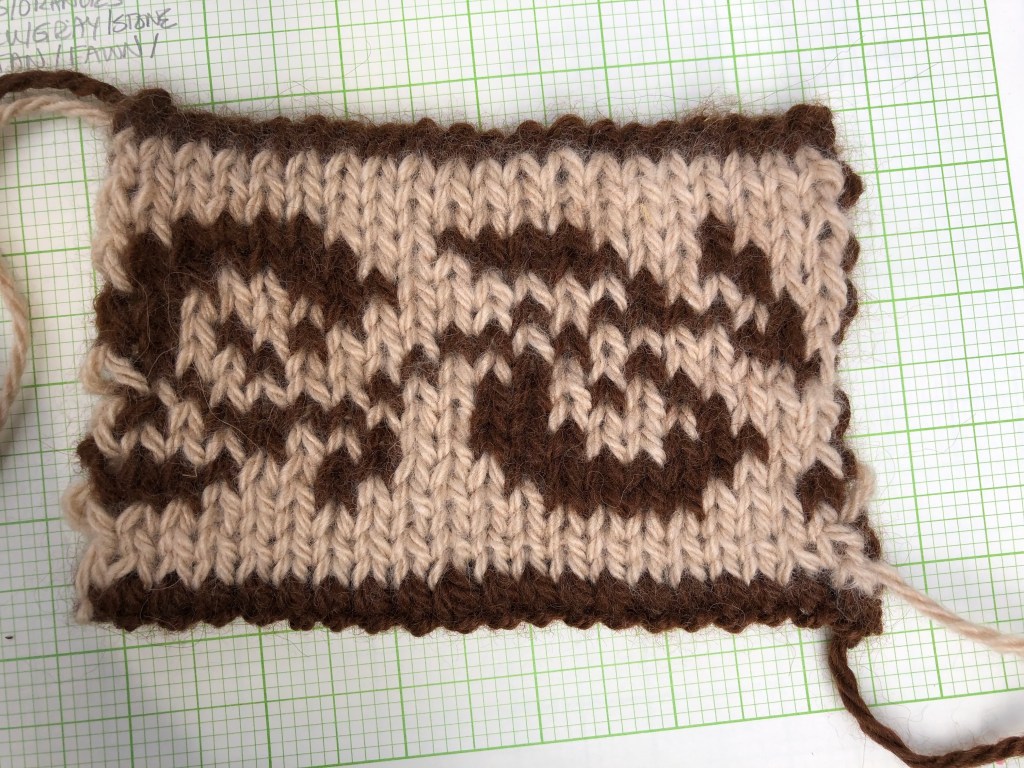
Brioche knitting is a slipped-stitch technique that results in a stretchy knitted fabric where the partially visible floats add interest to the fabric design. When worked in a rib pattern, as in the Reversible Brioche Wrap shown in the photos below, the fabric does not compress as much as traditional ribbing. But like a traditional rib pattern, the fabric doesn’t have an obvious right side or wrong side, which makes it an appealing stitch to use in scarves and wraps where both sides can be visible. In the photos below, the fawn-colored floats are visible on the side with the more prominent black knitted stitches. On the reverse side, the black-colored floats are visible with the more prominent fawn-colored knitted stitches.
The Reversible Brioche Knit shawl in black and fawn alpaca.
Close up view of the Reversible Brioche Wrap in black and silver-gray alpaca. Black floats visible with gray brioche knitted stitches.
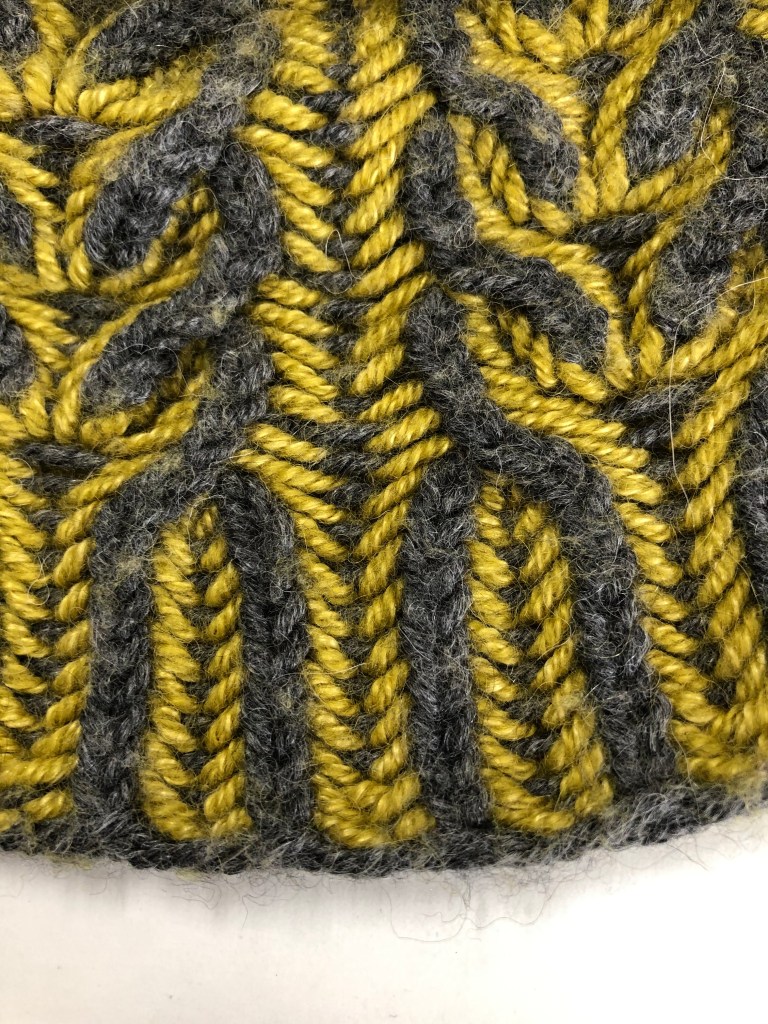
Each row in brioche knitting is worked twice–in the first pass through a row, half of the stitches are worked and half of the stitches are slipped using the brioche slip (essentially a YO worked across the slipped stitch), which sets up those stitches for the subsequent pass across the row. In the second pass through the row, the pattern is alternated: work the slipped stitches and slip the worked stitches from the previous pass. Because the float yarn is worked together with the stitch, it produces the characteristic look of brioche knitting where the floats are partially visible.
Gray floats are partially visible when brioche knitted green stitches are prominent and green floats are partially visible when brioche knitted gray stitches are prominent.
Because each row is worked twice, circular needles are required, even when working a flat object.
While the brioche technique can be a challenge, it produces such an interesting and beautiful fabric, it is well worth the effort to learn!
Katrin Schubert’s Wheat and Chaff Cowl
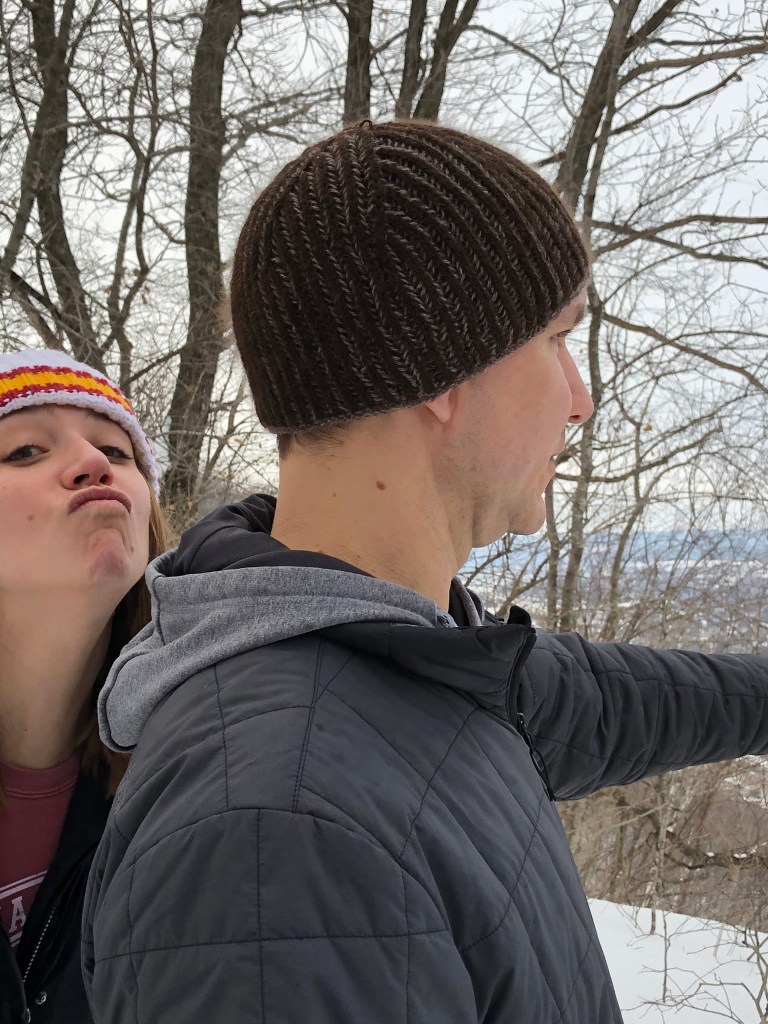
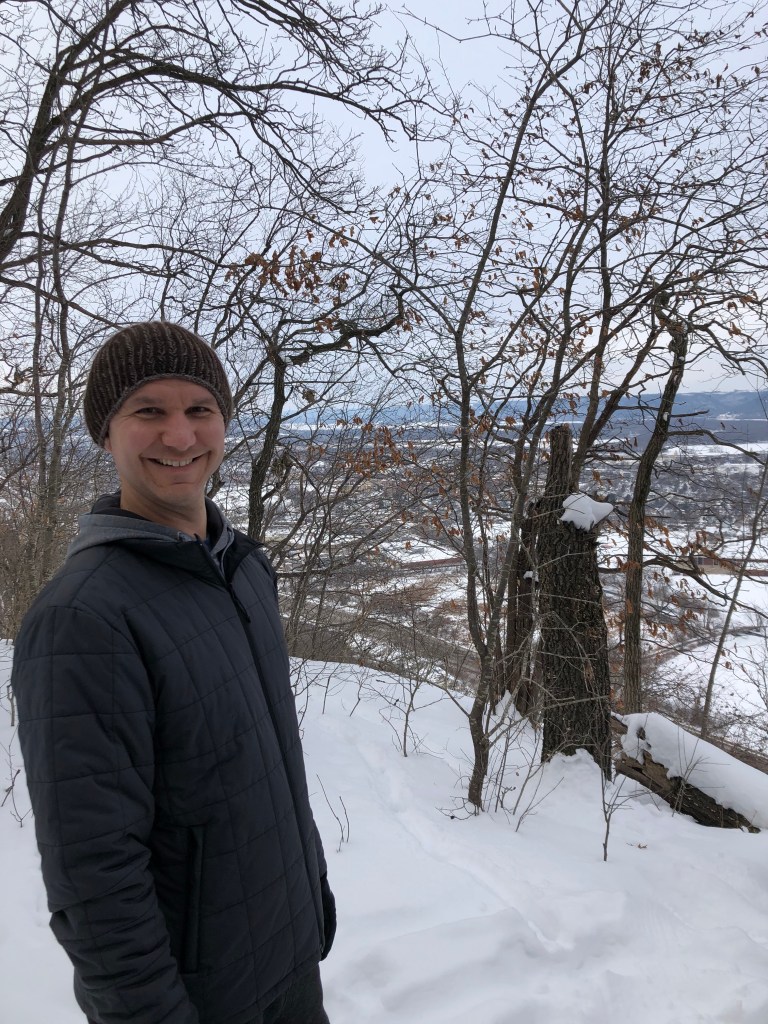
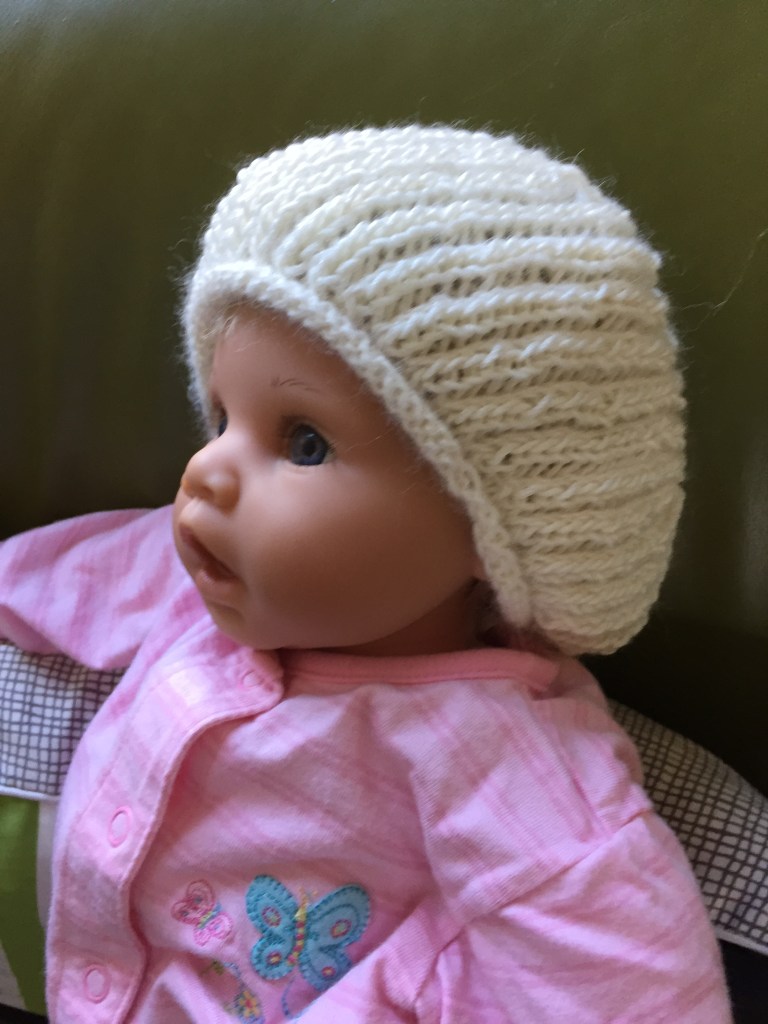
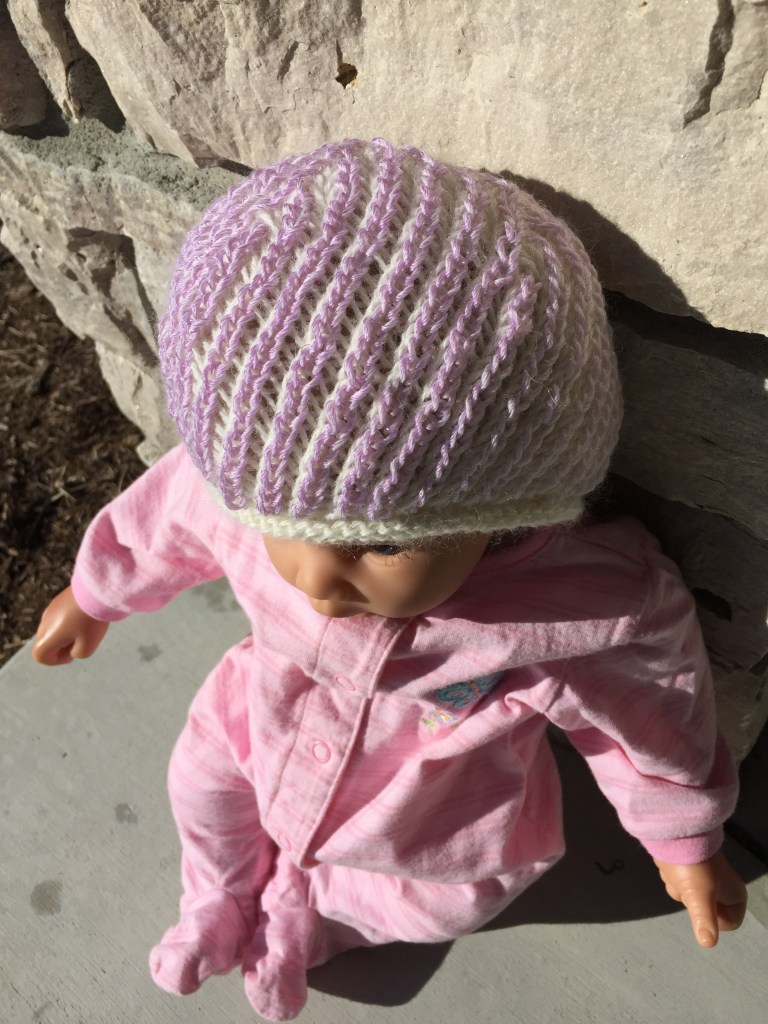
Brioche Beanie
Heading up to the top of the bluff in the Brioche Beanie
Child size brioche beanie.
Abracadabra yarn changes color in the sunlight.
The pattern for the Wheat and Chaff Cowl is available through Ravelry.
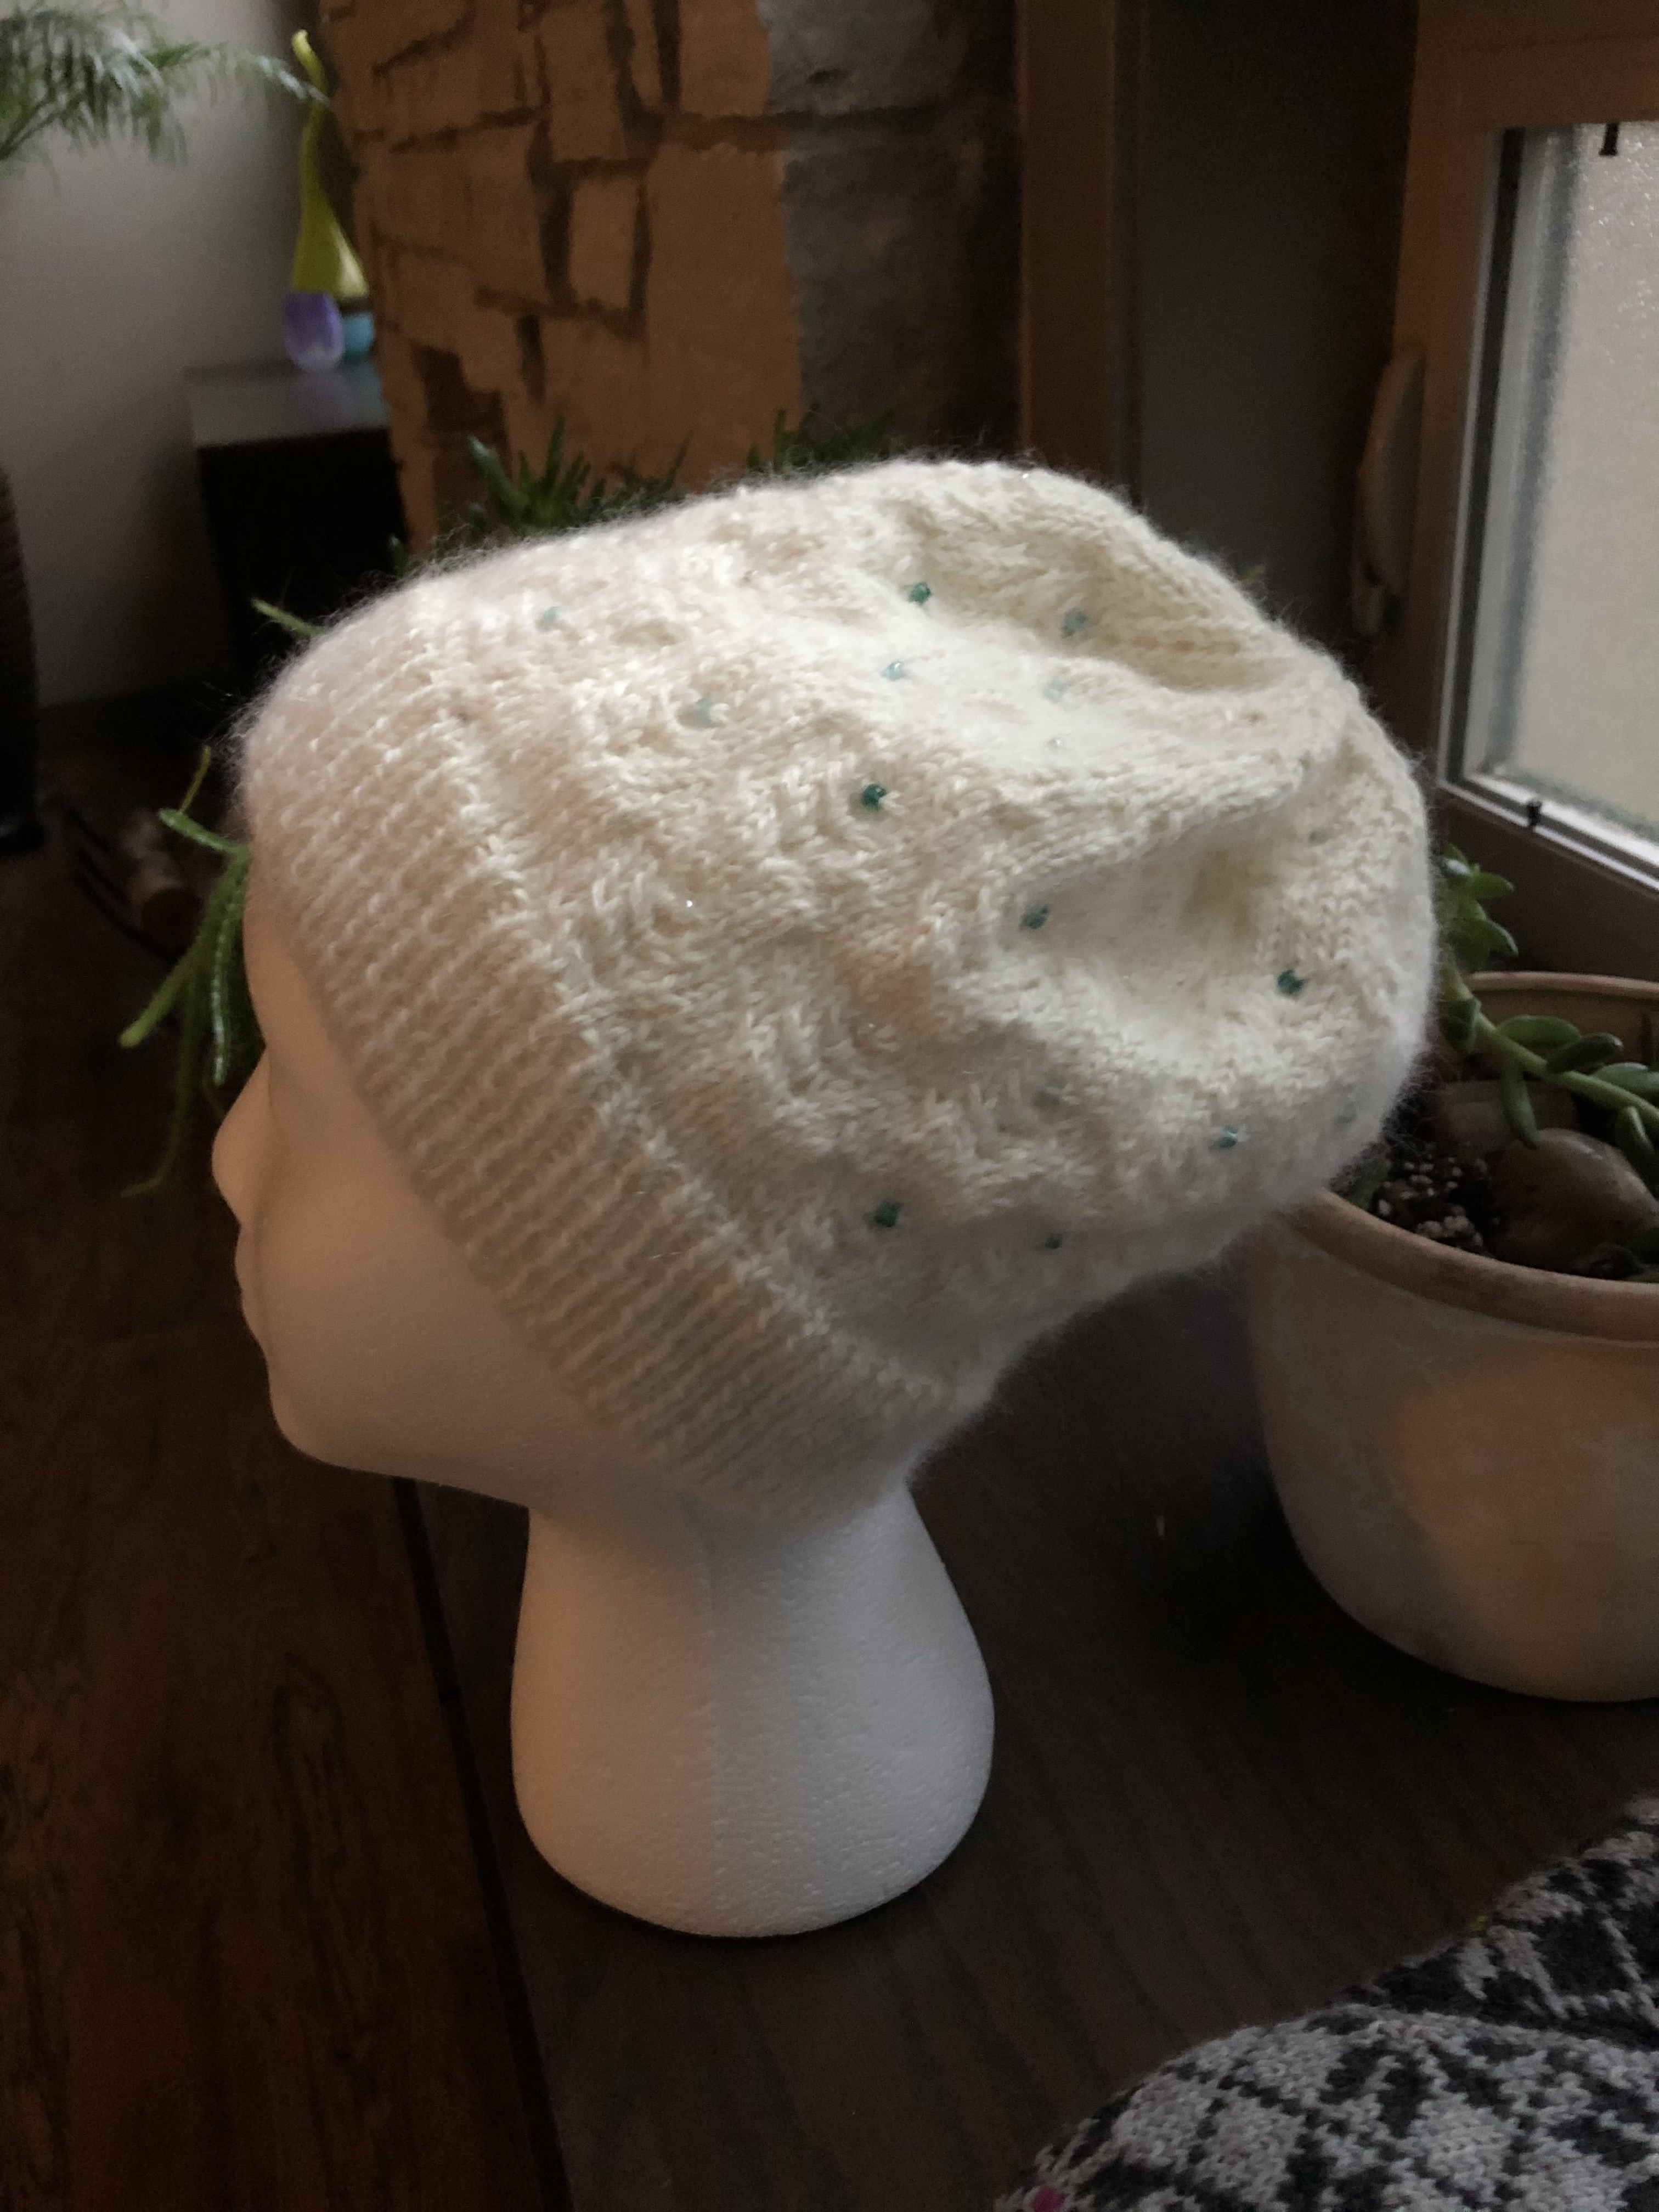
I have a new pattern ready to be test knitted and for use as a blog tutorial. If you are interested in test knitting this pattern, providing feedback on the pattern, and providing feedback on the blog tutorial, let me know in the comments below.
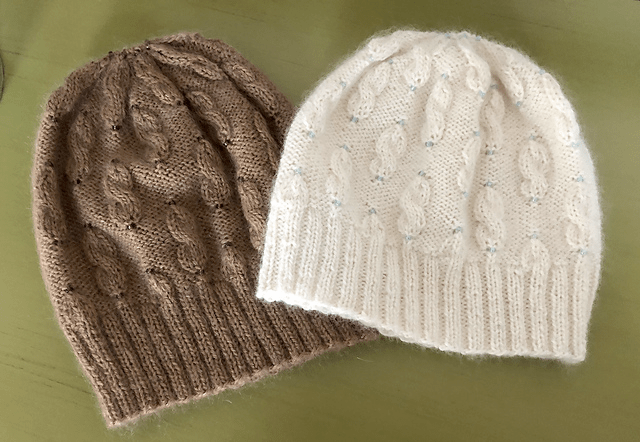
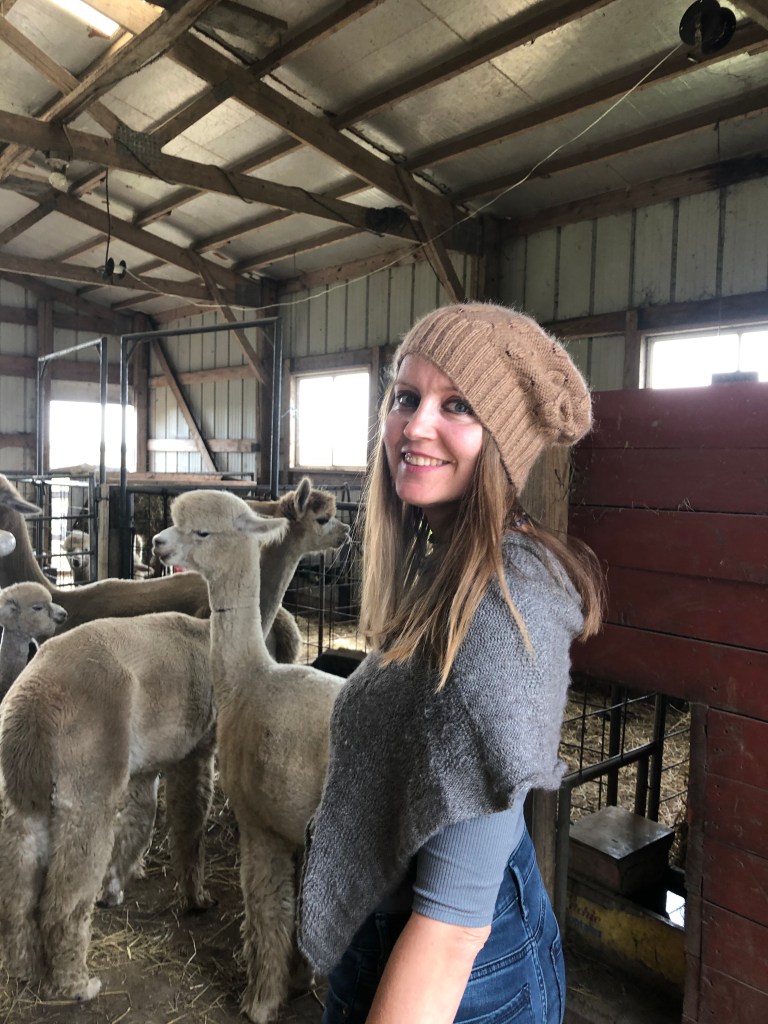
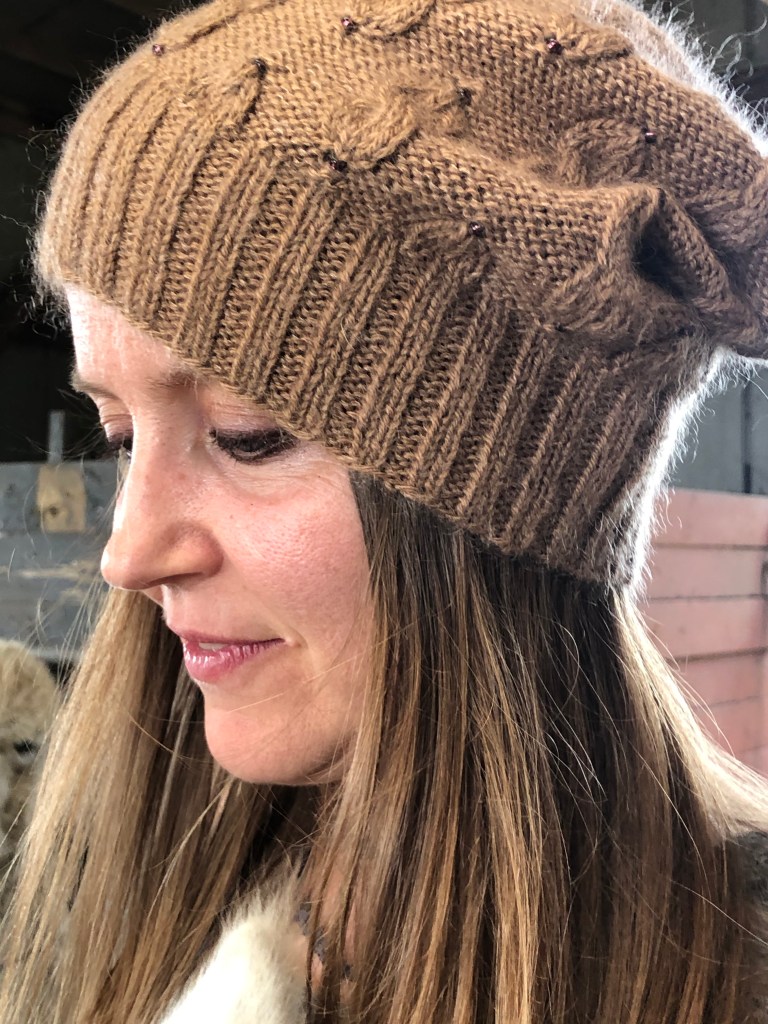
The hat is beaded and cabled, and constructed with two yarns held together. Super soft royal baby alpaca and a lace weight mohair give each stitch extra loft and warmth. Beads adorn the tops and bottoms of each of the broken cables in the pattern.
Techniques highlighted in the tutorial will be cables and beading.
You can purchase the alpaca yarn (~200 yards) through der Bauernhof Farms and the lace weight mohair (~230 yards) through your favorite local yarn shop or at Webs (Southampton Yarn).
There are at least three methods for working small circumference tubes. They are:
Using one circular needle with a long connecting cord, known as the “Magic Loop”.
Using two circular needles.
Using a set of 4 or 5 double pointed needles.
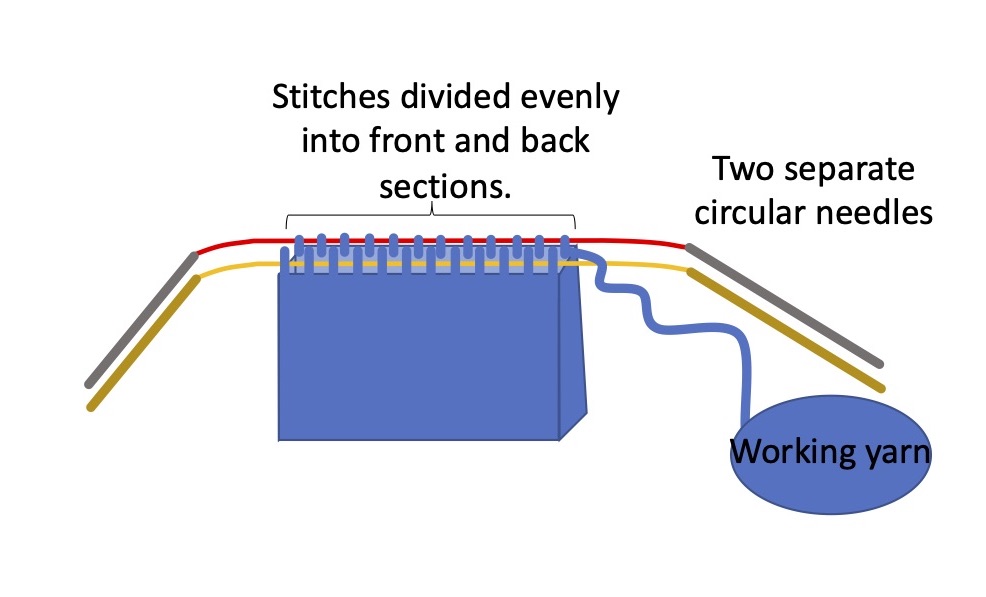
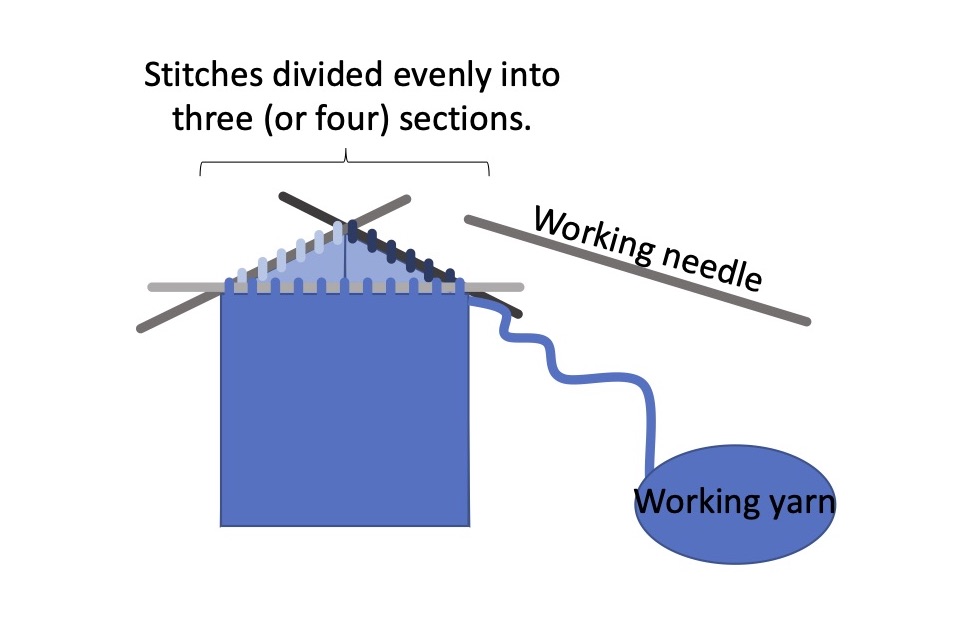
For all types of small circumference circular knitting, the stitches are divided into sets which are separated either by the flexible length of cord of the circular needle (magic loop), or on separate needles.
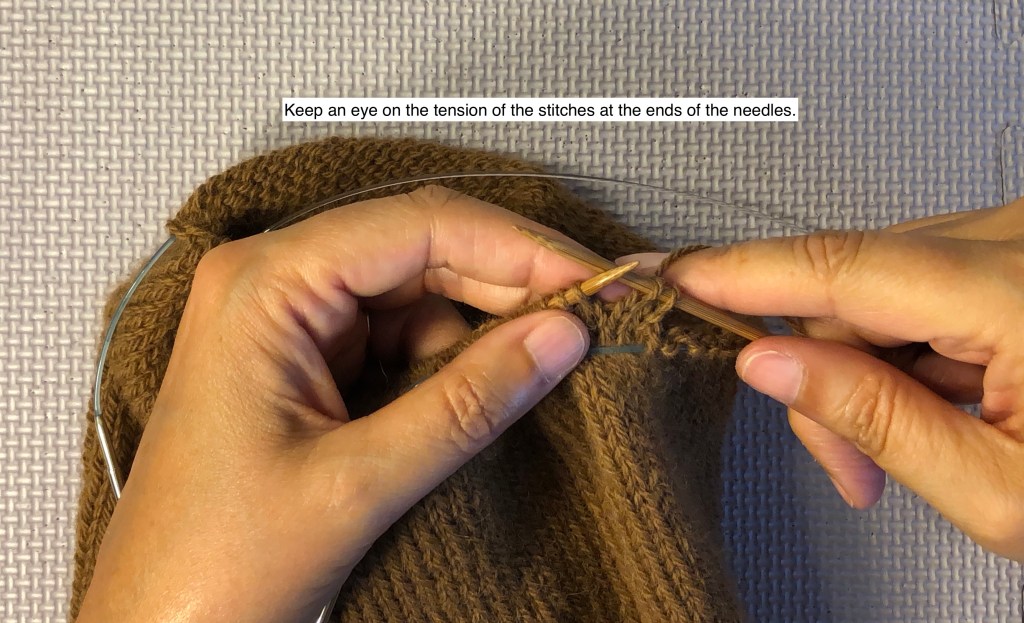
The thing to be wary of in this type of knitting is producing “ladders” at the intersections of the sets of stitches. Ladders are a gap between the stacks of stitches where you can see the yarn on the back of the work from the front side. Frustratingly, they don’t always disappear after blocking, especially when they are all stacked on top of each other, so it is best to try to avoid them. Ironically, ladders can form both from stitches that are too loose OR too tight, so you really need to pay attention to your stitch tension at the beginning and end of each set of stitches.
Magic Loop
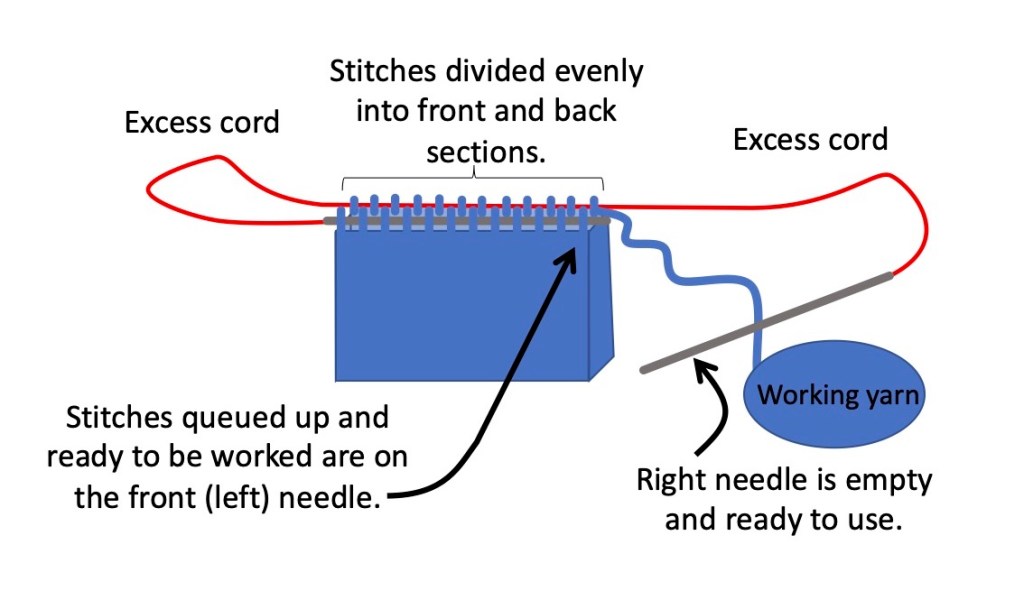
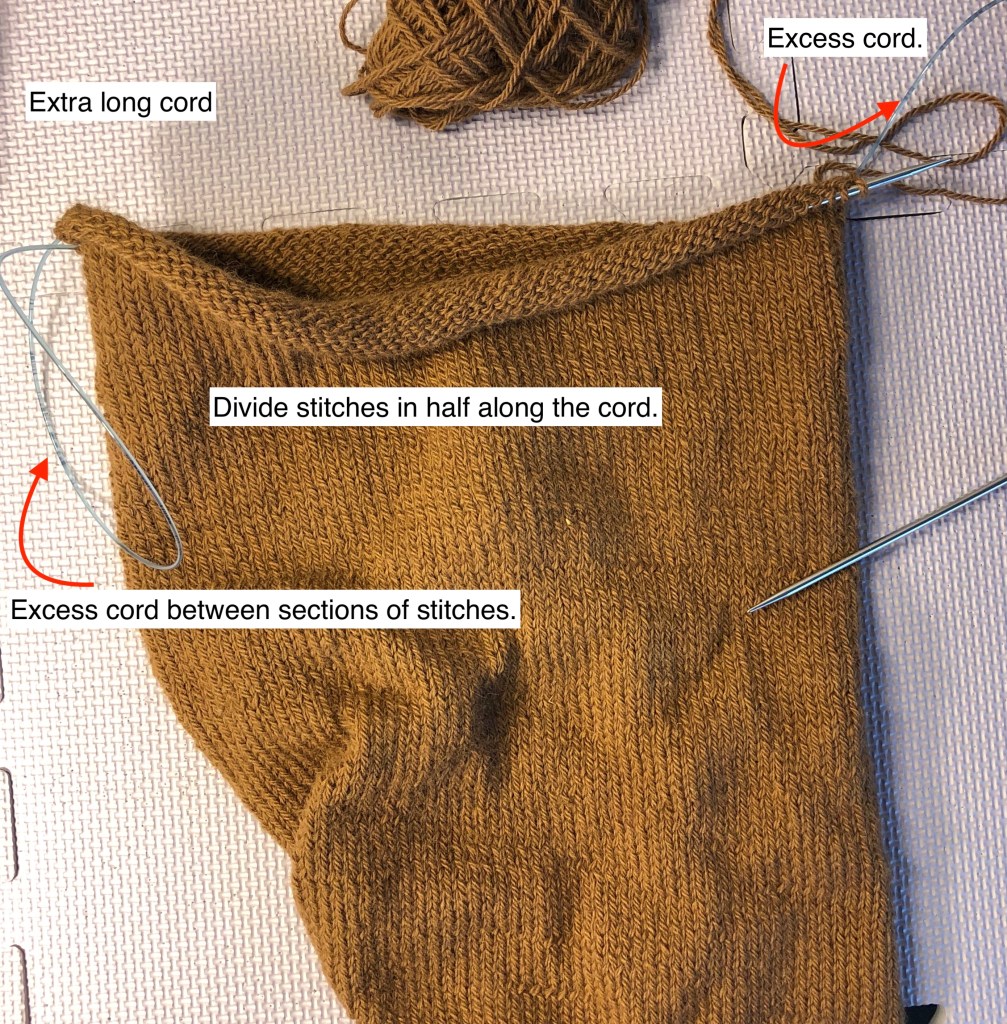
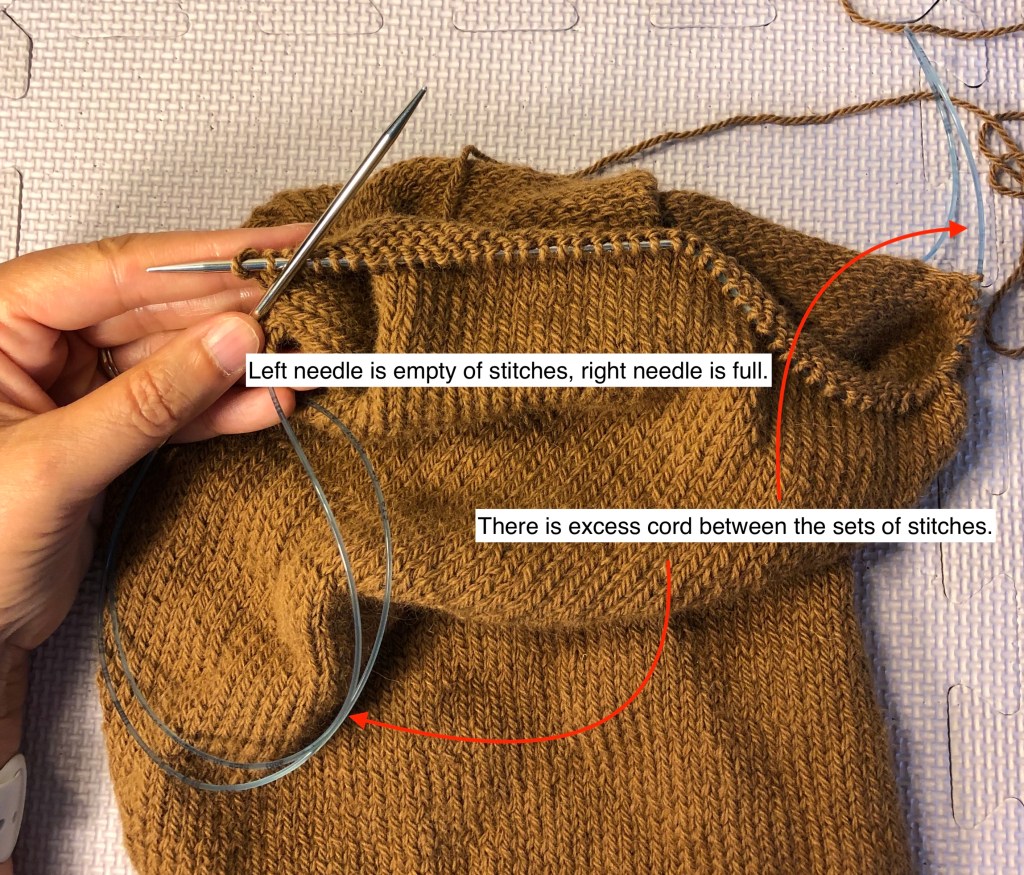
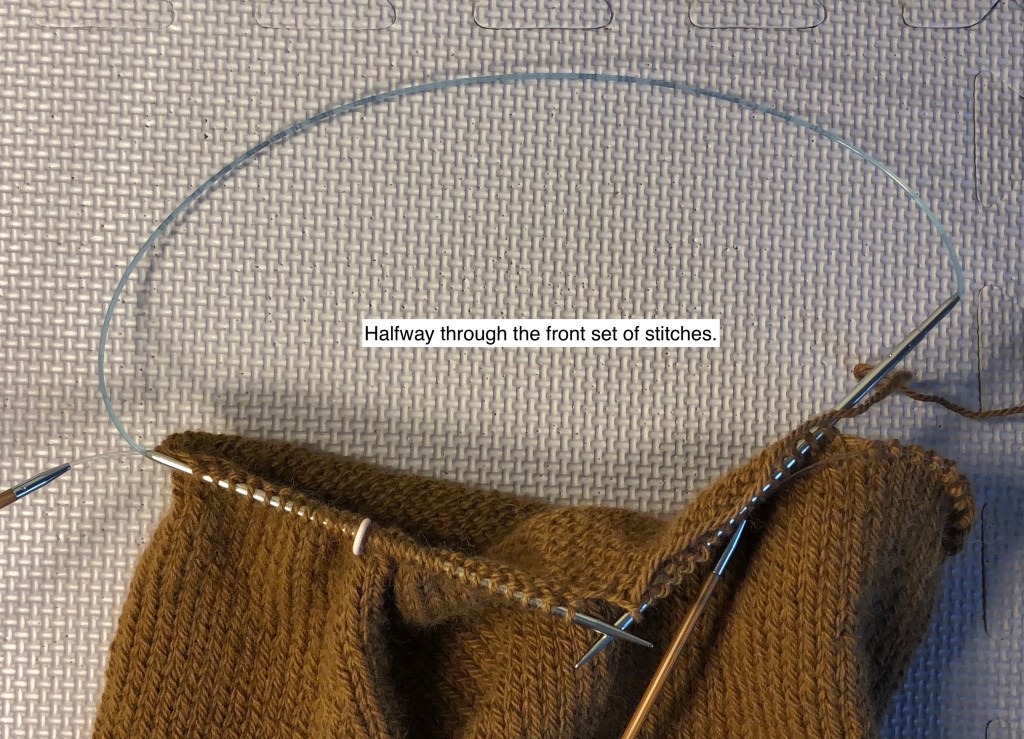
For the Magic Loop, you will need a very long, flexible cord on your circular needles. *Note: This is one reason to invest in a set of interchangeable needles, even though they are expensive. It’s easy to change the cord length while keeping your project on the same needles.* To work the magic loop, you divide up the stitches into two sections (front and back) with a loop of the excess cord separating them. The front set of stitches (those closest to your body) should be at the end of the left hand needle, ready to work. The back set of stitches (those farthest from your body) will be on the cord with the right hand needle extending out.
With the right hand needle, begin working the stitches off of the left hand needle using care not to pull the working yarn too tightly from the last stitch on the back set of stitches.
Hold the last stitch of the back set of stitches close to the first stitch on the front set of stitches to minimize the distance and tension differences.
Work across the entire set of stitches on the left needle.
Gently pull the cord through the back set of stitches (pull to the right) so that they are loaded onto the needle. Be careful not to pull the needle out of the stitches.
Turn the work. Now slide the back set of stitches off the needle and onto the cord so that the right hand needle is available for new stitches.
Now you are ready to work the second set of stitches (now on the front needle). Continue working and sliding stitches. Be aware and careful of the tension at the stitches between the front and back sets of stitches.
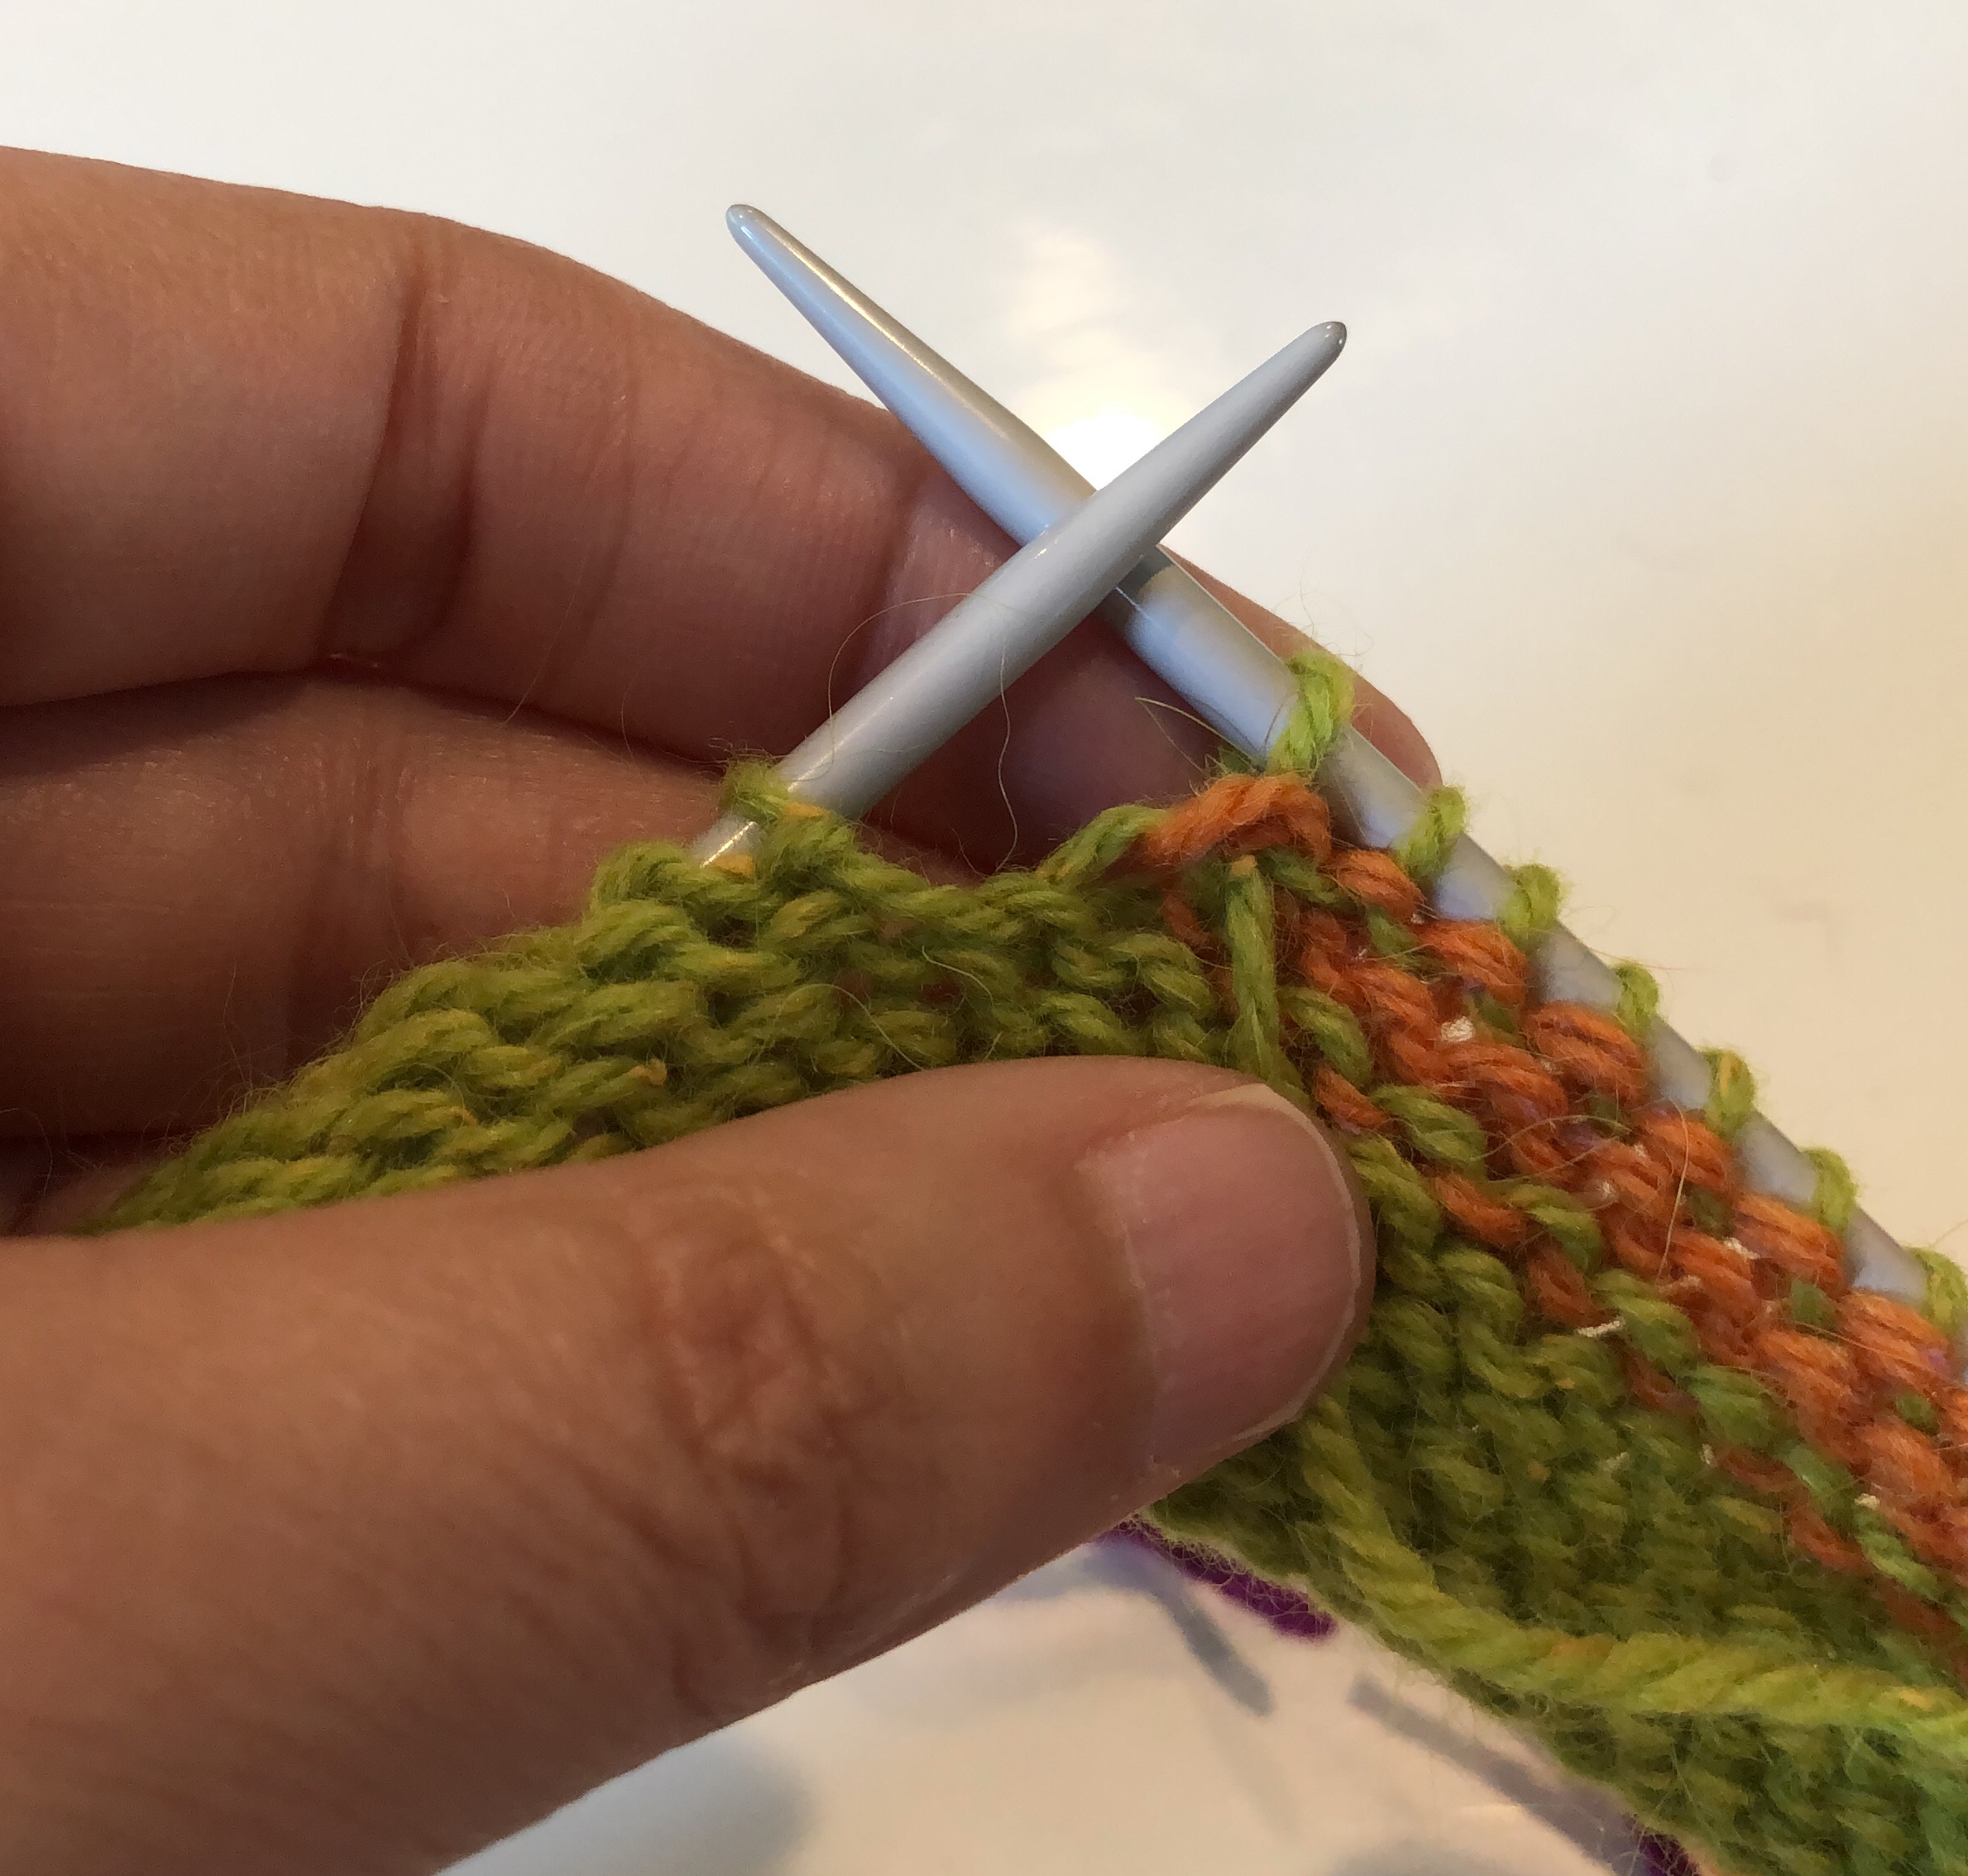
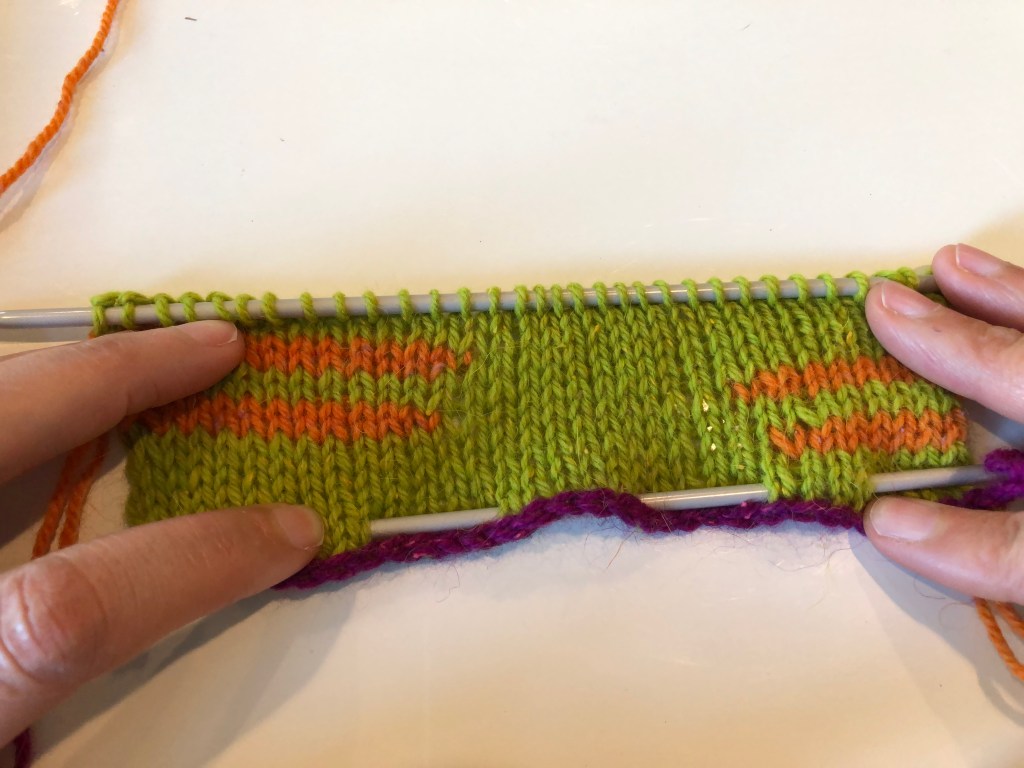
Two Circular Needles
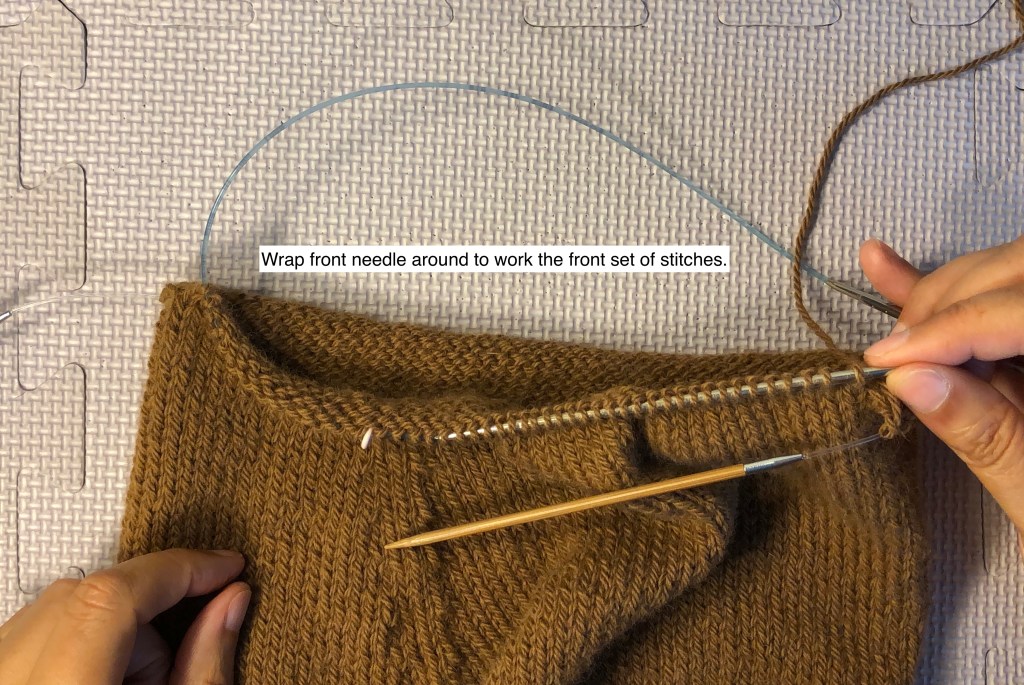
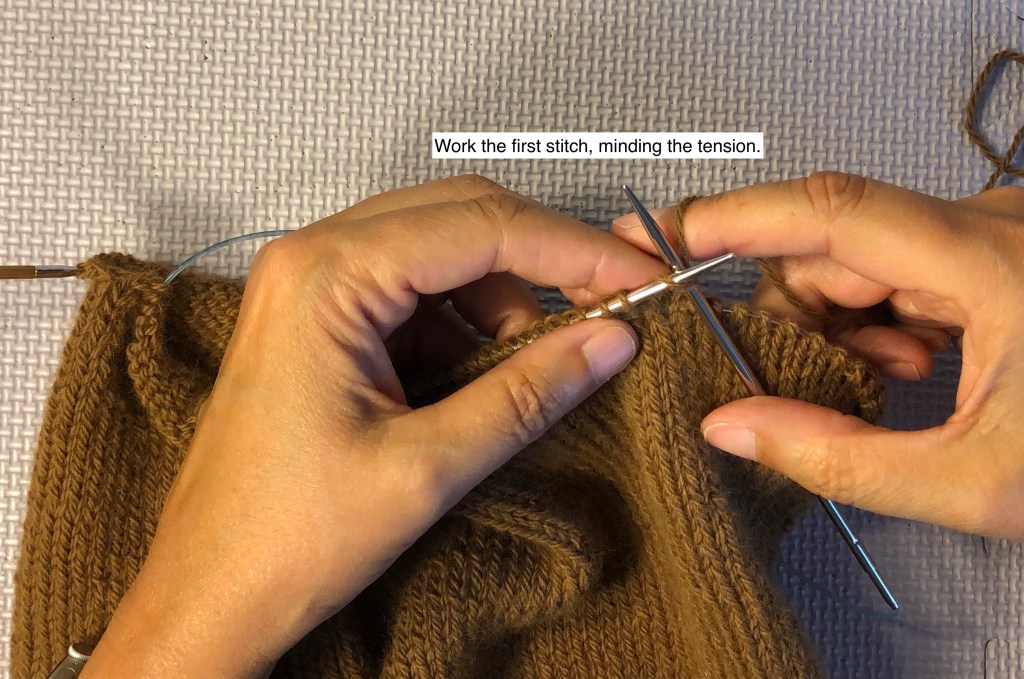
The technique is almost the same, except now you have two needles rather than excess cord. When working, you will always use the same needle for the same set of stitches. In the photos below, the front set of stitches is on the aluminum needles and the back set of stitches is on bamboo needles. I will always use the aluminum needles to work the stitches on the aluminum needles. I push all of the stitches up onto the left hand aluminum needle then wrap the right hand needle around to work the first stitch. The bamboo needles are hanging, or held out of the way. Be sure to check the tension of the first stitches. Once the set of stitches on the aluminum needles are worked, turn the work and use the bamboo needles to work that set of stitches.
Aluminum needles
Aluminum needles
Aluminum needles
Bamboo needles
Bamboo needles
Double Pointed Needles
Double pointed (DP) needles come in sets of 4 or 5. If you have a set of 4 DP needles, you will divide the stitches evenly over three needles to set up. If you have a set of 5 DP needles, you will divide the stitches evenly over four needles. The technique to work the stitches is exactly the same as above: check the tension at the first stitch on the new needle. It should not be too tight or too loose. The advantage of DP needles is that there is not a sharp turn (180o) between needles, so I think it is easier to control the tension of those first stitches. The disadvantage is that since you are dividing up the stitches into more than two sets, there are more intersections of needles to work with, potentially more opportunity to create ladders in your knitting, and working with the needles can be a bit fussier (that is, there can be a lot of fiddling with stitches and needles as you work around the tube). And, because the DP needles tend to be shorter than circular needles, you may find that stitches fall off the ends while you are working or removing from storage. This is easily fixed with needle tip protectors, but those can make the DP even fussier to use.
There are a couple of EASY ways to prevent ladders with DP needles that you can’t use with the magic loop or with two circular needles. But there is no easy way (that I have found) to prevent the fussiness of DP needles. However, I learned to knit using DP needles, and I don’t hate using them.
The following video shows some of the strategies I use for handling the DP needles and preventing ladders.
I’m teaching four (!) knitting classes at Heartland Community College this fall. They are:
Learn to Knit
Sweater Class
Chart Reading
Basic Brioche
Each course will have its own password protected post. The posts will be available only to registered students. I’ve had to assure the HCC Continuing Education Office that I won’t share class-specific information with people who aren’t registered for the course, and that seems fair. Both the community college and I want people to continue to want, need, and enroll in these types of classes. As far as I know (I asked), the continuing education office doesn’t have course-specific server space, so for now, I’m using this site as that platform.
I’m still planning to have posts about general techniques available without a password. I’m working on a public post about circular knitting and another about blocking. This information is also (or will be) available through the pattern-specific posts. I’ve been working on many posts simultaneously and I feel like my progress is frustratingly slow.
If you are helping edit or with the content/organization of the Steventon Shrug Pattern post (thank you!), that password is still the same. I’ve been adding all the updates to the Steventon Shrugto the post titled “Project Notes for the Steventon Shrug” so it is super long now. There are just a few more additions to that post and it will be complete. Eventually, all of that information for the Steventon Shrug pattern will be available on that one page, but I’m still trying to figure out the best way to copy, convert, and format while I’m trying to finish adding all of the information to the post. (It’s been so much work! Fun work, but really, I did not know what I was getting myself into!) If your password to THAT post, linked above, no longer works, please let me know, because I’m hoping that I can divide up the posts into public (no password), pattern-related and class related, each with a different set of passwords.
As an additional note, right now, the HCC classes are scheduled to be in person, however, they might be converted to remote learning via Zoom if (when??) the county slips back into Phase 3 or Phase 2. I’ve been working hard to make this possible (probable?) transition to remote learning easier on myself and still effective for the students. Part of my strategy is use this site as a resource in addition to the live Zoom meetings.
If that works well, I hope to offer my own patterns, content, and classes through this site and generate another revenue stream for this post-chemistry-career experiment that I’m doing. I’m still trying to figure out how I can make this knitting experiment profitable (well, at this point, I would settle for breaking even). It’s been a tough year for everyone I know in the fiber community. My community college classes were canceled. Stitches Midwest was cancelled/moved on-line. Stitches Midwest provided an important venue to sell my patterns. In the past, pattern sales from that venue were enough to support many of the costs associated with this new adventure (including the cost of this site subscription). Right now, everything about this experiment is unsustainable, but I’m hoping that it will turn around in the next 6-9 months.
In short, I value your continued support through comments on these posts, feedback on the pattern-specific pages, and your continued enrollment (in person or remotely) in the community college classes, and of course through pattern sales via my Ravelry store.
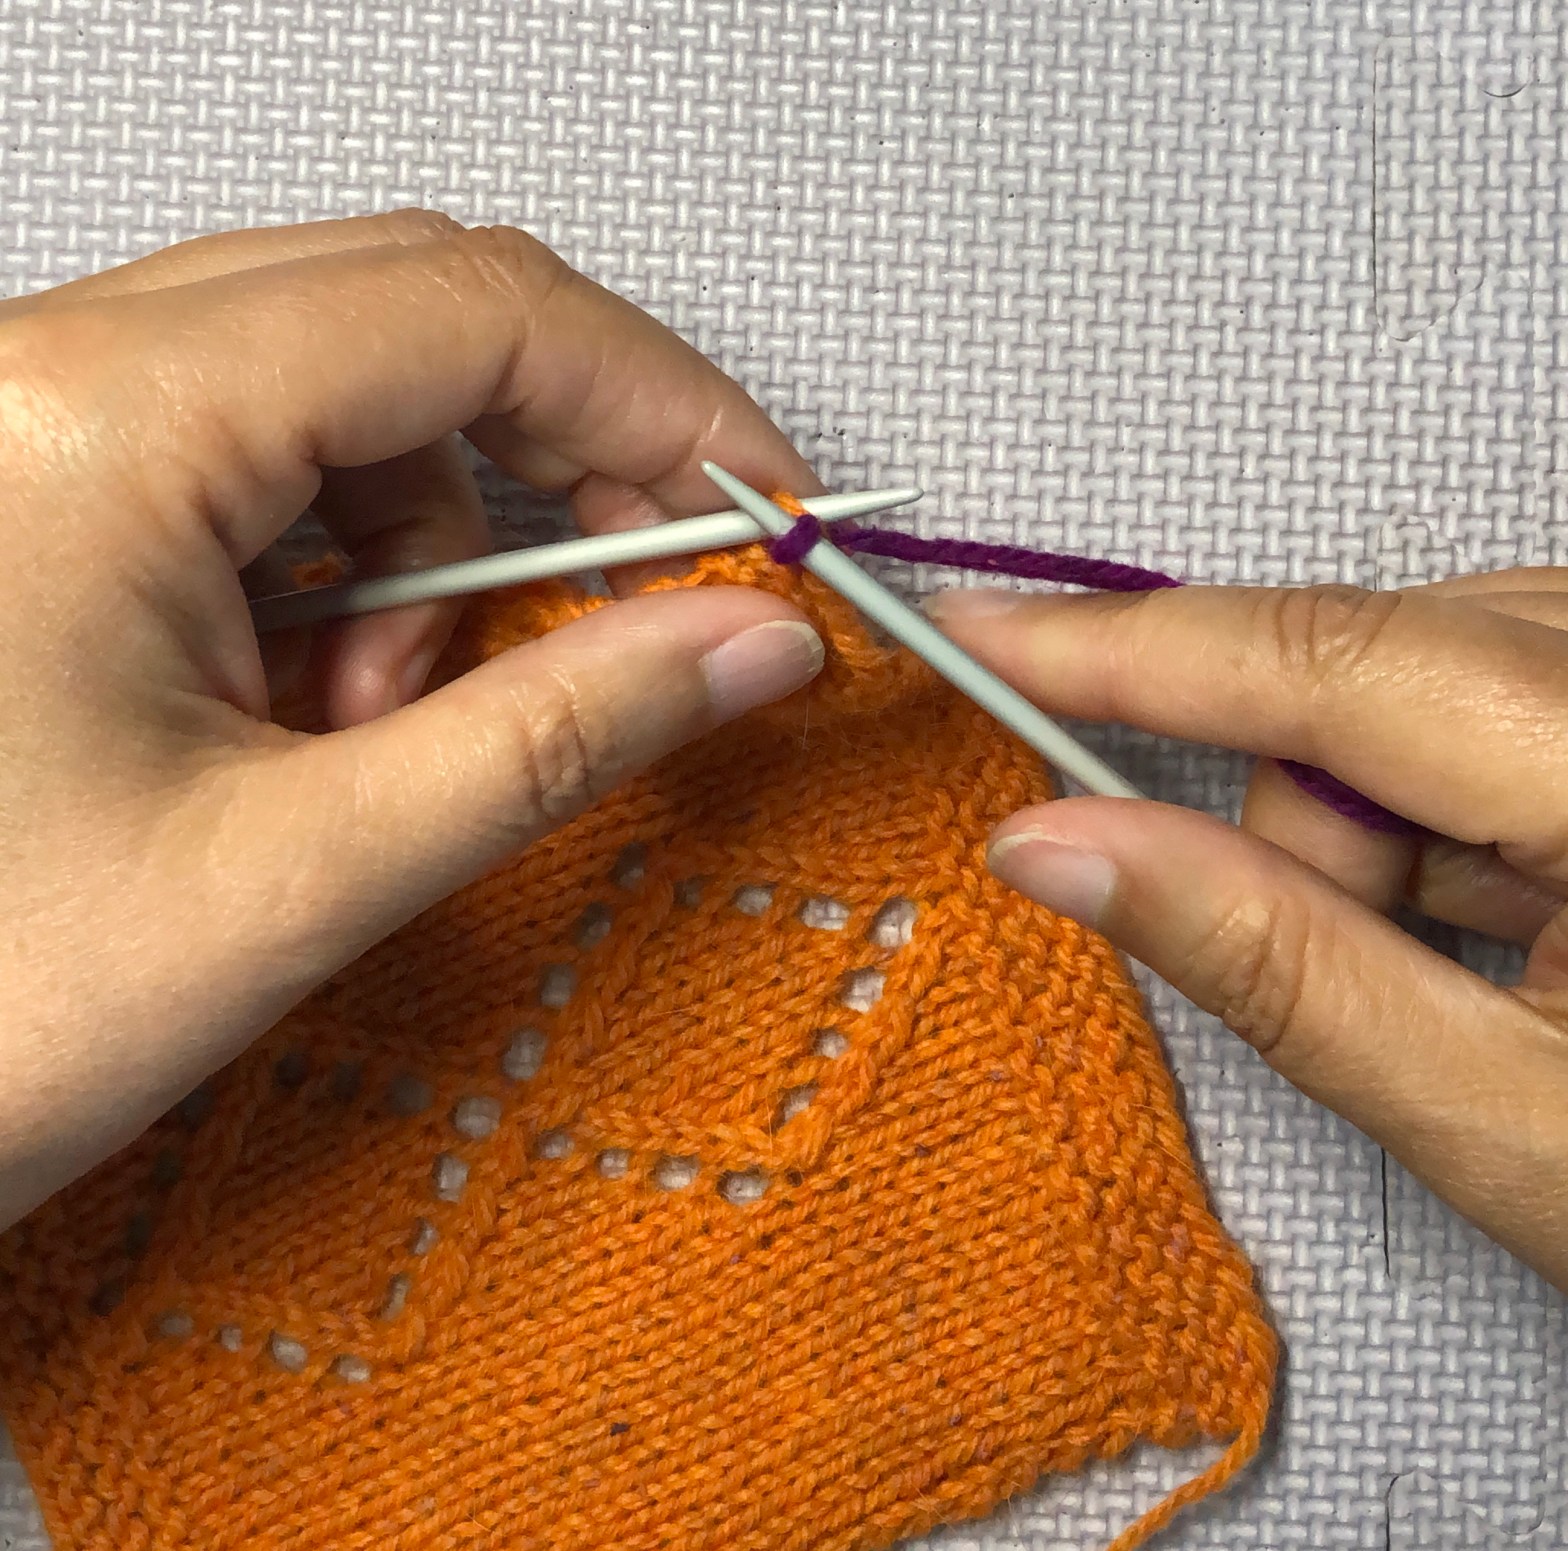
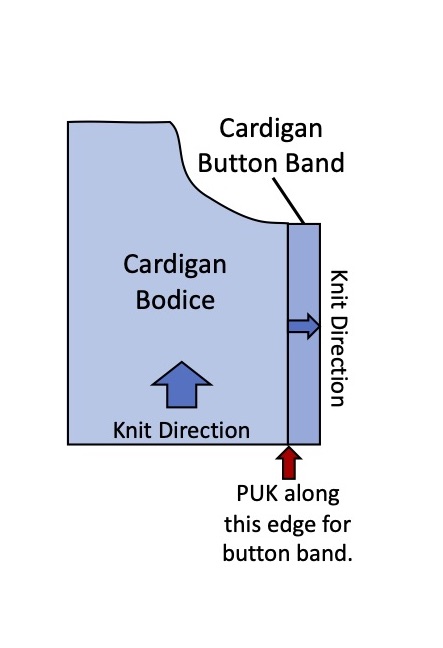
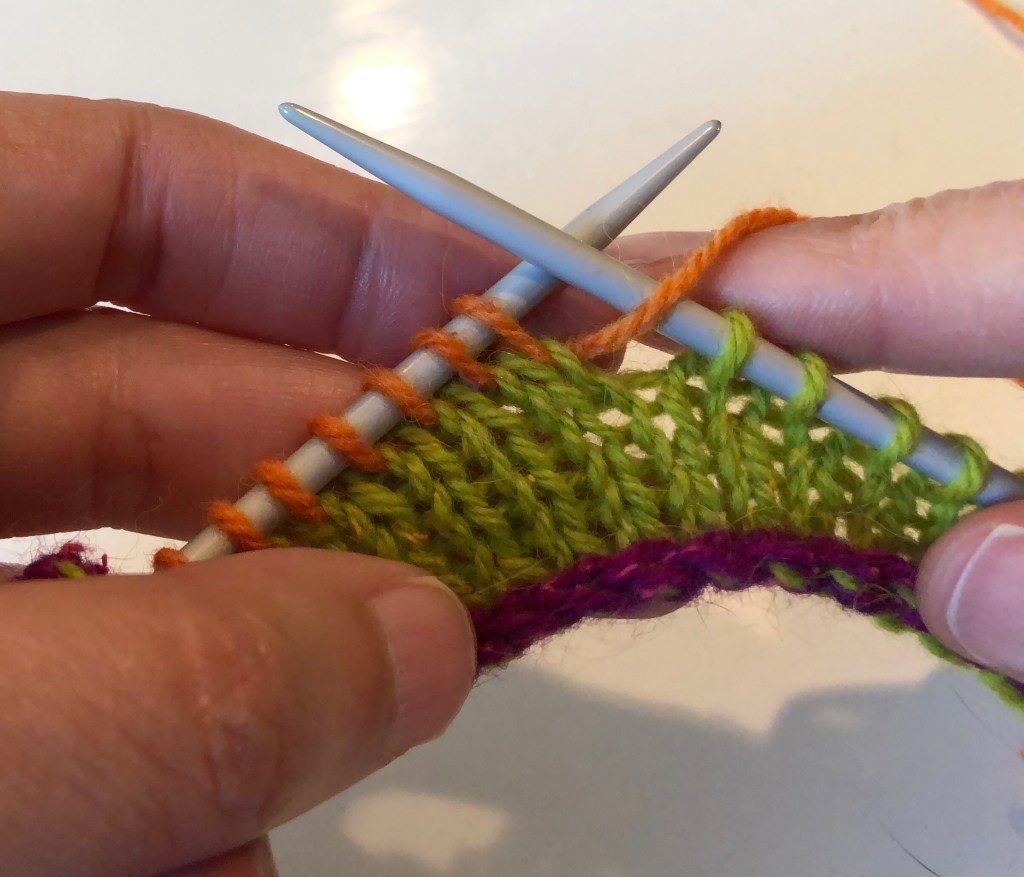
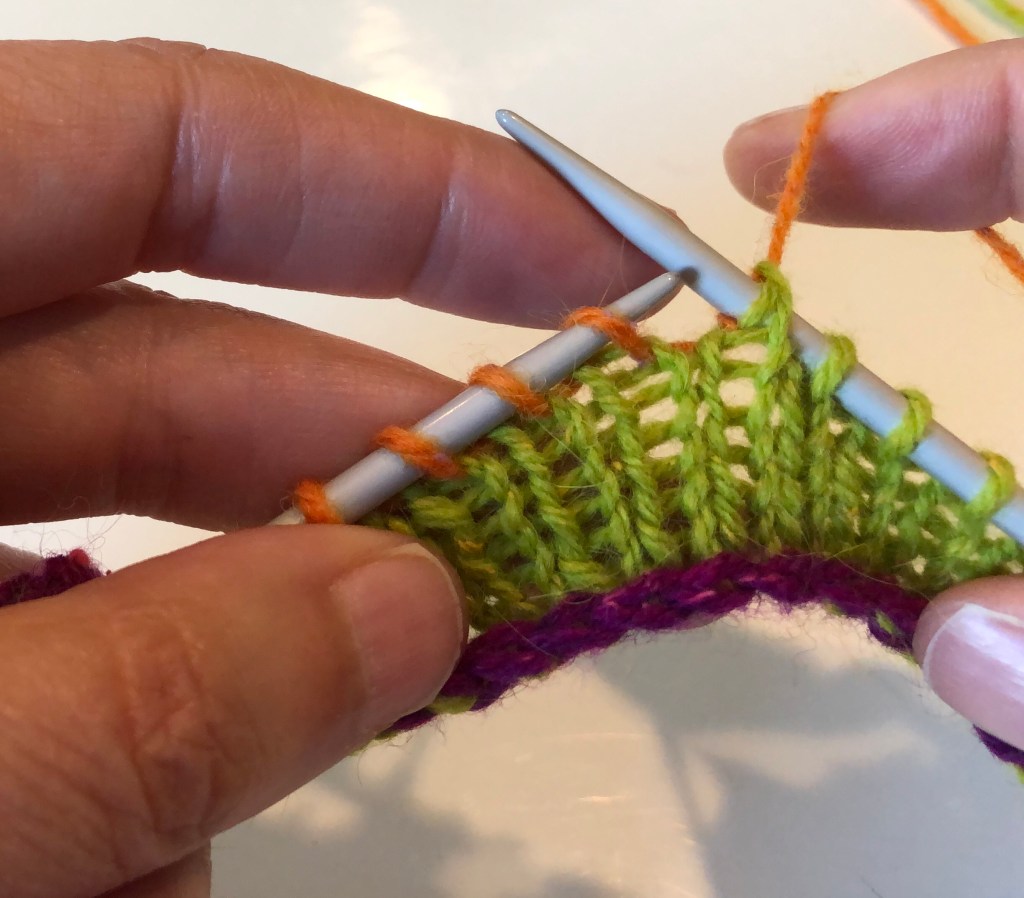
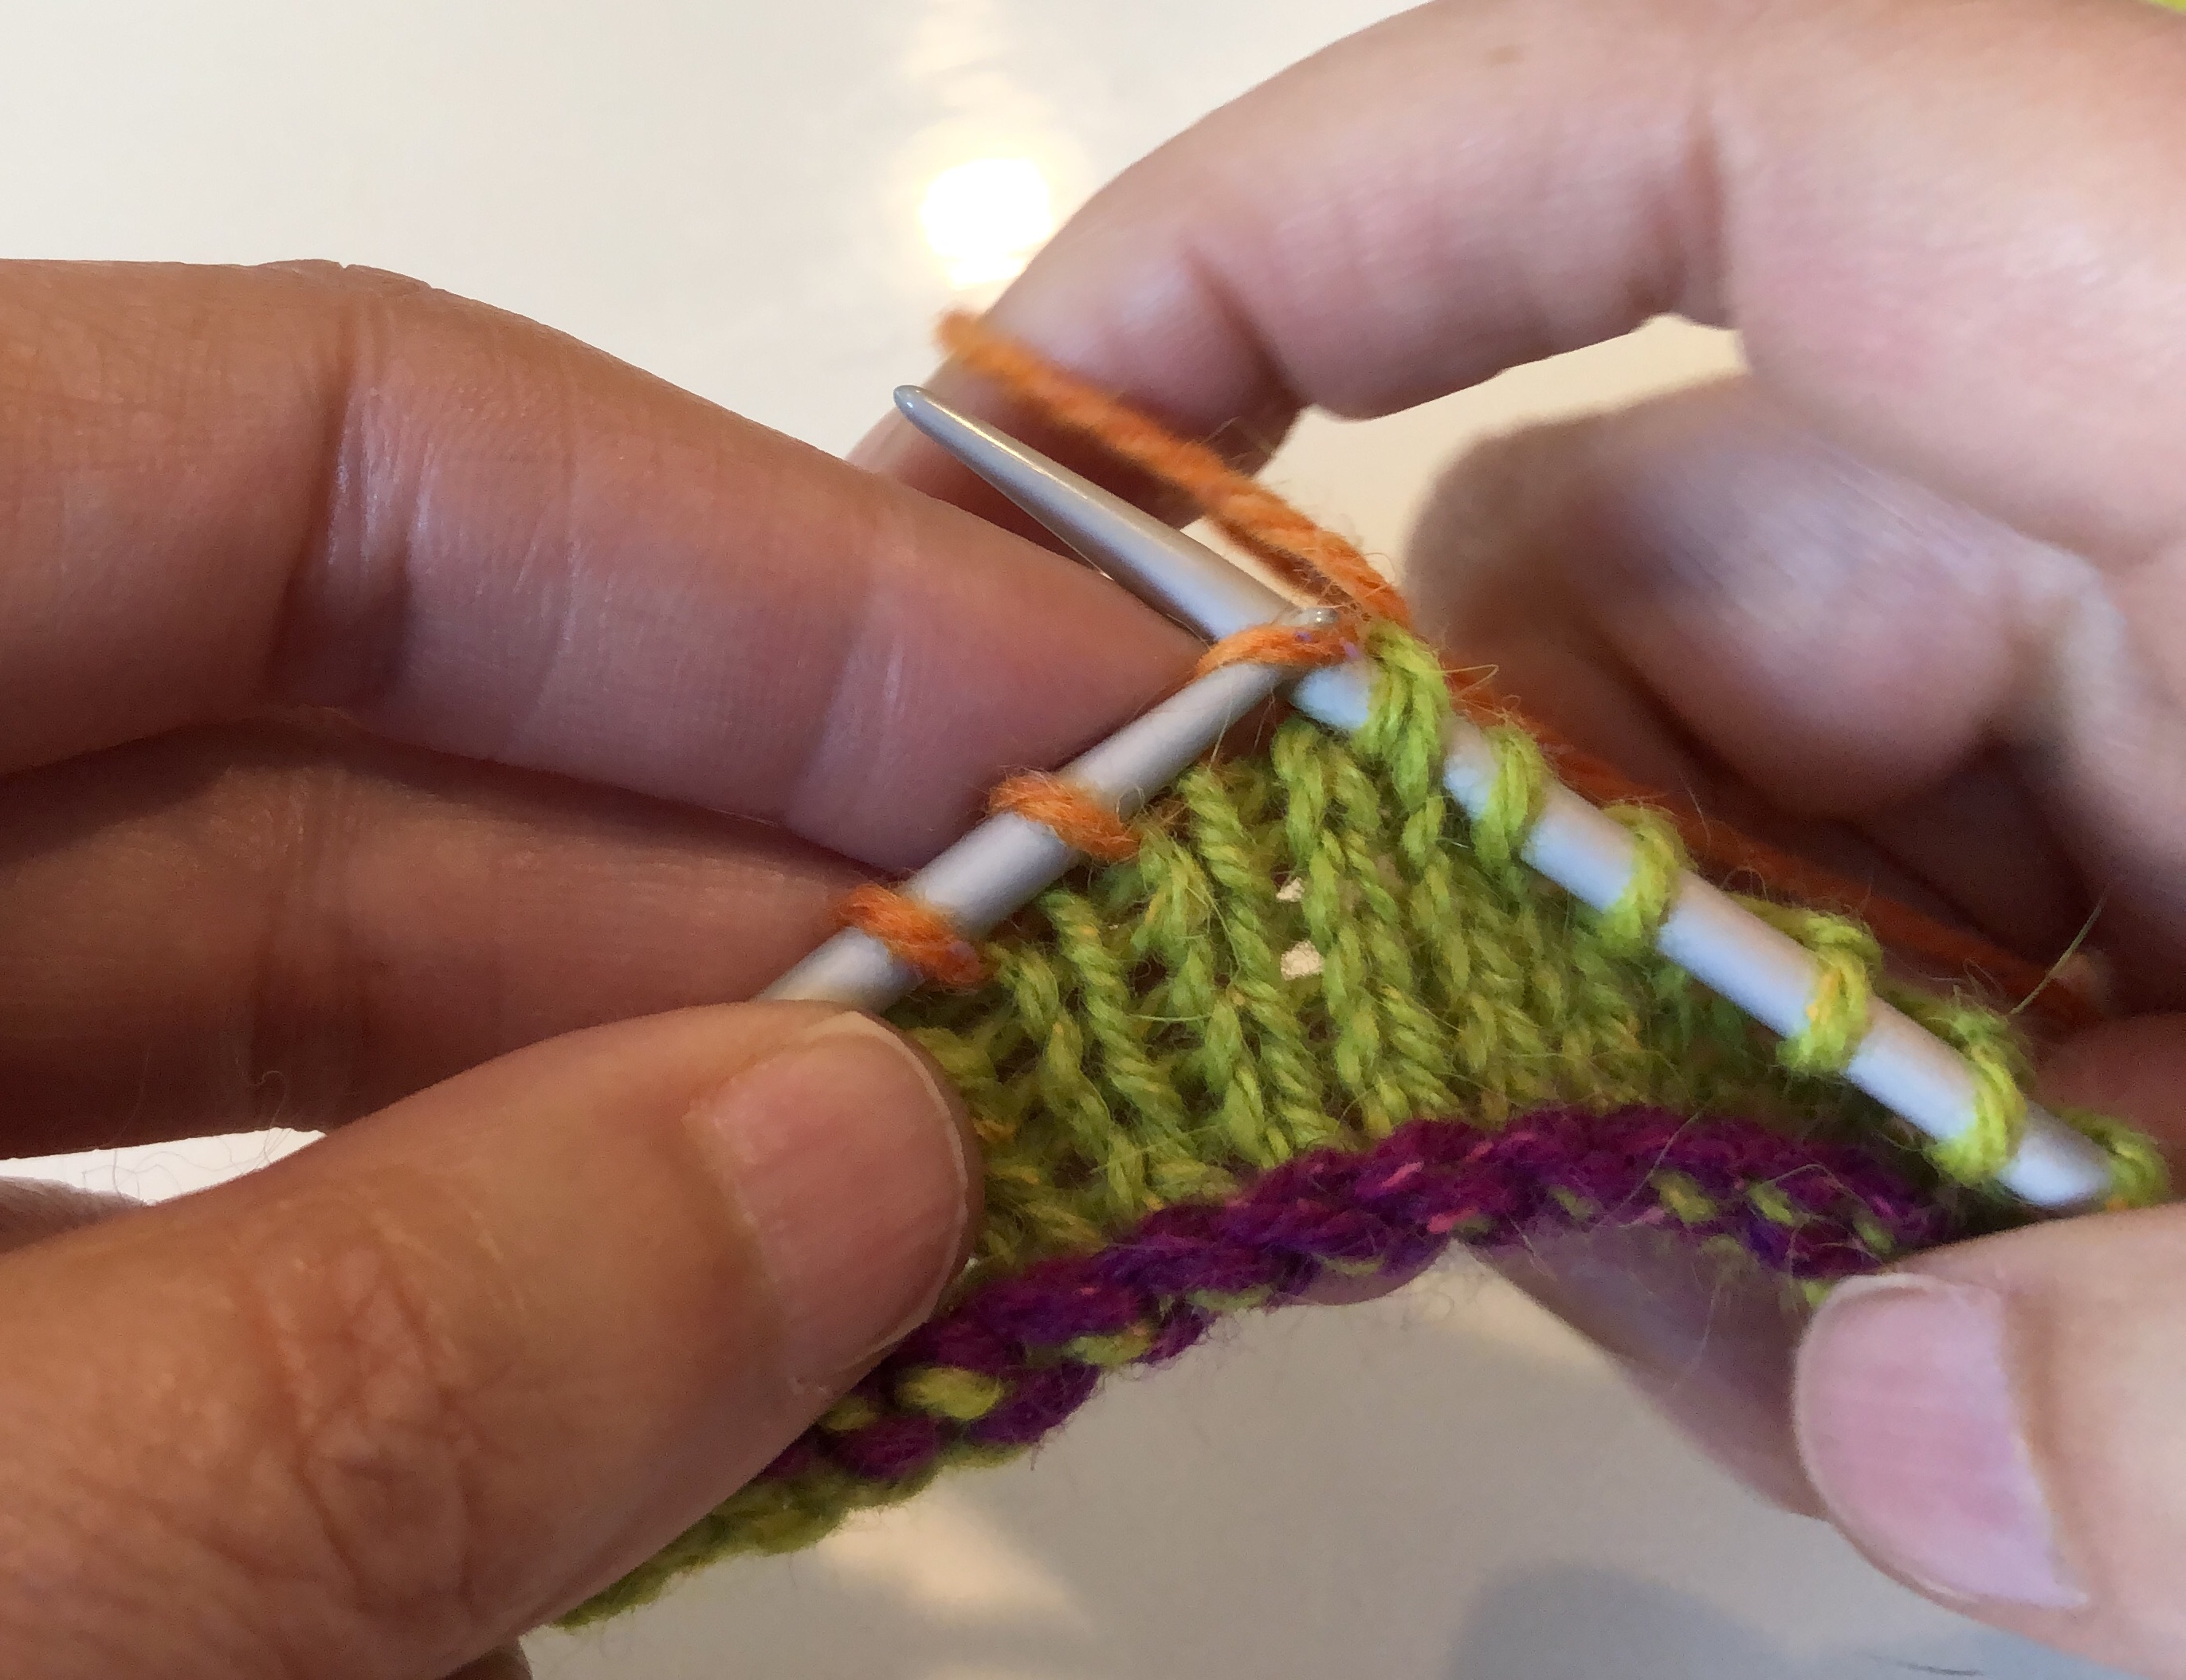
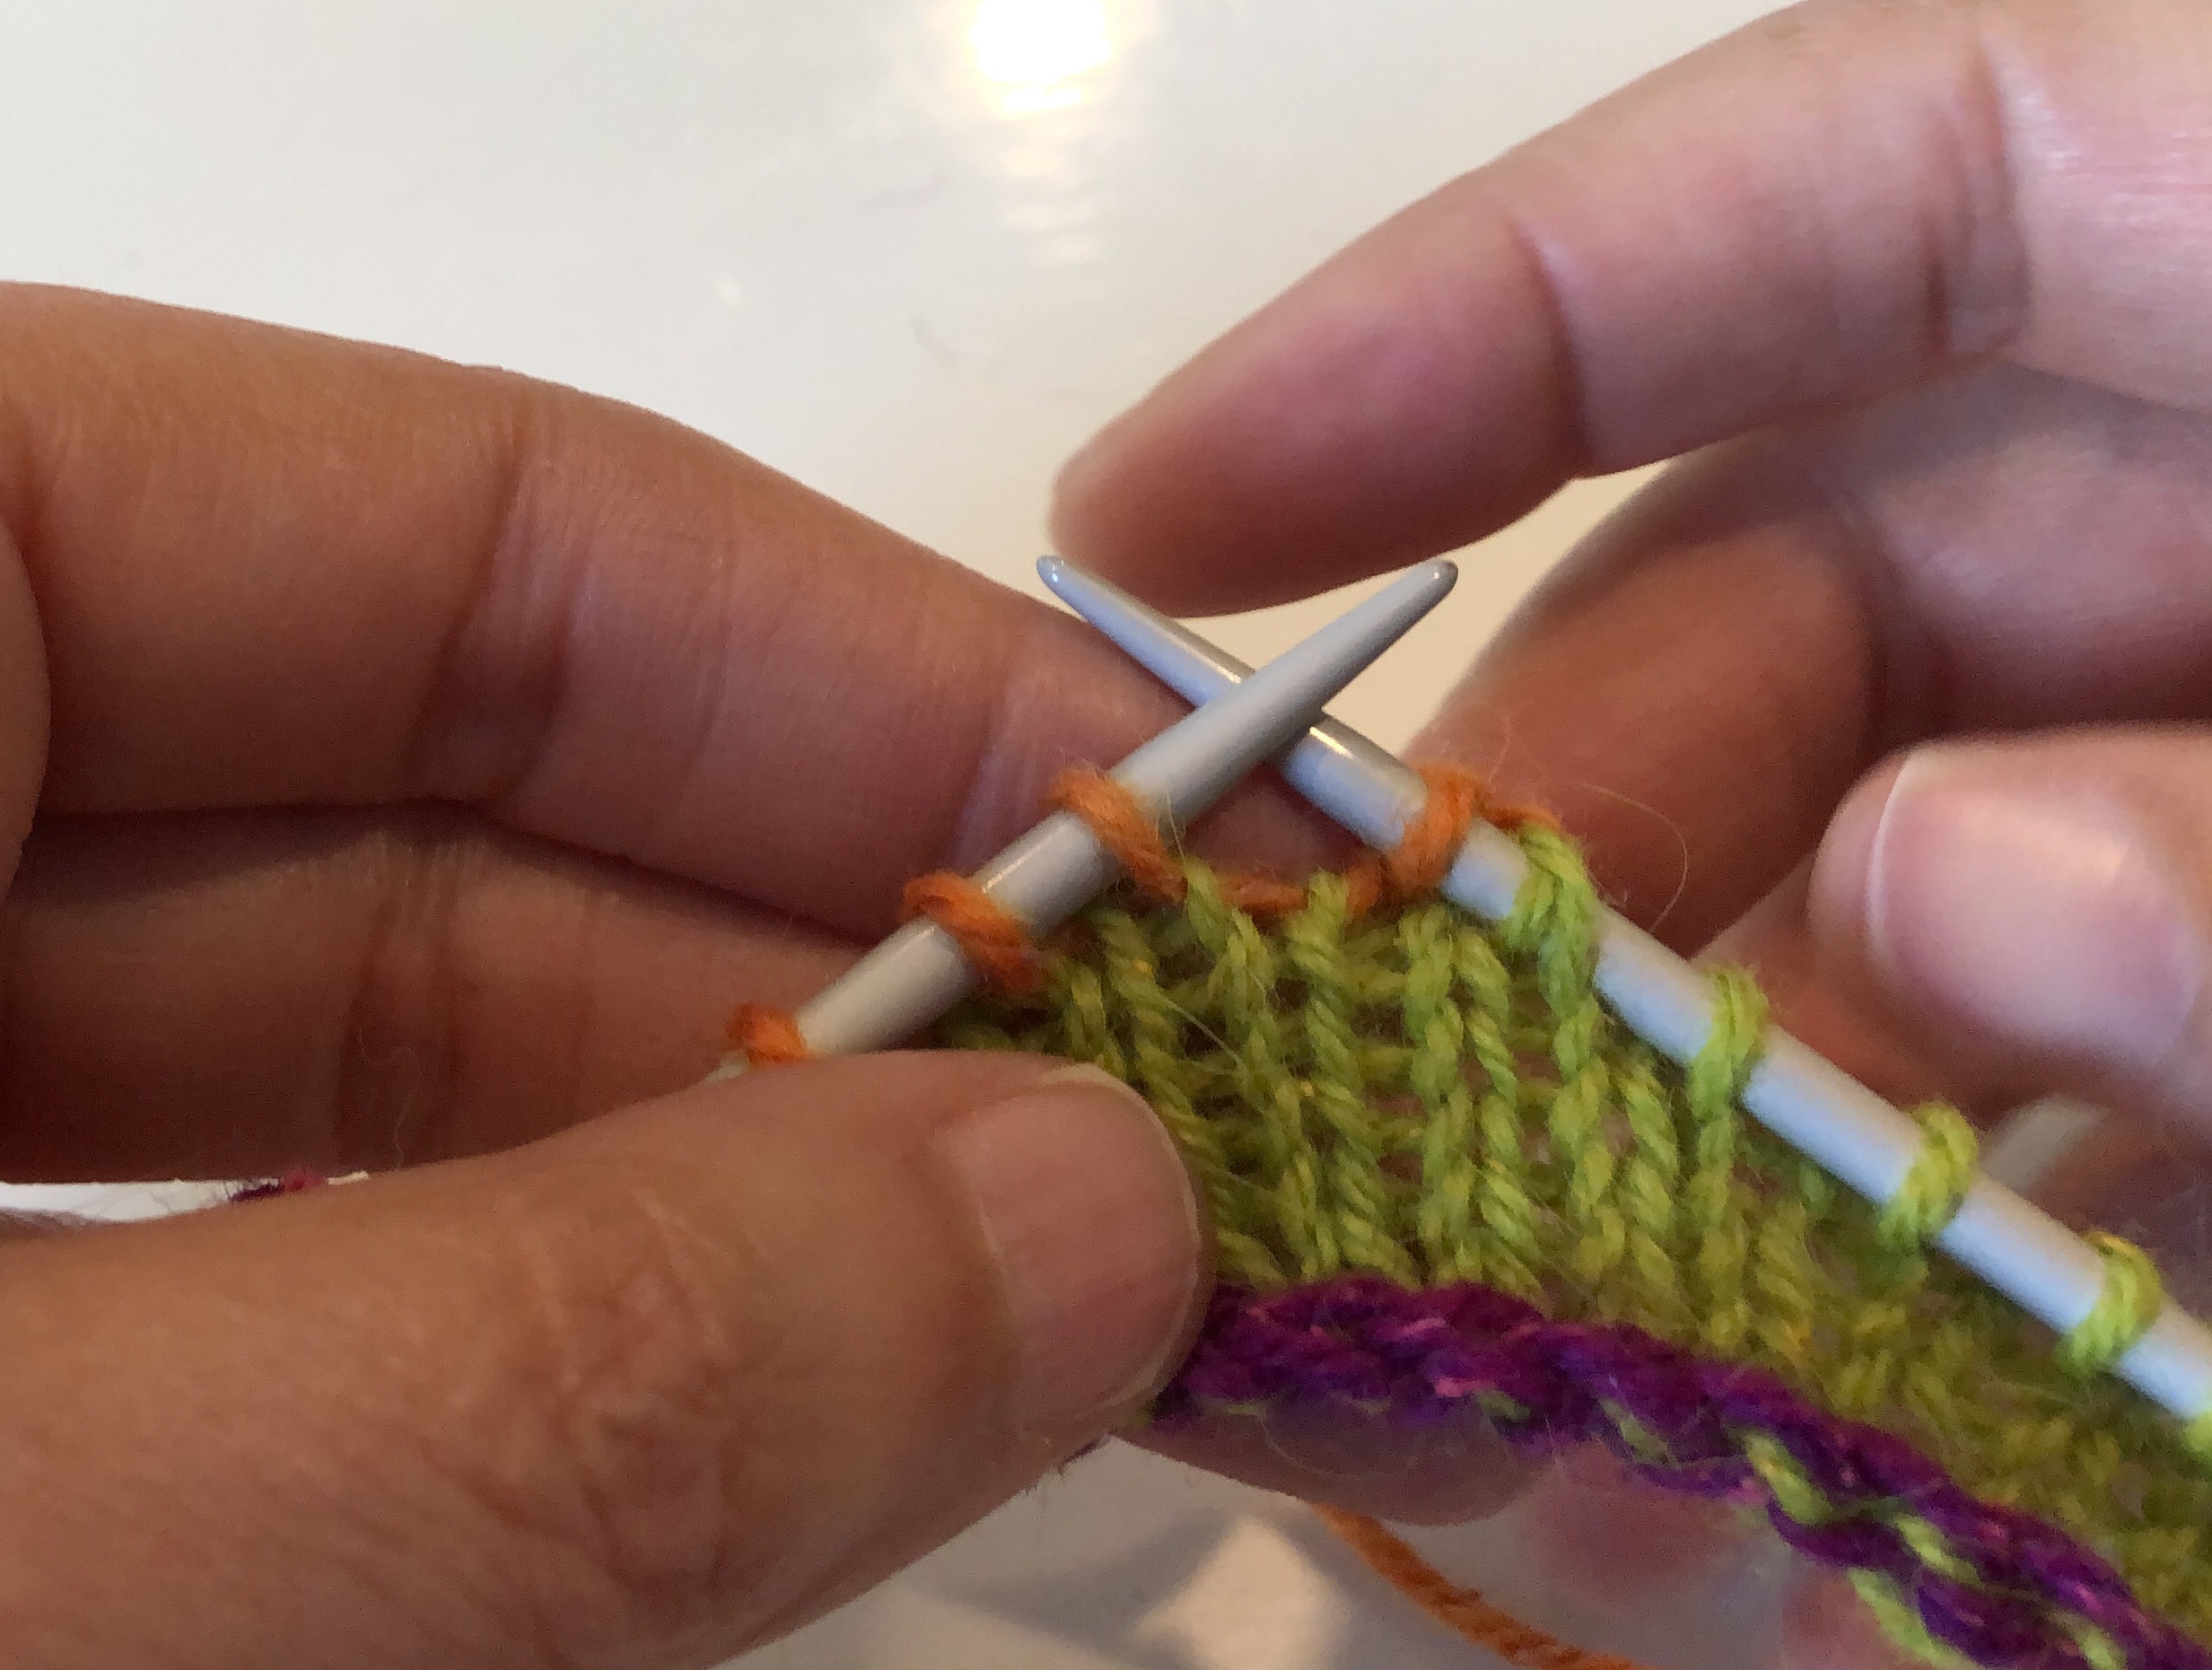
Pick Up and Knit (PUK) is an important skill to have in your skill project bag. I have used PUK innumerable times over the years. It is most commonly required for the button bands of cardigans and at the neckline for the collar. A PUK is used when you want to begin working perpendicularly to a set of stitches, like at the button placket of a cardigan. It can also be used extensively in modular knitting, such as in the Harlequin Swing Cardigan by Jane Slicer-Smith.
Harlequin Swing Cardigan by Jane Slicer-Smith uses PUK extensively. Each of the mitered squares is connected via PUK.
The Technique
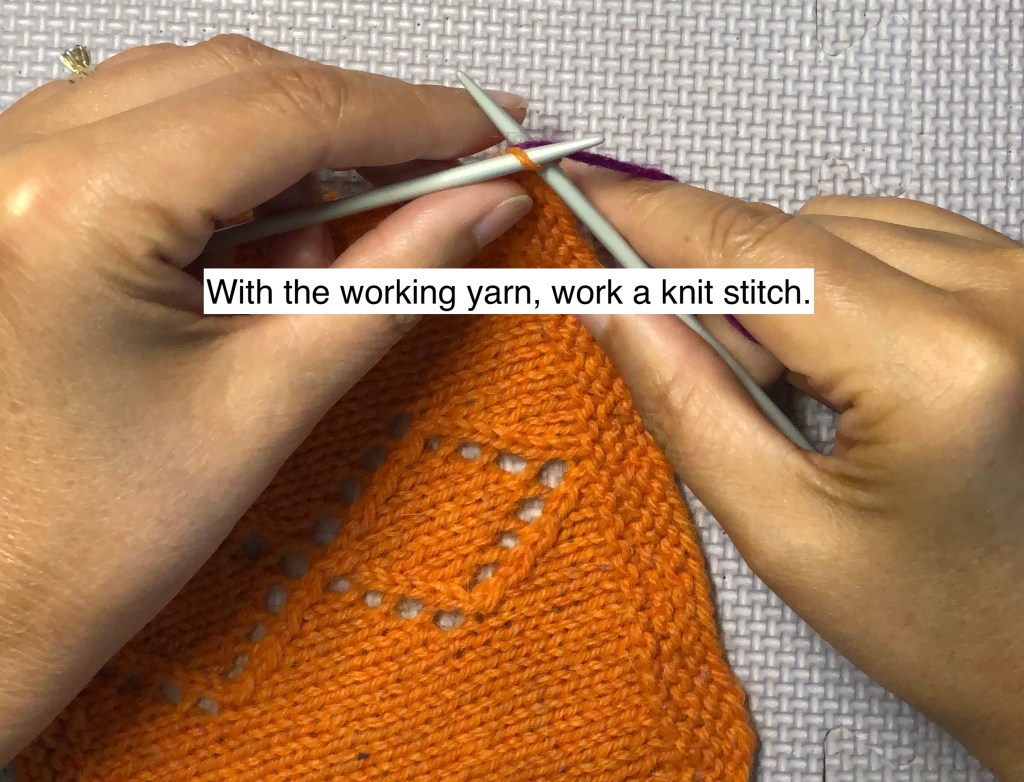
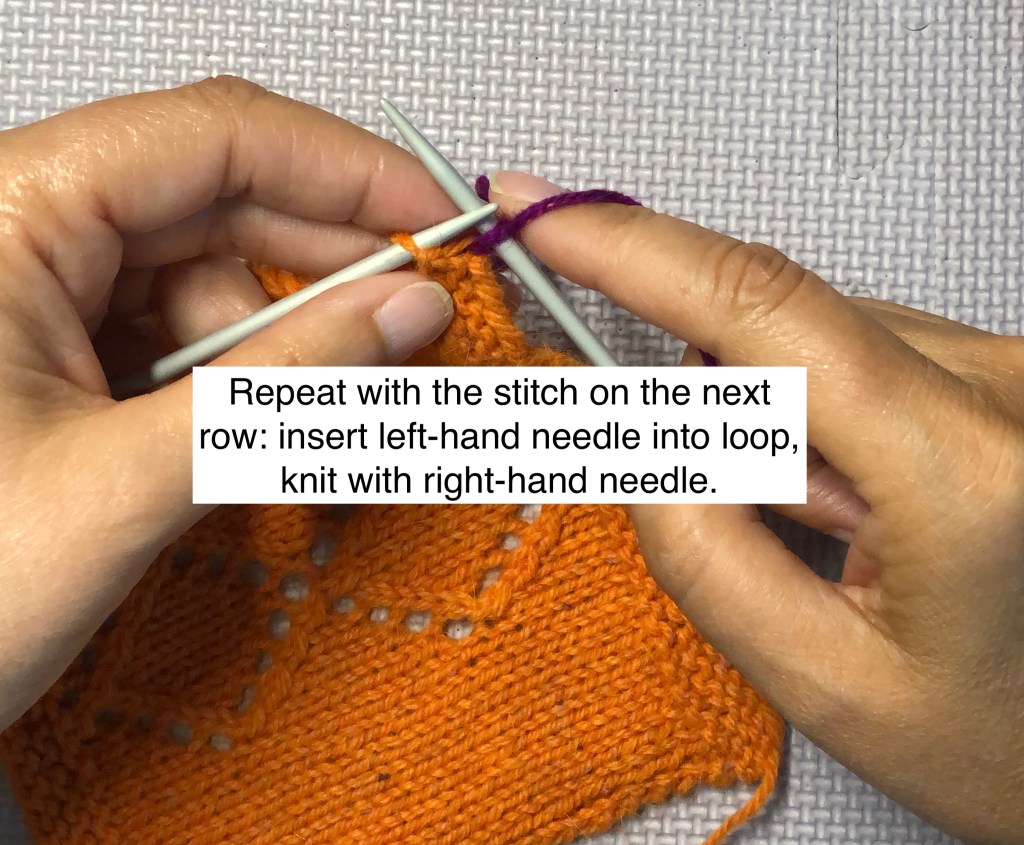
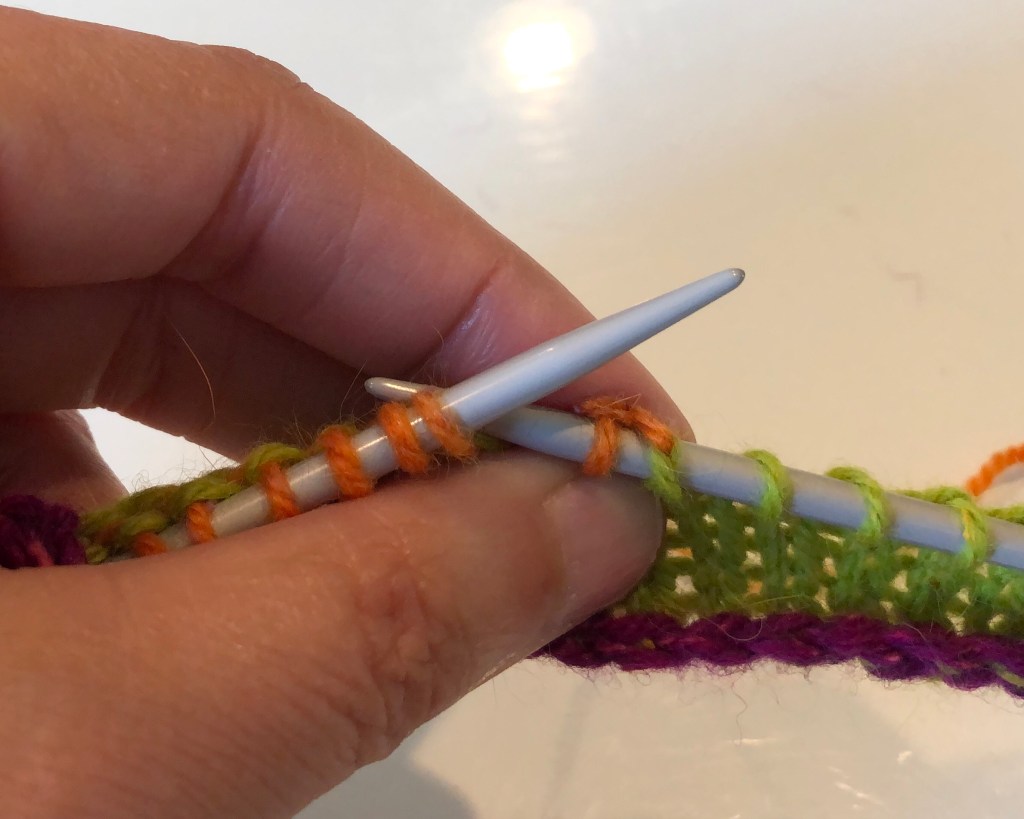
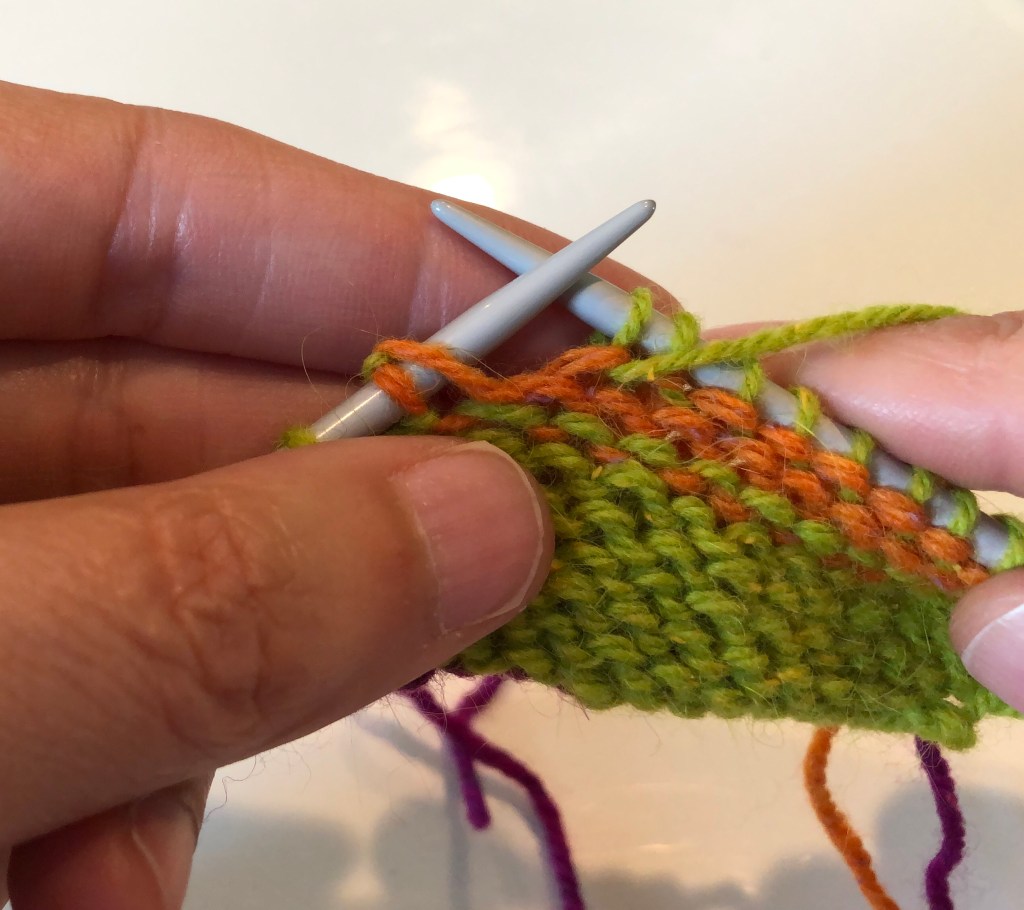
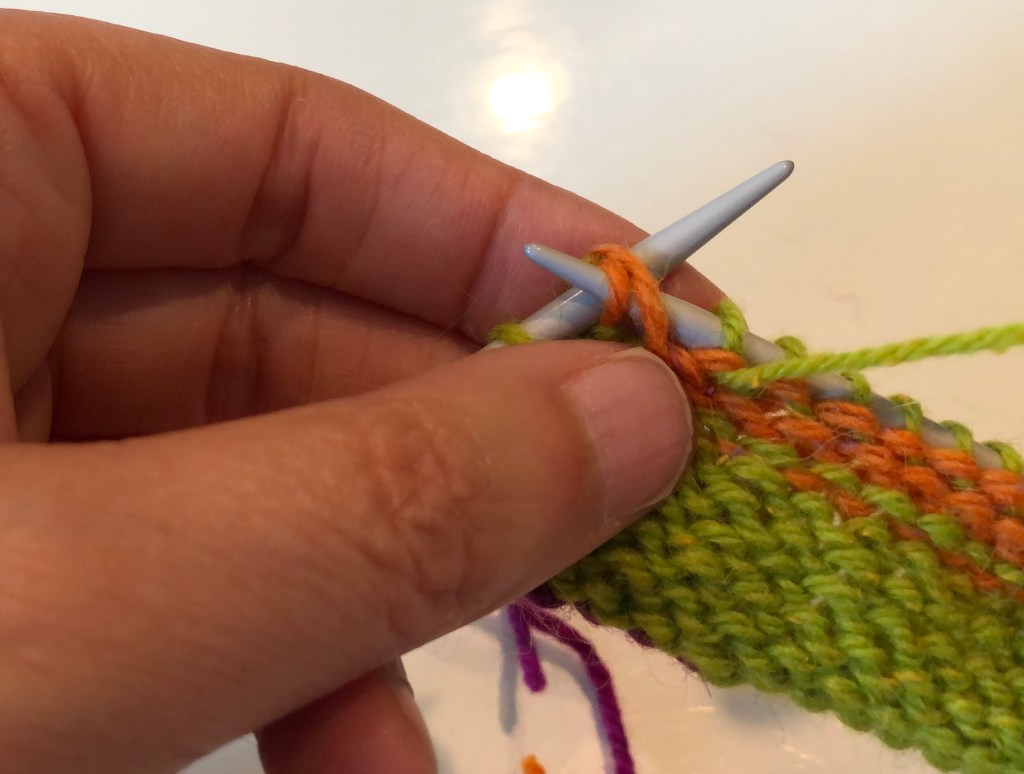
The photos and video below demonstrate how I perform a PUK.
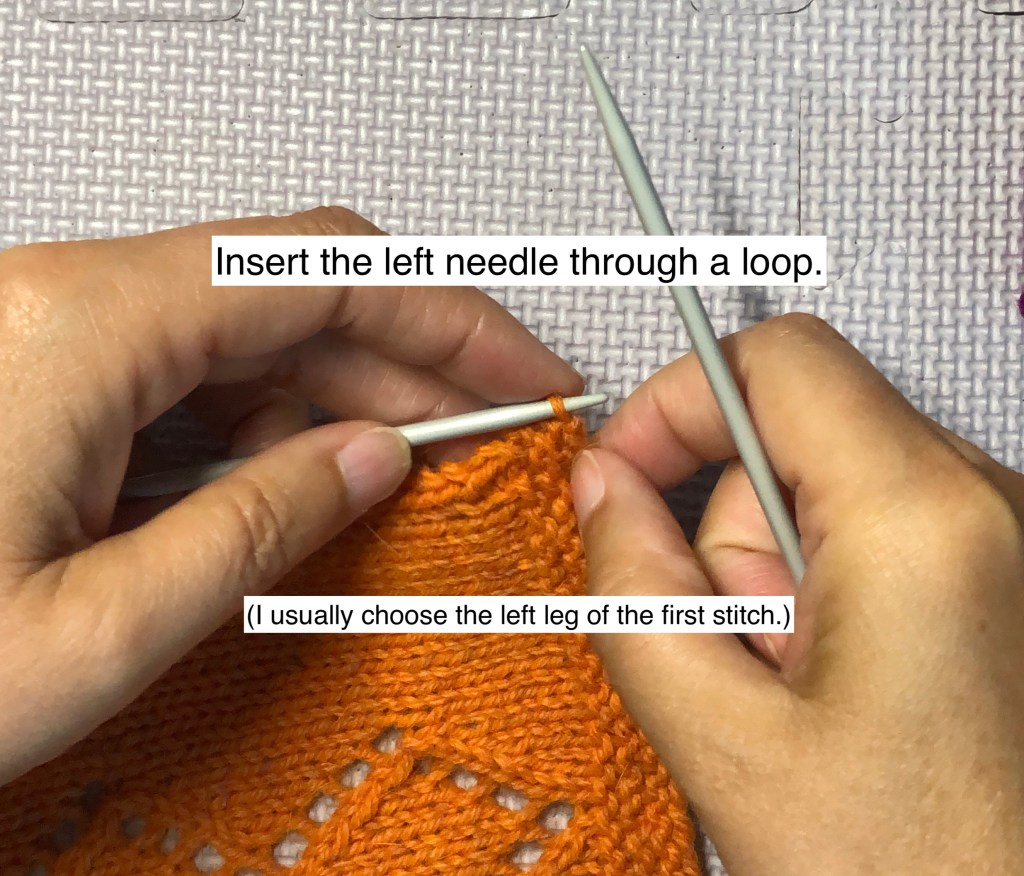
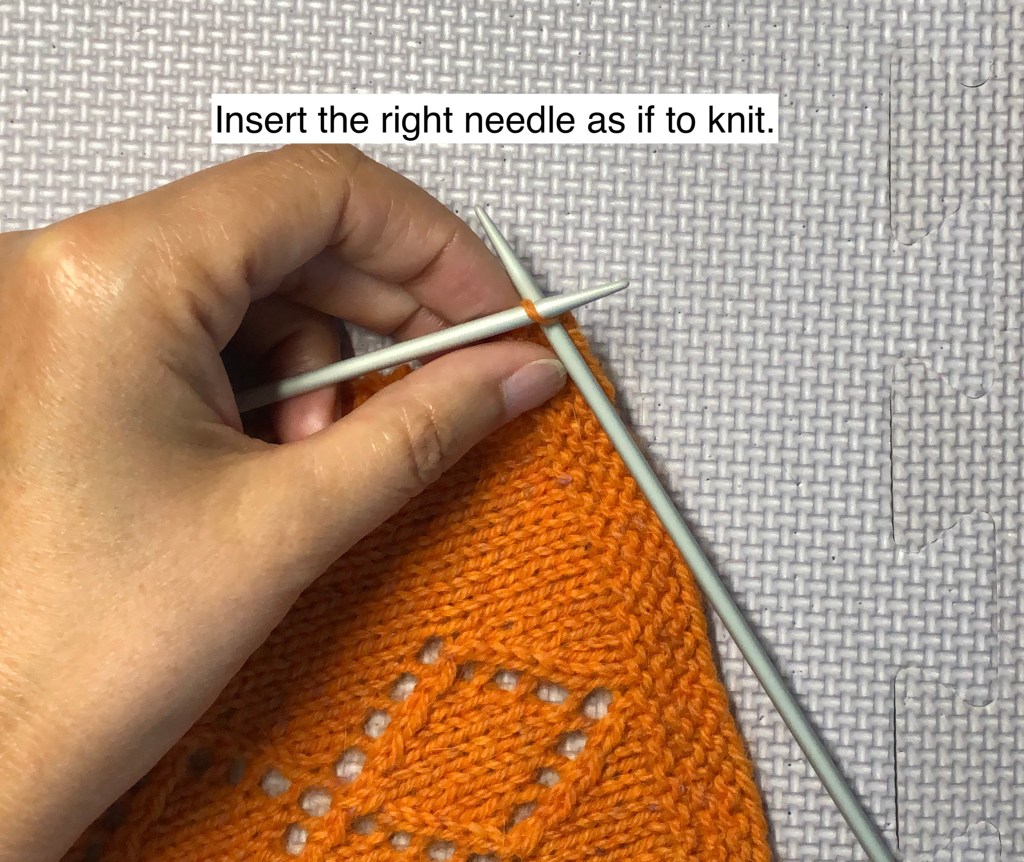
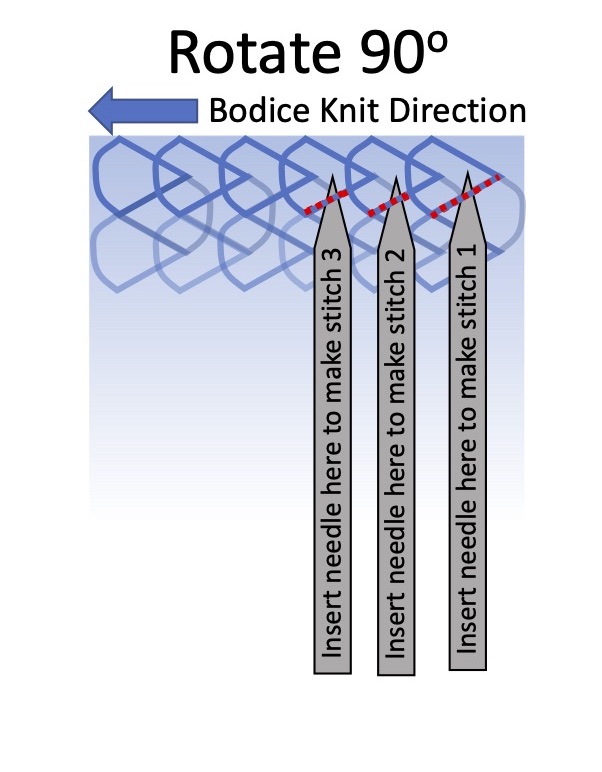
To pick up stitches for a button band on a cardigan, for example, I would first rotate the bodice 90o to the left (counter-clockwise) and begin picking up stitches on the right-hand corner. I insert the left-hand needle into the left leg of the first column of stitches and knit into this loop, forming the first stitch of the button band. I continue to pick up stitches in the left leg of the first stitch up the column of stitches up the edge of the bodice.
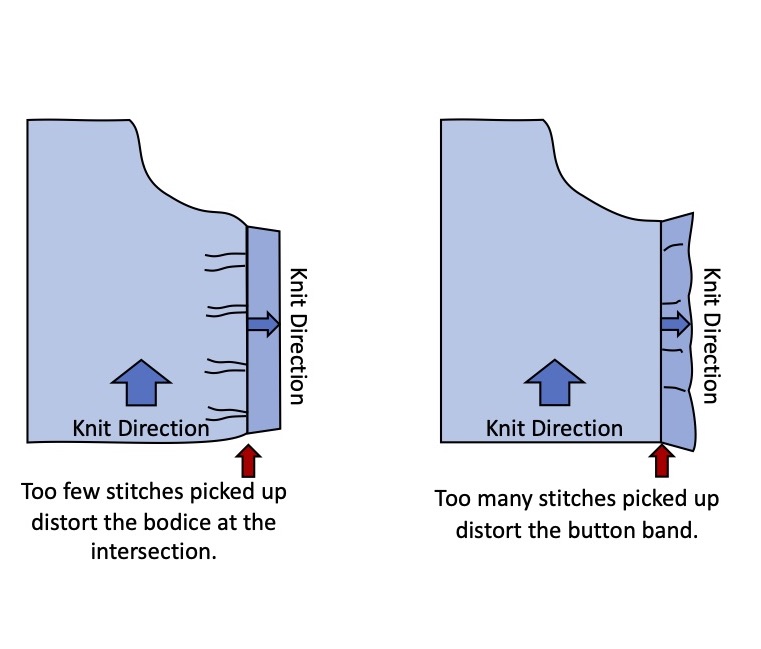
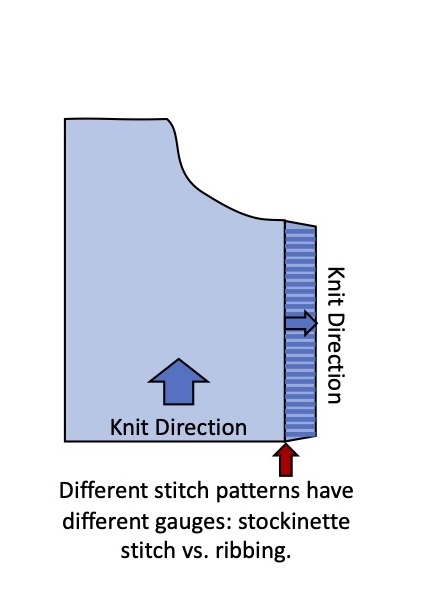
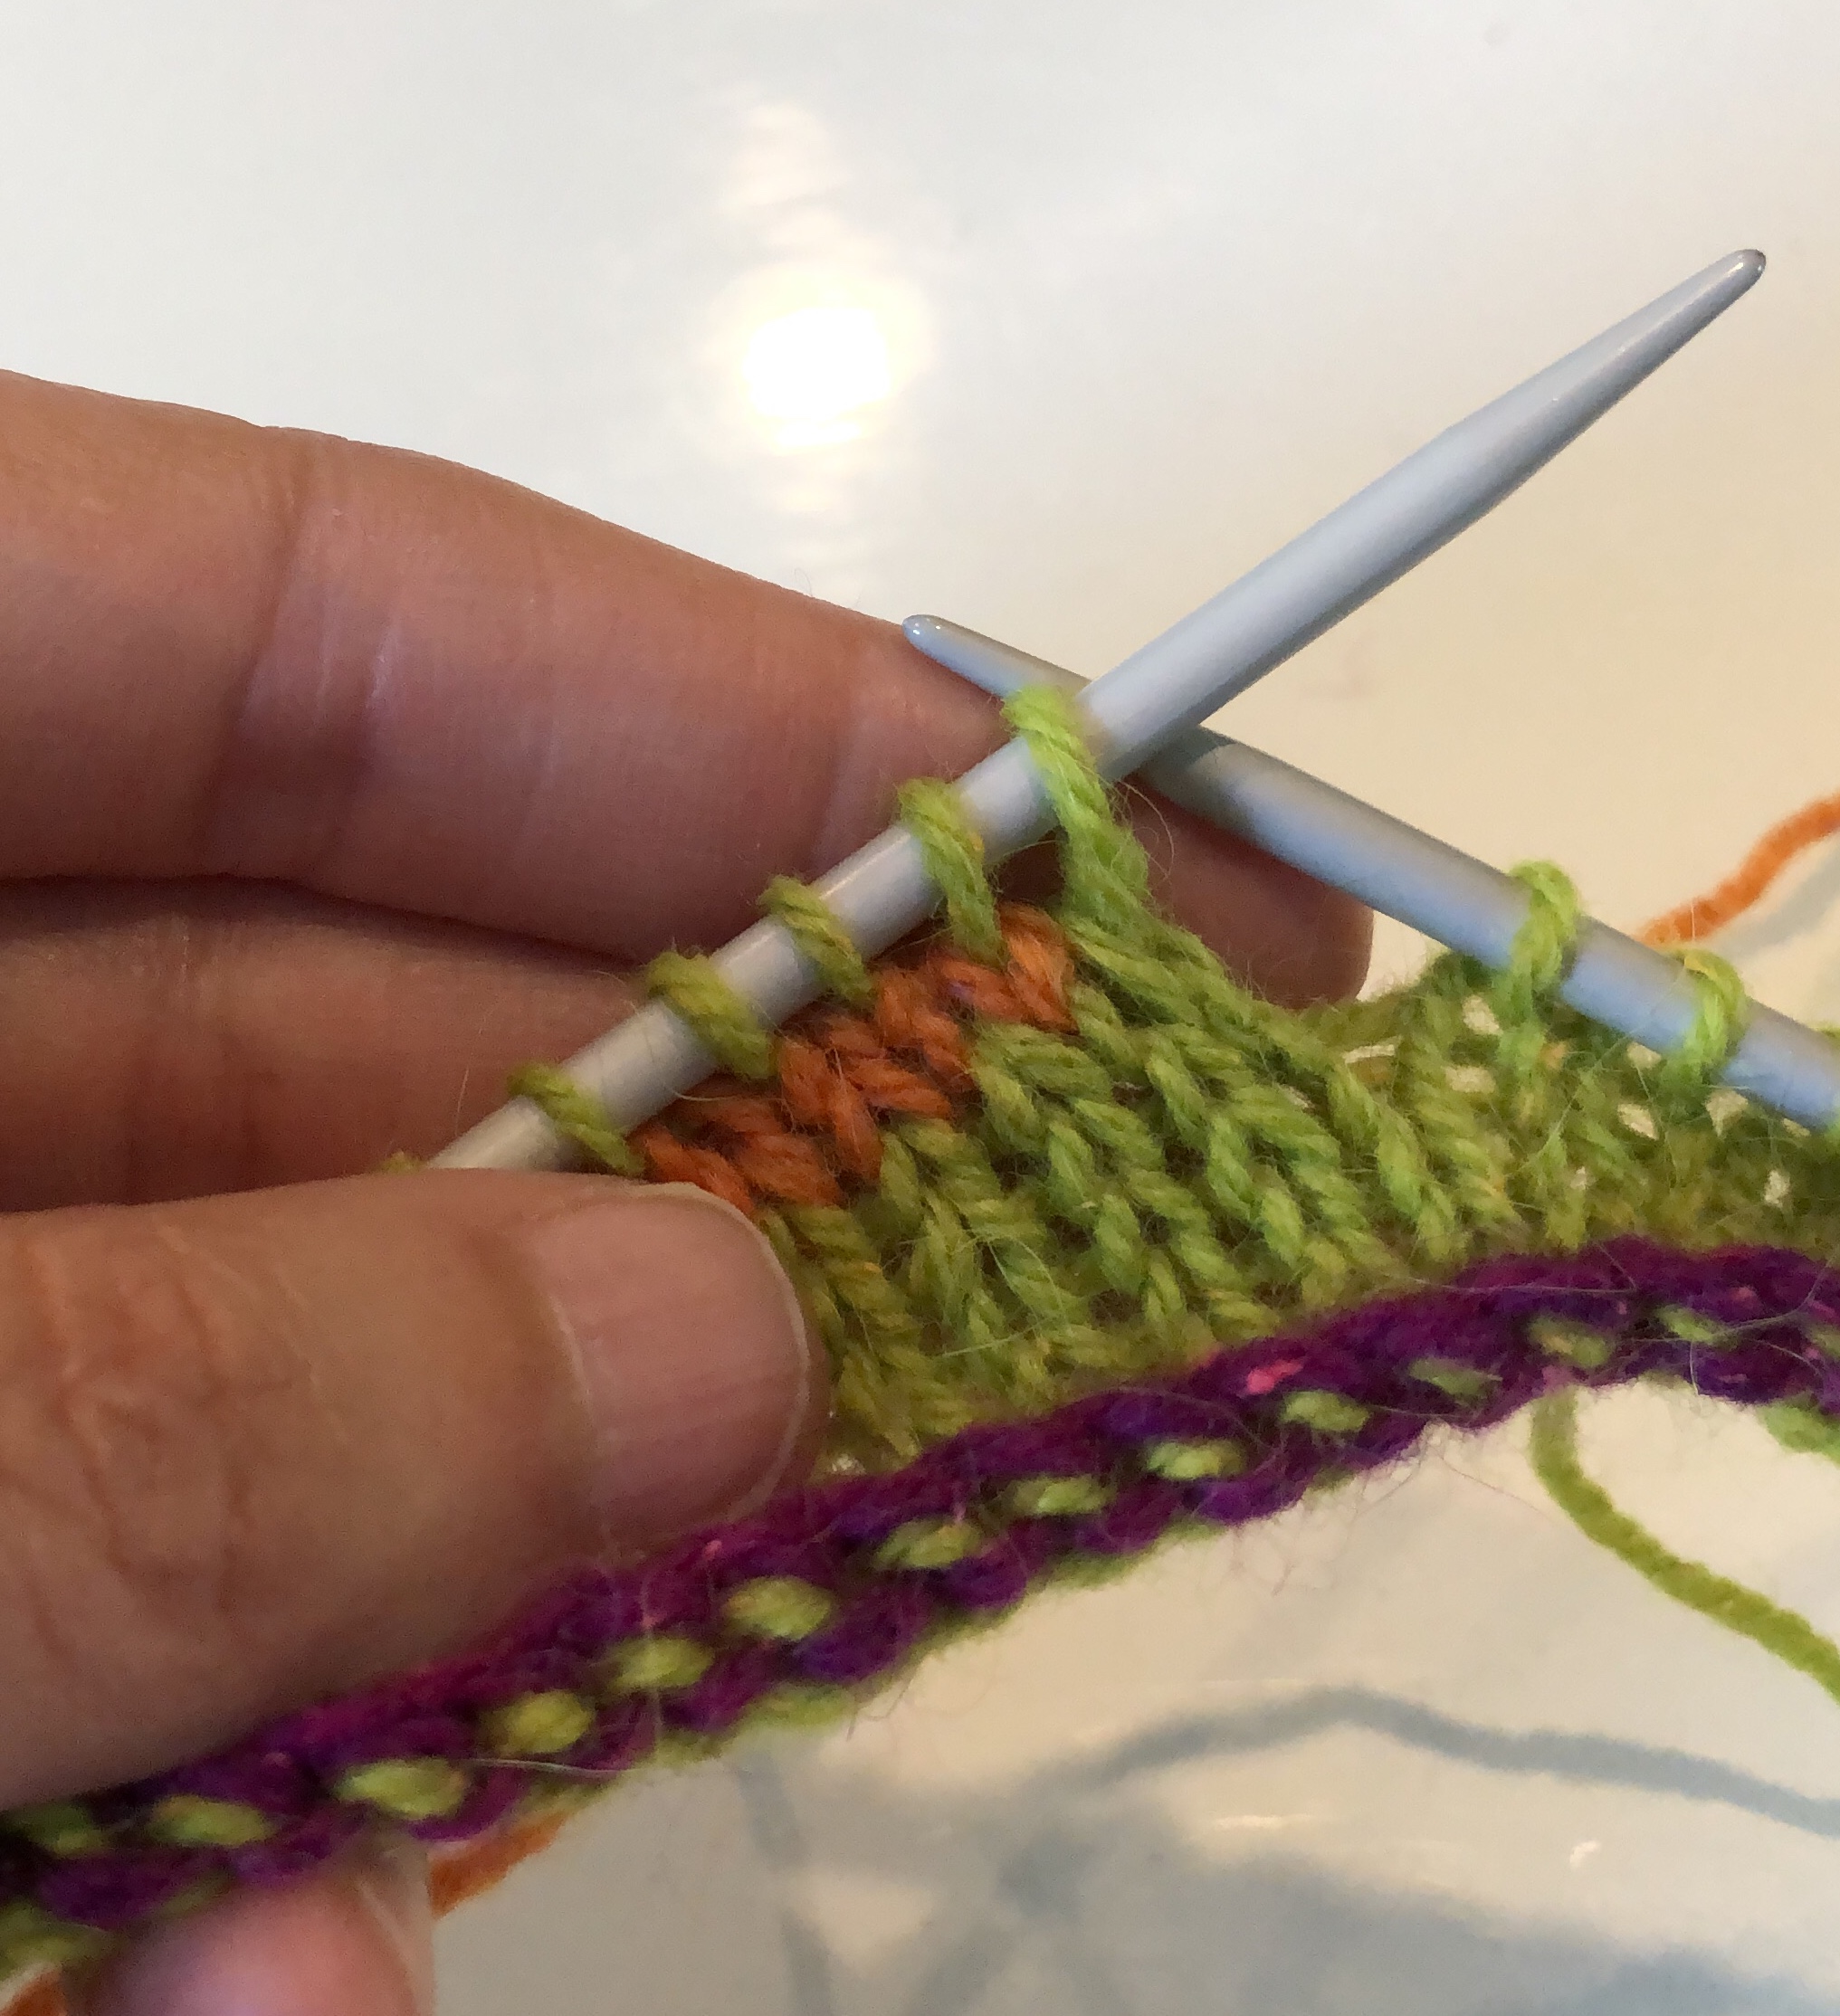
If your stitch gauge and row gauge are exactly the same (unlikely), you can pick up one stitch for every row. In all my years of knitting, I have never had this occur. So to prevent puckering of the bodice or distortion of the button band, you will likely have to skip some–but not too many–rows as you pick up stitches along the edge. If you pick up and knit too few stitches, the bodice will pucker. If you pick up and knit too many stitches the button band will be wavy with too much fabric. If you are using a ribbing stitch to form a flat button band, the gauge of ribbing will be different than the gauge of stockinette, and the button band will naturally compress at the outer edge.
The ribbing of the button band will naturally compress.
How Do I Know When to Skip a Row? A Good Place to Begin:
I use a couple of general rules when picking up stitches. They are listed below.
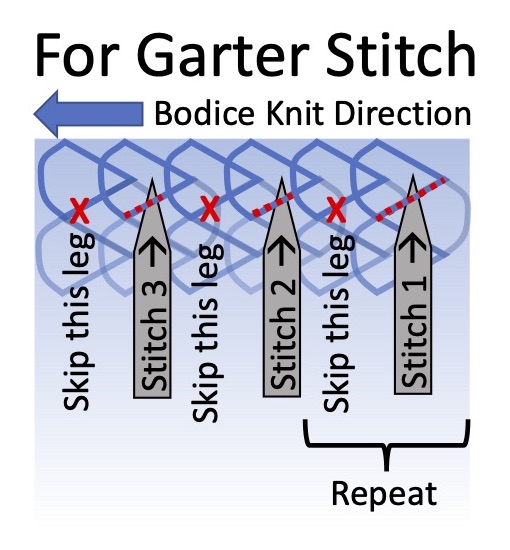
To pick up along garter stitch, I pick up one stitch for every garter stitch ridge.
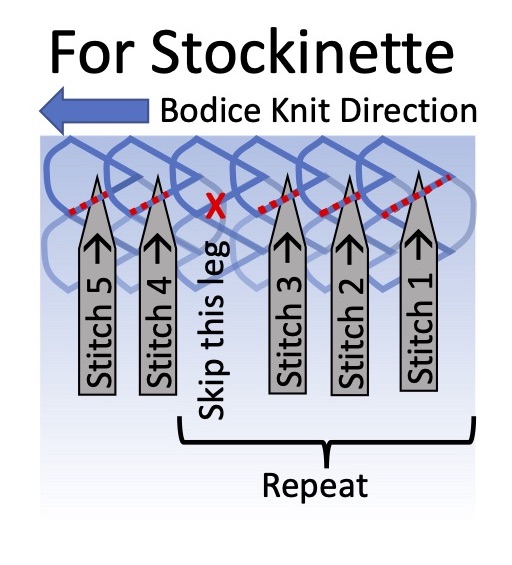
To pick up along stockinette stitch, I pick up one stitch in every row for three rows, skip the fourth row, repeat along the edge. In other words, pick up 3/4 of the number of rows along the edge.
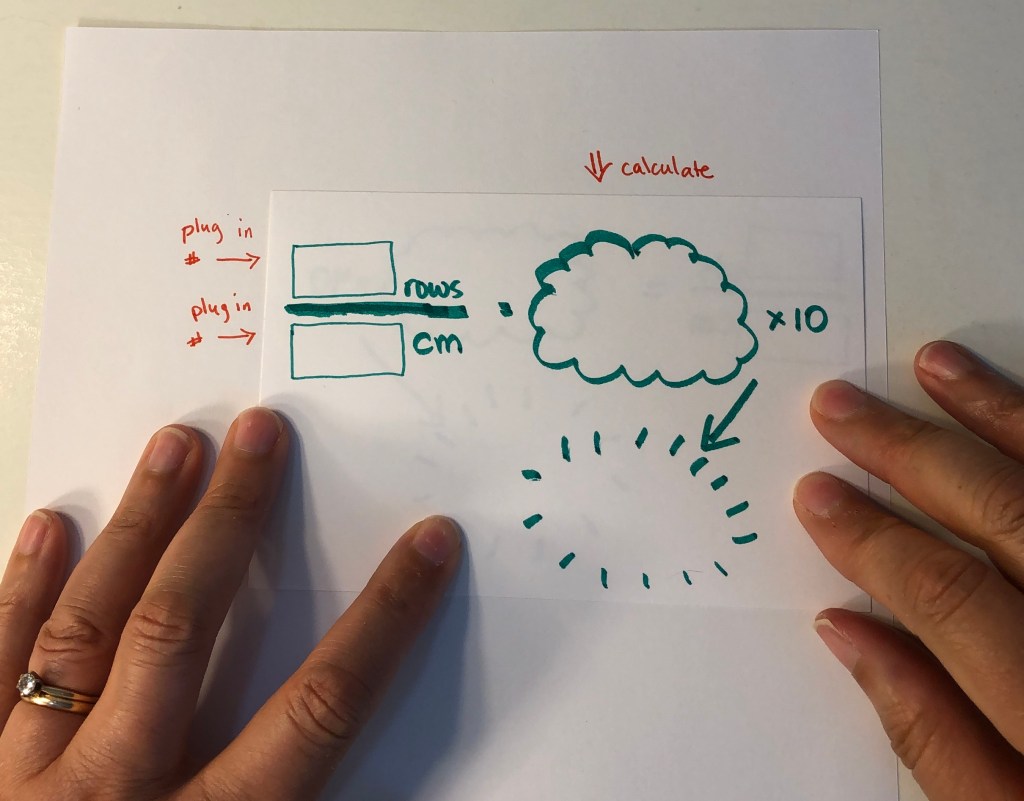
Sometimes my gauges are different enough from the 3/4 ratio that I need to calculate how many stitches to pick up. I’ve detailed below how to calculate the number of stitches to pick up, the number of skips, and where to place the skips.
Calculations
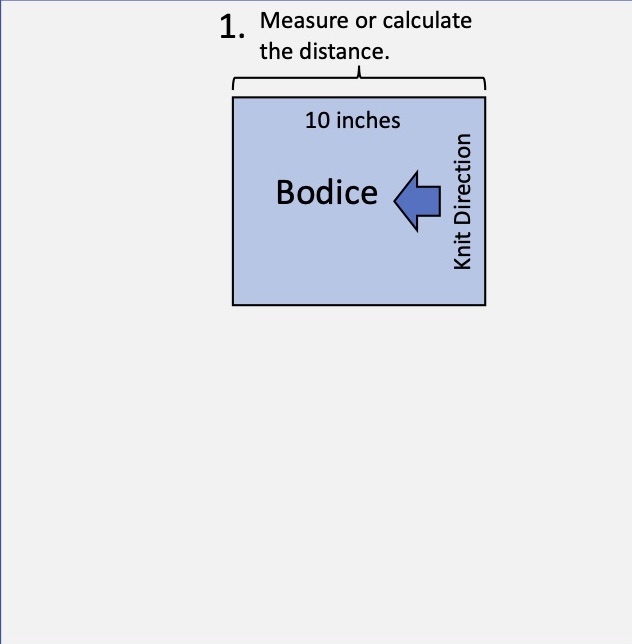
Strategy for calculating how many stitches to PUK and where to place them:
Measure (or calculate using your row gauge) the length of the section where you will be picking up stitches.
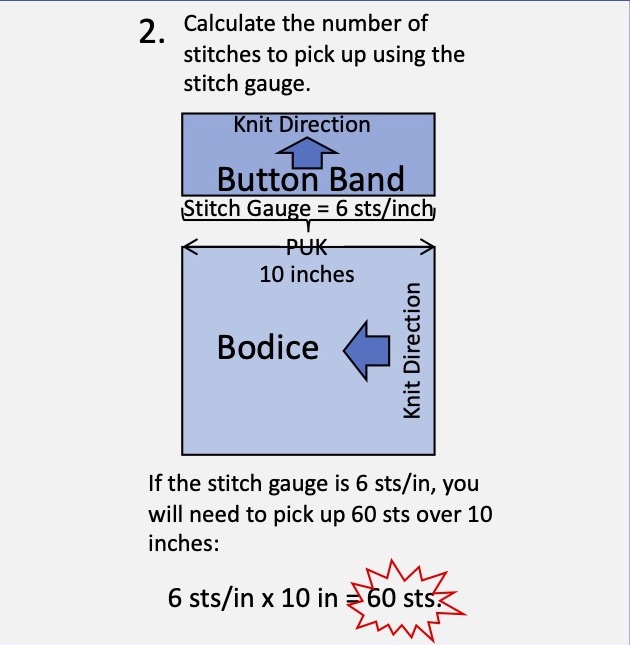
Calculate how many stitches to pick up using your stitch gauge.
Calculate when/where to skip rows.
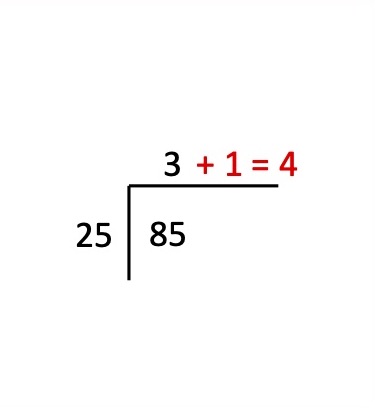
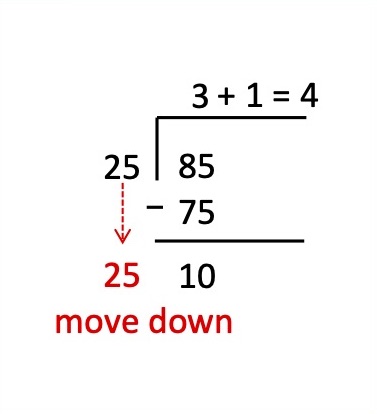
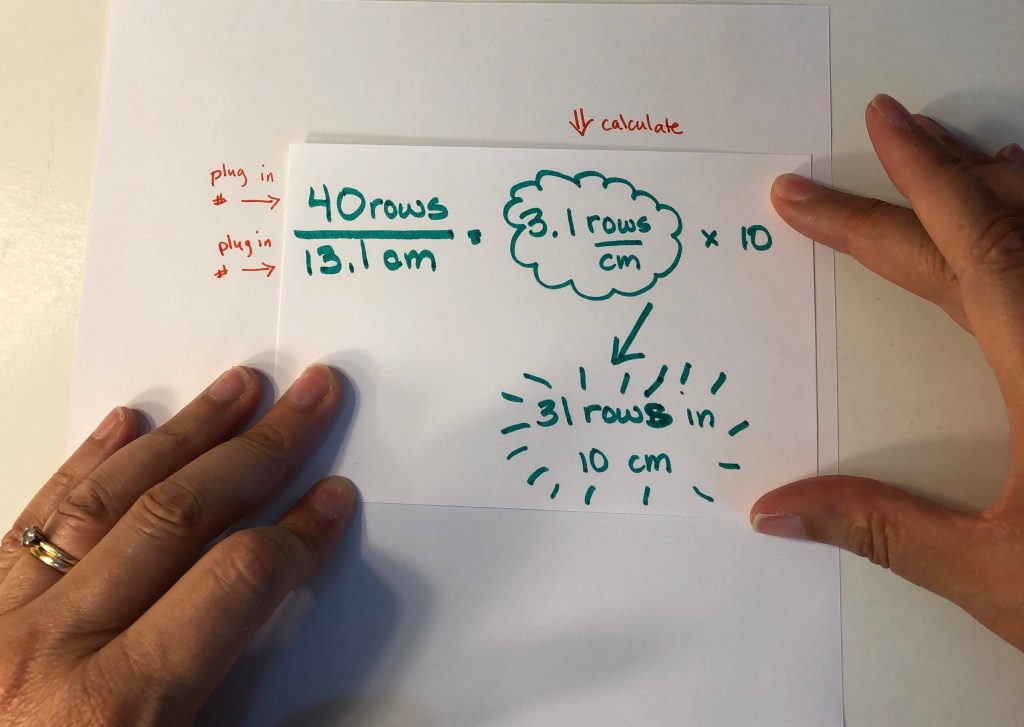
The Calculations for Step 3–Showing the work for determining the combination of skips.
Divide the numerator (85) by the denominator (25) and show the integer, disregard the decimal places.
Add 1 to the integer.
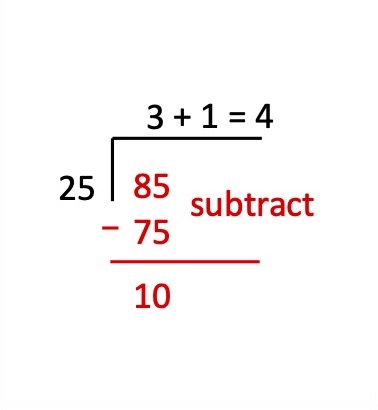
Multiply the integer and denominator, write below the numerator.
Subtract to obtain the remainder.
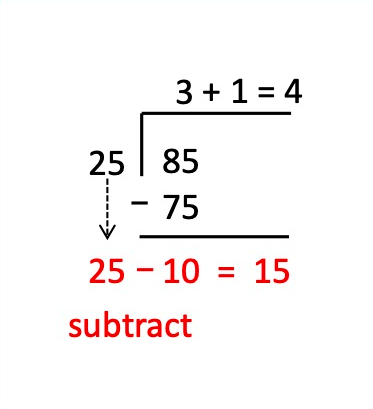
Transcribe the denominator down.
Subtract the remainder from the denominator.
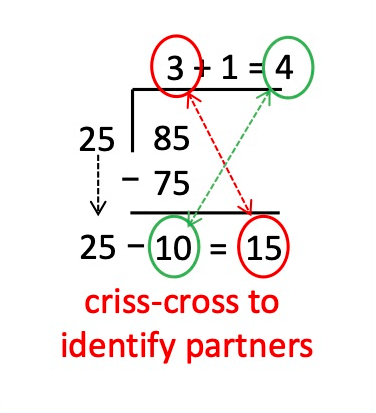
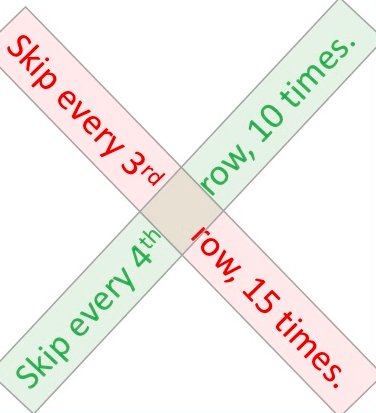
There are several ways to skip every 3rd row 15 times and every 4th row 10 times. To avoid puckering or wavy fabric, you should try to space these skips out evenly rather than grouping together. Perhaps something like this:
Repeat the skip pattern: [skip every 3rd row, 4th row, 3rd row, 4th row, 3rd row] a total of 5 times.
Or, repeat the skip pattern: [skip every 4th row, 3rd row, 3rd row, 3rd row, 4th row] a total of 5 times.
Be reassured that as long as you are close to the correct distribution of skips, it will look good!
In April and May, I was fully expecting my plans for June and July to completely disappear, and I was mentally preparing myself for that disappointment. I purchased yarn and made project lists to last me well into 2021, as I anticipated hanging out on my patio, in my home office, and in the family room all summer long. My plans have changed significantly from when I made them last December, but as things begin to open up, it now looks like I will be able to make use of at least some of those reservations.
As we learn more and more about this virus, I feel like there is not too much risk heading out in for some mobile knitting, as the camper has self-contained cooking, bathroom, and sleeping. The science I’ve seen indicates that this virus doesn’t last long in the sunshine (UV radiation kills it quickly), and at warm temperatures it doesn’t last long on surfaces, so being outside is one of the best places to be. I have packed my masks for grocery shopping, hand sanitizer and soap for hand care, and disinfecting wipes for surfaces, along with hiking boots and poles, bear spray, insect repellent, first aid kit, and sun screen.
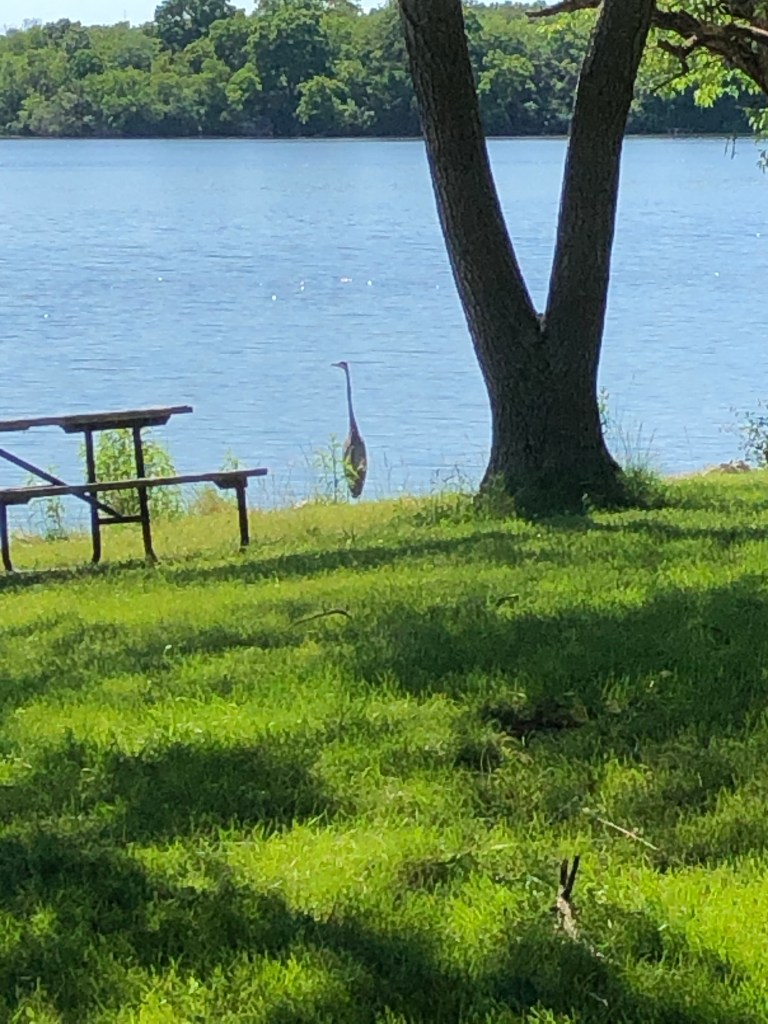
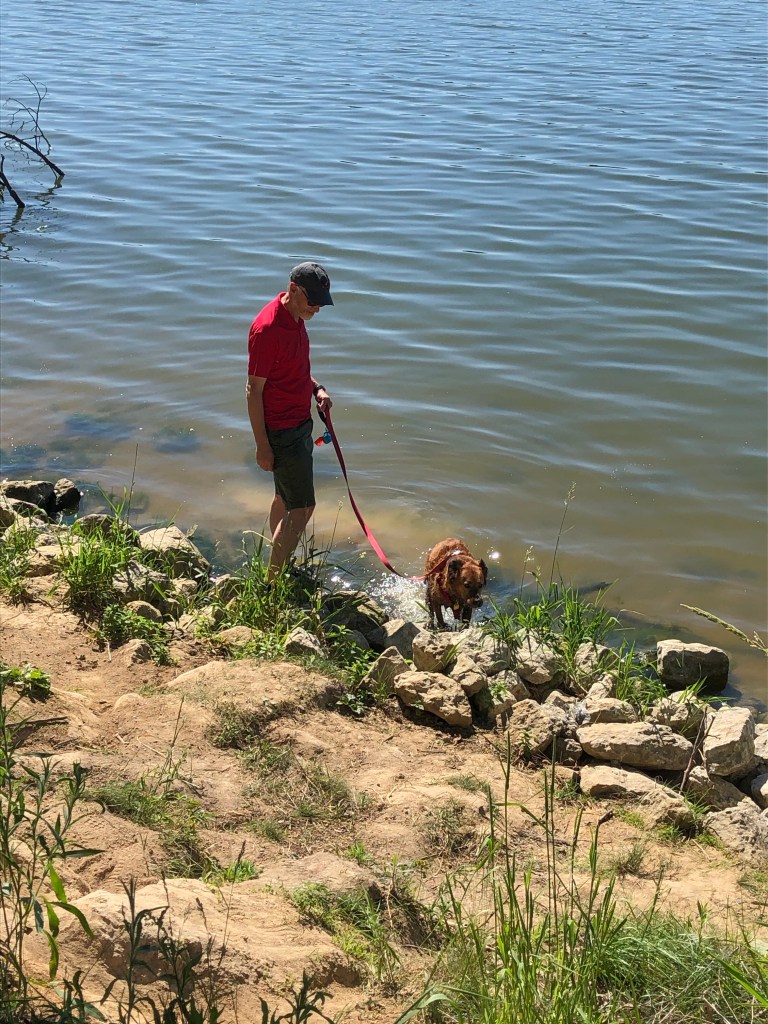
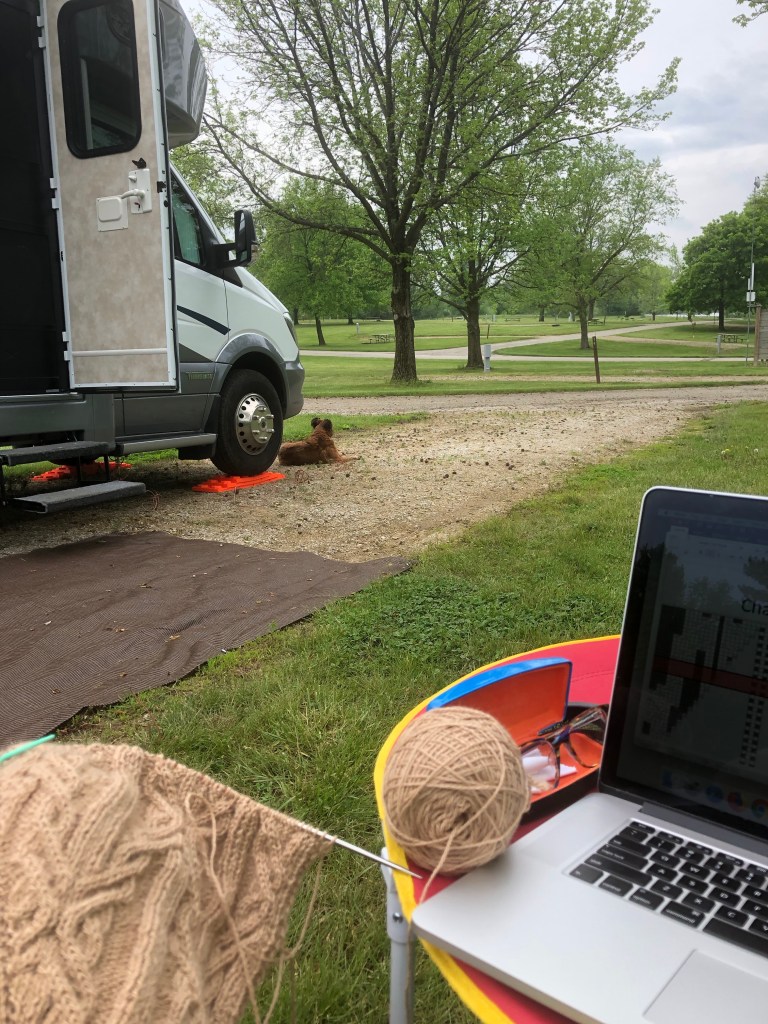
I’m also beginning to plan the stitching projects I’ll take along. Space is at a premium in the camper, so there are tough decisions ahead. Do I take the yarn winder? Yes. Do I take blocking mats and supplies? Maybe not. I already know that I will over pack the projects, predicting that I’ll get much more finished than I really will. Instead I’ll spend my days walking the dog, dipping toes in the water, hiking, with evenings by the campfire. Doesn’t it sound glorious?
Early morning Lake Evergreen
Great Blue Heron near a picnic site.
Lucie gets her toes wet.
Bald Eagle.
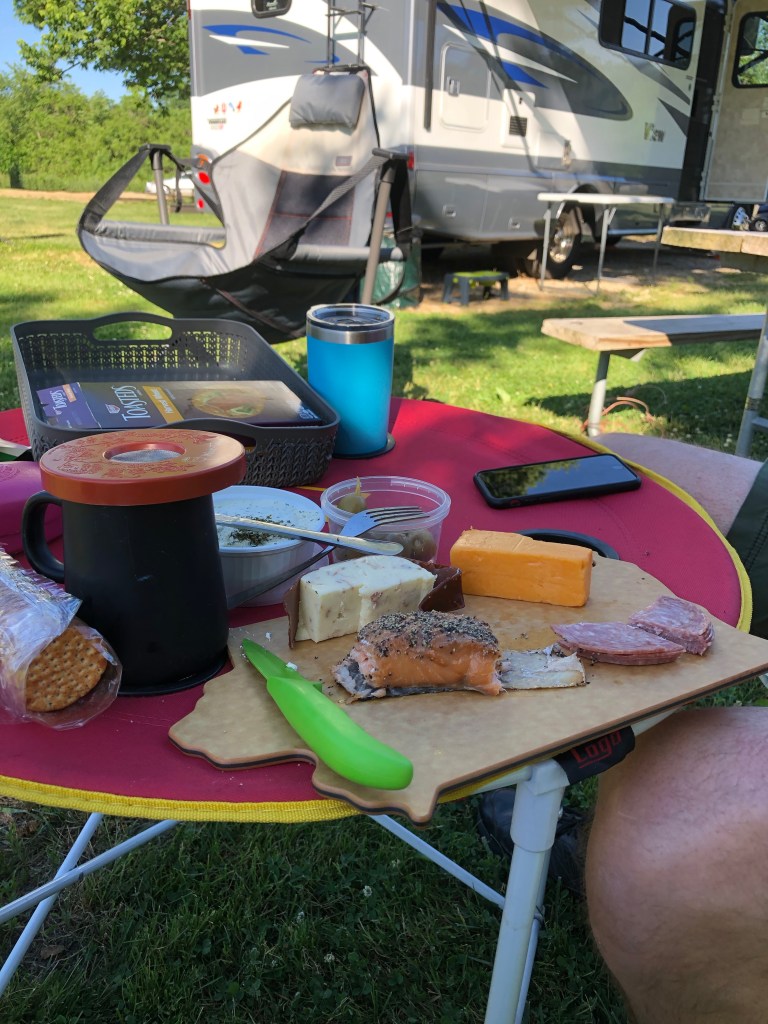
Perfect “no-cook” dinner.
Not enough chocolate for this enormous marshmallow.
We head out this weekend for a close-to-home practice trip which was originally planned for March, then April, then May. My daughter and I head out the following week for an extended stitching road trip that takes us to the upper Midwest and eventually out to Montana and Glacier National Park where we will meet up with a few friends and family (properly socially distanced and outside, of course).
Local camping.
Already added to my project box (not just a bag, but a box!) is the yarn for two National Parks inspired projects that I’ve been planning for >2 years. I’ve had these ideas bouncing around in my head but no time to swatch and work on them. I’ve got yarn for small projects (hats and cowls) as well as the yarn for all of my current projects.
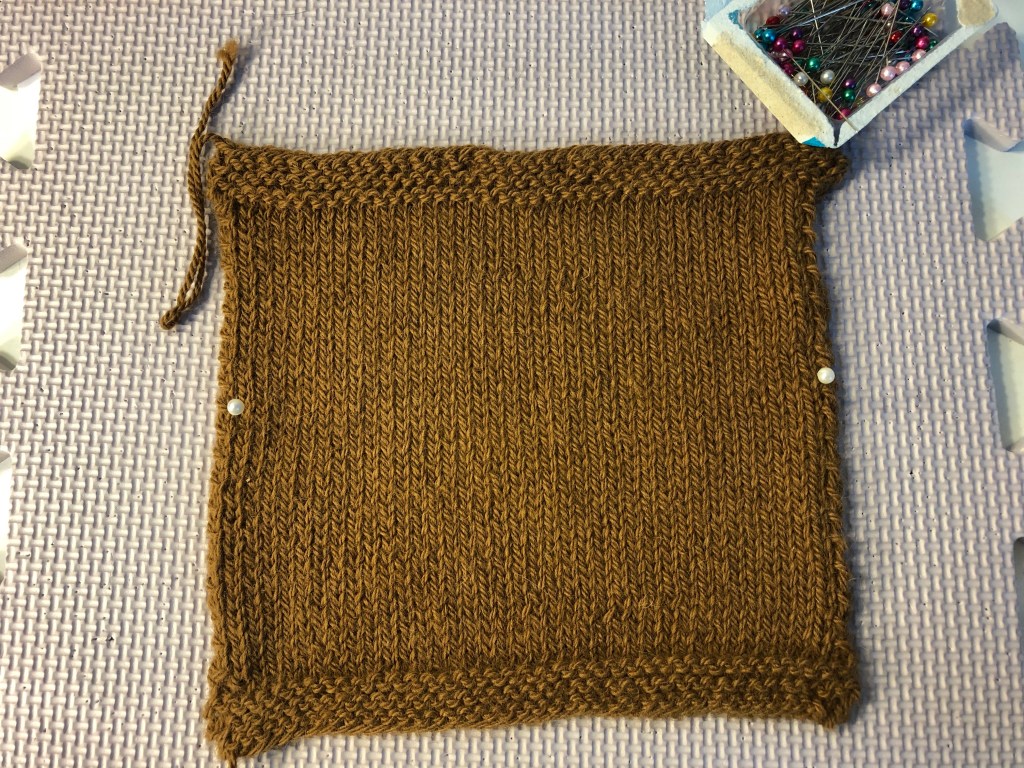
Once you have knit your swatch and it is blocked and dry, you can measure it to calculate your gauge.
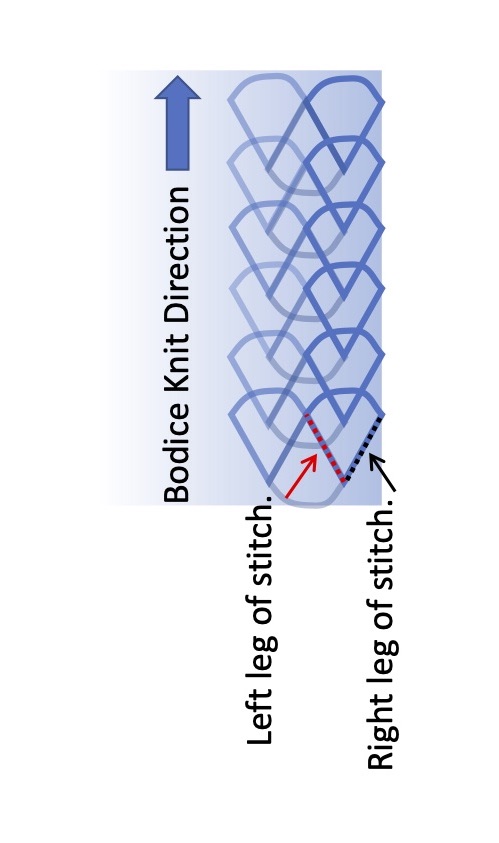
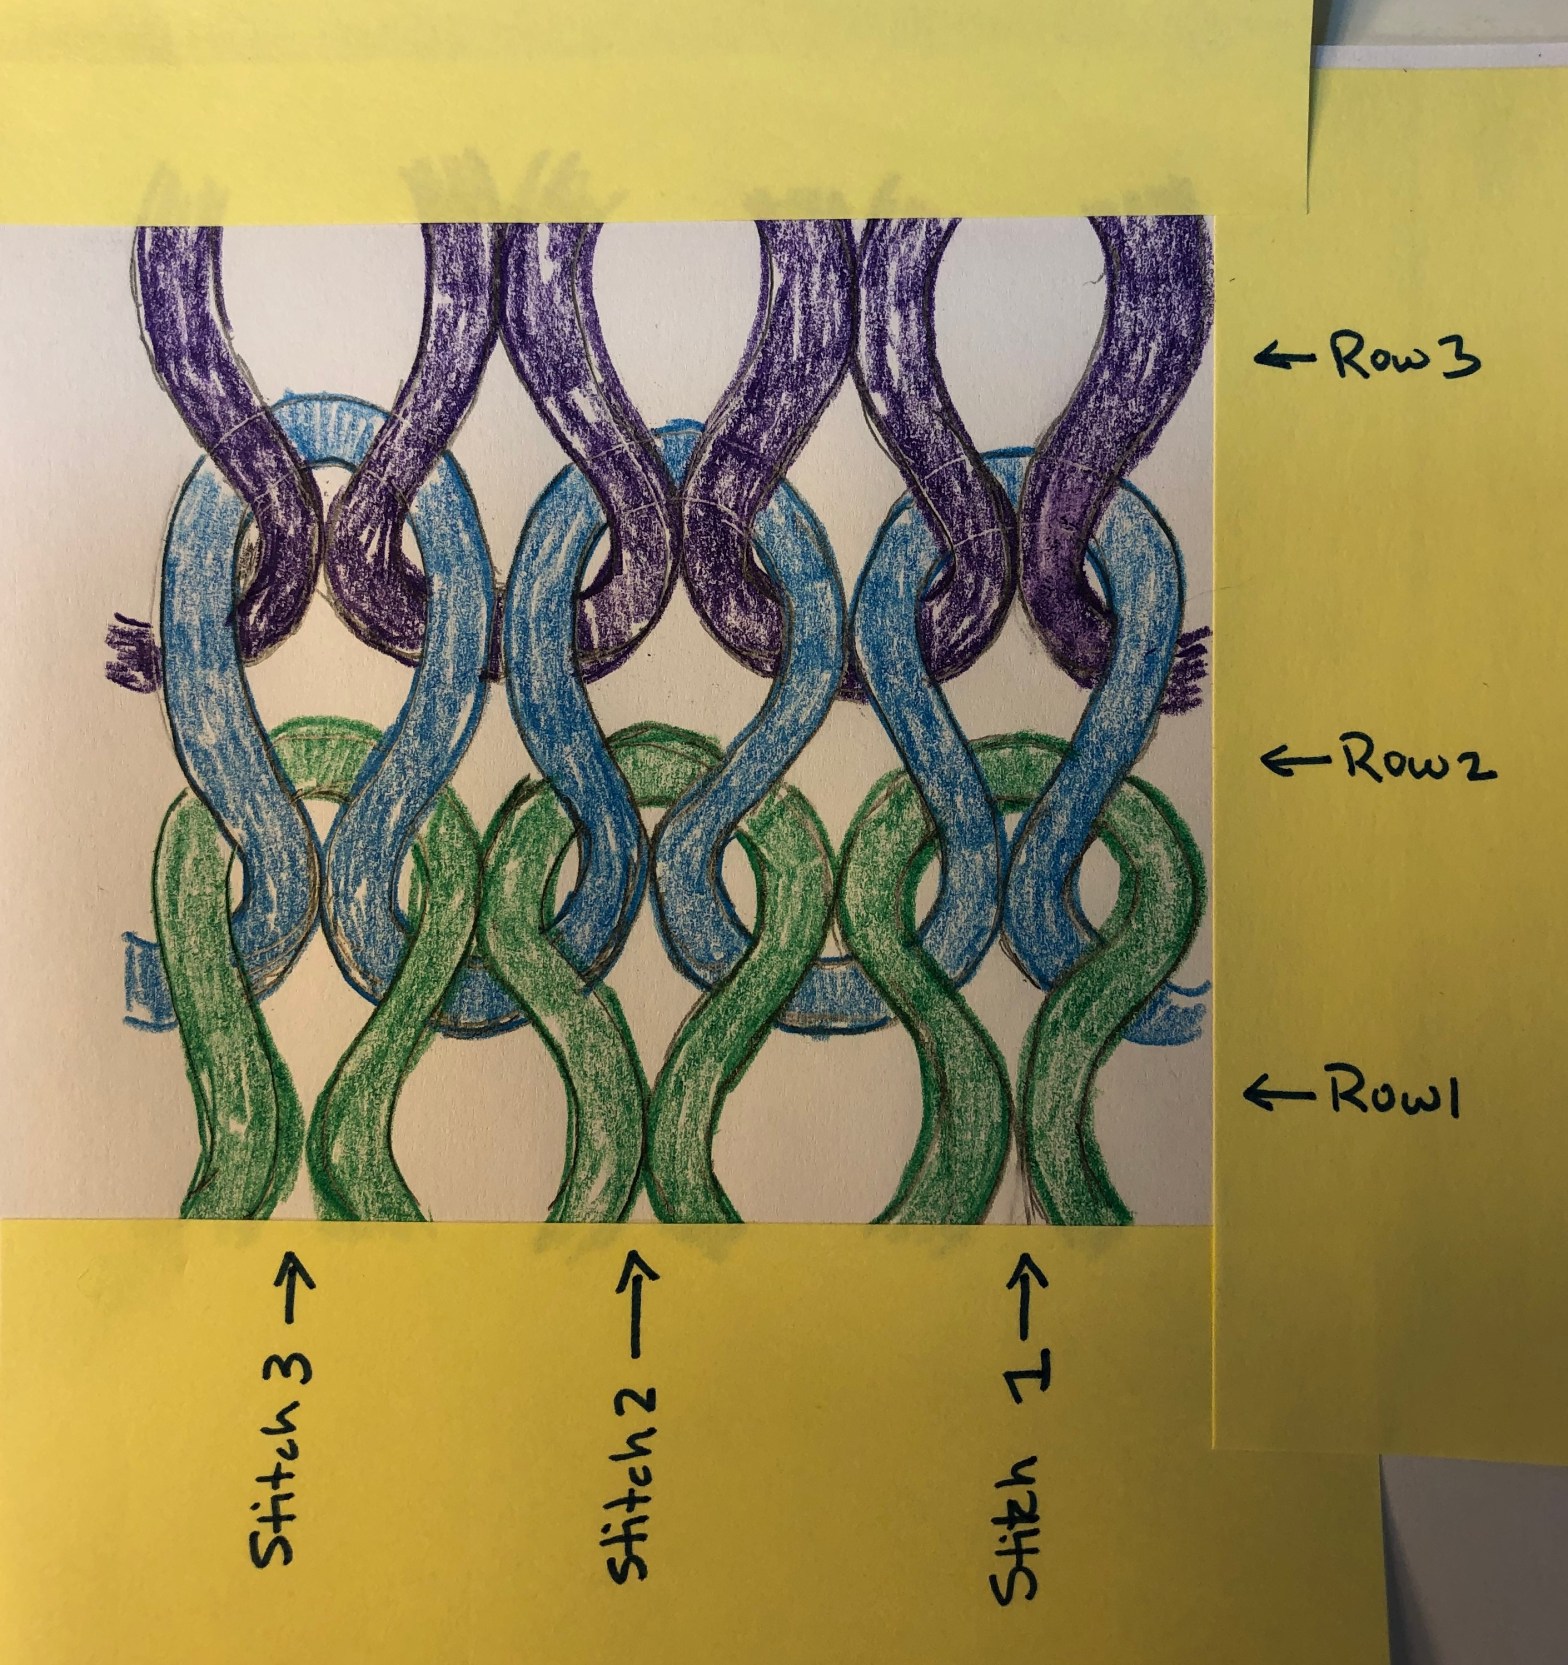
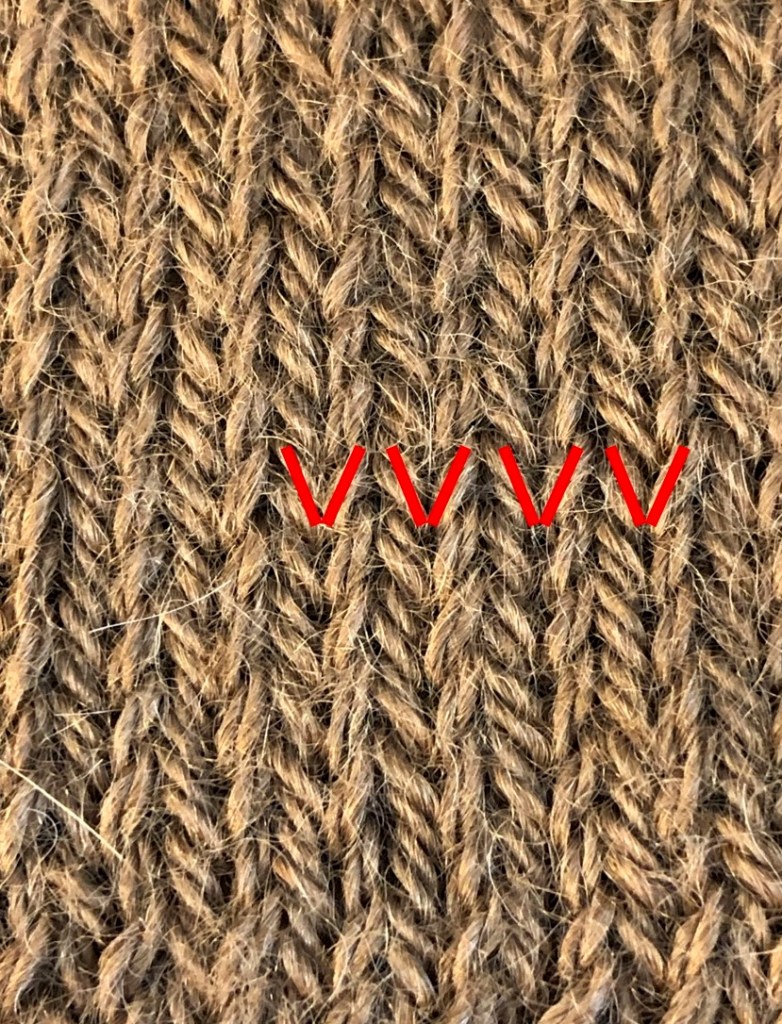
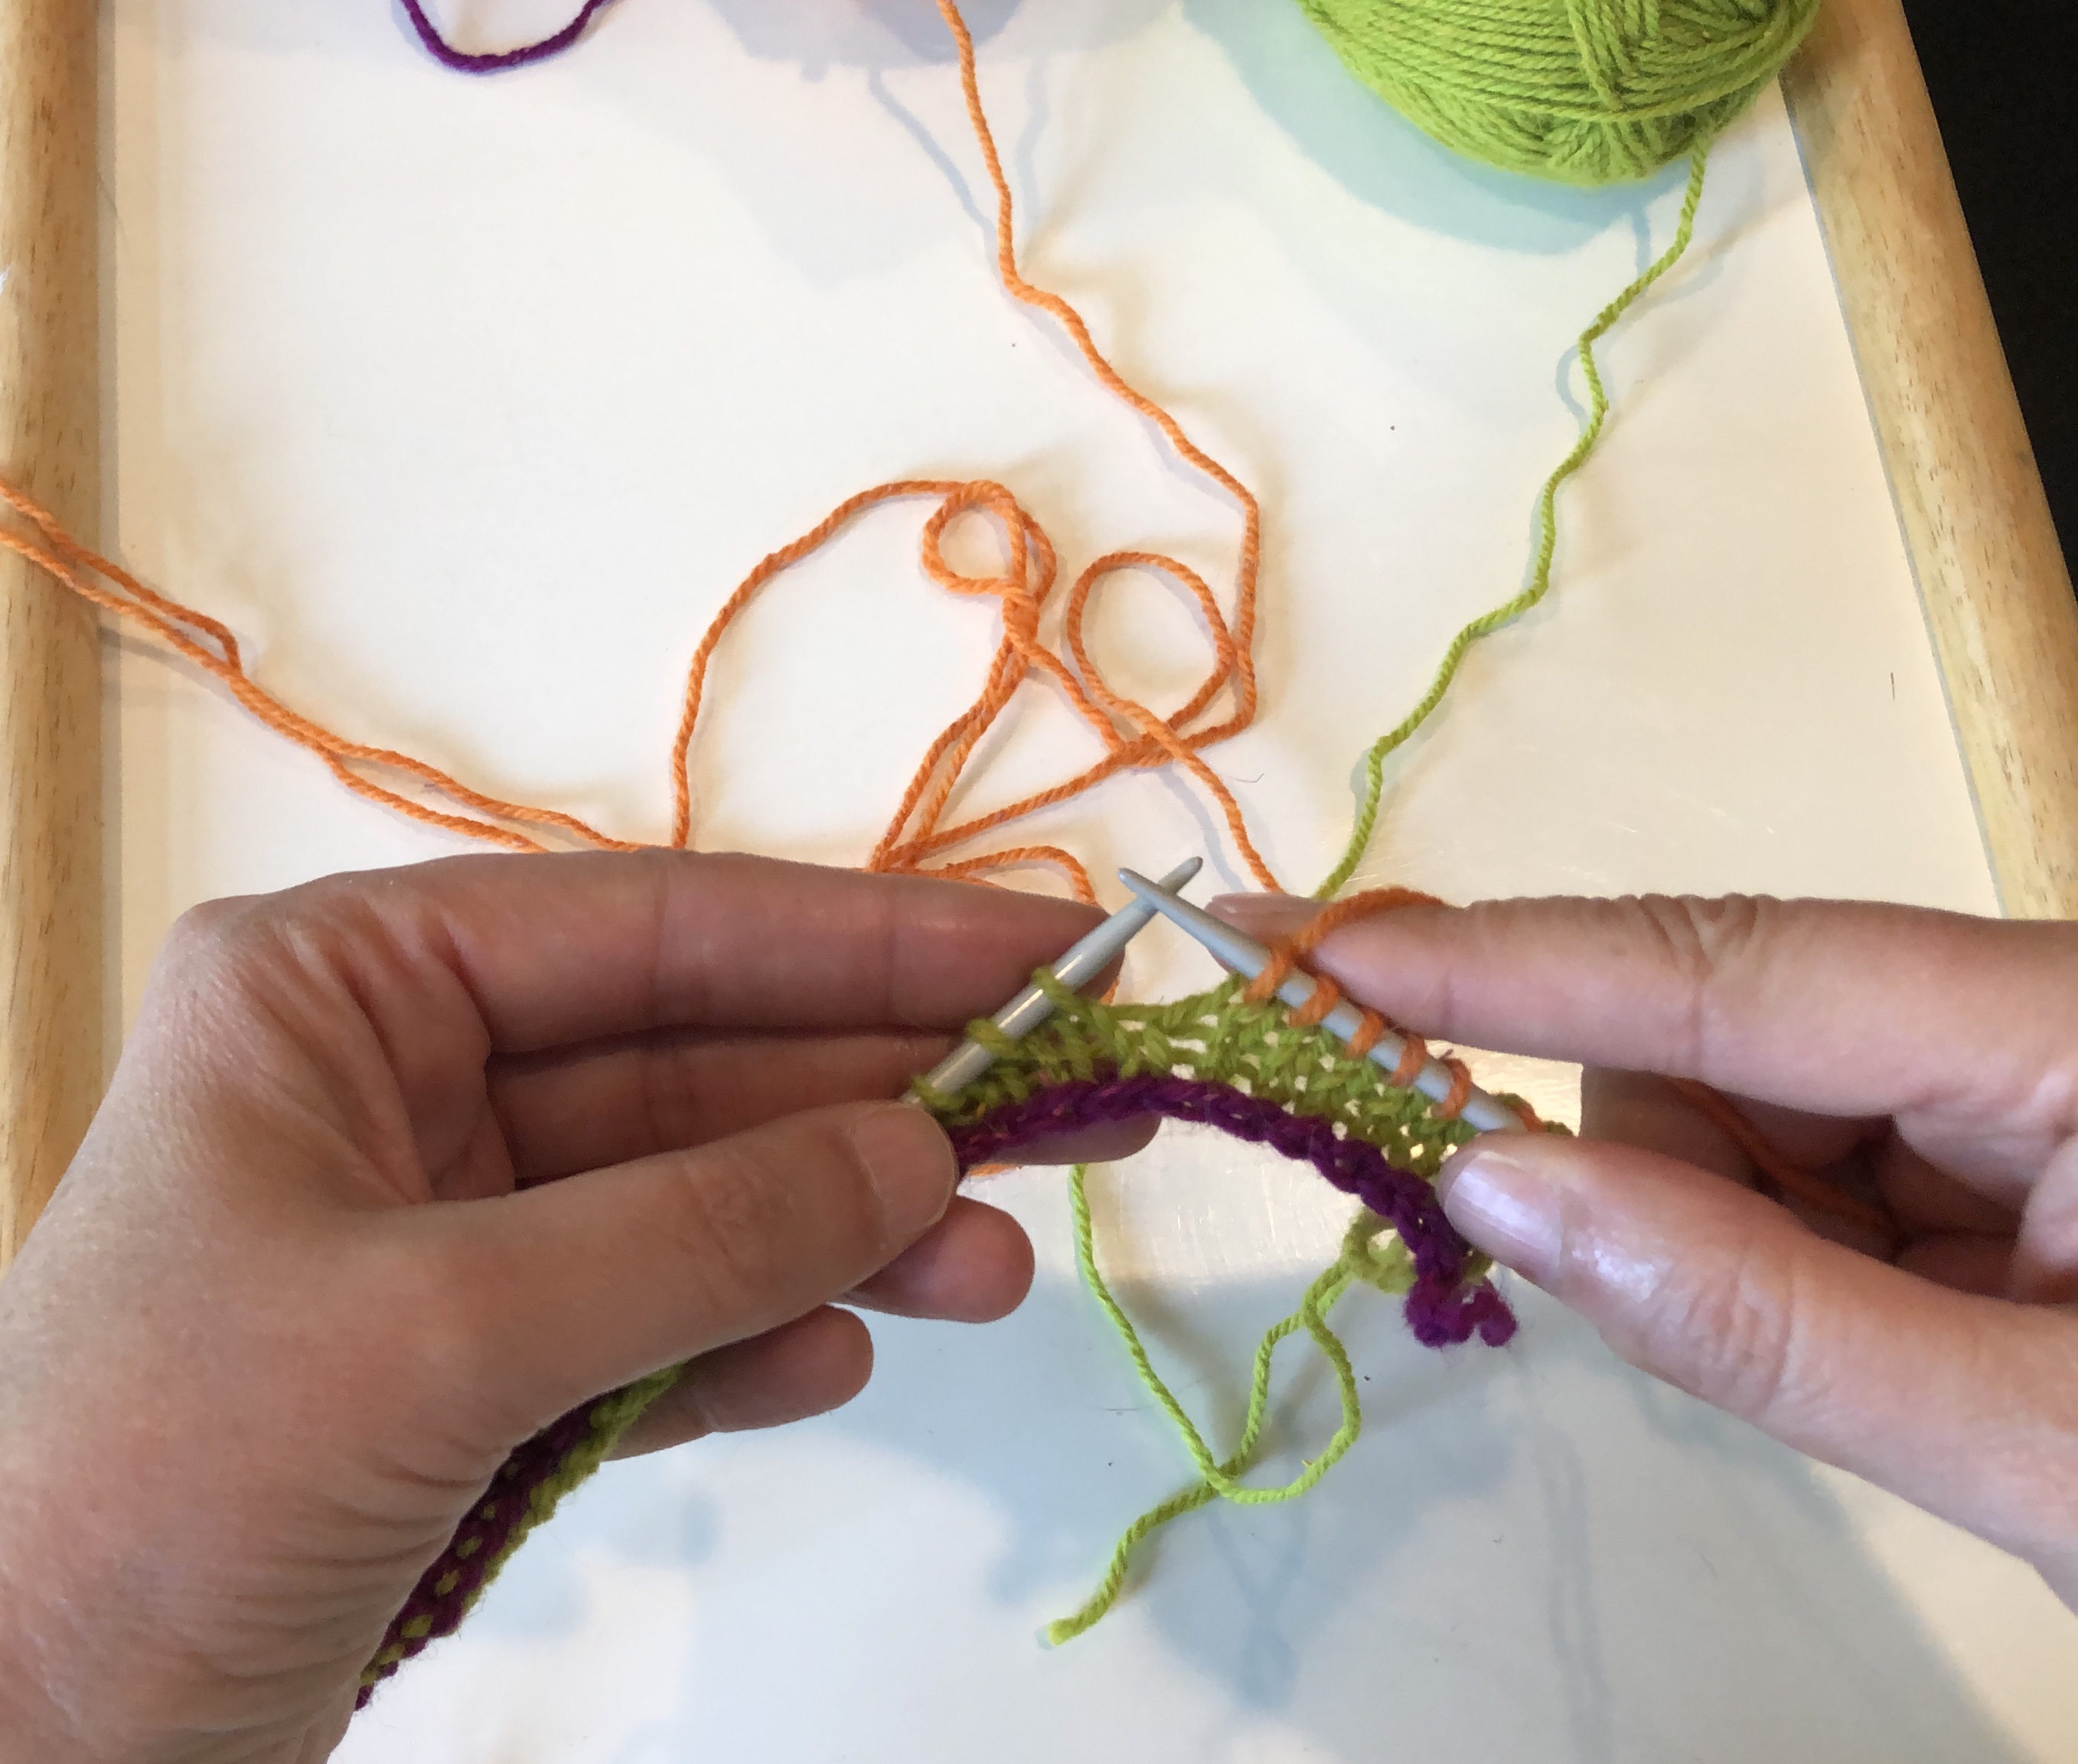
First, let’s look at the anatomy of a knit stitch to make sure we know what to look for on the stockinette stitch swatch. In the cartoon figure below, there are three stitches and three rows of stockinette stitch. Row 1 is in green, Row 2 in blue, and Row 3 in purple. The right side (public side) of stockinette stitch is made up of what looks like row-upon-row or stacks of V-like stitches. Can you identify the stitches in the photo of the swatch? The sides of the V are known as the “legs” of the stitch. They are highlighted in red in the third photo below. Don’t get confused by the plies that make up the yarn. You can see some of the plies making up the legs in the stitches below.
Cartoon of stockinette stitches and corresponding photo of stockinette stitches. The V-shaped legs are highlighted in red.
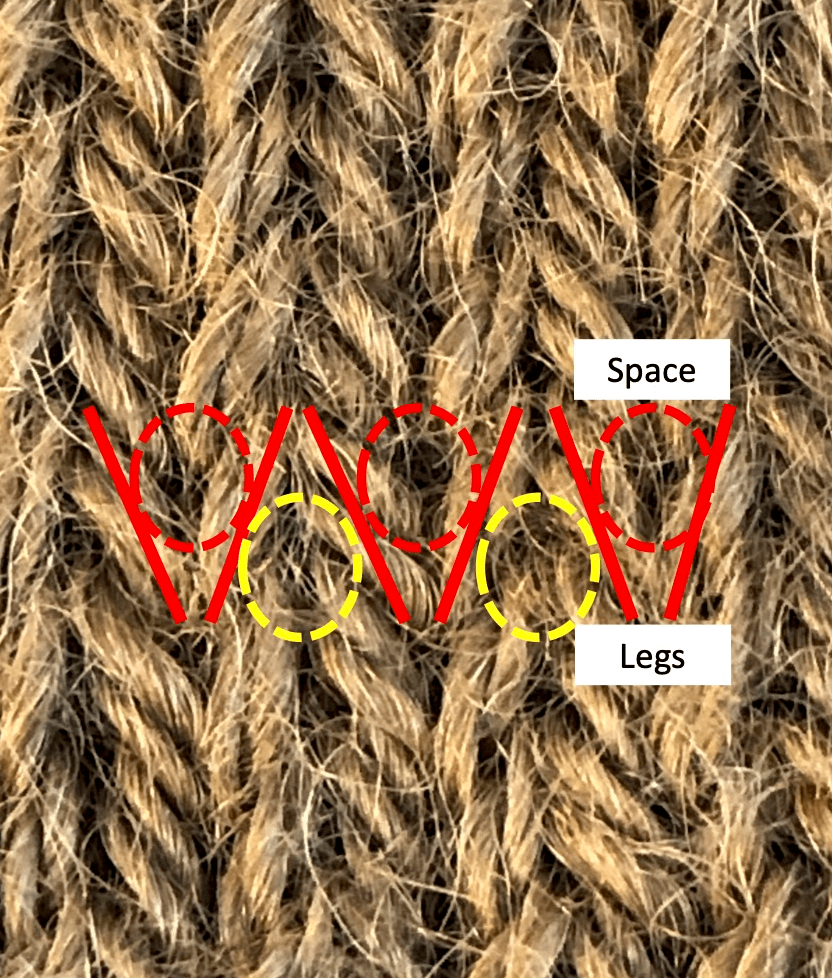
In addition to identifying the legs of the stitch, we also want to identify the three different spaces associated with each stitch. There is one space in the center of the stitch (shown in red oval below), and one space on each side of the stitch (each shown in yellow ovals below). These spaces will be our points of reference for measuring.
Since the gauge is the measure of the average size of the stitch, the more stitches you measure, the more accurate your average stitch size measurement will be. This is the reason we make our swatch larger than a 1 x 1 inch square. If you are only measuring a few stitches, the probability of having one wonky stitch changing the average size of the stitches increases. So, we want to measure as many stitches as possible, which is why I measure across the entire body of the swatch. I know the number of stitches in the body of the swatch (because I know how many stitches I’ve cast on) and I often know the number of rows in the body of the swatch (because I’ve hopefully remembered to keep track), and that means there is little to no counting of stitches. This is especially helpful when you are working with dark colored yarns, because all the parts of the stitches are harder to see, so there ends up being less guessing.
Stitch Gauge
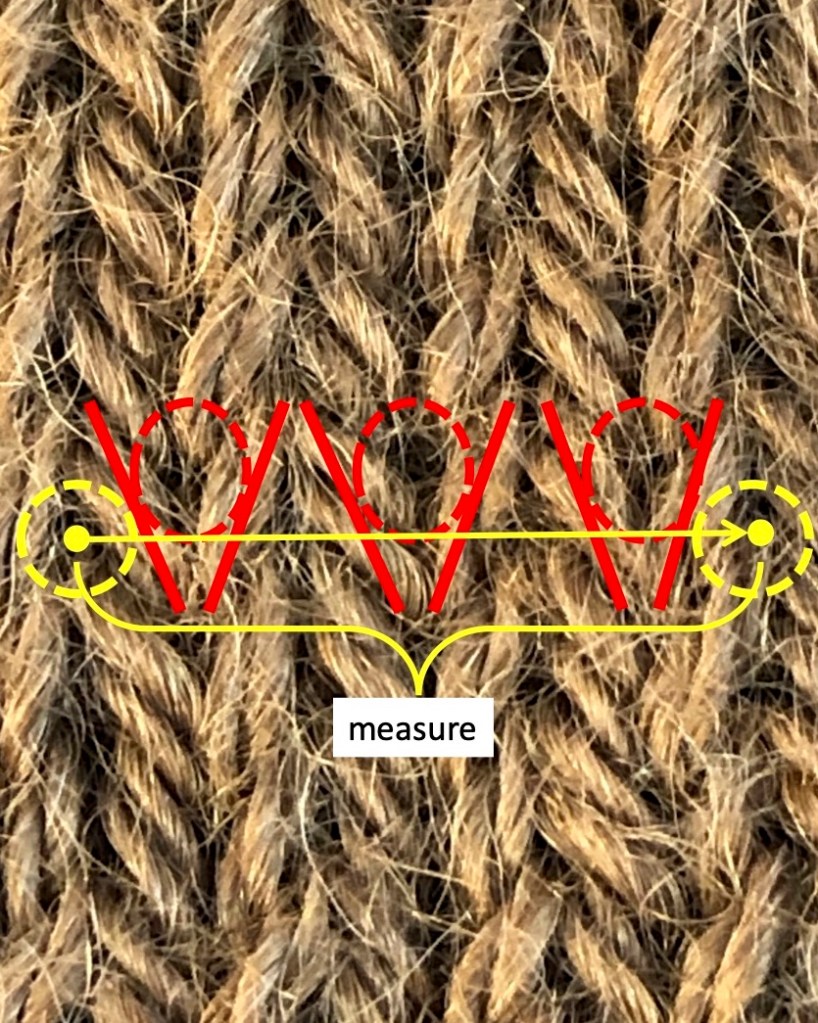
When you measure to obtain the stitch gauge, you want to measure from the side space on the left side of the far left stitch to the side space on the right side of the far right stitch, as shown in the last photo below. Note: In real life, you will be measuring across more the three stitches!
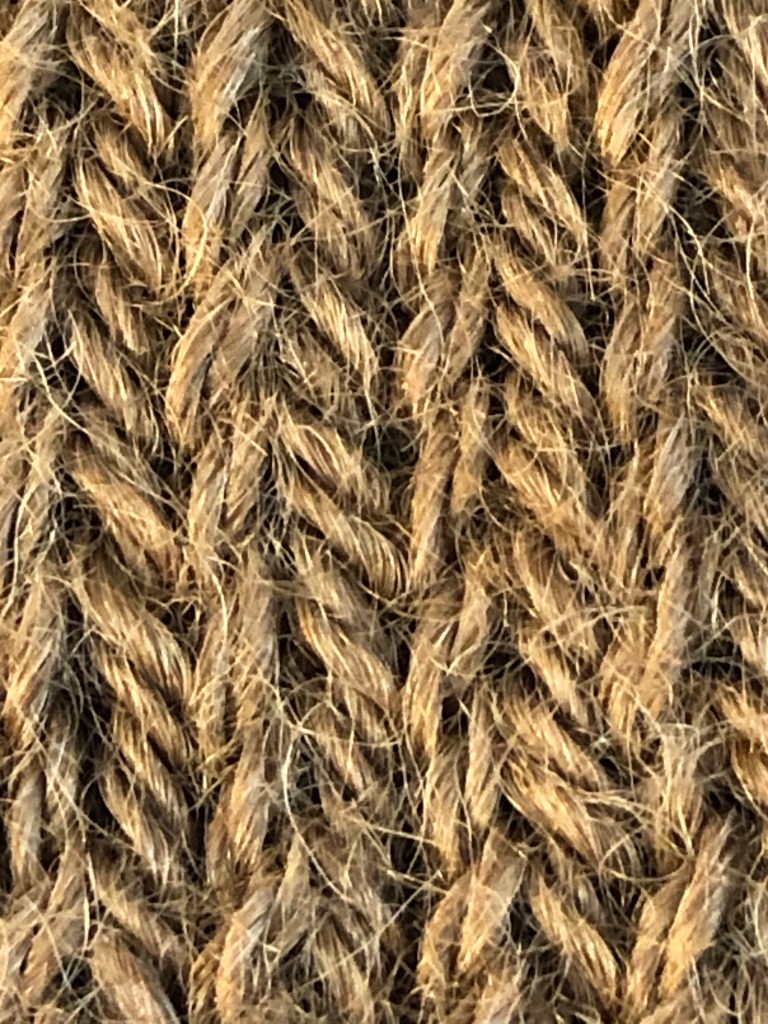
Stockinette Stitches
V-shaped legs of stockinette stitches.
Spaces in stitches: red are center spaces, yellow are between stitches.
In my swatch, I cast on 40 stitches. There are 2 edge stitches on each side of the swatch (remember each right side row begins with a K1, P1 and ends with a P1, K1). That means we have 36 stitches across the body of the swatch. I find the easiest way to measure the stitch gauge is to simply measure across the body of the swatch (not including the edge stitches).
Place a pin in right side space of a row of stitches. Follow the row across the swatch.
Place a second pin in the left side space on the left side of the swatch.
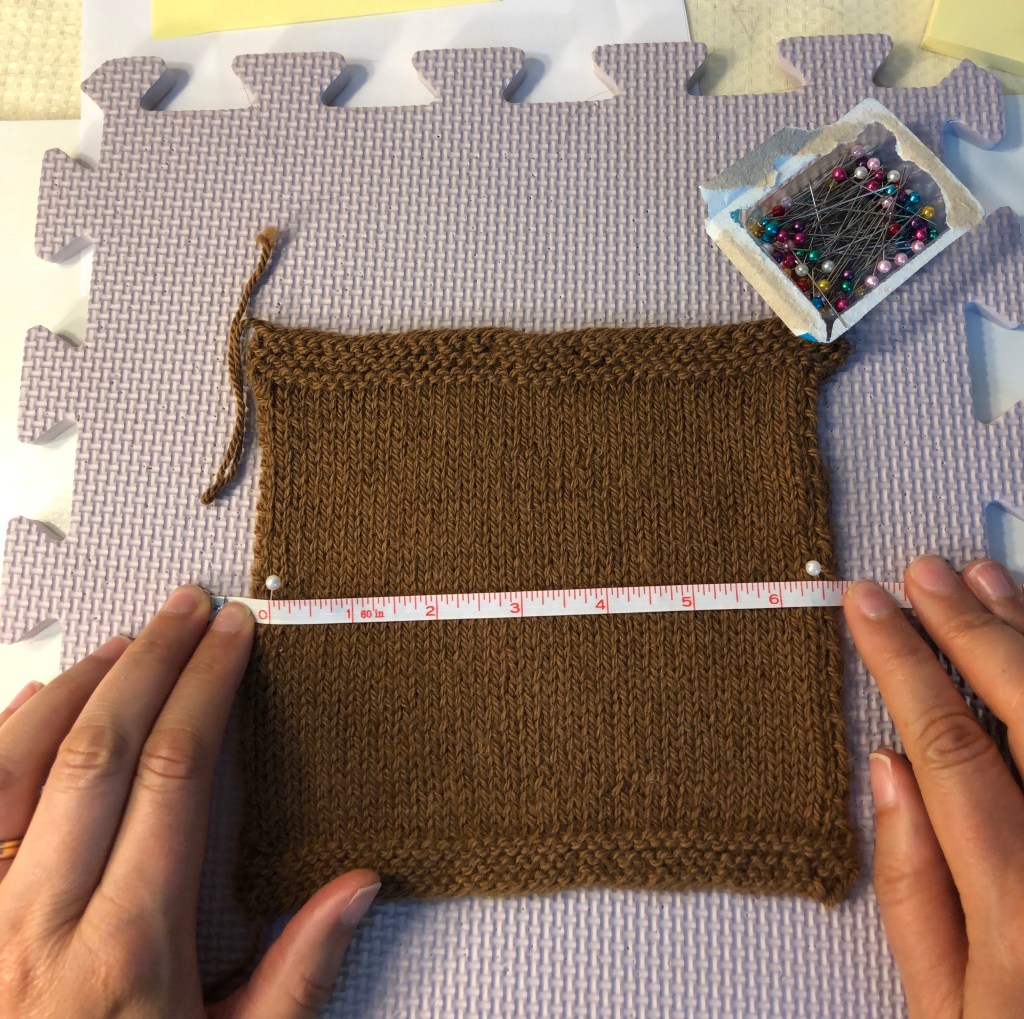
Measure from the base of one pin to the other.
I measure 6 7/16 inches (6.44 inches) across or 16.4 centimeters across.
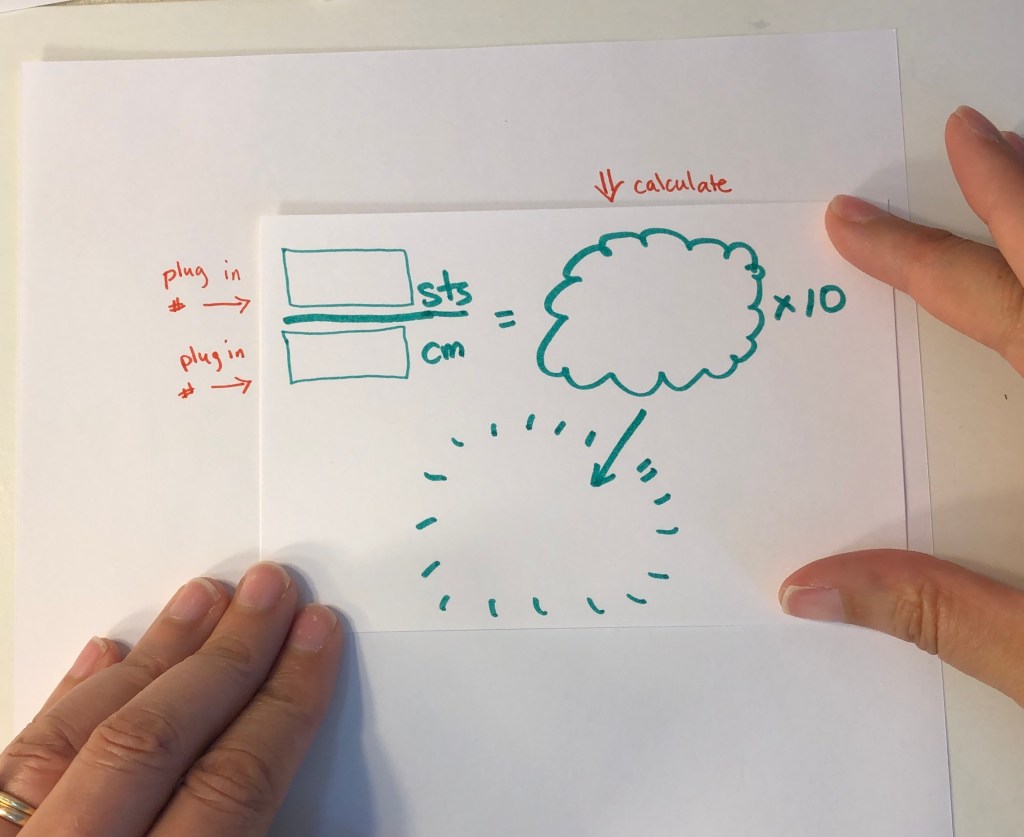
Hold on to your hats, because here comes the math! To calculate the stitch gauge, divide the number of stitches that you are measuring (36 sts) by the width (6.44 in) = 5.6 sts/in. The gauge is given for 4 inches, so multiply this number by 4 = 22.4 sts in 4 inches.
My calculated gauge is 22.4 sts in 4 inches and 22 sts in 10 cm.
Note: I usually use centimeters because the math is easier and I find it to be more accurate. The math is similar: 36 sts divided by the width in cm (16.4) = 2.195 sts/cm X 10 cm = 21.95, or 22 sts in 10 cm.
Row Gauge
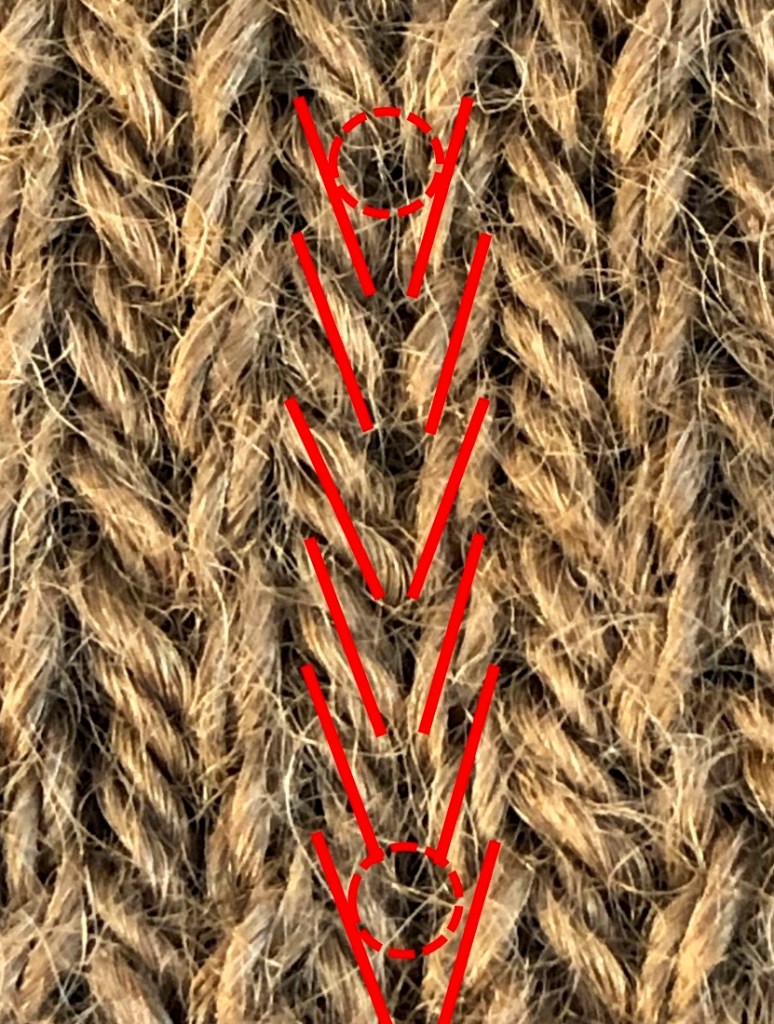
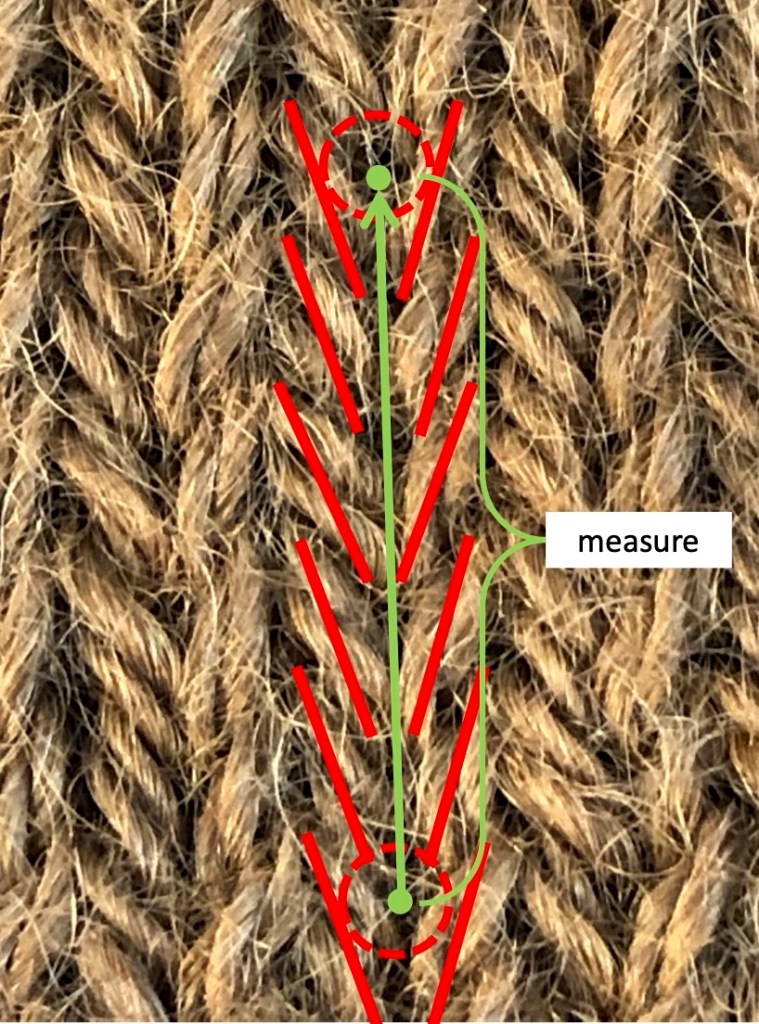
For row gauge, you will measure from the center space to center space in the same column of stitches. The center spaces are marked with the red circles in the photos below.
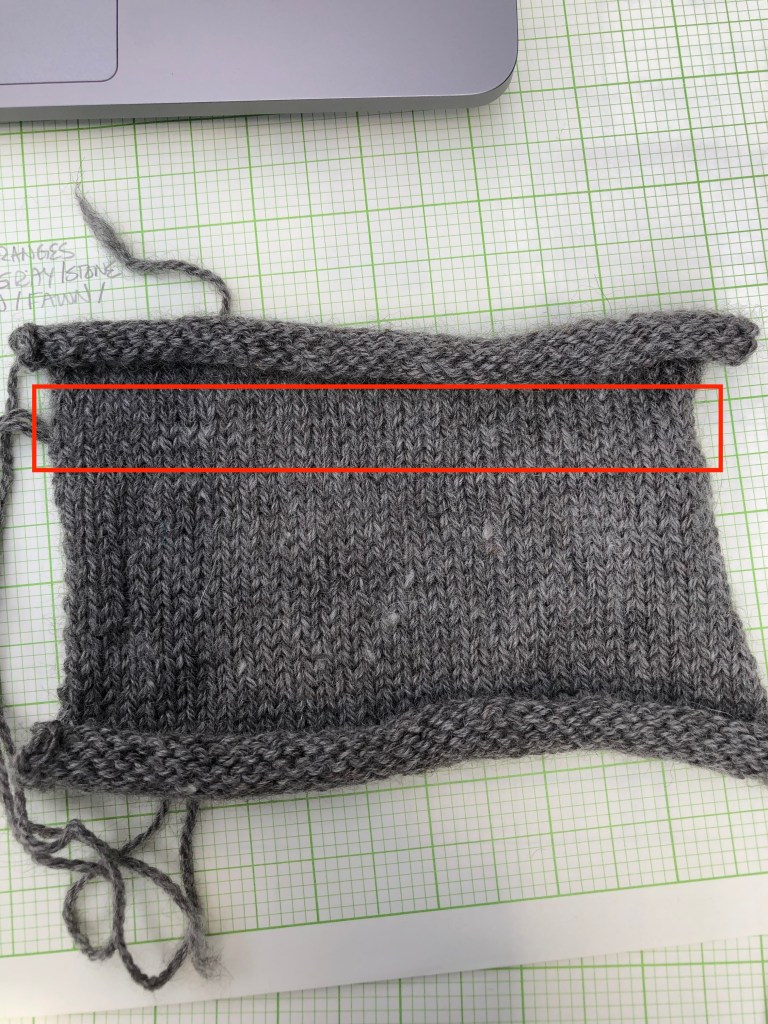
I’ve worked 40 rows between the garter stitch edges of my swatch. I locate the center spaces of the stitch at the bottom row of the body of the swatch. I follow the column of stitches up to the top and place a pin in the center space of the stitch in the last row of stockinette stitches. Measure between the pins and calculate.
Mark the top and bottom center spaces.
I measure 5 1/8 (5.125) inches or 13.1 cm from top to bottom pin.
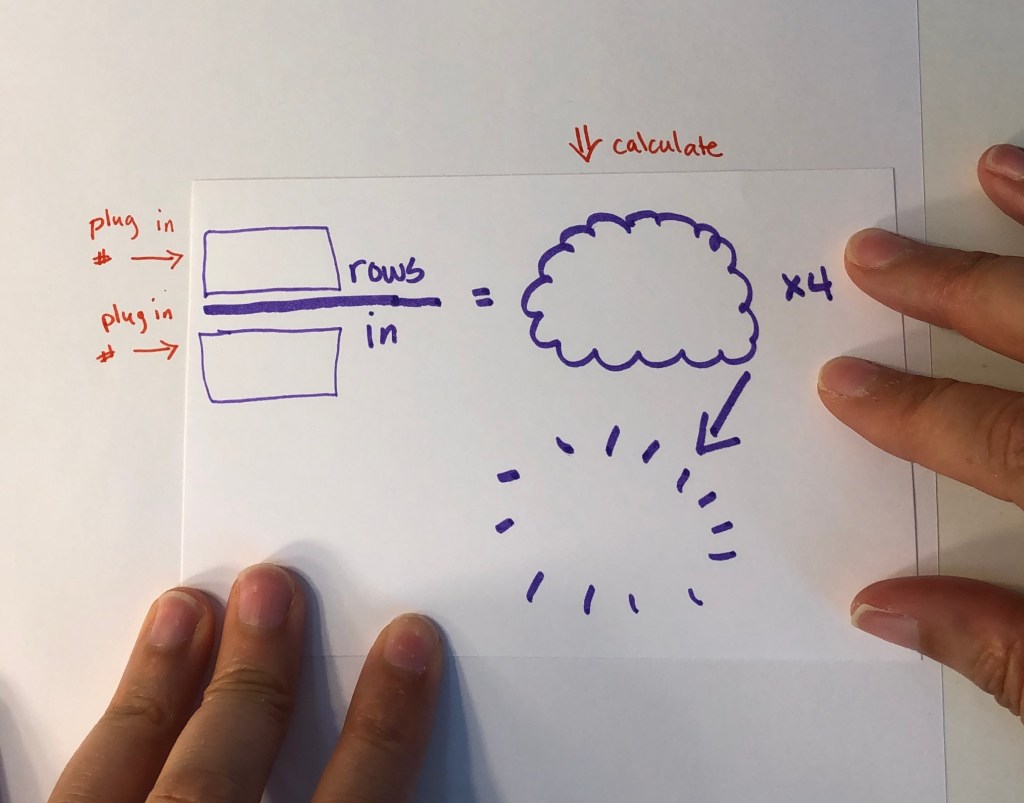
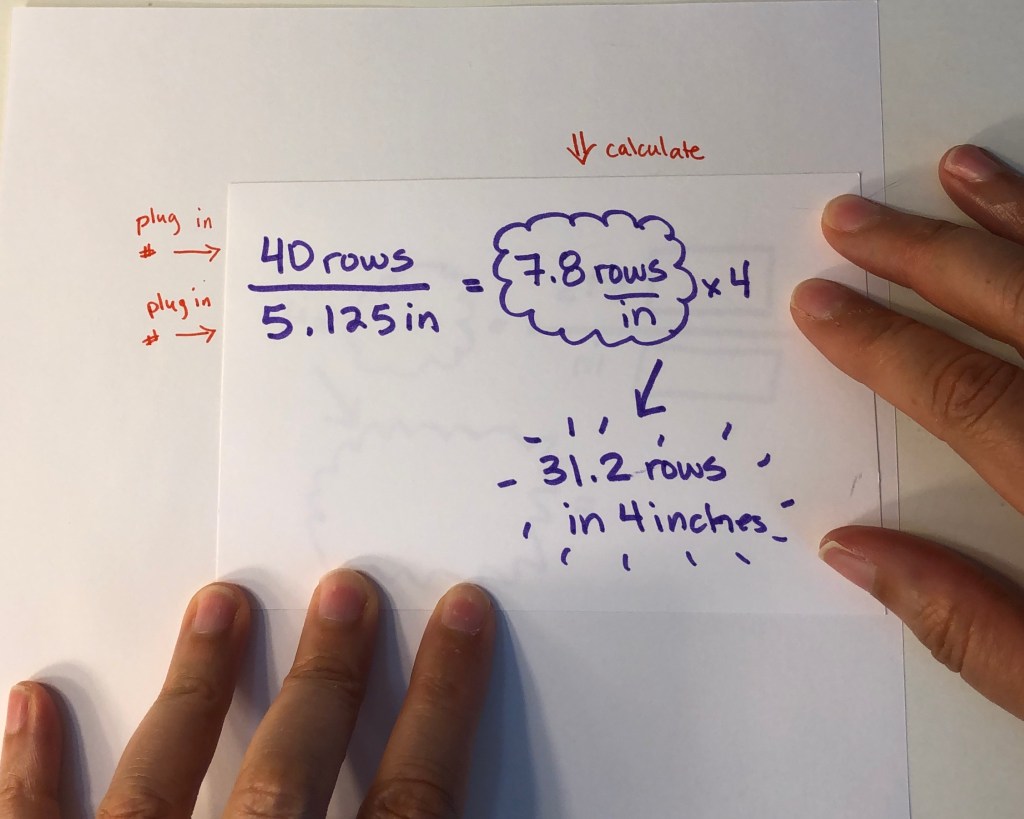
Divide number of rows by length and multiply by 4 to get the number of stitches in 4 inches.
Divide the number of rows by the length (in centimeters) and multiply by 10 to get the number of stitches in 10 cm.
My calculated row gauge is 31.2 rows in 4 inches or 31 rows in 10 centimeters.
My calculated gauge is 22.4 sts x 31.2 rows in a 4 x 4 inch swatch, or 22 sts x 31 rows in a 10 x 10 cm swatch.
I wasn’t always a fan of the gauge swatch, but by necessity, when I began designing stuff, I had to swatch. At first I used my swatches for the obvious reasons (determining how many stitches to cast on, increase, decrease, etc.), but after a few designs, I realized the additional value of my swatches. Not only do I return to my swatch information (to work the math) while I’m working on my project, but I also return to my swatches for inspiration and as a way to document and build on my ideas for new designs. Nowadays, I’ll never rarely knit a project without using a swatch. Often, I will work up at least two swatches, especially for a new stitch or color patterns.
Before I fully embraced my gauge swatch, I knew that I should make a swatch, I just didn’t do it. I wanted to begin knitting on my new project ASAP and I thought my knitting was probably close enough to the gauge given in the pattern. I couldn’t wait to cast on a new project with new yarn and I went charging ahead with the cast on.
I think that gauge swatches can be intimidating, especially for new knitters. I know from my own experience that when I first began to knit, I thought was that I was “pretty close” to gauge, but I really didn’t know what it was or how to use it, and I certainly didn’t measure it accurately (hanging from needles–mid-project – UGH!). Fortunately, in the 1980’s, over-sized sweaters – sweaters with lots of positive ease – were fashionable, and that’s the project I started with – an over-sized sweater. With over-sized sweaters, you can be “pretty close” to gauge and still end up with something that fits. Having a slightly lower stitch gauge (fewer stitches per inch) would mean that the over-sized sweater would be a bit more over-sized. Having a slightly higher stitch gauge (more stitches per inch) the over-sized sweater would still fit, but be a bit less over-sized. Lucky on my part!
Because I didn’t really know what I was doing, I would kinda-sorta check my gauge as I worked, hauling out my tape measure and measuring while my work was hanging on the needles. I think my experience is pretty typical of new knitters. I didn’t know what I didn’t know. I didn’t know how to a). make a swatch (it’s not as obvious as one would think, especially for a new knitter) b). measure the swatch to check the gauge (also not obvious to a new knitter), and c). block anything, and why blocking is important for the swatch. Blocking wasn’t even mentioned until the last paragraph of the sweater pattern. How would a novice knitter know to block the swatch? Even if I had known those things, I wouldn’t have known exactly what to do if my gauge didn’t match the pattern gauge in the first place. Additionally, as a beginner, I didn’t have an array of needles to swap if my gauge didn’t match the pattern. I was a poor college student, and even way back then, knitting was an expensive hobby. After purchasing the pattern book (Lopi, vol 10), two sets of circular needles (sizes US 6 and 10), and two sets of double pointed needles (US 6 and 10), and the yarn, I had already more money invested in this new-to-me-hobby than in my entire 1984-1986 new technology CD collection. The point is, even if I’d made a swatch, I wouldn’t have known what to do with it or how to fix it, and if I HAD known how to fix it, I probably still wouldn’t have spent the money on four more sets of needles that still might not get me the correct gauge. It was definitely easier just to ignore the swatch and blissfully begin knitting. I used the needle size suggested and got very lucky that the sweater fit when it was finished. If the sweater hadn’t fit, I may never have knit anything again. But it DID fit. And so I made another one. And another. And another… and never made a swatch. Of course, it was only a matter of time before there was a project failure due to “incorrect gauge”.
Now I know better. I’ve got the tools I need to make a swatch and measure it properly and years of experience to know how to use the swatch to my advantage. I’ve come to embrace and even enjoy (!) the swatch process.
My top uses of my gauge swatches are given below.
First, I use the swatch for all the math reasons: when, where, how many stitches, rows, increases, and decreases. The gauge swatch is a calibration of my knitting with a specific set of needles, a specific type of yarn, and a specific knitting technique. My gauge can change slightly when I use metal or bamboo needles. My gauge changes more when I use different types of yarn. My gauge changes a LOT if I change my knitting technique, which I do occasionally for some obvious reasons. For example, I get a different gauge when I work in the round versus when I work back and forth, or when I do two-handed stranded knitting compared to simple stockinette. Sometimes I change my technique for less less obvious reasons. For example, sometimes I alternate “picking” and “throwing” techniques on projects to work different muscles in my hands, wrists, elbows, and shoulders to reduce the chance of repetitive motion injuries.
I don’t worry too much about the change in gauge with different needle types because it is usually such a small difference that it doesn’t significantly affect the outcome of the finished object. I pretty freely change needle types within projects, especially if I don’t like how the stitches move off the needles. I would caution against changing from round to square needles though, as I suspect there would be a more significant change in the gauge.
Using different yarns, even if they are the same weight, can give a different gauge, so whenever I use a different type of yarn, even if it is the same weight, I make a new swatch to make sure the gauge matches what I am expecting.
And of course, if I’m going to use a different knitting or stitch technique, I make a new swatch because, as I stated above, I know I have very different gauges when I use different techniques.
The second way I use my swatch for is to determine if like the fabric I am making. Do I like the color combination of the fabric? Do I like the weight and fullness of the fabric? Do I like the drape of the fabric? I am likely to be spending a lot of time and and I’ve probably already spent money on this project, so I want to be pleased with it when I am finished. For this reason, the swatch should be large enough to be a good representation of the fabric of the finished project. At the minimum, the swatch should be 4 by 4 inches, and ideally 6 by 6 inches. A larger swatch will give you a more accurate calibration (better math) as well as a better representation of the fabric.
A third way I use my swatches is to determine if I like the technique or stitch pattern enough to commit to an entire project. For example, I love the look of linen stitch, but I find that it can be tedious. If I can’t muster the motivation and enthusiasm to work through the gauge swatch, how will I finish an entire project with this stitch? If I am learning a new technique or practicing a new type of stitch, it is better to practice in a swatch than in a large project. Creating a swatch gives me time to practice and to consider if I want to plunge into the larger project. I have definitely abandoned ideas when I discovered how challenging it was going to be based on the swatch.
The last and unexpected way that I use my swatches is as a occasional and sentimental trip down memory lane, which only occurred to me as I was getting out my swatches to photograph them. I got distracted by the basket full of swatches, and needed to handle them all. I do a lot of knitting for other people now and don’t have access to many of my finished projects. All I have left is the swatch. Each swatch has a person, project, or idea associated with it and I enjoy remembering these things. It does help to LABEL your swatches (especially with needle sizes) if you ever want to go back and use them.
I’ve shown some of my recent swatches below. Some have made it to finished objects, some are still waiting for their project destinies.
Double-Knitting Technique with Charted Pattern – I haven’t completely given up on this swatch yet. But, reading the charted pattern while implementing the double-knit technique was much more challenging than I first thought it would be. So this project is on-hold for now. I love the reversibility of this fabric and with practice (the edges need work!) it could make a nice hat band, or mitten cuff. Whatever it’s going to be, it will be warm with those double layers!
The cast on is almost invisible from the front – public side. It looks like a seam.
The seam is quite visible on the back – private side.
I tried a new cast-on technique with this swatch. I was looking for an alternative to a provisional cast on, and this is what I came up with. You can see the cast on from the “private side”, but it looks like a seam from the “public side”. It is not quite as tidy and seamless as a provisional cast on, but I think it works well.
I used the cast on method above for this version of the Steventon Shrug
I used a traditional provisional cast on for this version of the Steventon Shrug.
You can see the difference between the cast on methods in the shrugs. The cast on is visible, but looks like a seam in the gray version. The provisional cast on for the white version is seamless.
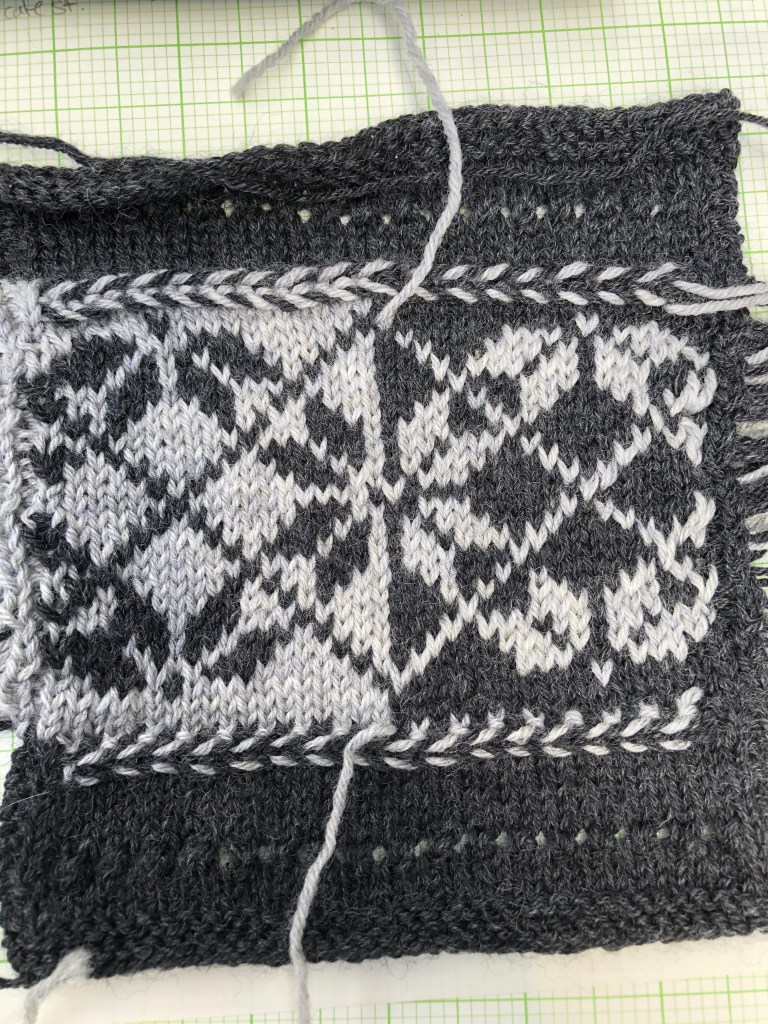
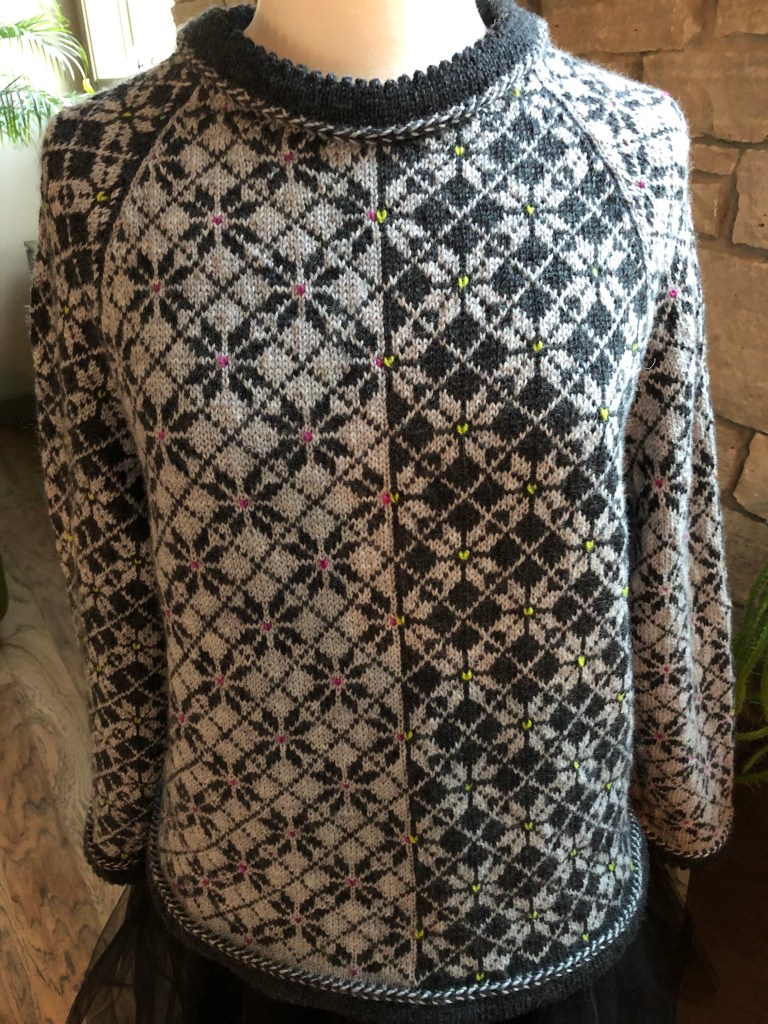
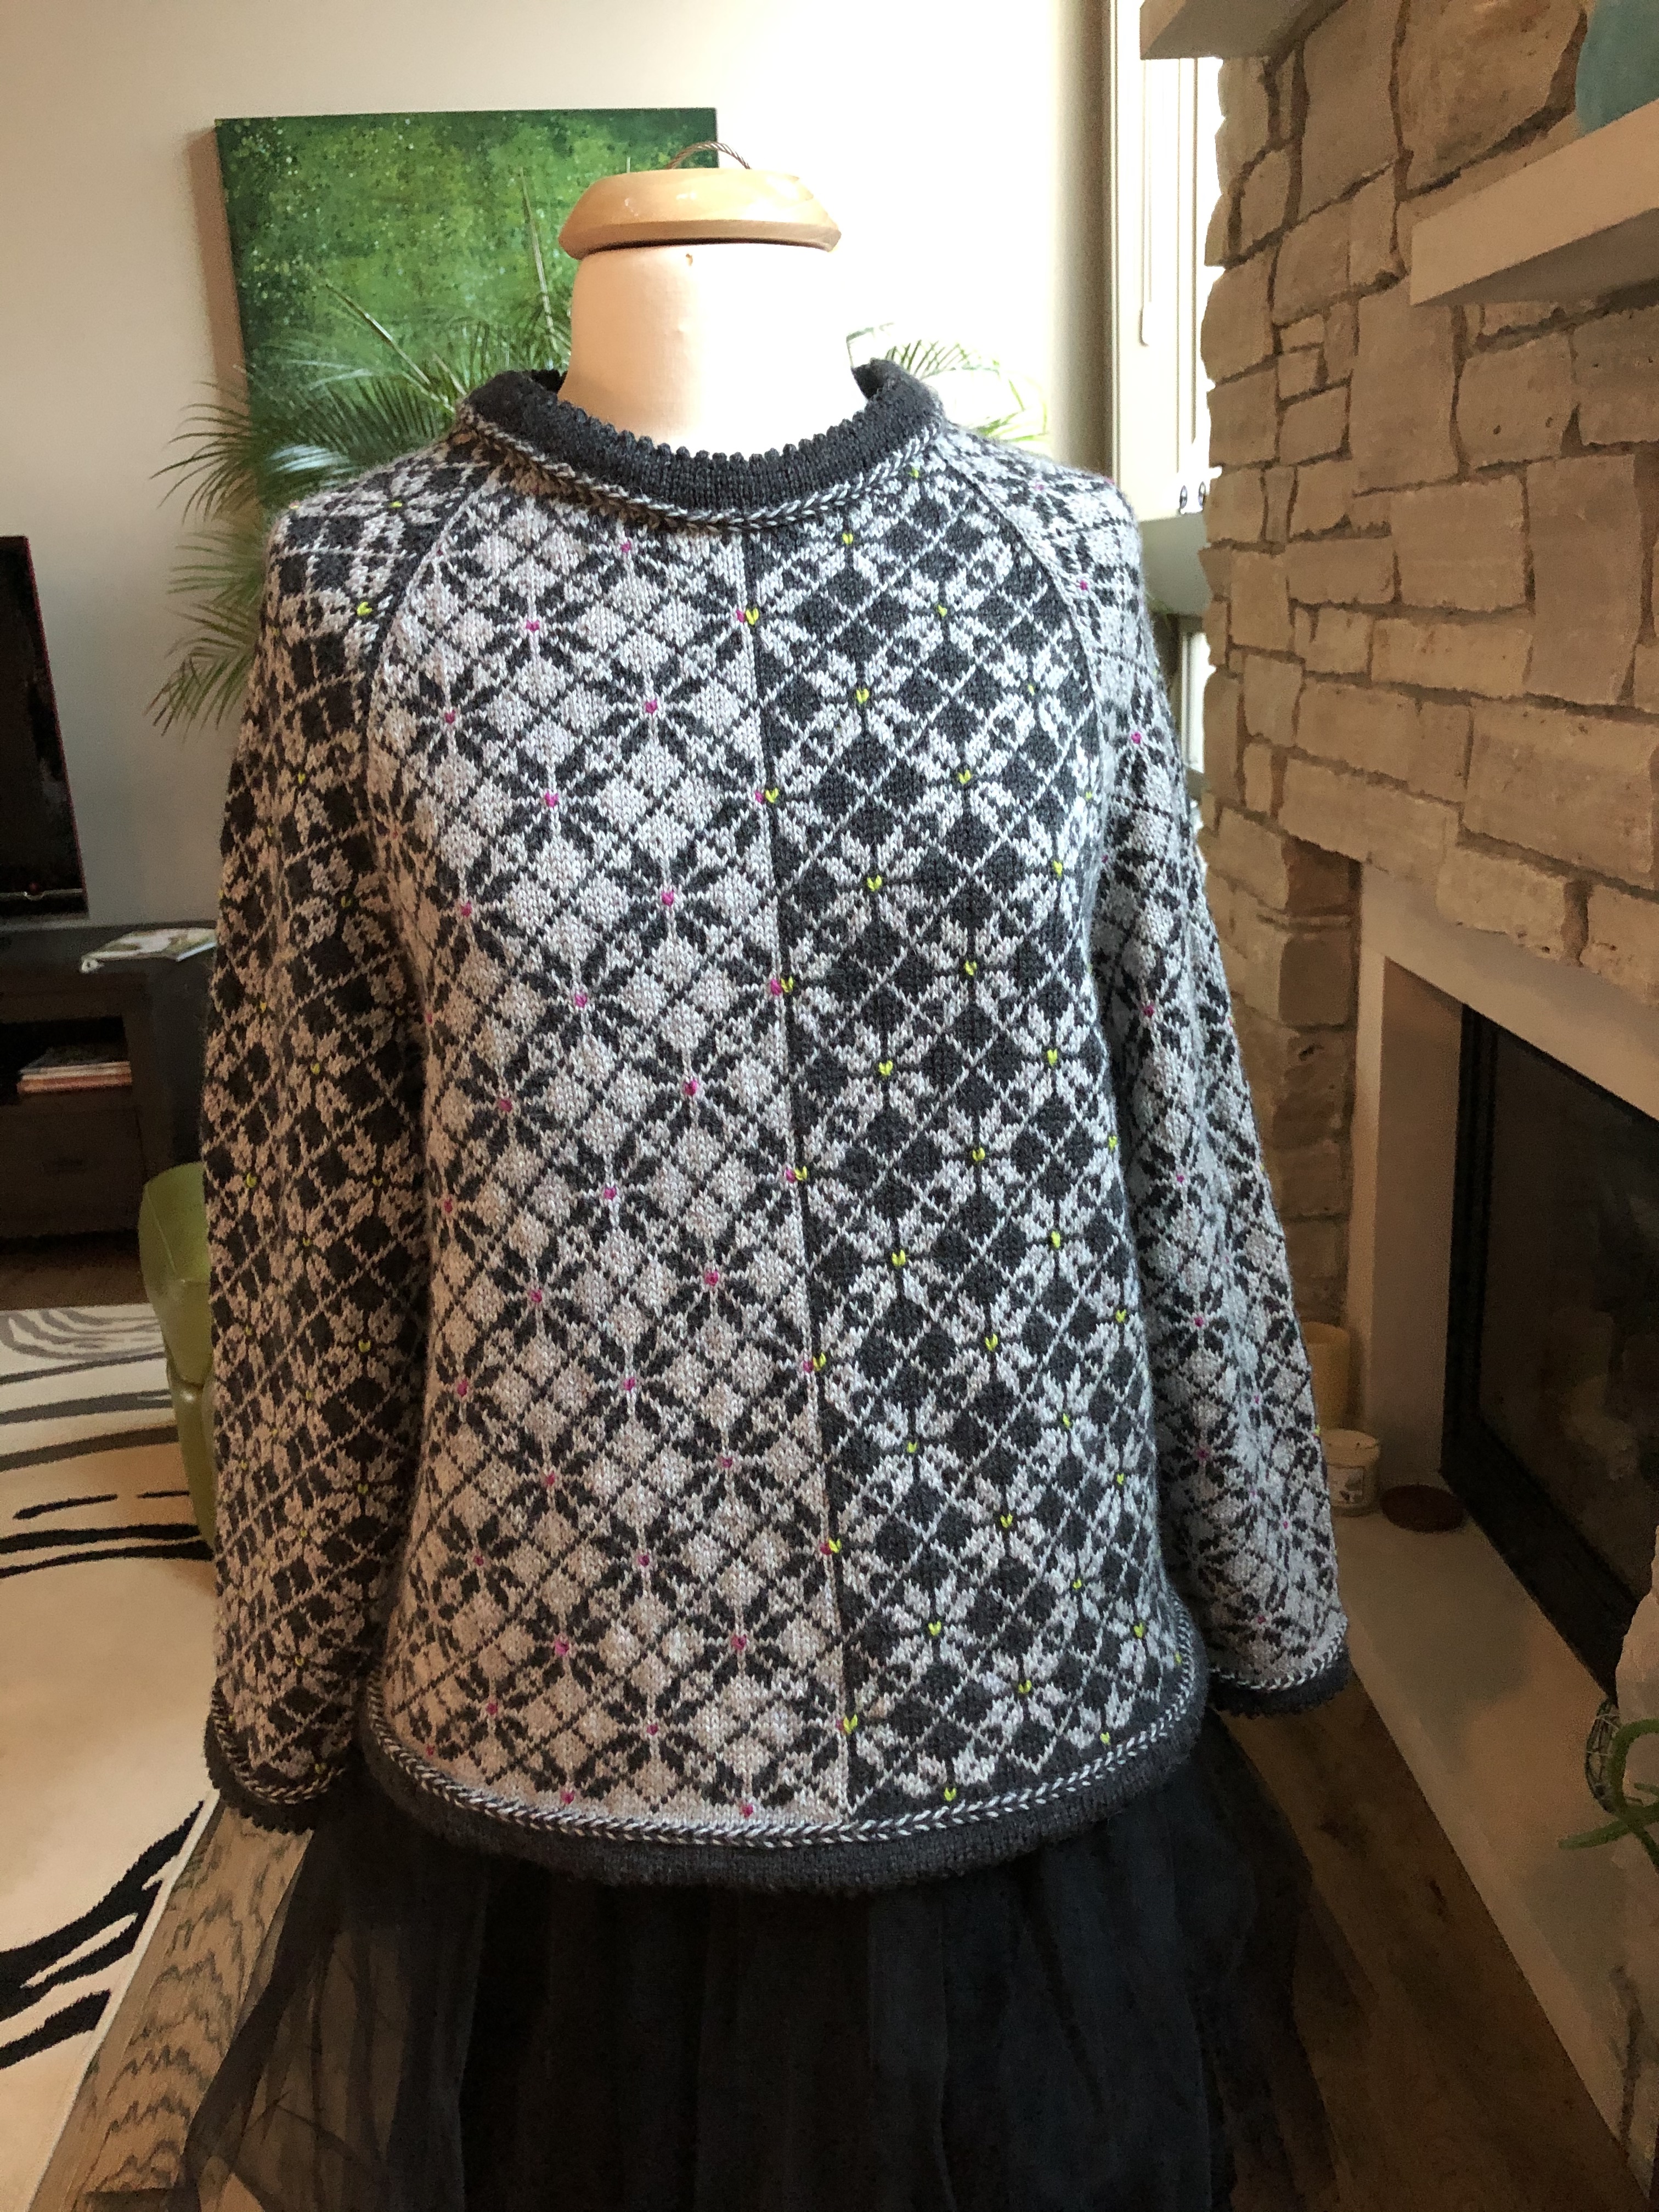
I was testing the colors, stranded knitting technique, and the Latvian braid technique in this swatch. I loved everything about this and it became a sweater!
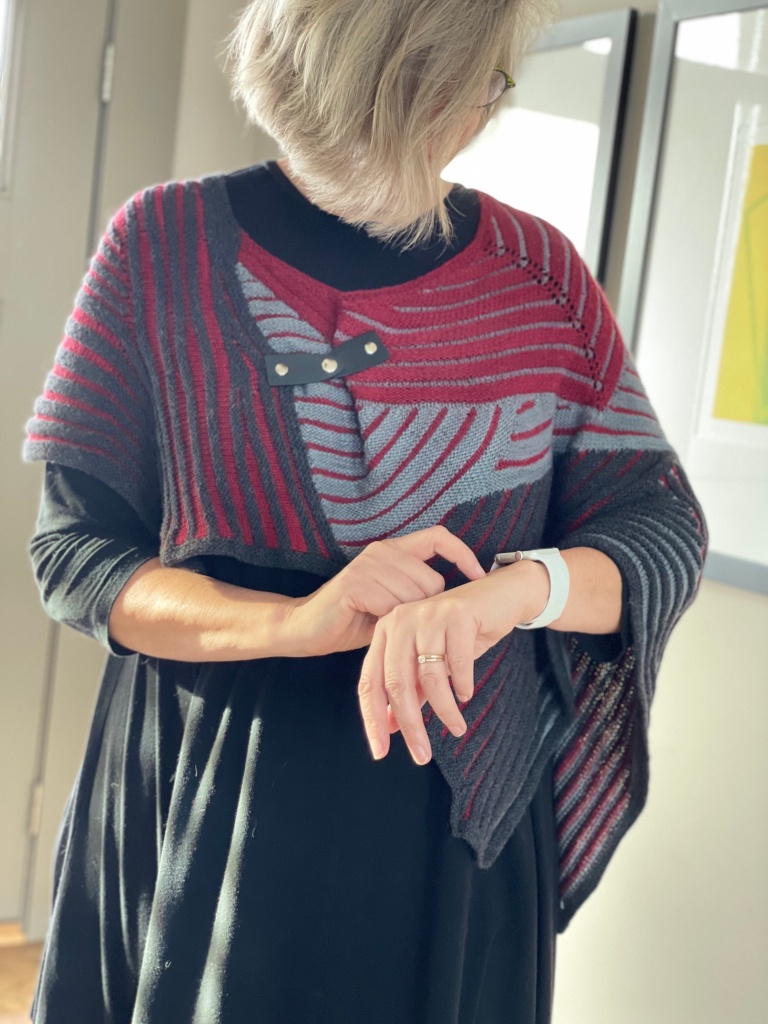
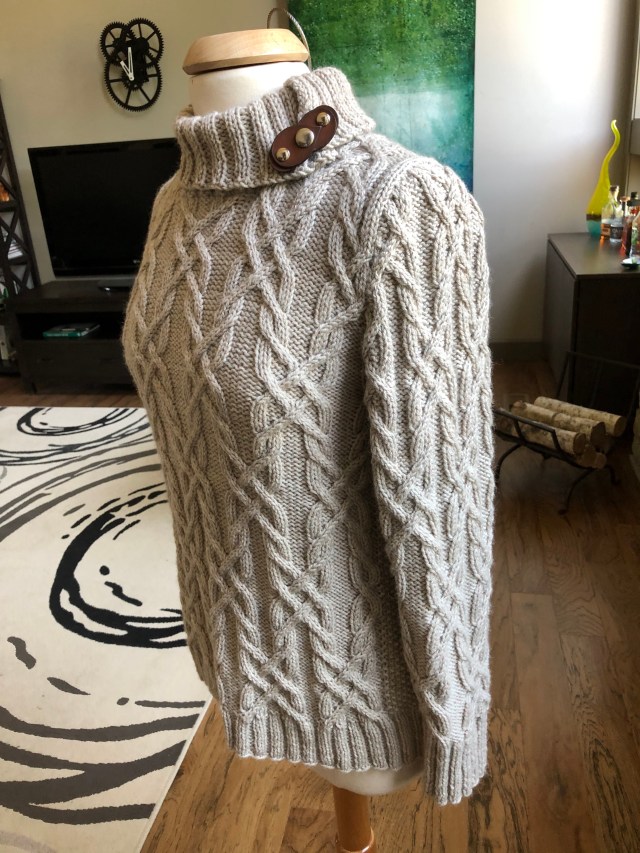
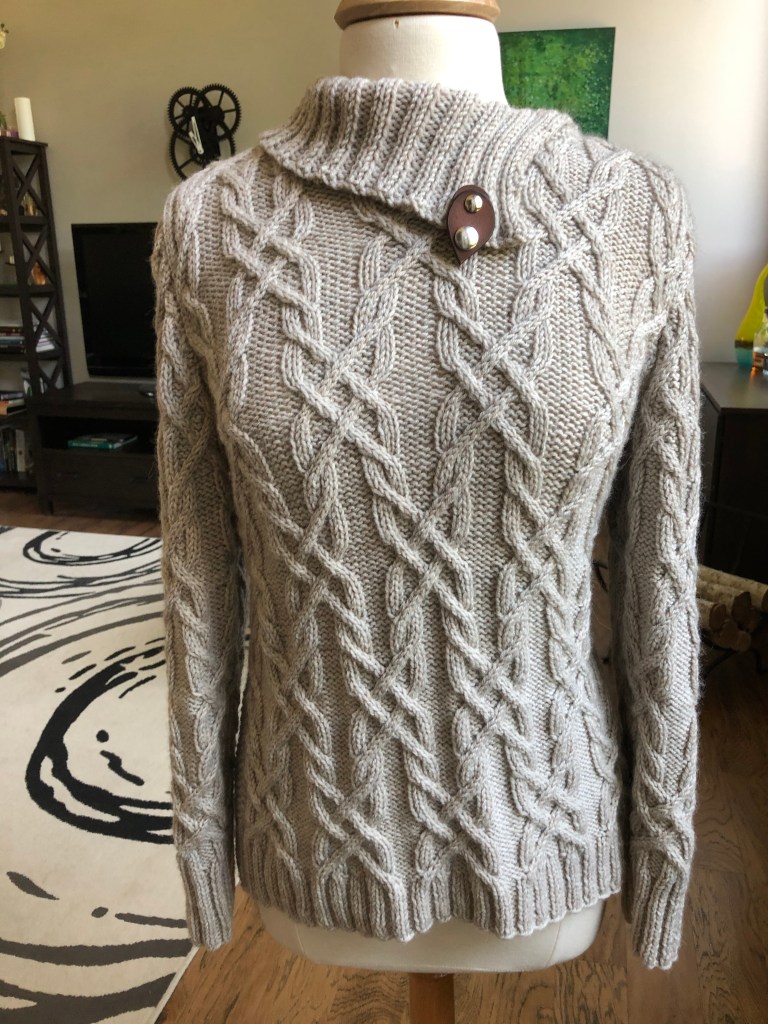
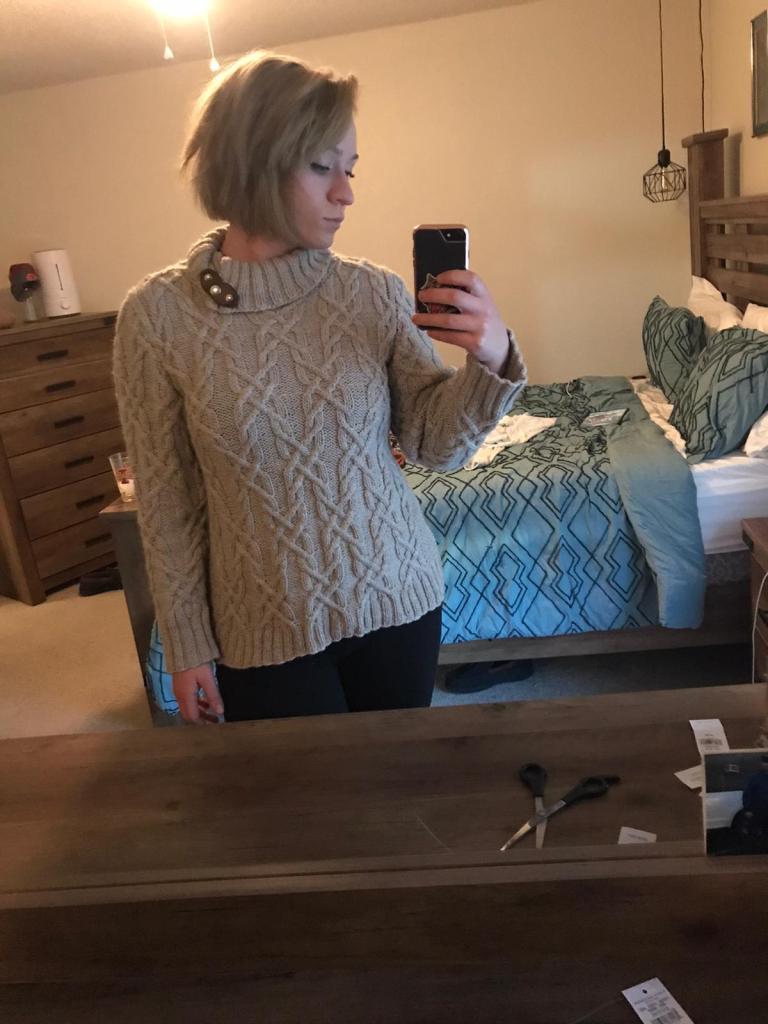
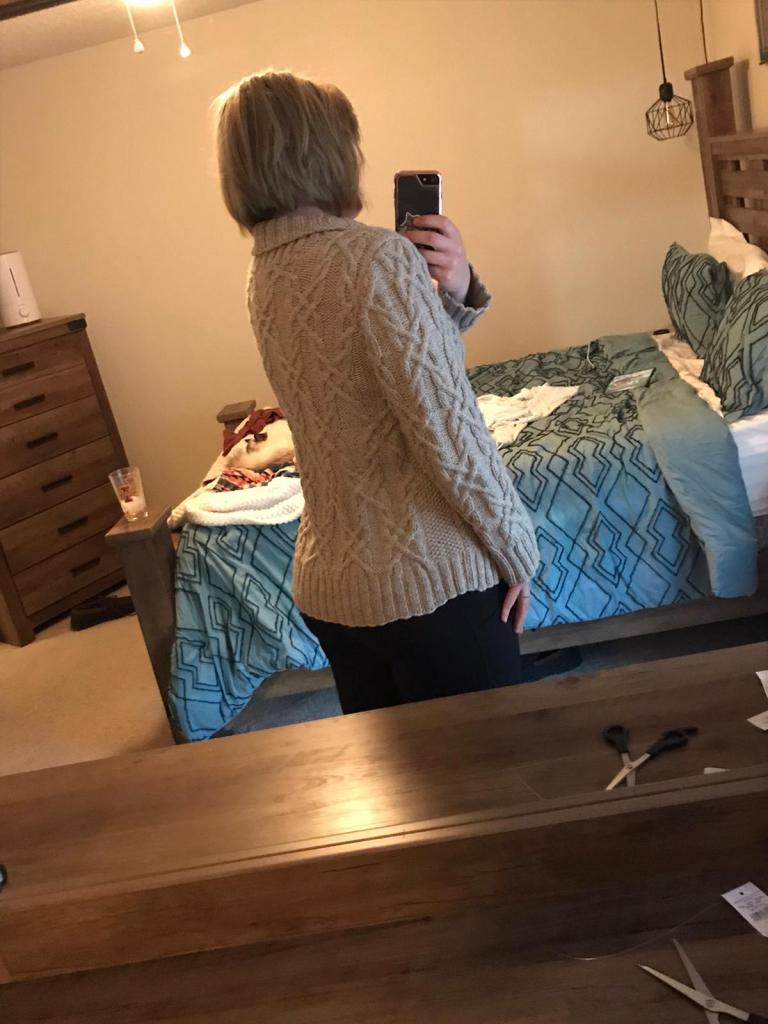
Another swatch resulting in a sweater. If all goes well, BOTH Ben and Chloe will get sweaters like this for Christmas 2020. Chloe’s is finished. I really like the leather closure for the collar.
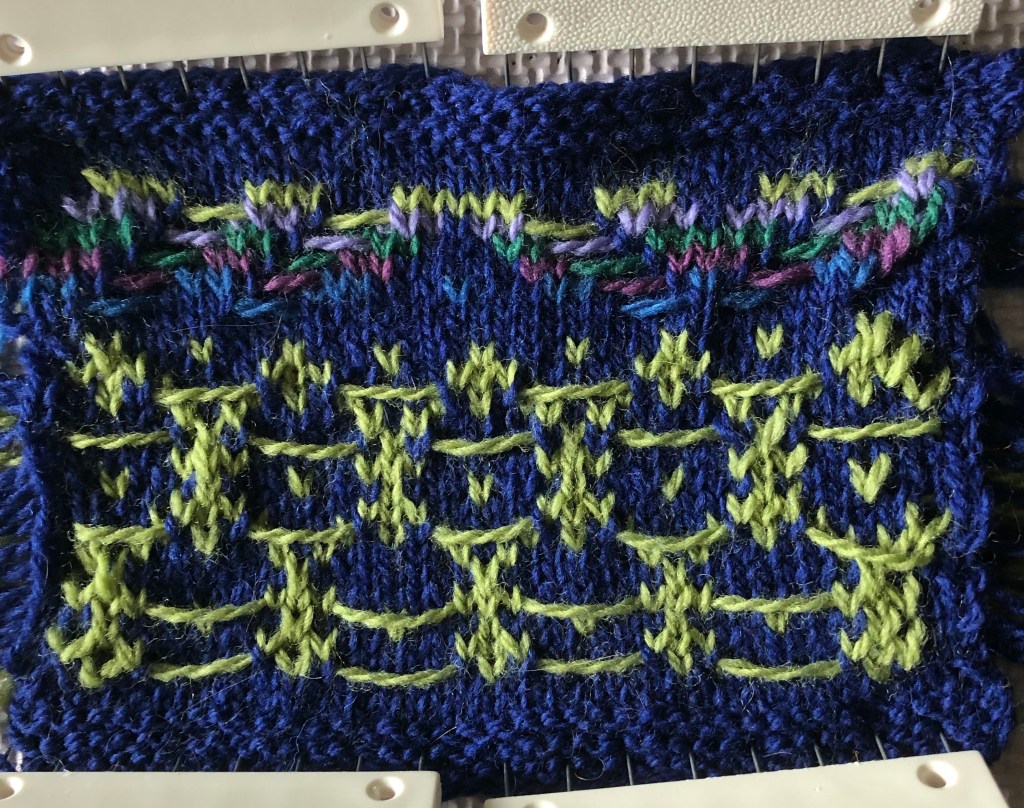
The first swatch: playing with visible floats. I really liked the top bit.
Second swatch adjusting the pattern and color combination.
I don’t know what this is going to be yet, but I LOVE how it looks! It reminds me of the western-style woven blankets. A cowl? A scarf? Mittens? Sweater or wrap? It could be so many things.
In summary, make swatches! Play with colors, textures, and stitch patterns. Label and save your swatches!
You may have noticed a password protected post yesterday. I was poking around on WordPress and found this feature, which was quickly followed by a nugget of an idea, followed by an experiment.
My idea is that I would like to include “how-to” posts along with my patterns for sale through Ravelry. A virtual KAL, if you will. These password protected posts are a test of how this might work. If you are interested in knitting along with me and providing feedback about what to include in the password-protected posts, I would welcome it and will share the pattern and the password. Let me know! My time in May is rapidly disappearing, so realistically, this will happen in earnest in June.
I still hope to have many open access posts about techniques–the password protected posts will be about specific patterns that I have available for sale.
I didn’t intend to wait this long to write, but here we are, mid-April and I’m finally getting back to this blog experiment.
I was planning to take January off from writing, since I needed a break after the end-of-semester craziness, all the chocolate mayhem, and our holiday activities. Since I began knitting for other people in 2015, I have reserved December and January to knit for myself–that is, to work on personal projects, mostly for my family, but sometimes for myself.
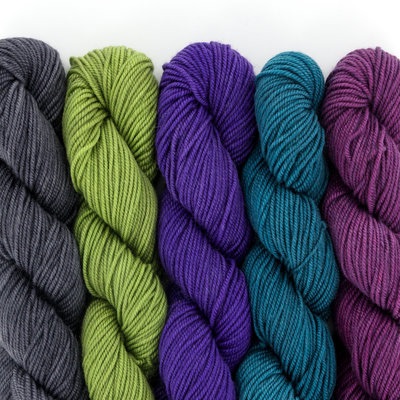
December and January knitting this year included these fun projects: 1) a sweater for my daughter, 2) a hat for my niece, and 3) a hat for a friend.
Fading Christmas Sweater (original design), Hat with Bow (original design, but unimaginative name), Sparkling Cider Hat (pattern by Kristin Lehrer)
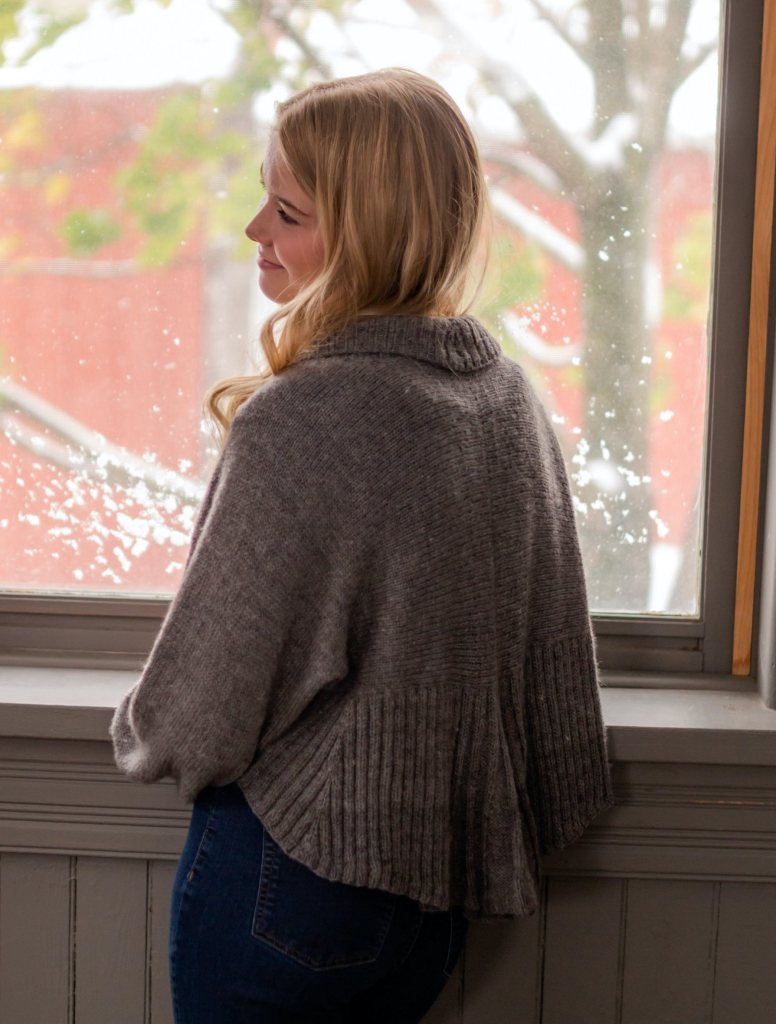
In February, I planned to focus on writing another pattern–the Steventon Shrug–which I first knit in the fall of 2019. My hope was that I would add blog posts for this piece as early as the end of February, however, that was not to be.
Steventon Shrug, Size M/L in Gray
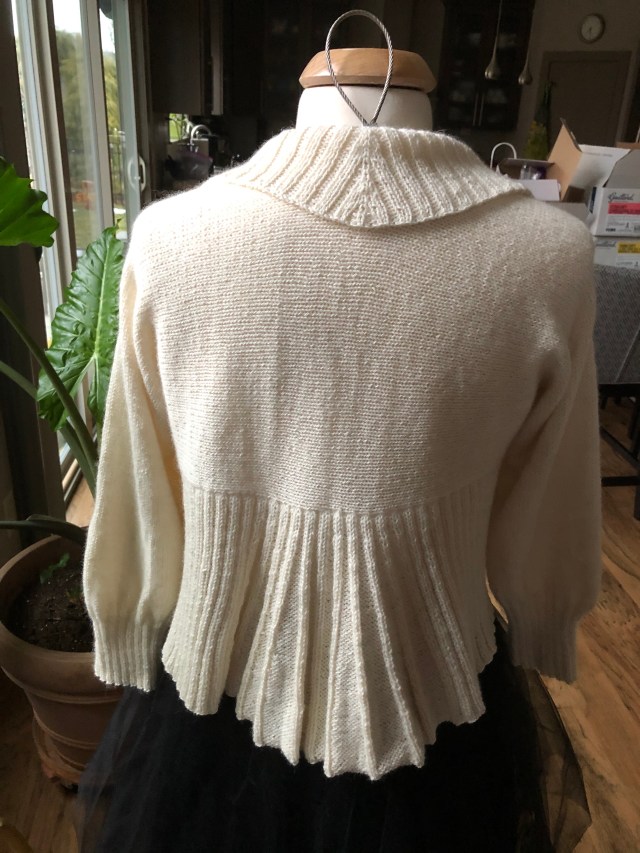
Since I began writing patterns for my designs, I’ve learned several important lessons. First, it is quite a different process to knit a piece than it is to write a pattern describing how to knit that piece. Each new piece begins with a plan, but while I’m creating that first piece, I tend to incorporate a lot of modifications as I am knitting it. These modifications can be for styling or for the ease of pattern writing. Whatever the reason, the original plan rarely gets written into a functional pattern without major revisions and changes. Hence, the second lesson I’ve learned is that it is extremely beneficial for me to make a second run through the pattern while working a second piece. My goal for February was to knit a second shrug as I re-worked the written pattern and then to knit a third piece as the blog feature in late February and early March.
Round Two of the Steventon Shrug: Size XS/S in White
The third lesson I’ve learned about pattern writing is that test knitters are as valuable as gold. In the fall of 2019, I used the Free Pattern Testers group from Ravelry for the first time. I ran a test knit for the Chocolate Cascade Cowl. It was a steep learning curve, but definitely worth the time I invested in learning the process. I got terrific feedback about the pattern and it was fun to interact with the group. And the written pattern is better for it! I decided that this would be the best way to work through my future patterns, but it does add months to the pattern-writing process. At the end of February, I was finished with my second Steventon Shrug, had my pattern written and in good enough shape to share with the test knitters and to begin my third piece.
It was all going swimmingly until the week of my spring break in mid-March. We all know what happened. The corona virus and COVID-19 upended our lives. Universities extended spring breaks. Universities switched to short term on-line learning formats and work-from-home. The state issued shelter-in-place orders. Universities extended on-line learning formats until the end of the semester. April activities were cancelled, May activities were cancelled…
We all have our own narratives during this crazy time. I’ve been so busy adjusting to a new on-line class format, that my knitting and knitting-related activities just stopped for a month. I had zero motivation for anything above and beyond getting my classes ready and answering emails. I found that I was reluctant to begin a new project, and I had no motivation to continue to work on existing projects. I couldn’t focus long enough to write and edit my pattern. I alternated between feelings of alarm, dread, guilt, panic, anger, and grief. I was reluctant to check the test knitting group on Ravelry because I knew that there would be questions that I had to attend to, and I just didn’t have the mental energy to do it. Of course, this added to the cycle of guilt, dread, and panic. (Sincere apologies to my test knitters!)
I’m finally, finally, getting some knitting motivation back. Some of my dread has eased, and I decided that I will not going to feel guilty about these missed self-imposed deadlines, though I have to keep reminding myself of that. Once I accepted the fact I could (and should!) take some time to adjust to this new normal, I finally began to move forward. I took the time last week to finish working on the Steventon test knit and get the pattern uploaded to Ravelry. The pattern is available to purchase here. If you want to skip the knitting and purchase the finished piece, you can find out about where to buy either of these pieces here. I never did finish the third piece to feature for the blog, but I hope to in the coming weeks. I’ve already featured some of the techniques in previous posts, and they are linked below.
The next few posts will focus on the techniques used for this pattern:
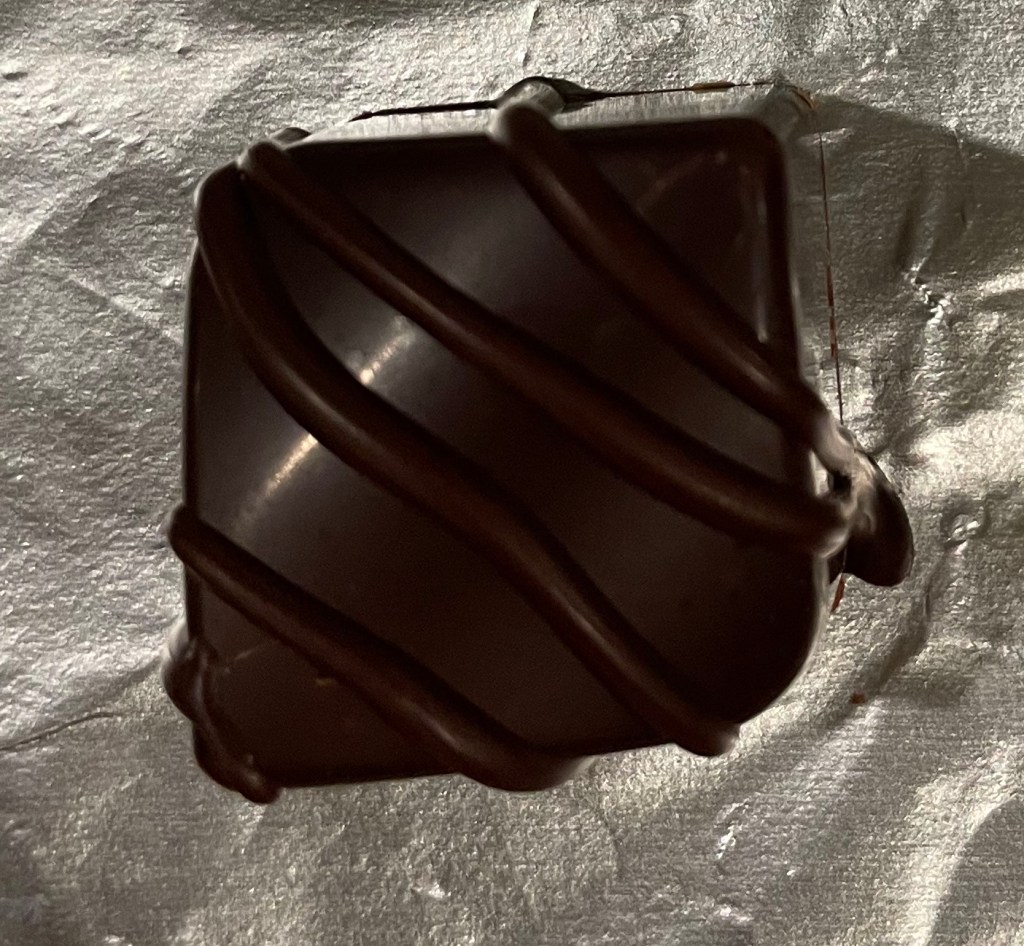
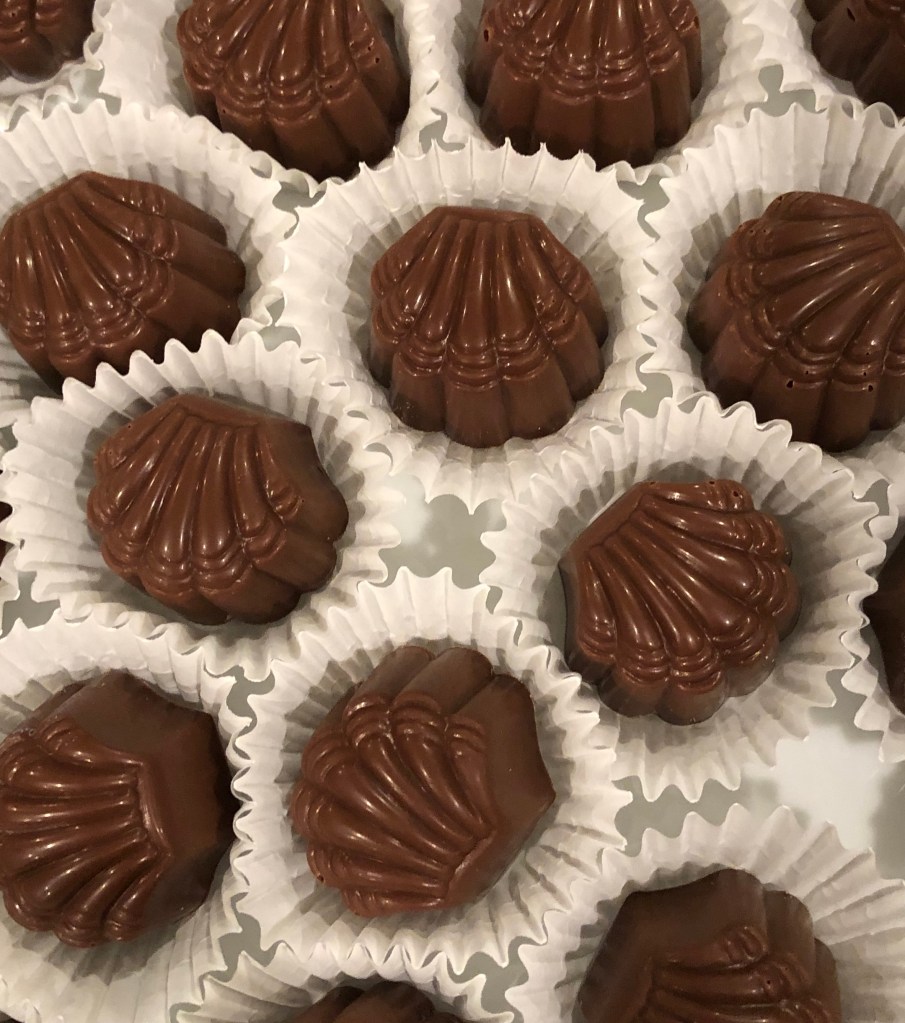
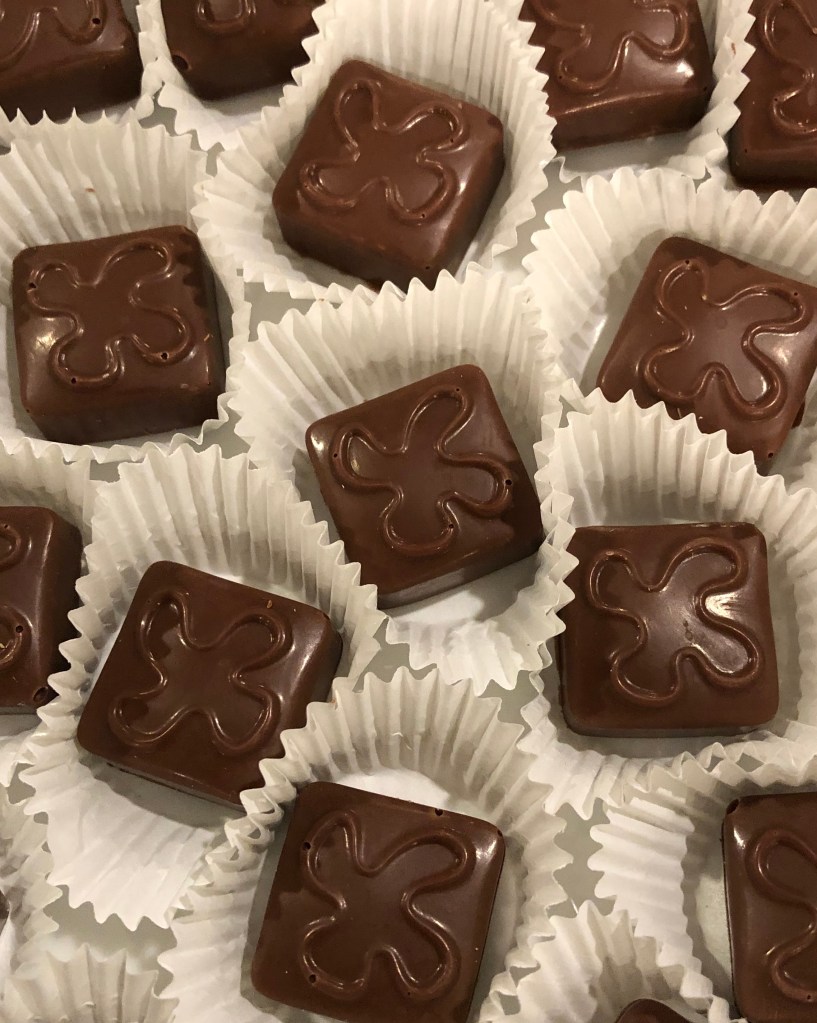
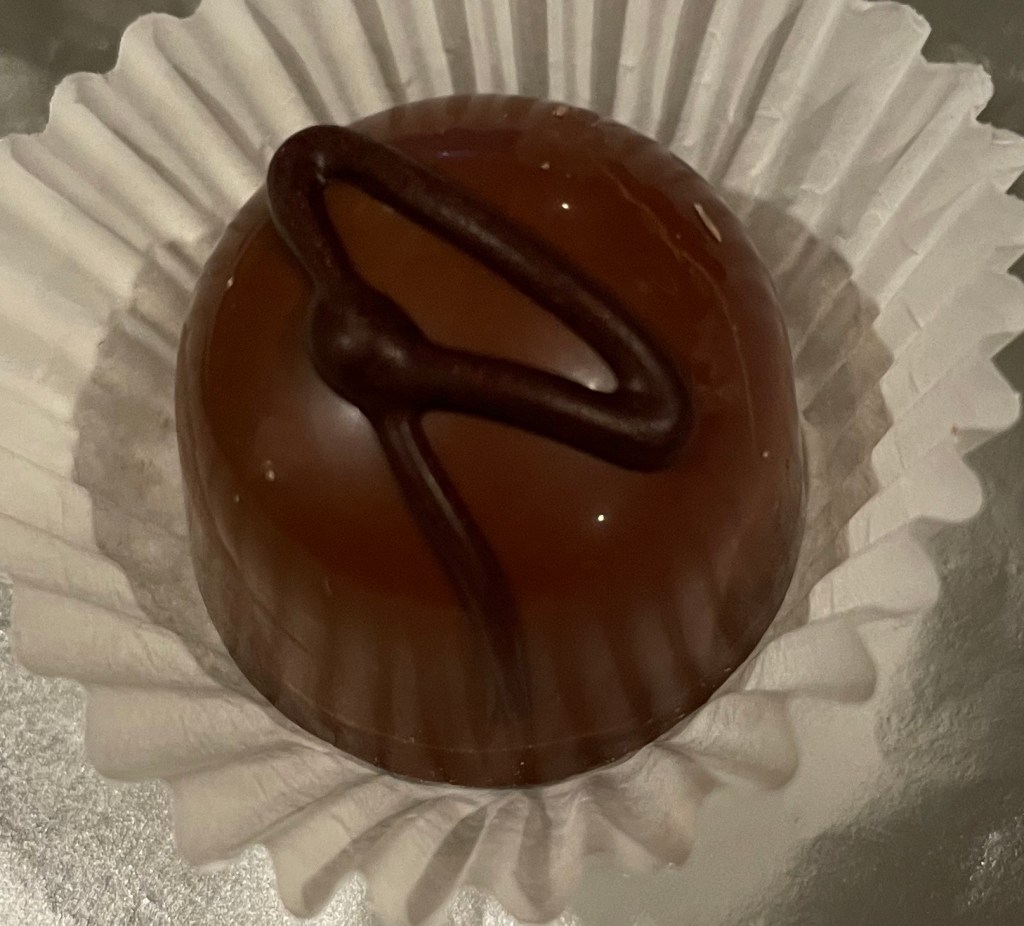
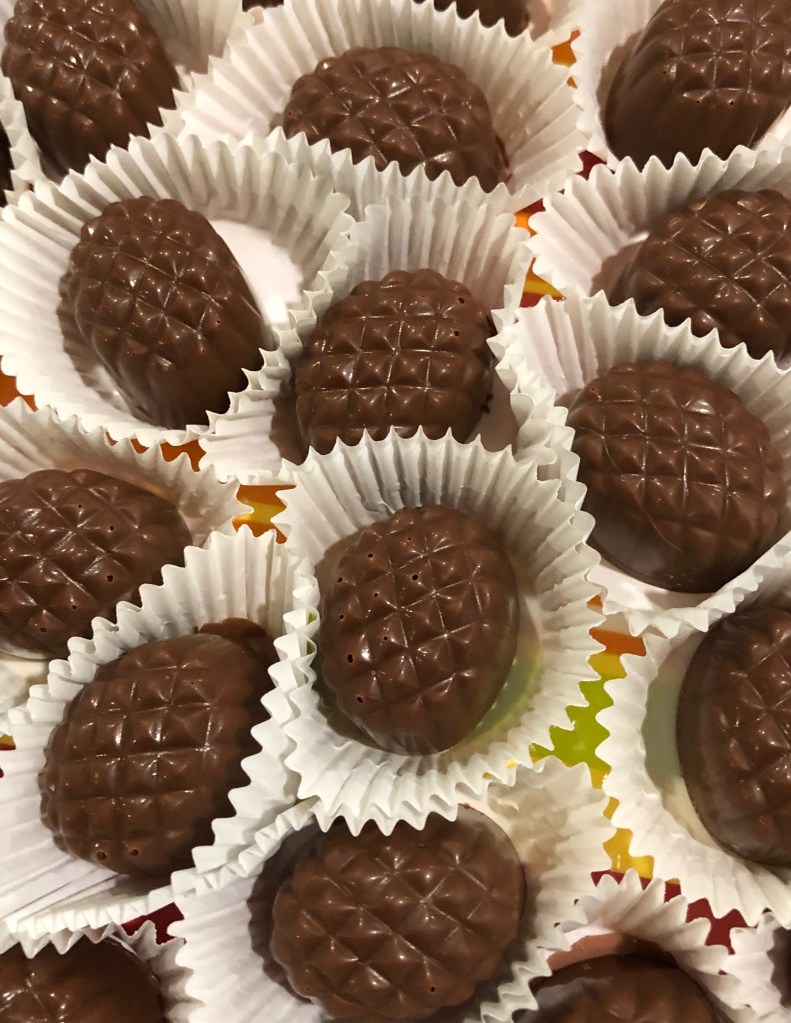
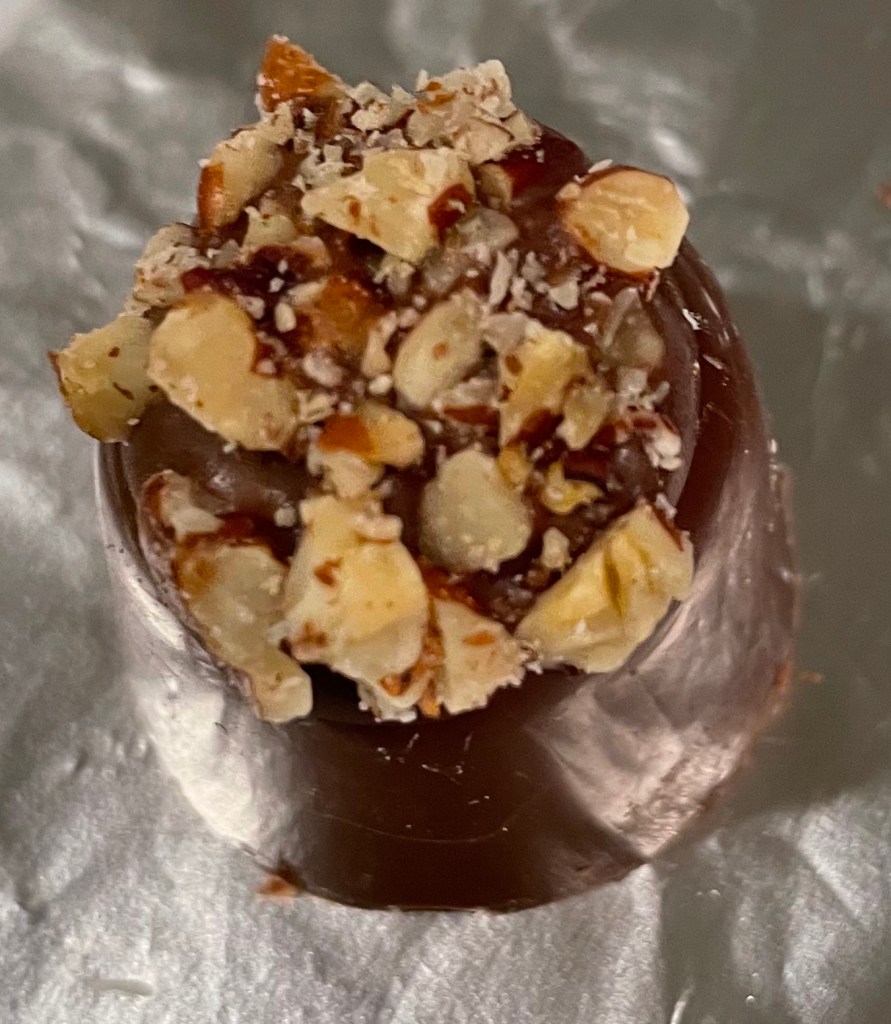
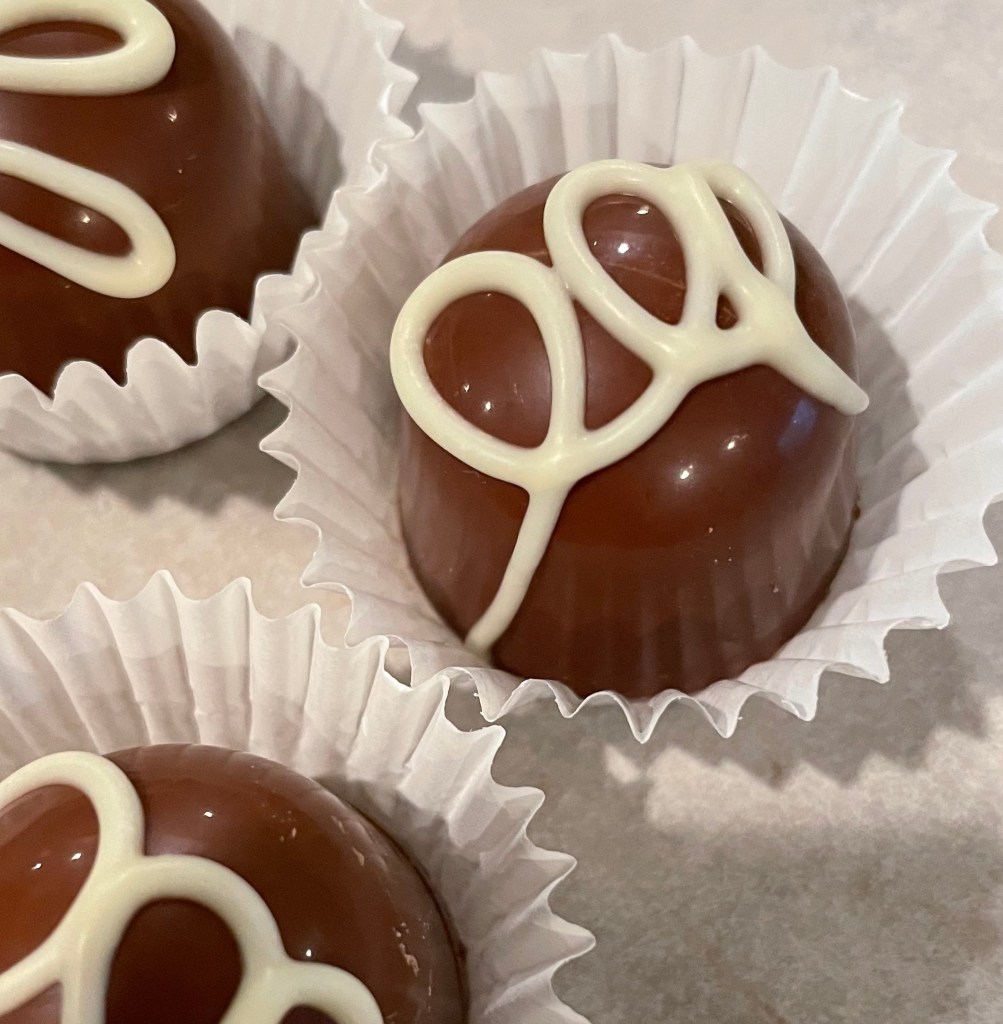
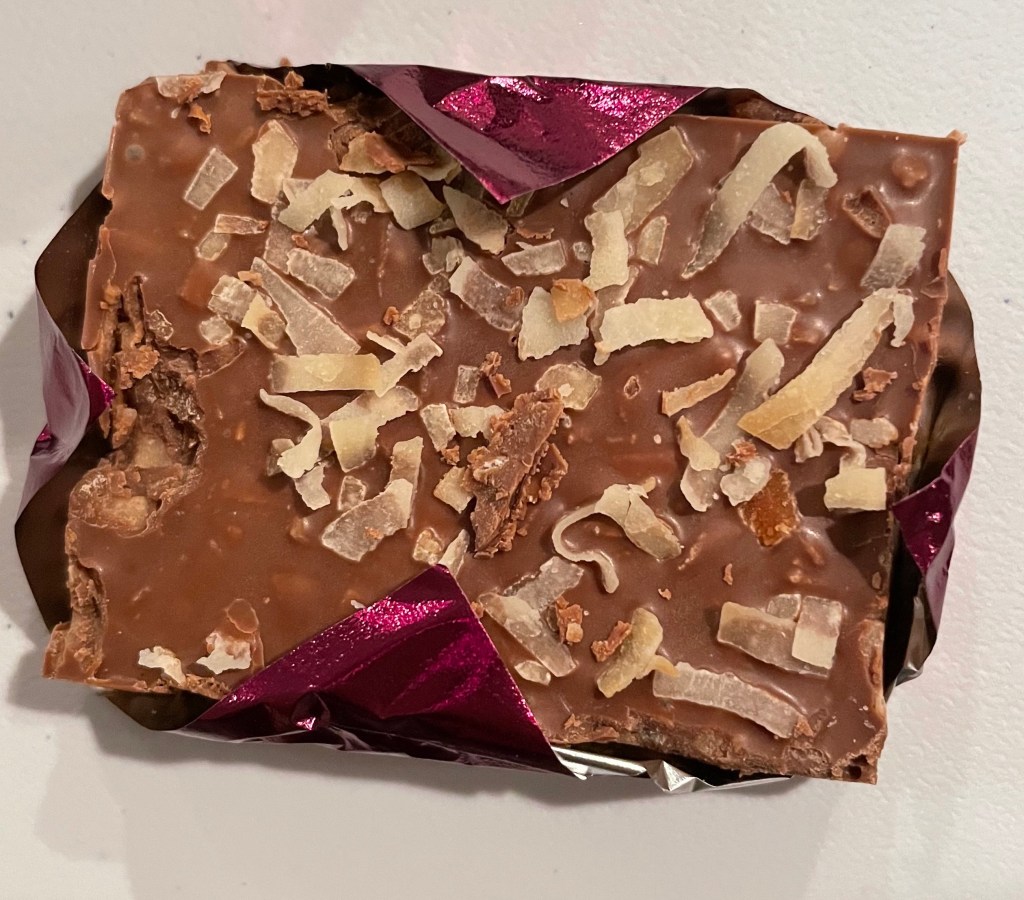
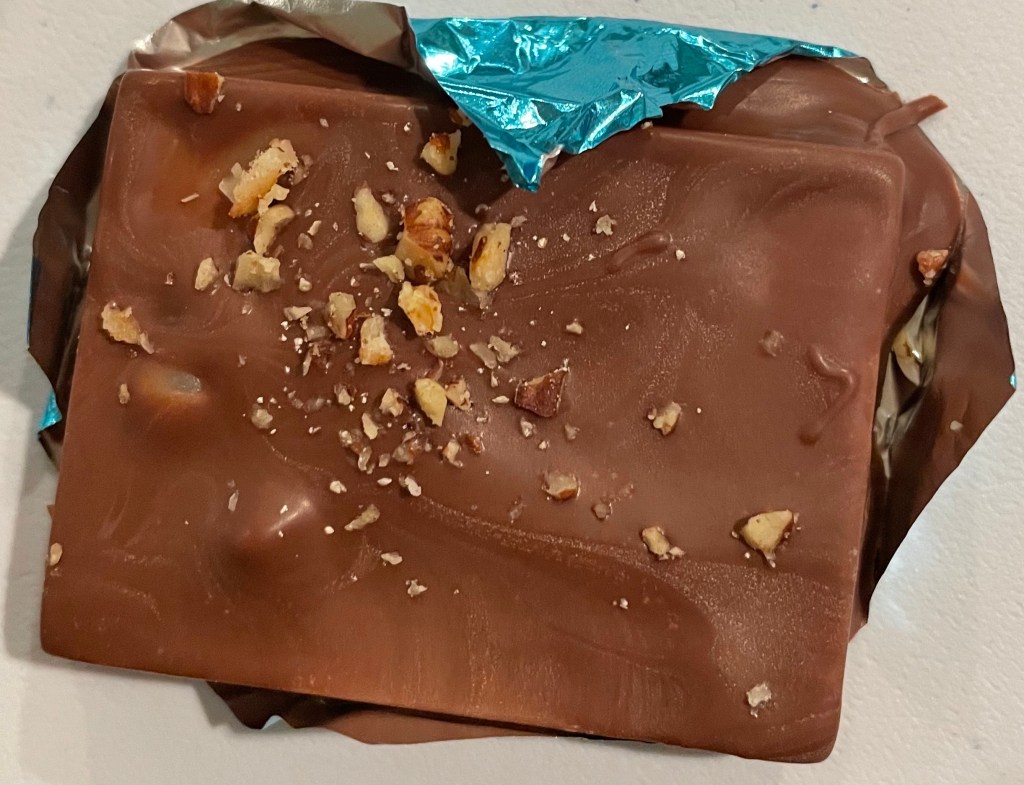
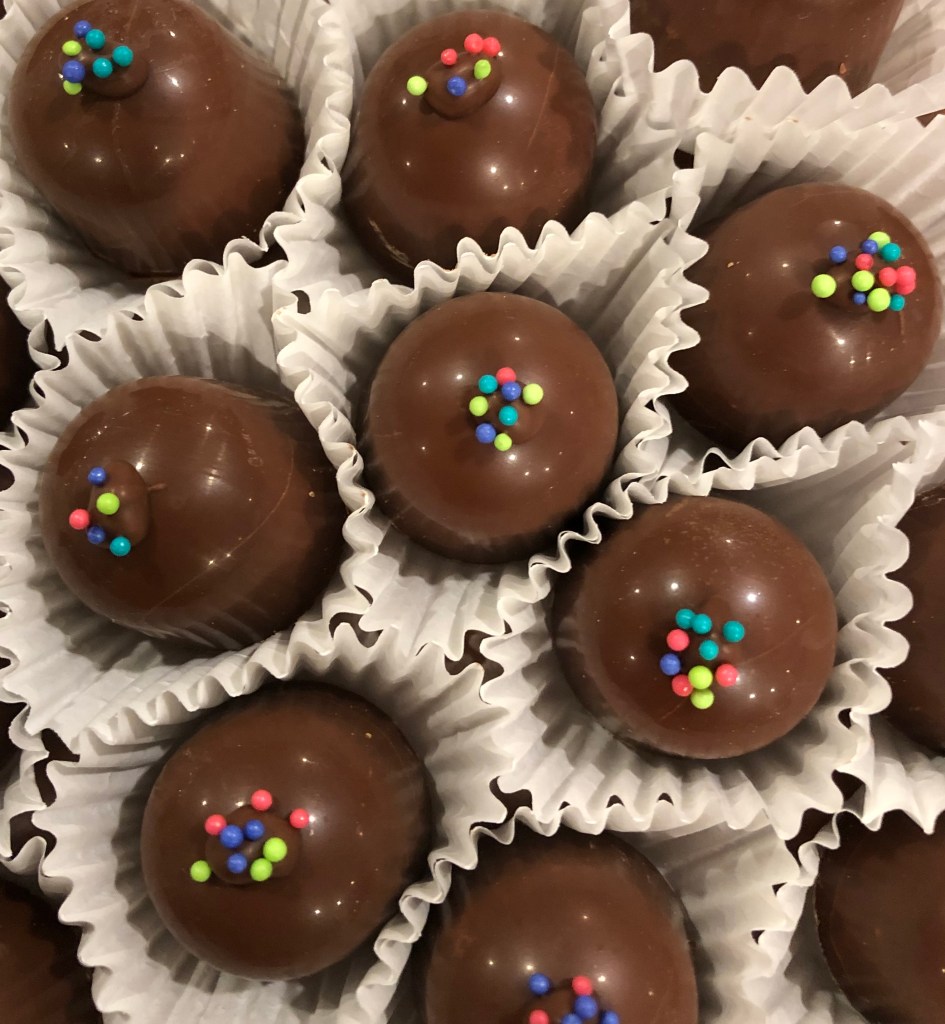
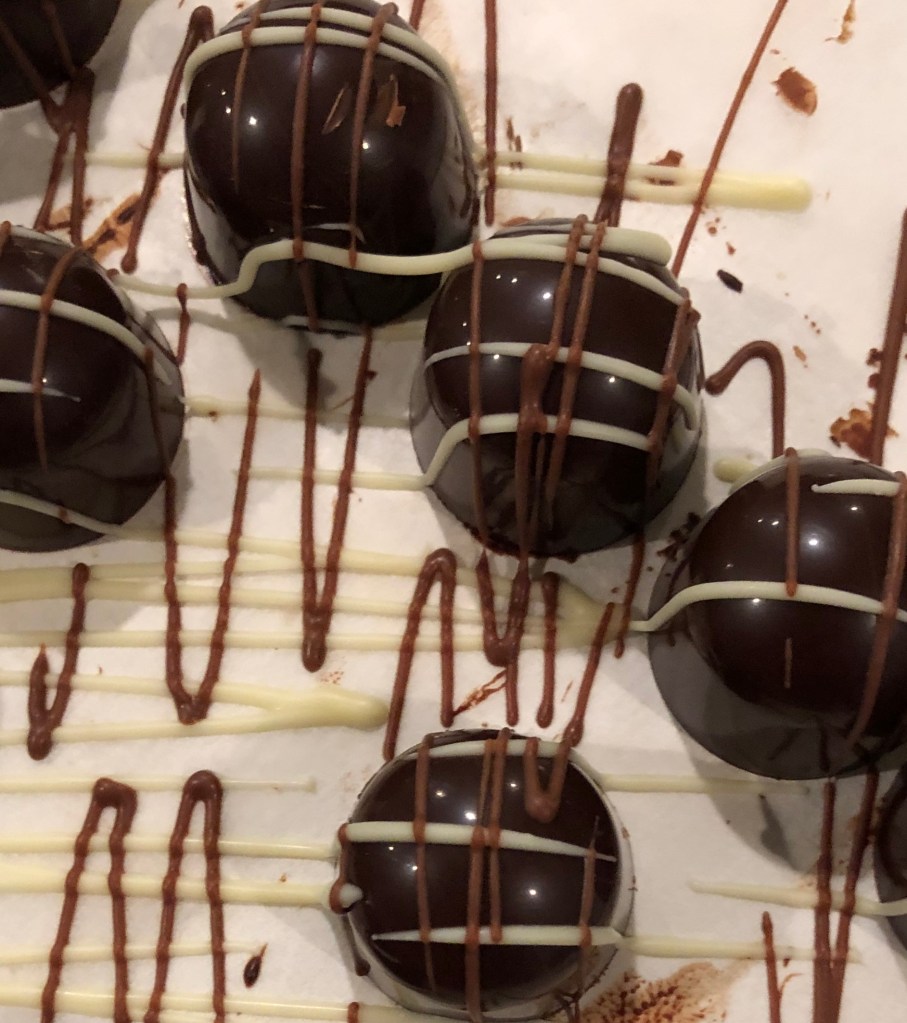
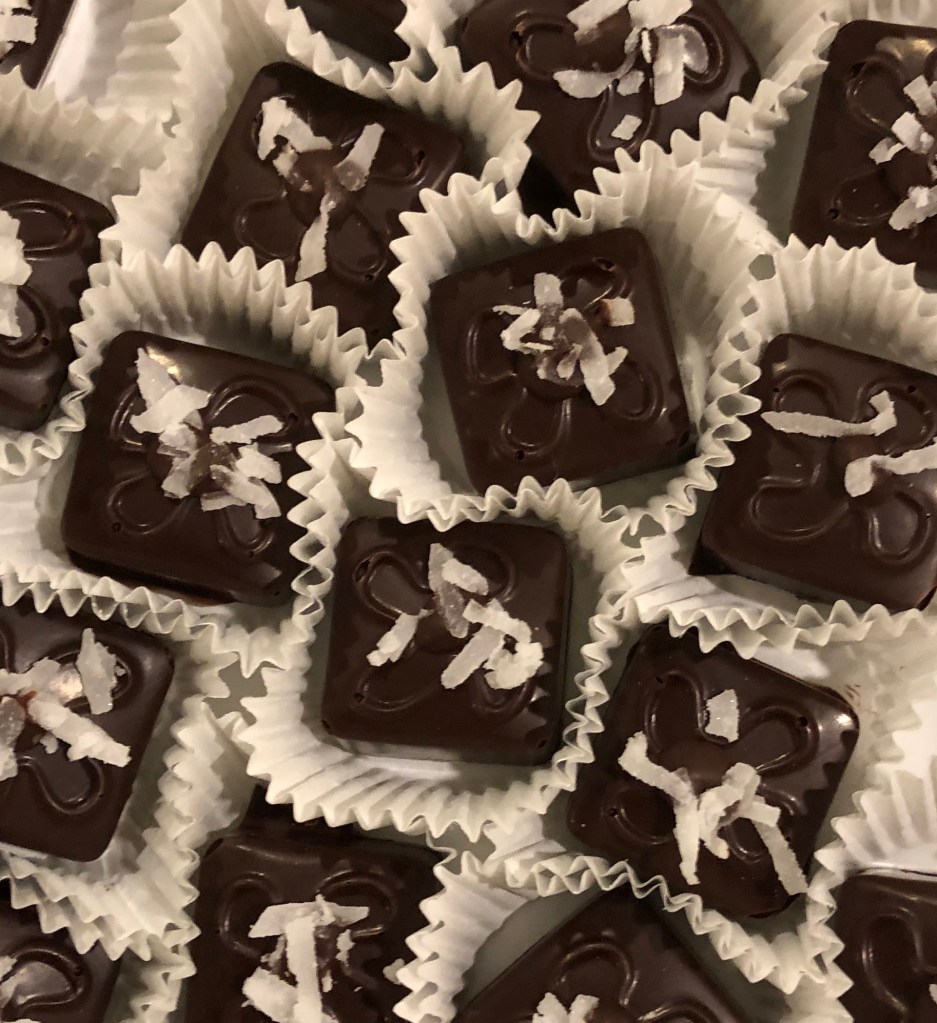
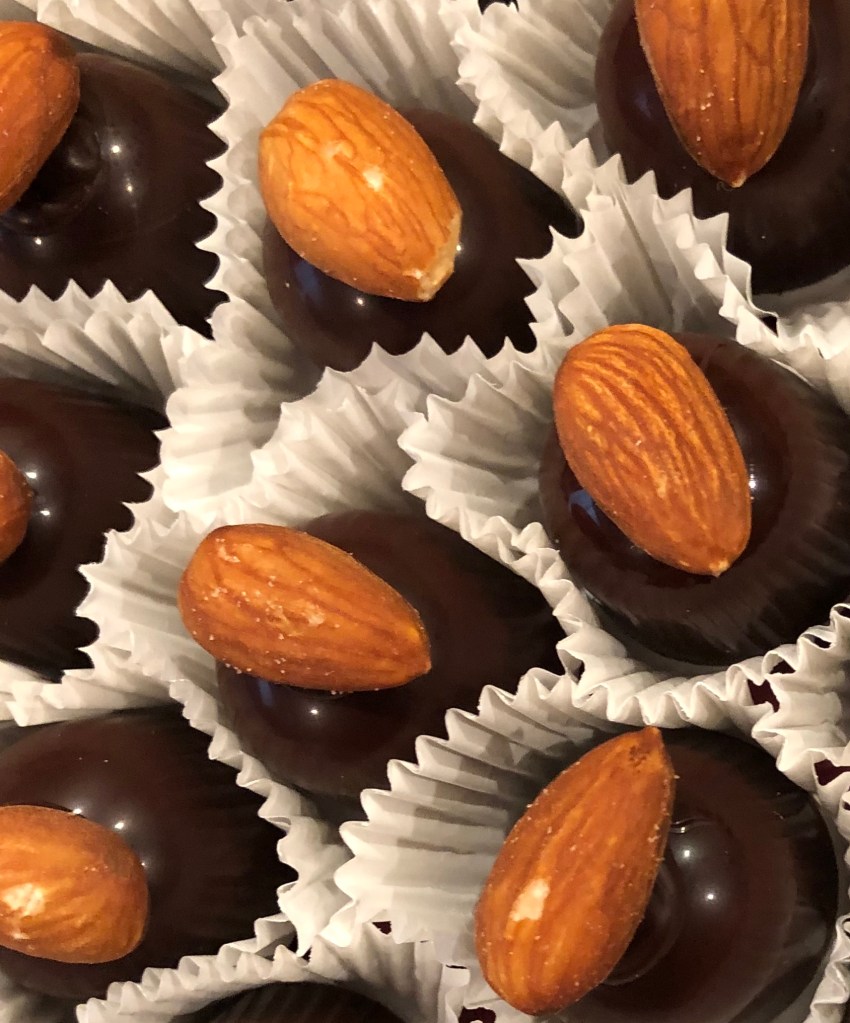
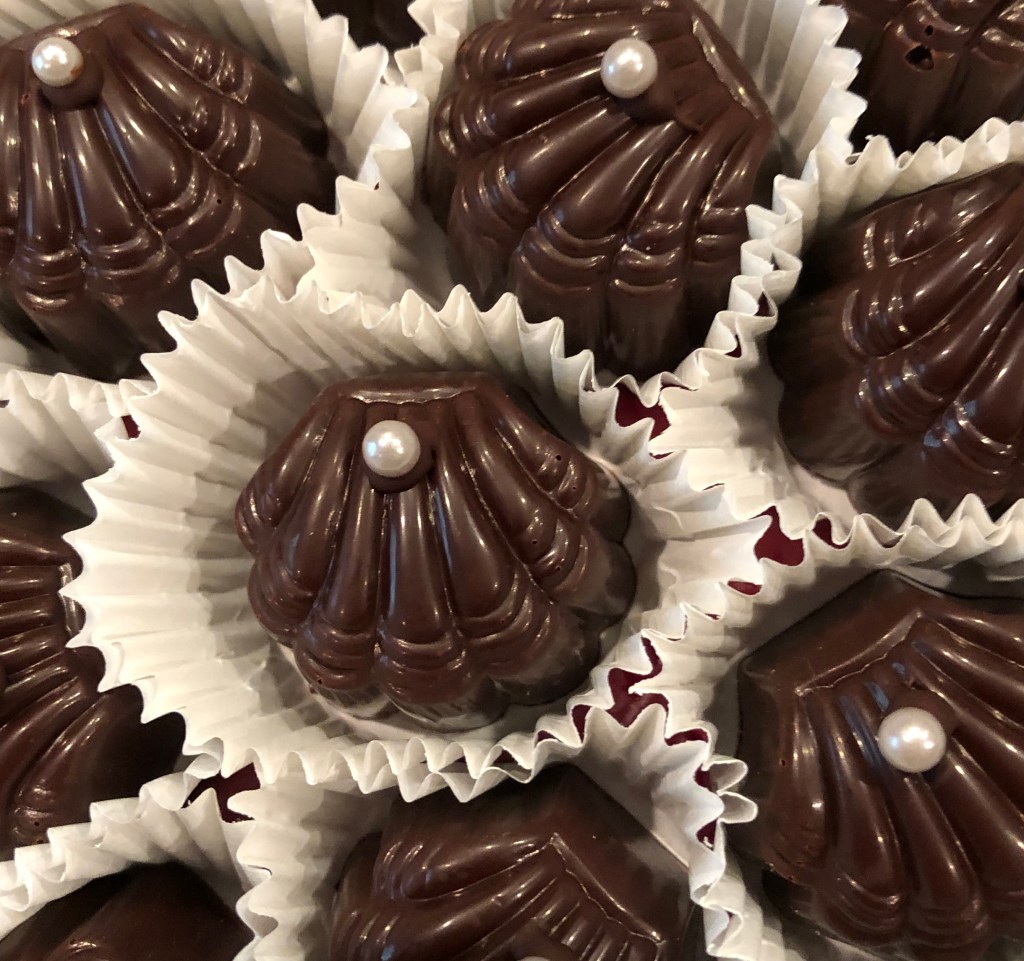
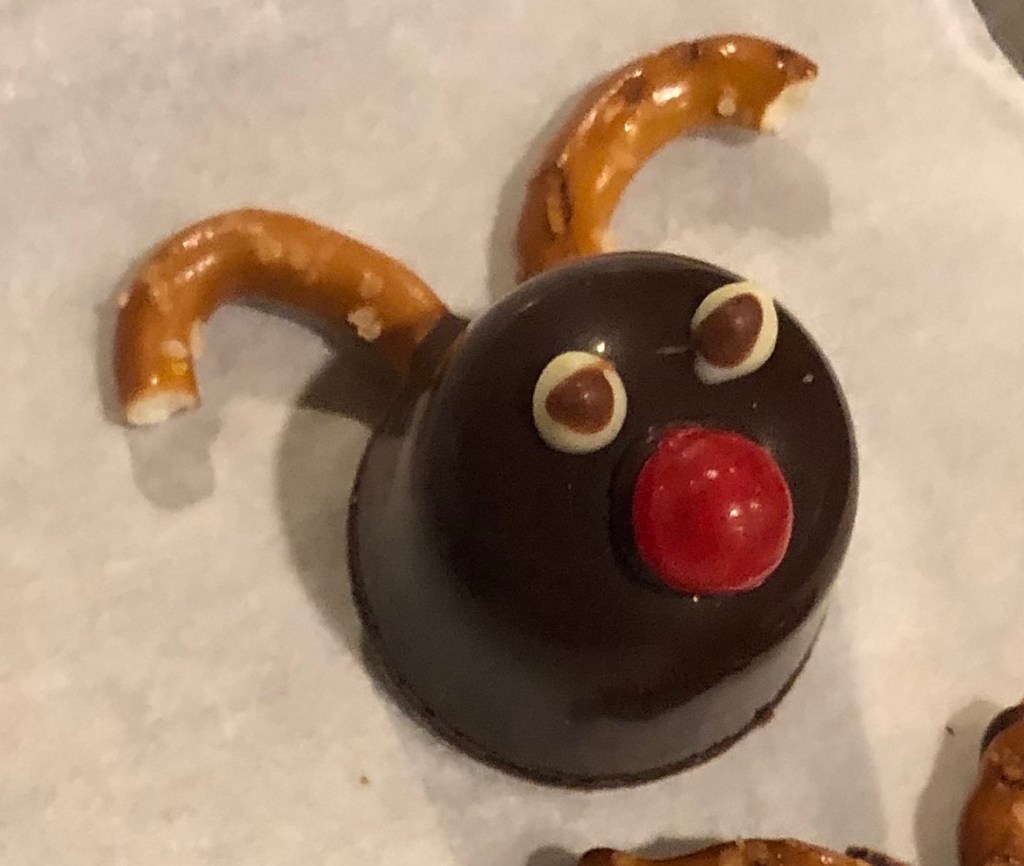
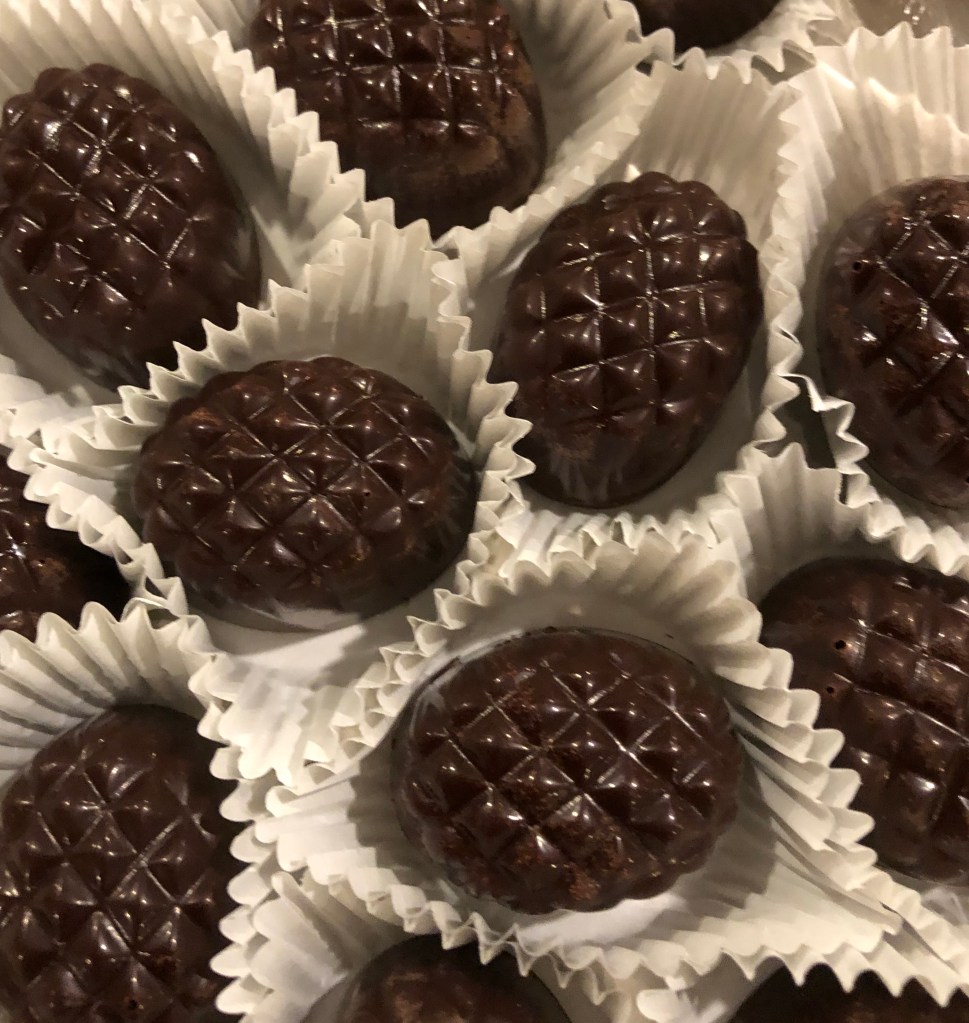
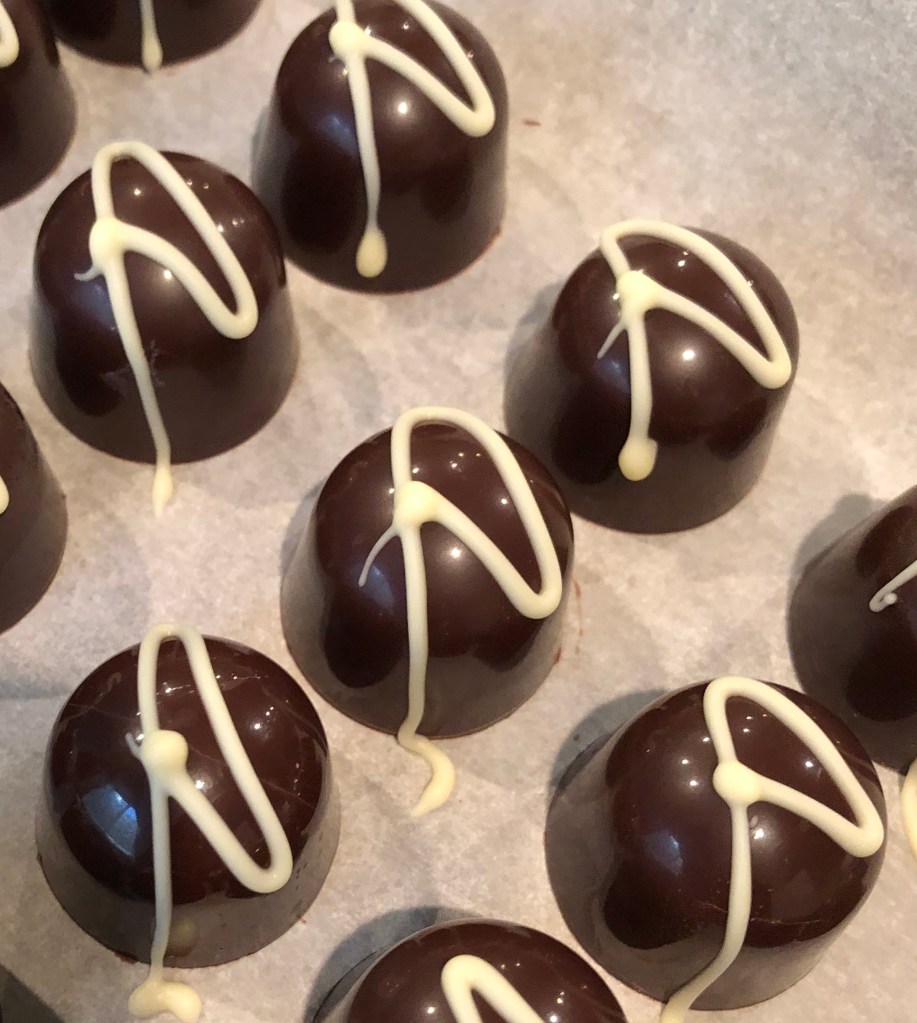
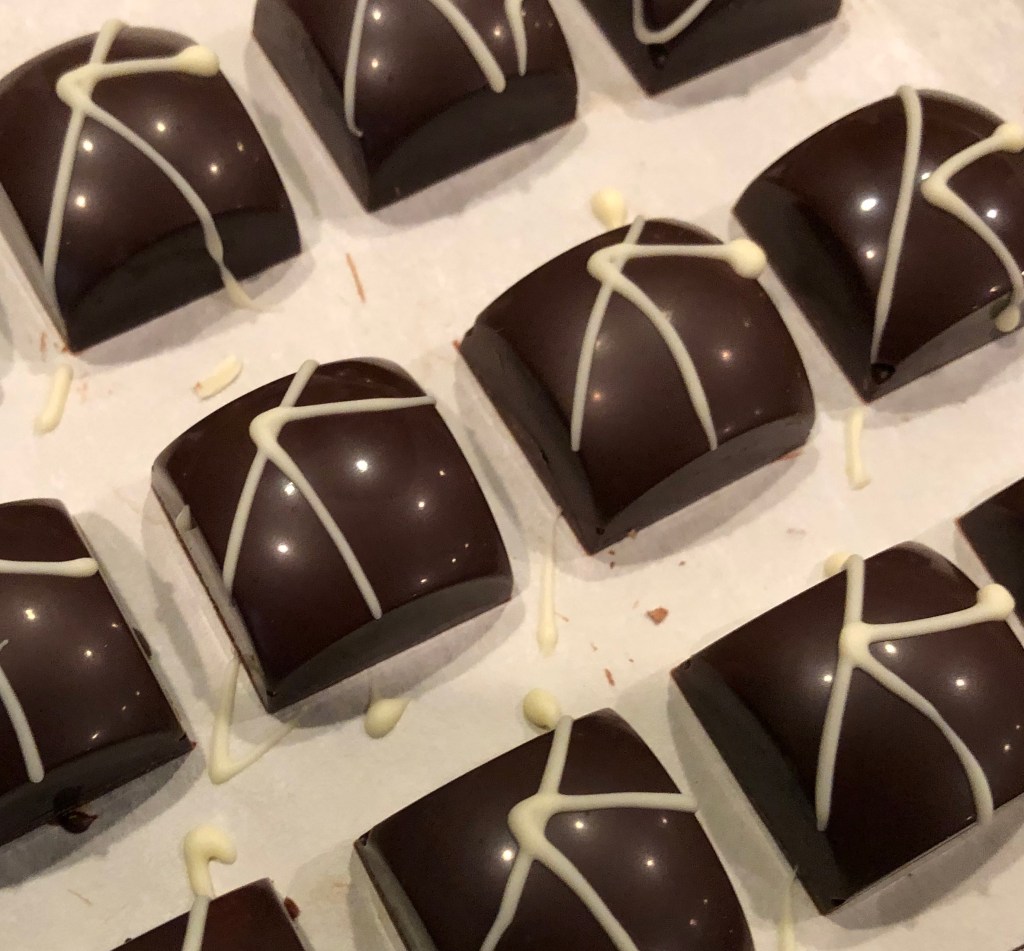
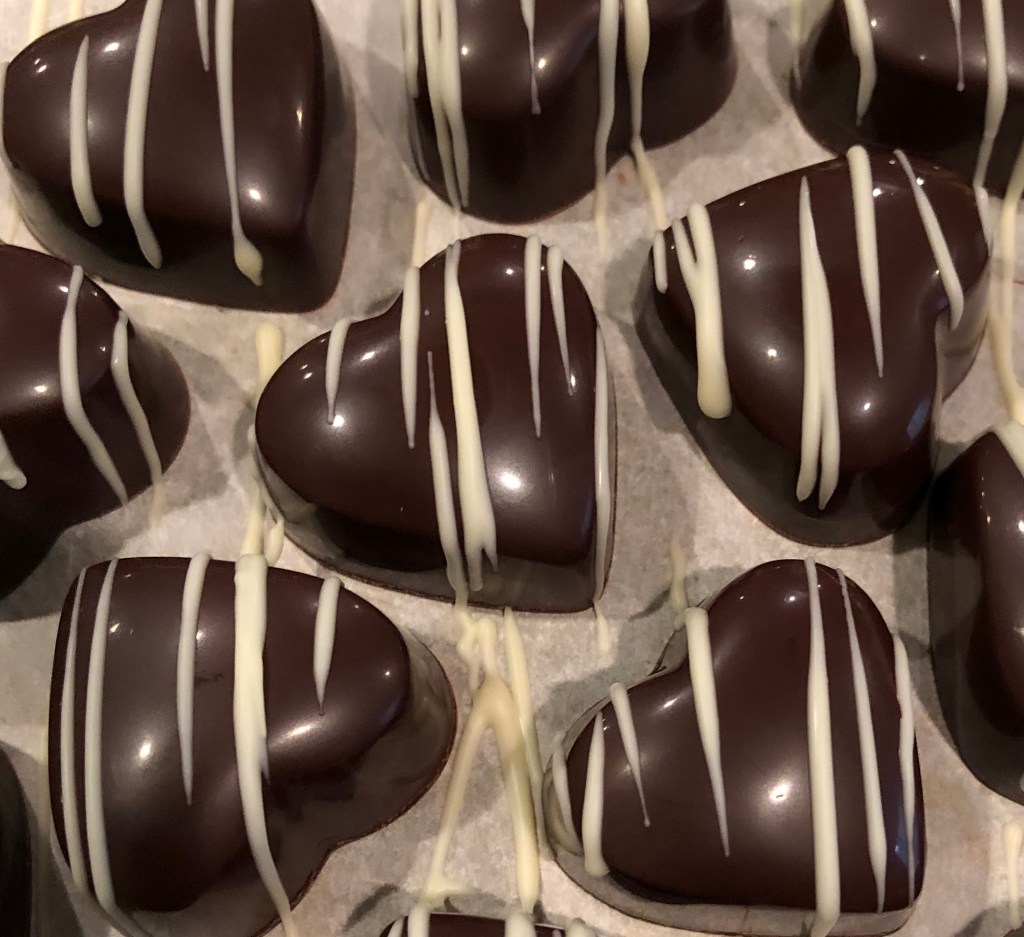
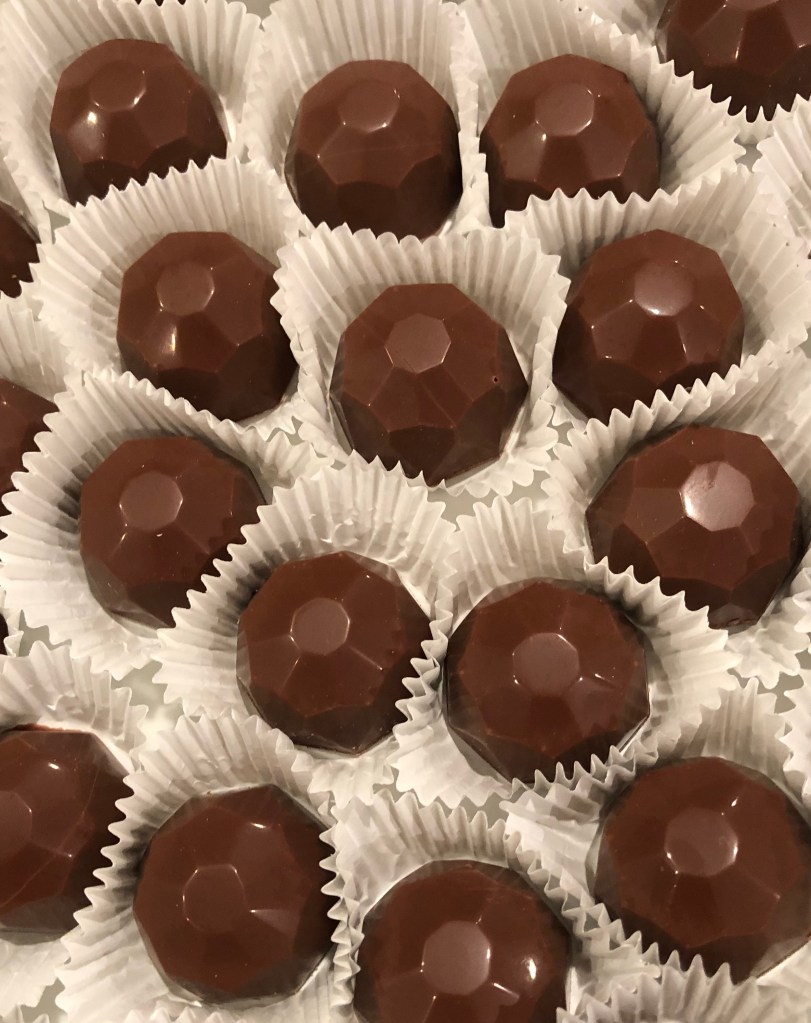
Time Lapse of Truffle Making: working hard in the chocolate kitchen.
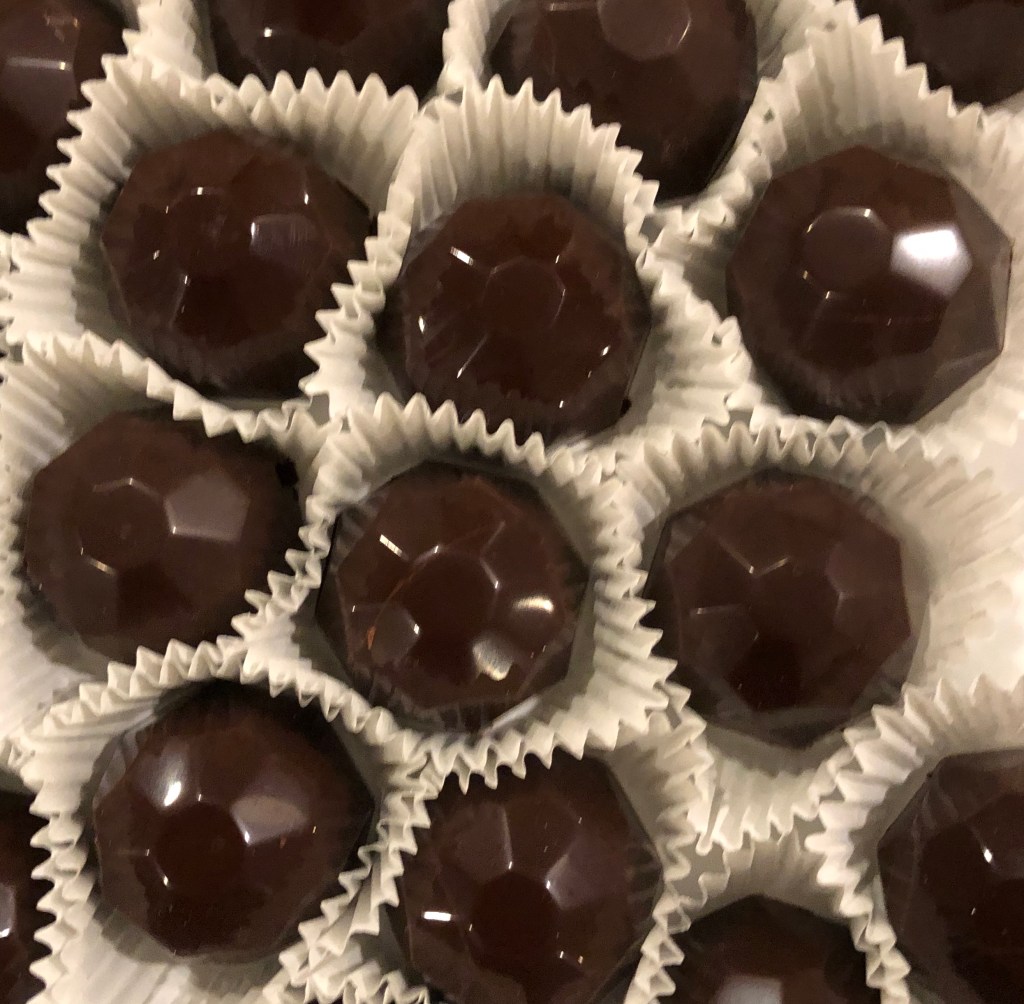
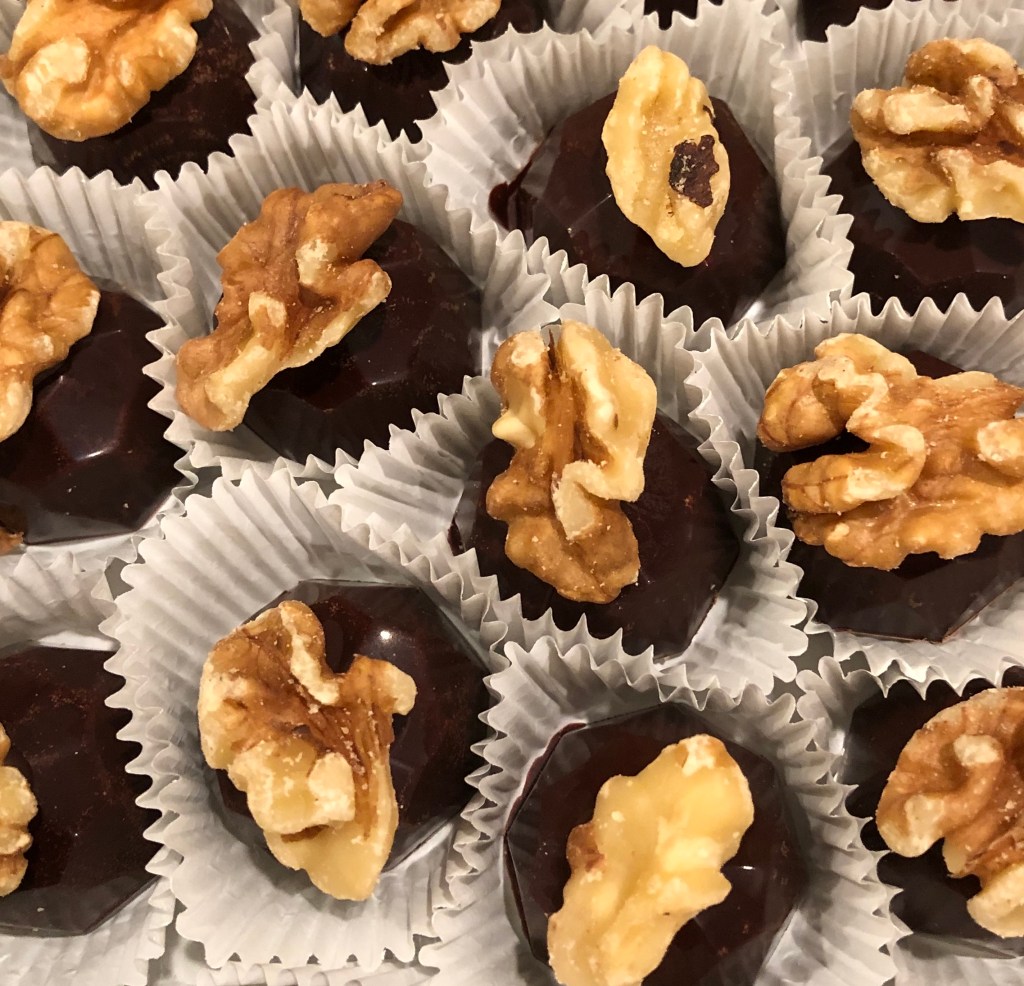
I’ve been hard at work making chocolates, knitting Christmas gifts, and working on end of semester activities. I will be back soon to debut the 2019 flavors list and photos.
Since I learn best by visuals, I like to use charts when I knit. Charts help me identify patterns quickly and that allows me to knit without referencing the pattern as often. Another advantage to using charts is that I can identify mistakes more quickly, because I have a visual reference for how the stitches in the current row are stacking up on the previous rows. Identifying mistakes earlier makes fixing them easier.
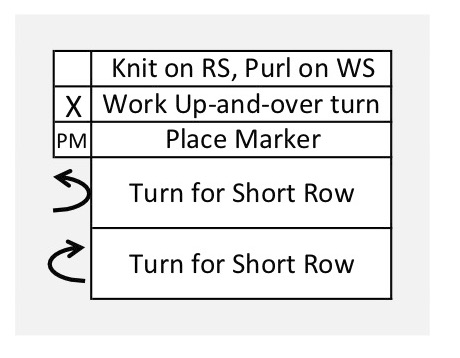
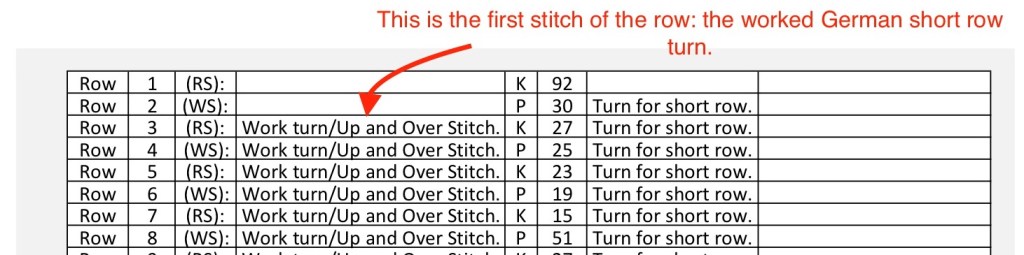
The charts for the Chocolate Cascade Cowl show all the rows, that is, both right side (knitted, odd-numbered) and wrong side (purled, even-numbered) rows. The right side rows are read from right to left (<——). The wrong side rows are read from left to right (——->). Each blank square in the chart represents a stitch (knit on right side, purl on wrong side). I used German short rows for this project, so the German turned stitch is marked with and X in the chart. I used an X to represent this stitch because if you look at the top of the worked stitch, it looks like an interconnected X or two upside-down Vs. Curved arrows on the chart show where to turn the work.
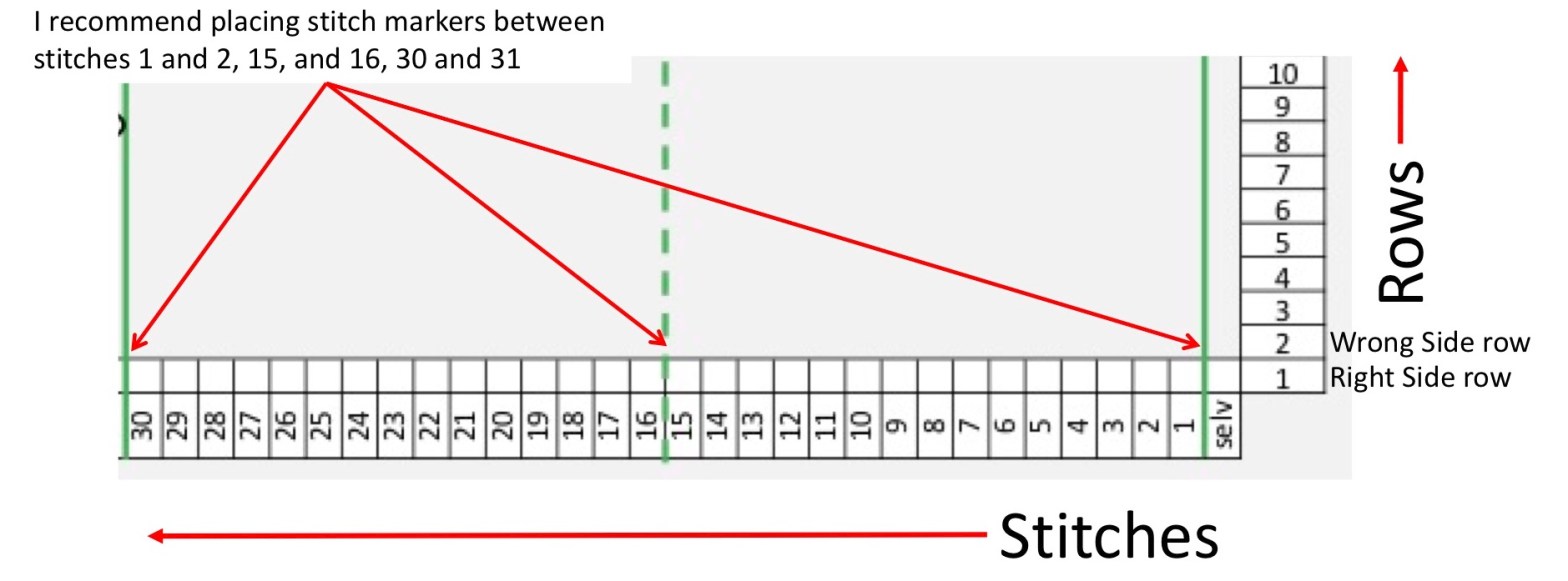
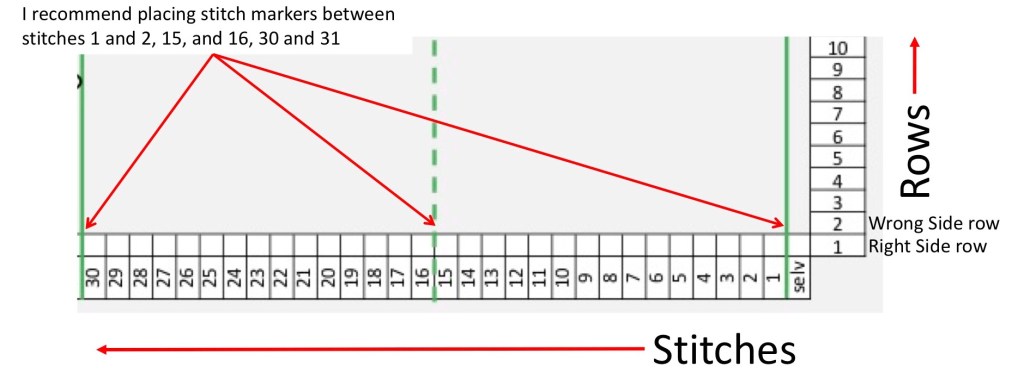
In each of the charts, the stitches are numbered at the bottom and the rows are numbered on the side. There are 90 stitches in the pattern plus two selvedge stitches – one on each side – for a total of 92 stitches across the full row. The figure below shows a portion of Chart 1 – the set up chart. The green lines show the recommended placement of stitch markers. The stitch markers help you to keep track of your place in the row. I highly recommend using them.
Figure 2. Stitches and rows are numbered on the bottom and sides, respectively.
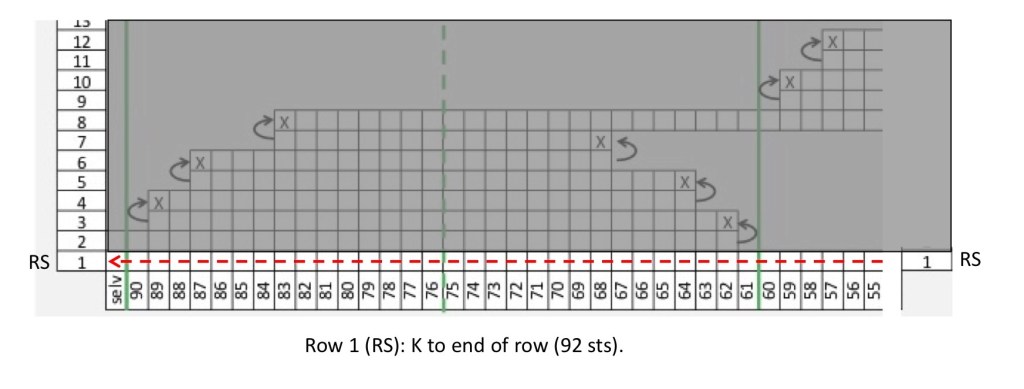
The charts for this pattern look a bit different because they show the short rows (and a lot of empty space) since not every row has 92 stitches. In fact, in the chart shown in Figure 2 above, only row 1 has stitches shown in it in this small section of the chart. Figures 3.1-3.4 below show how the turns and short row stitches are represented in the charts.
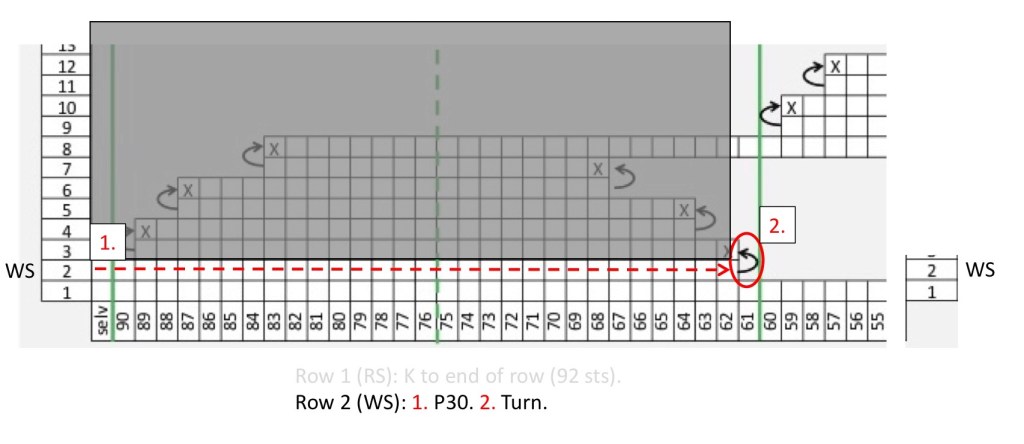
Figure 3.1. A portion of Chart 1, showing stitches 55-90 + selvedge stitch, rows 1-12, and the turns. Stitch marker placement is shown by the green lines.Figure 3.2. For row 1, the right side is facing you, knit across all stitches in the row.Figure 3.3. For row 2, the wrong side is facing you. Purl 30 stitches and then turn the work so the right side is facing you.Figure 3.4. For row 3, work the German short row turn by bringing the yarn up and over the right hand needle. Knit 27 stitches and turn the work for the next short row.
In this pattern, I’ve also included row-by-row directions. These are a handy reference to use along with the charts since the number of stitches are given in each short row.
I also like to use the stitch markers as a reference for where to turn. I find it easier to count 1, 3, or 7 stitches from the stitch markers rather than 27, 25, and 23 worked stitches. For example, in the chart below for row 2, I would work up to one stitch before the third stitch marker and turn. Row 3 work up to one stitch before the last stitch marker and turn. Row 4: work up to 3 stitches before the third stitch marker, turn… continuing to use the stitch markers as my reference points.
Once you have worked through the first chart, the second, third, and fourth charts are set up the same way. The pattern is the same, but offset, for charts 2 and 3, so there is a lot of repetition. It’s a great way to practice those short rows!
The Chocolate Cascade Cowl pattern begins with a provisional cast on, which is also known as a crochet cast on. For the provisional cast on you will need:
contrasting color waste yarn, preferably a light color to make it easy to see.
knitting needle
similarly-sized crochet hook (similar in size to the knitting needle)**
**If you don’t have a similarly-sized crochet hook, there is an alternative method shown below.
Since you will be removing the waste yarn when you are grafting the ends together, I suggest beginning and ending the cast on with several chain stitches (videos below, parts 1 and 3). This allows you to easily grab onto onto the waste yarn when it is time to unravel it. This is optional, of course. You can begin with a single slip stitch. The movements of the cast on are showed in the part 2 video below.
For the cowl, I’ve cast on 92 stitches with my contrast color waste yarn (tan), and then knit across all the stitches with my first color (white).
I’ve used a light-colored contrast waste yarn for the provisional cast on for this Chocolate Cascade Cowl. My first row of knitted stitches is in white yarn.
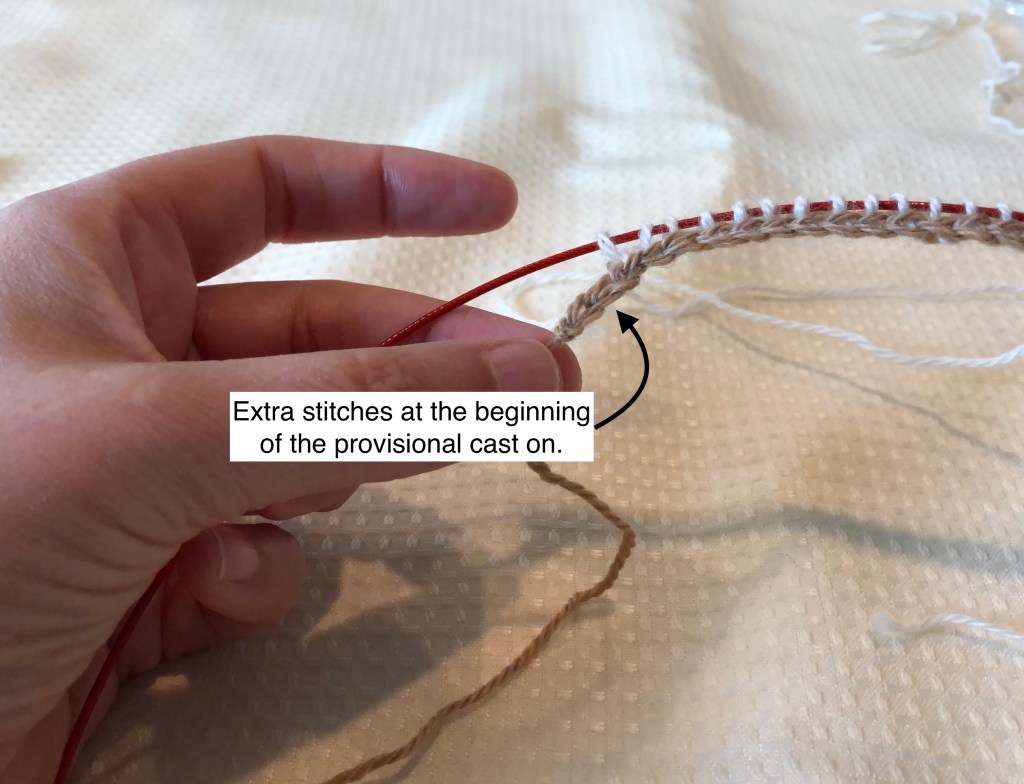
The end of the provisional cast on has extra chain stitches so that I can easily unravel when I’m finished knitting.
**Alternative Method for the Provisional Cast On
If you don’t have a crochet hook handy, there’s an alternative method for this cast on that uses only knitting needles. I begin the same way, with a few chain stitches. Place the last loop of the chain stitches on the right-hand needle.
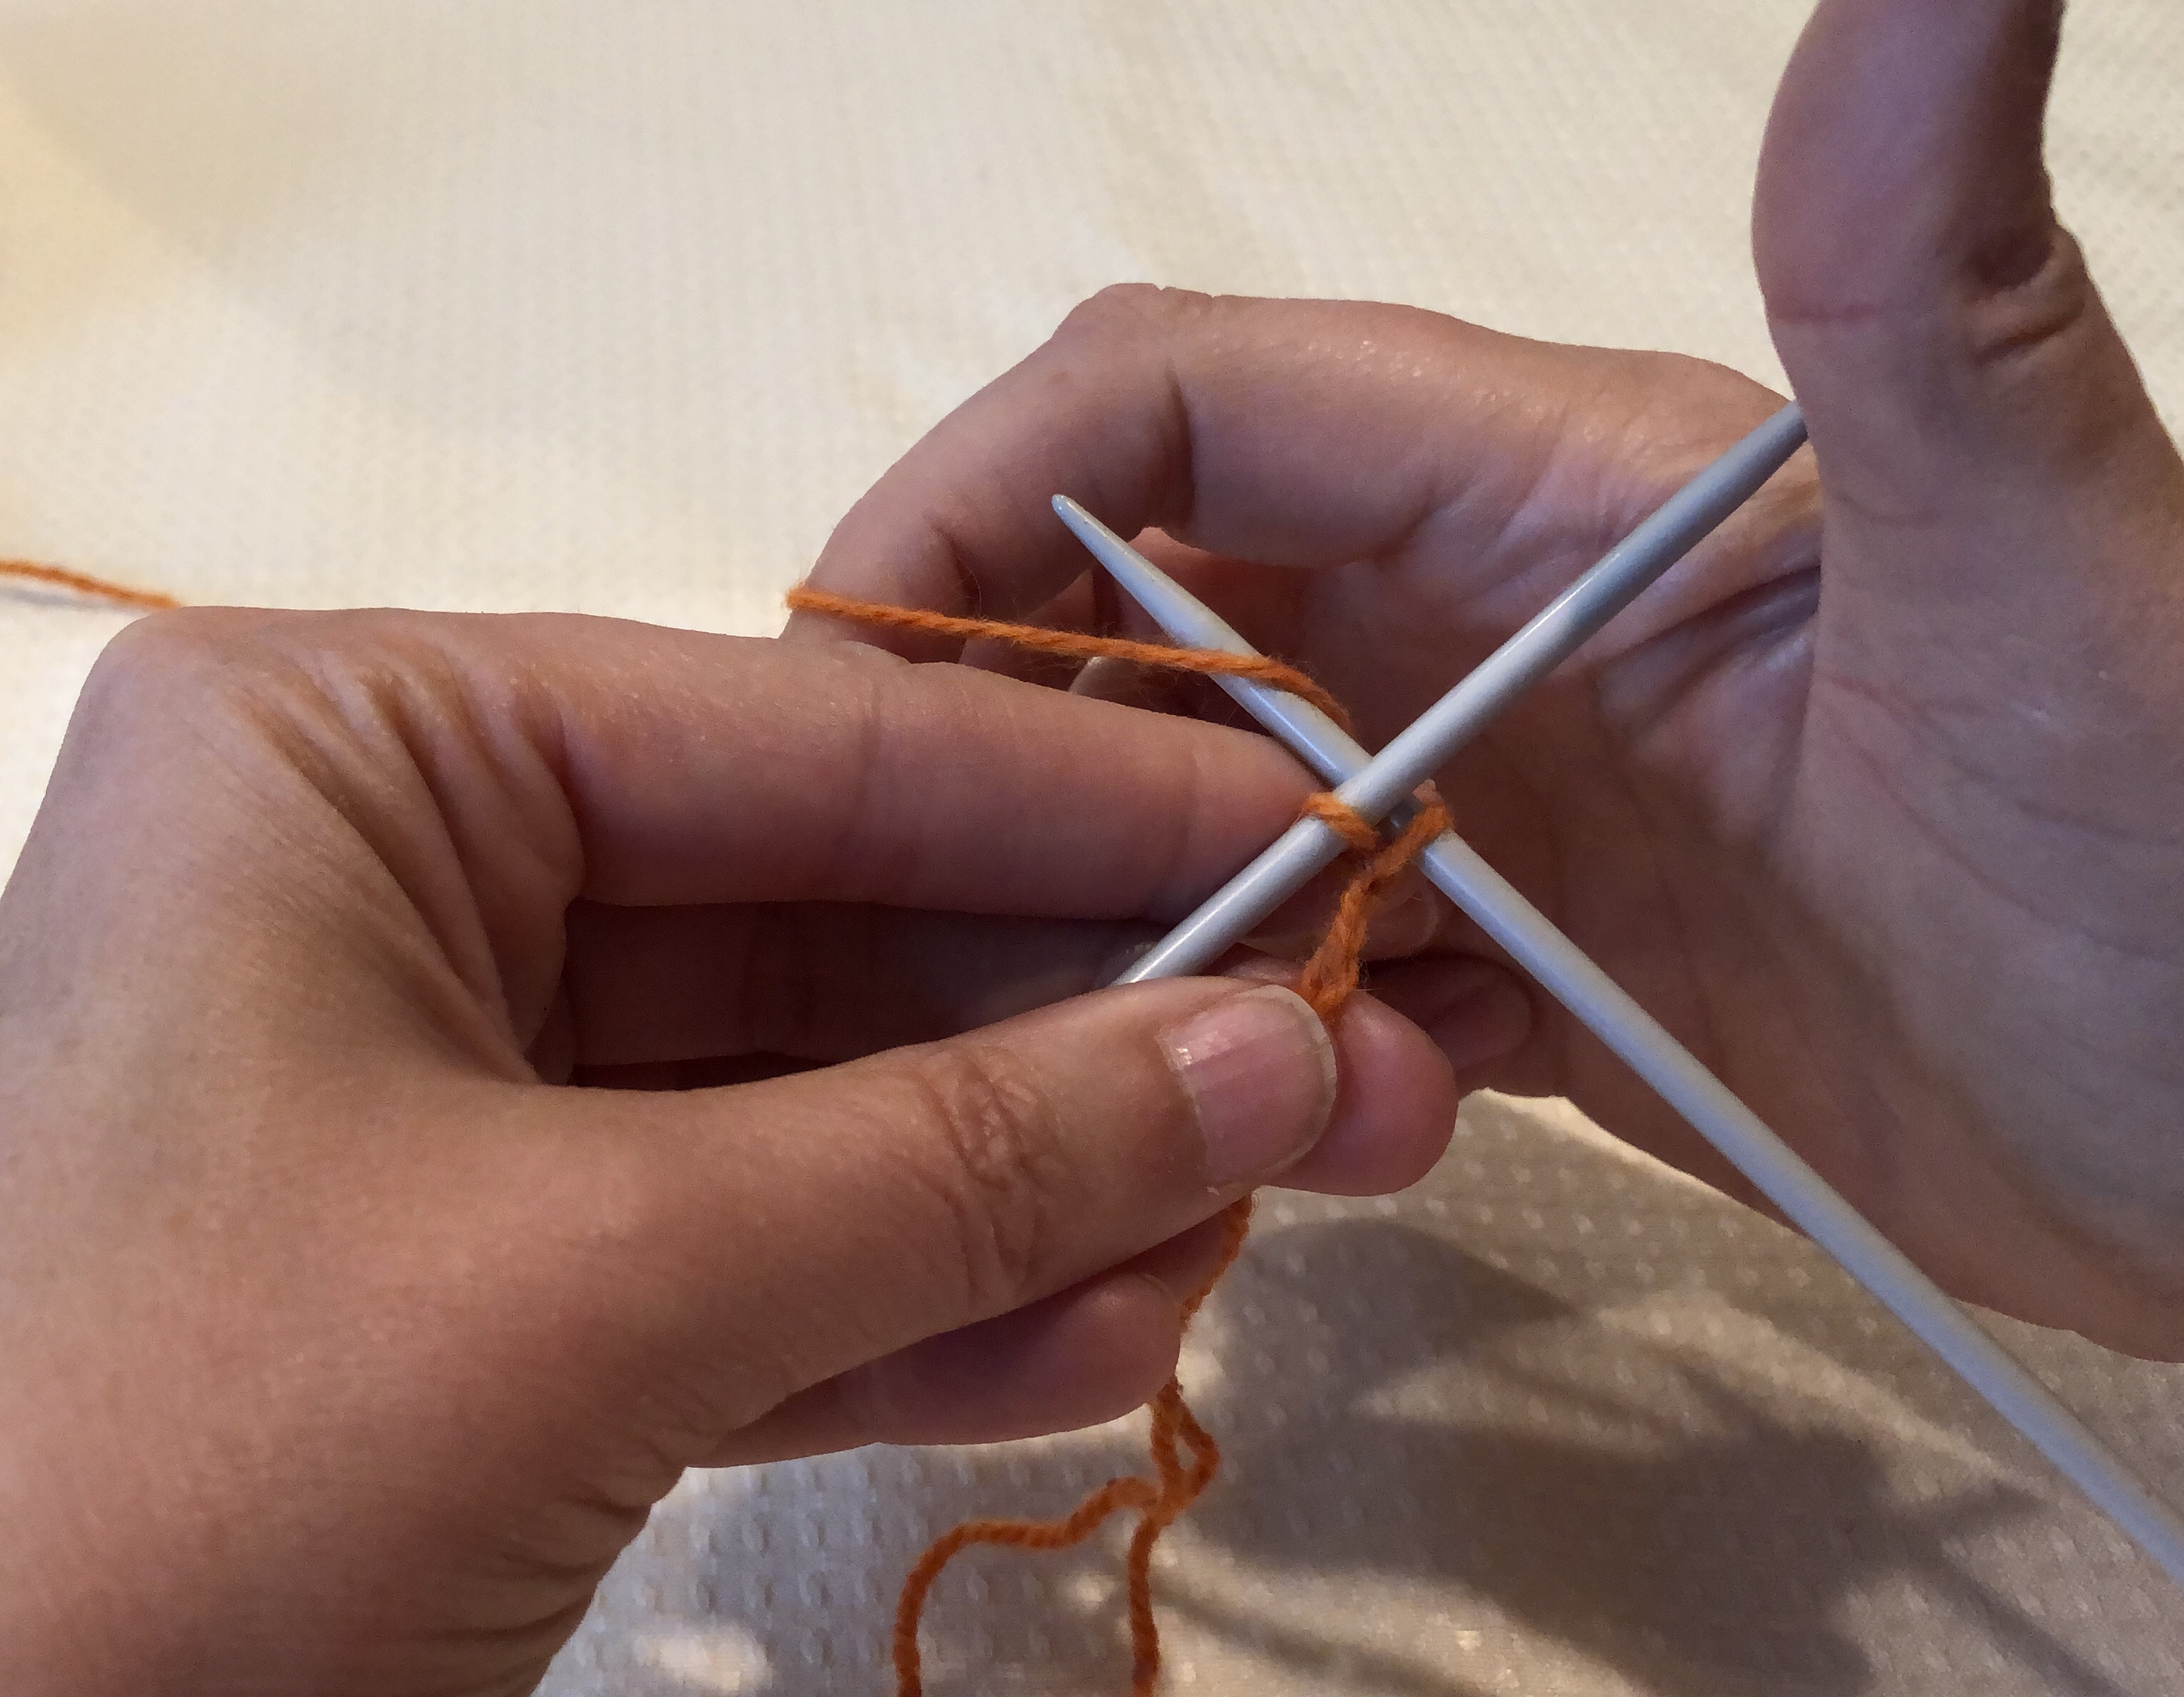
Next, hold the needles crossed, with the left needle over the right needle.
Bring the yarn from the back around to the front (counter-clockwise) around the left-hand needle and to the back, between the two needles.
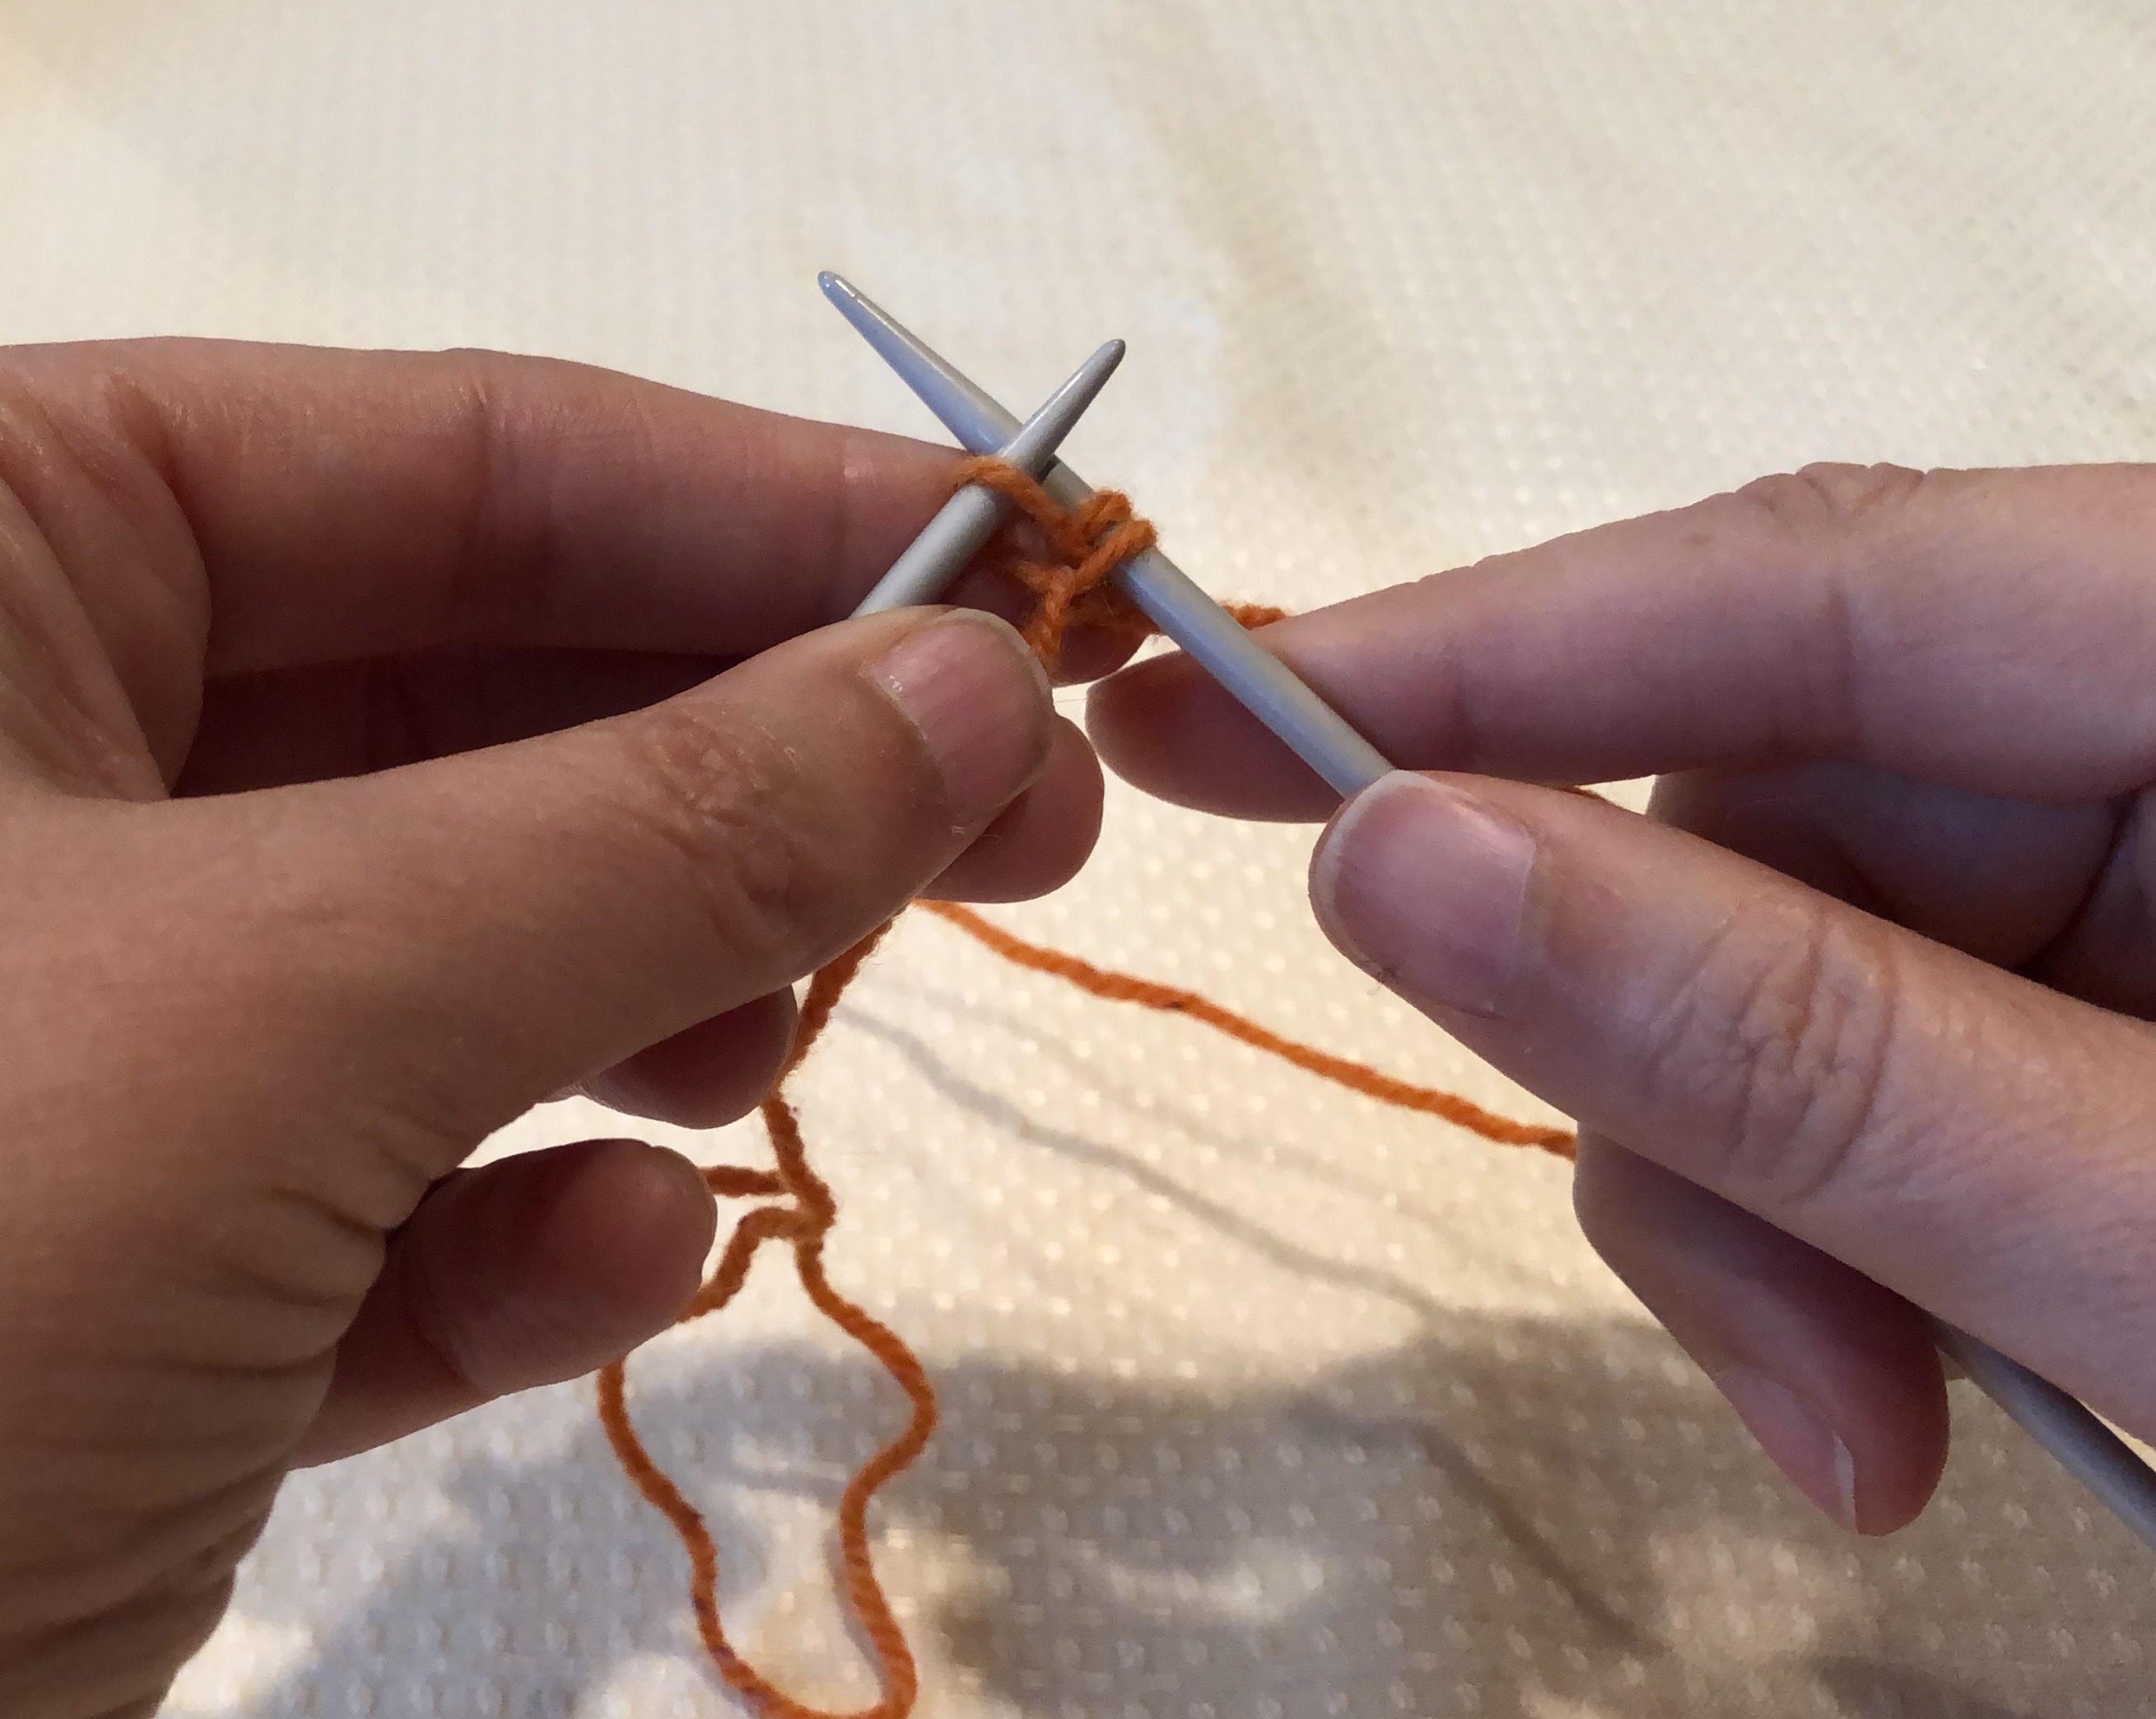
Continue wrapping the yarn all the way around the right-hand needle (clockwise). You will now have one loop (stitch) on the left-hand needle and two loops on the right-hand needle.
Carefully move the bottom stitch (right-hand needle) over the top stitch and off the needle – this motion is similar to a bind off. The stitch on the left needle is the first cast on stitch.
Removing the Provisional Cast On
Once you have finished the knitting, you will remove the provisional cast on stitches. Below is a video showing how to remove the cast on stitches.
I’m looking for test knitters for this new chocolate-inspired pattern. If you are interested in helping me fine tune and proof-read the pattern and charts, I will send you the final version of the pattern (free), a coupon code for another free pattern (from my self-published patterns), and chocolate truffles (if you want them). My target date for finishing and publishing the pattern is January 2020.
Techniques Required:
provisional cast on
short rows
reading charts (there are also row-by-row directions)
Kitchener Stitch/grafting
blocking
seaming
I will have tutorials on each of these techniques in up-coming posts.
Materials Required:
a total of 780 yards of fingering weight yarn, in multiple colors. I used: 130 yards ecru, 130 yards of light fawn, 130 yards of rose gray, 130 yards of dark brown, and 260 yards of medium brown alpaca (Der Bauernhof Farms) for the color scheme above, but you can use any color combination that you like. Each section of scallops requires about 25 yards of yarn, so this could be a stash-buster.
US 4/3.5 mm needles.
stitch markers
Gauge
22 sts x 32 rows in a 4 x 4 inches swatch. Slight variation in gauge will affect the width and length of the cowl, but are not critical to the finished fit or appearance of this project.
Expectations
I would like weekly feedback on your progress- updates, and questions by e-mail or Ravelry messages (mbaur).
You should make a project page on Ravelry and link it to the pattern once it is published. If you use the code: TEST-MB-TTRJQJ as your pattern name, Ravelry will automatically link to the finished pattern as soon as it is published.
Feedback on the pattern should be through e-mail or Ravelry messages and not through the public project page.
Once complete, a final photo of the blocked cowl added to your project page.
If you are interested, let me know in the comments and I will send the draft pattern to you by e-mail.
Possible Color Schemes
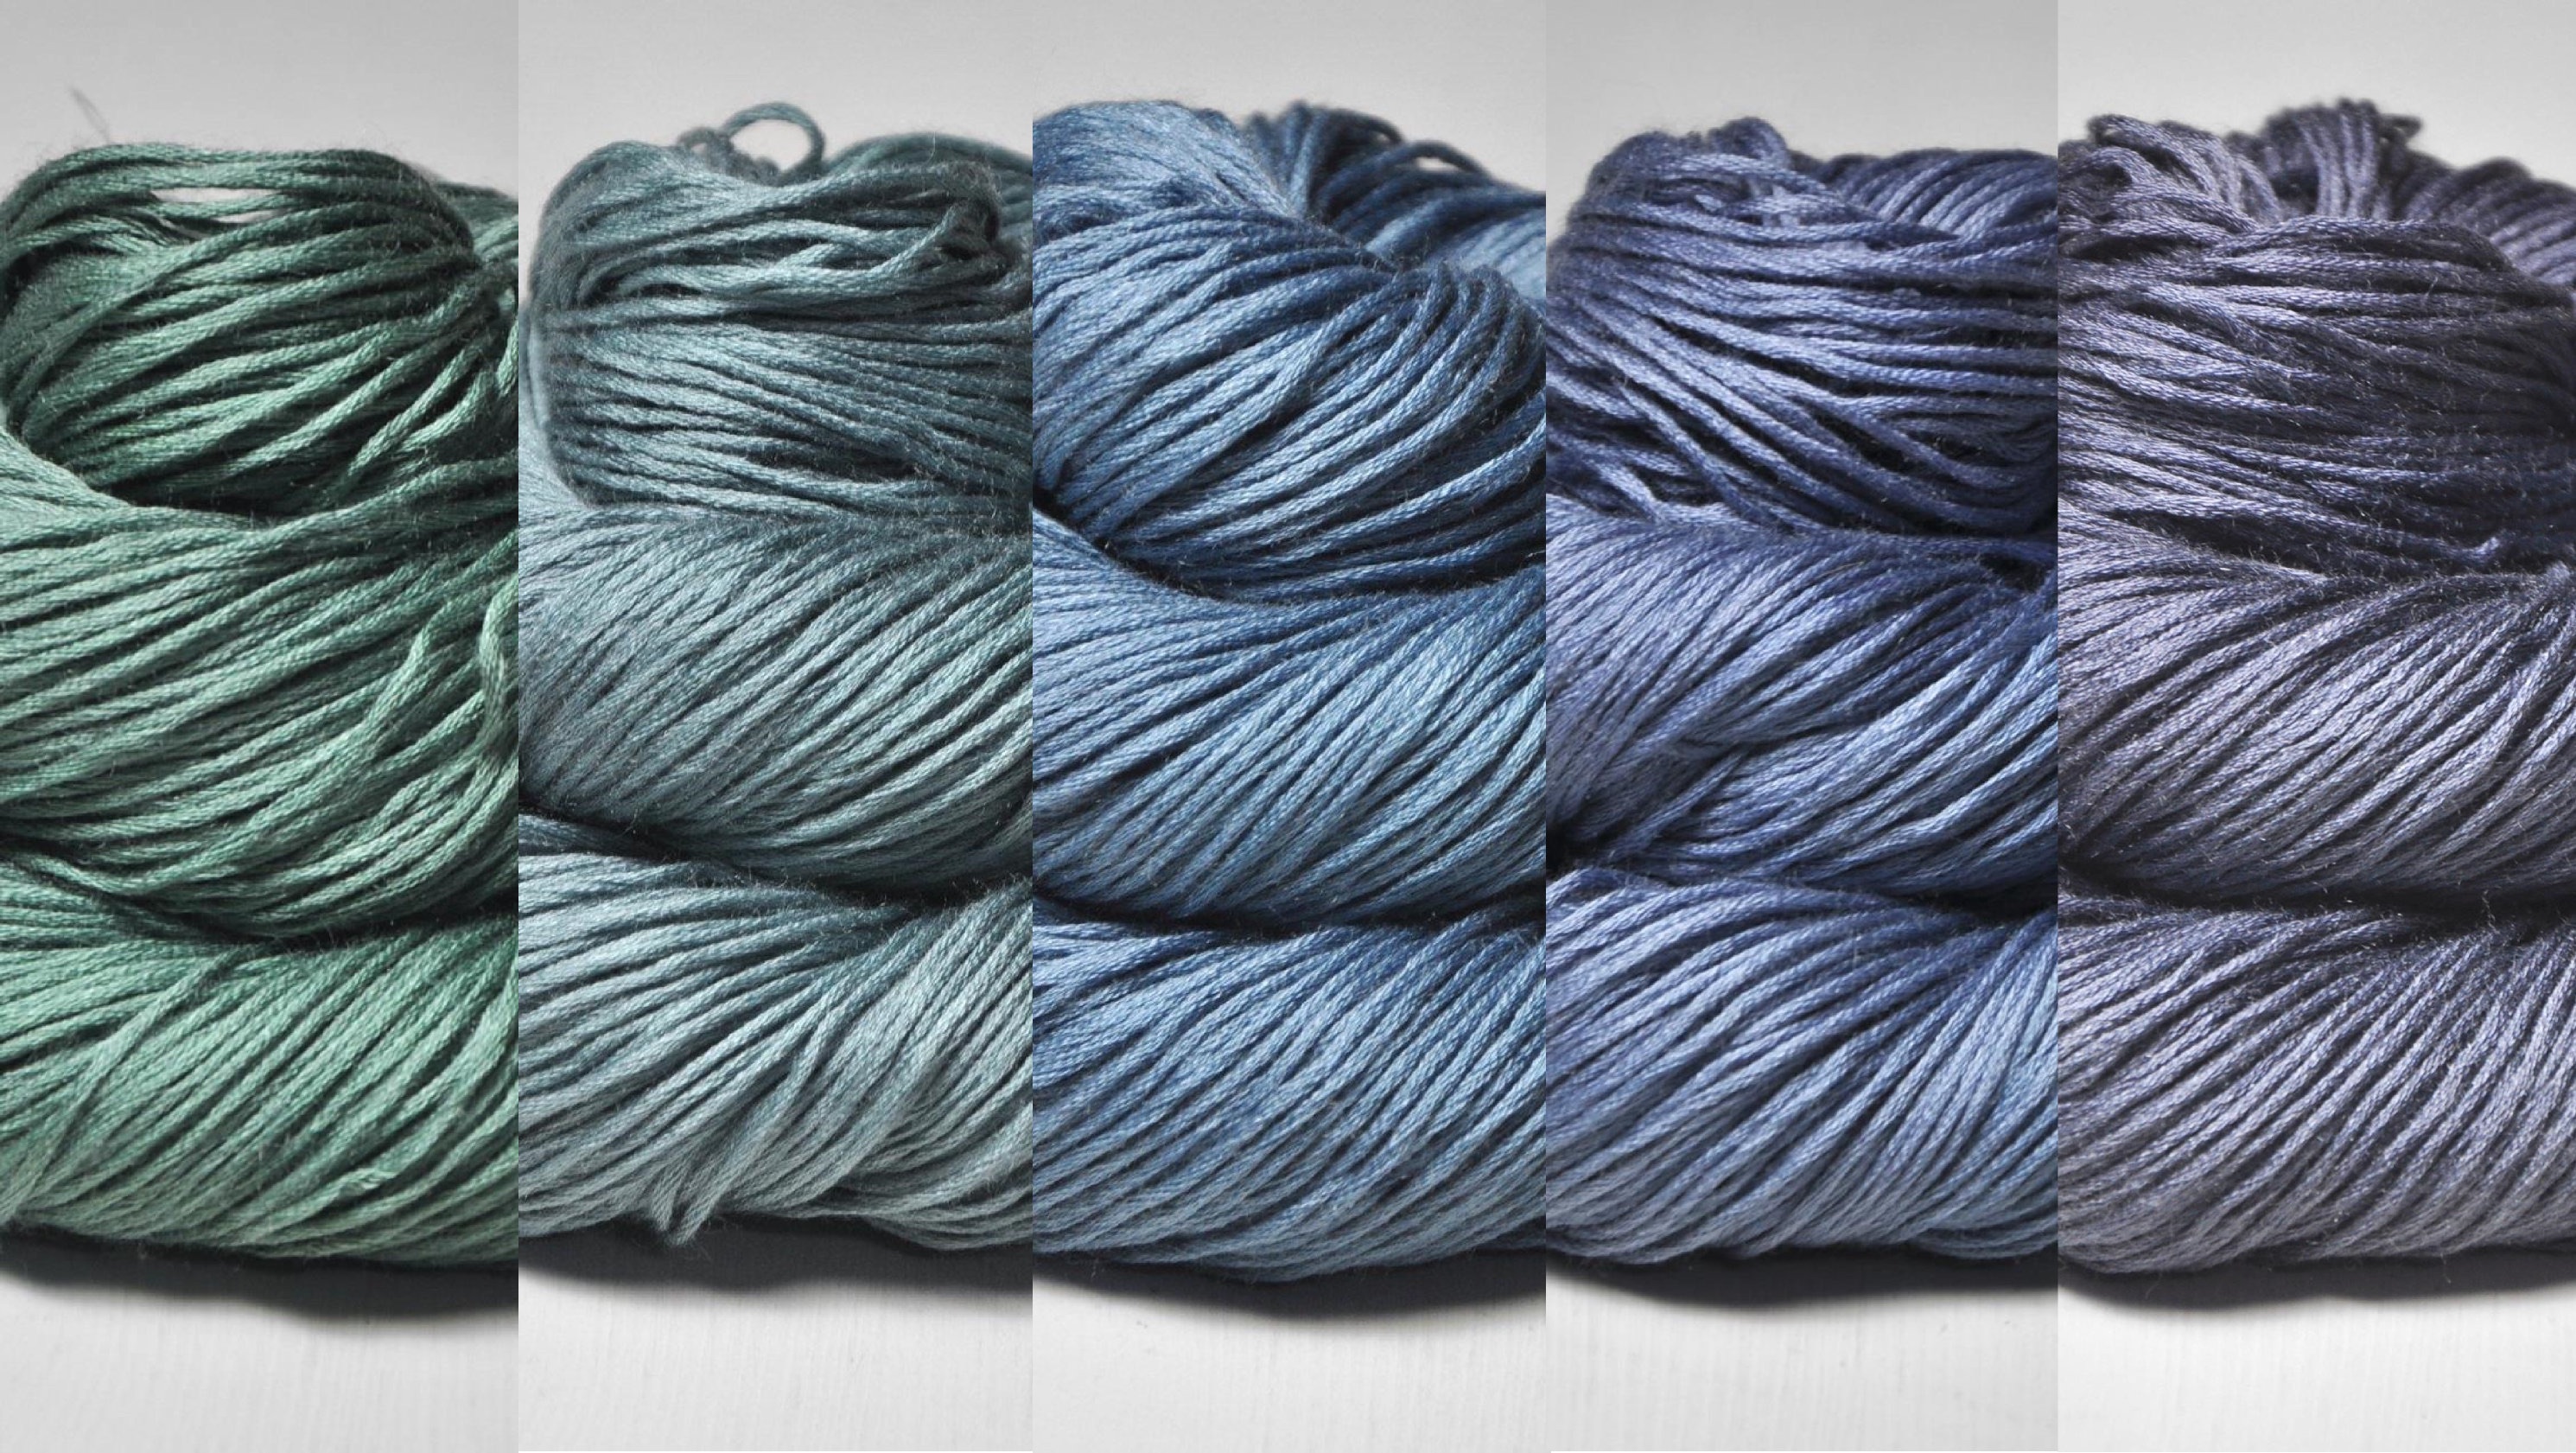
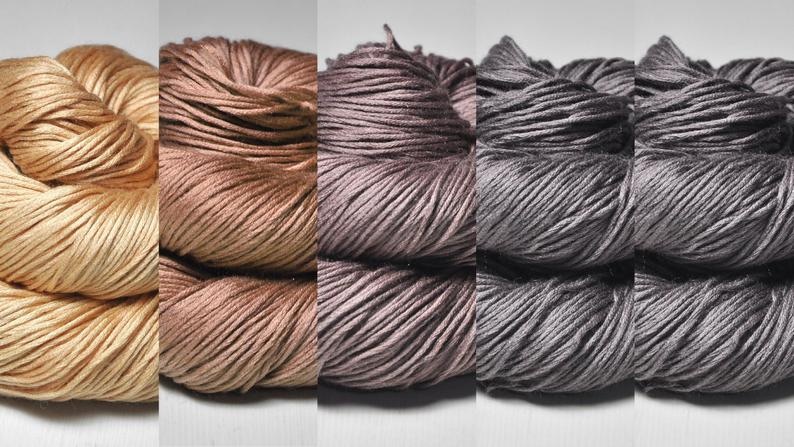
I think this would be lovely in a gradient set as well. Pictured below are the natural colors of alpaca in a different order – ranging from white to dark brown – and three gradient set samples (examples from DyeForYarn Etsy shop and Wonderland Yarns).
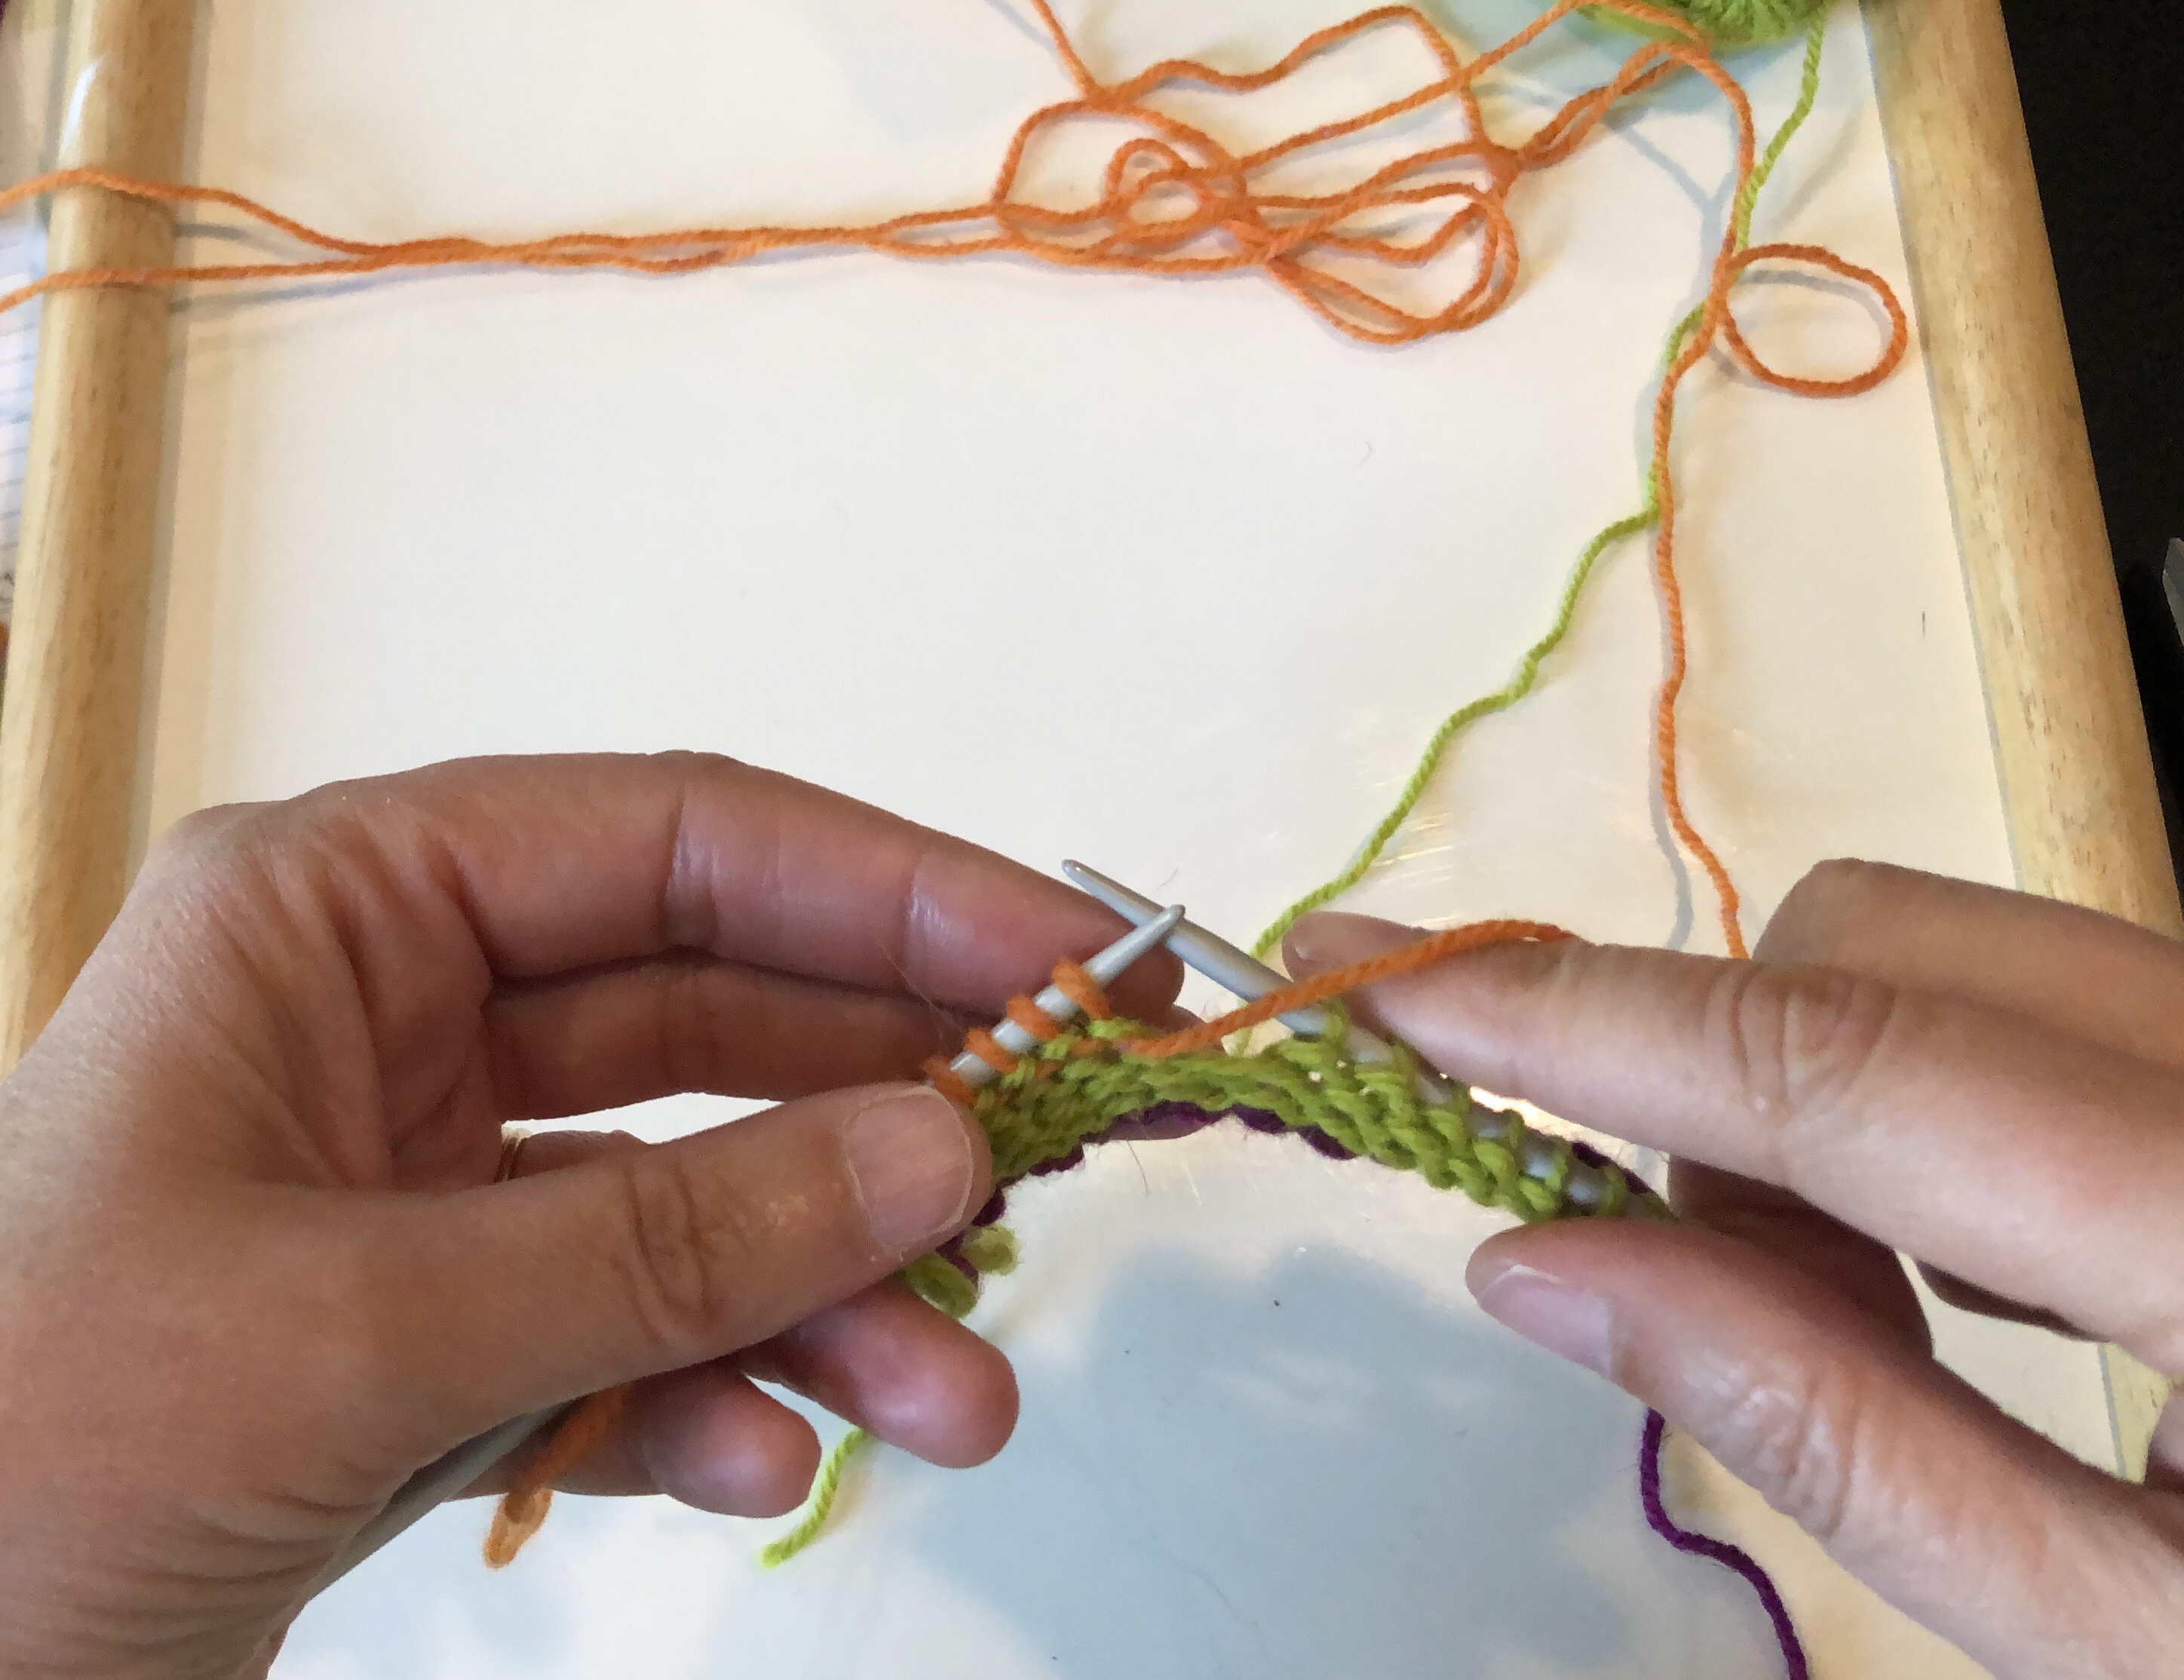
My preferred method for short rows in stockinette stitch, is known as the German-style short row. I like to refer to it as the up-and-over method, because you pull the working yarn of the turned stitch up and over the needle before you begin working the next row. Like wrap-and-turn short rows, there are two parts: working the turn and working through the turned stitch.
Working the Turn: Right Side of Stockinette
For this type of short row, you will work up to the turning point and turn the work. Easy!
Next, you will transfer the first stitch (purlwise) to the right-hand needle.
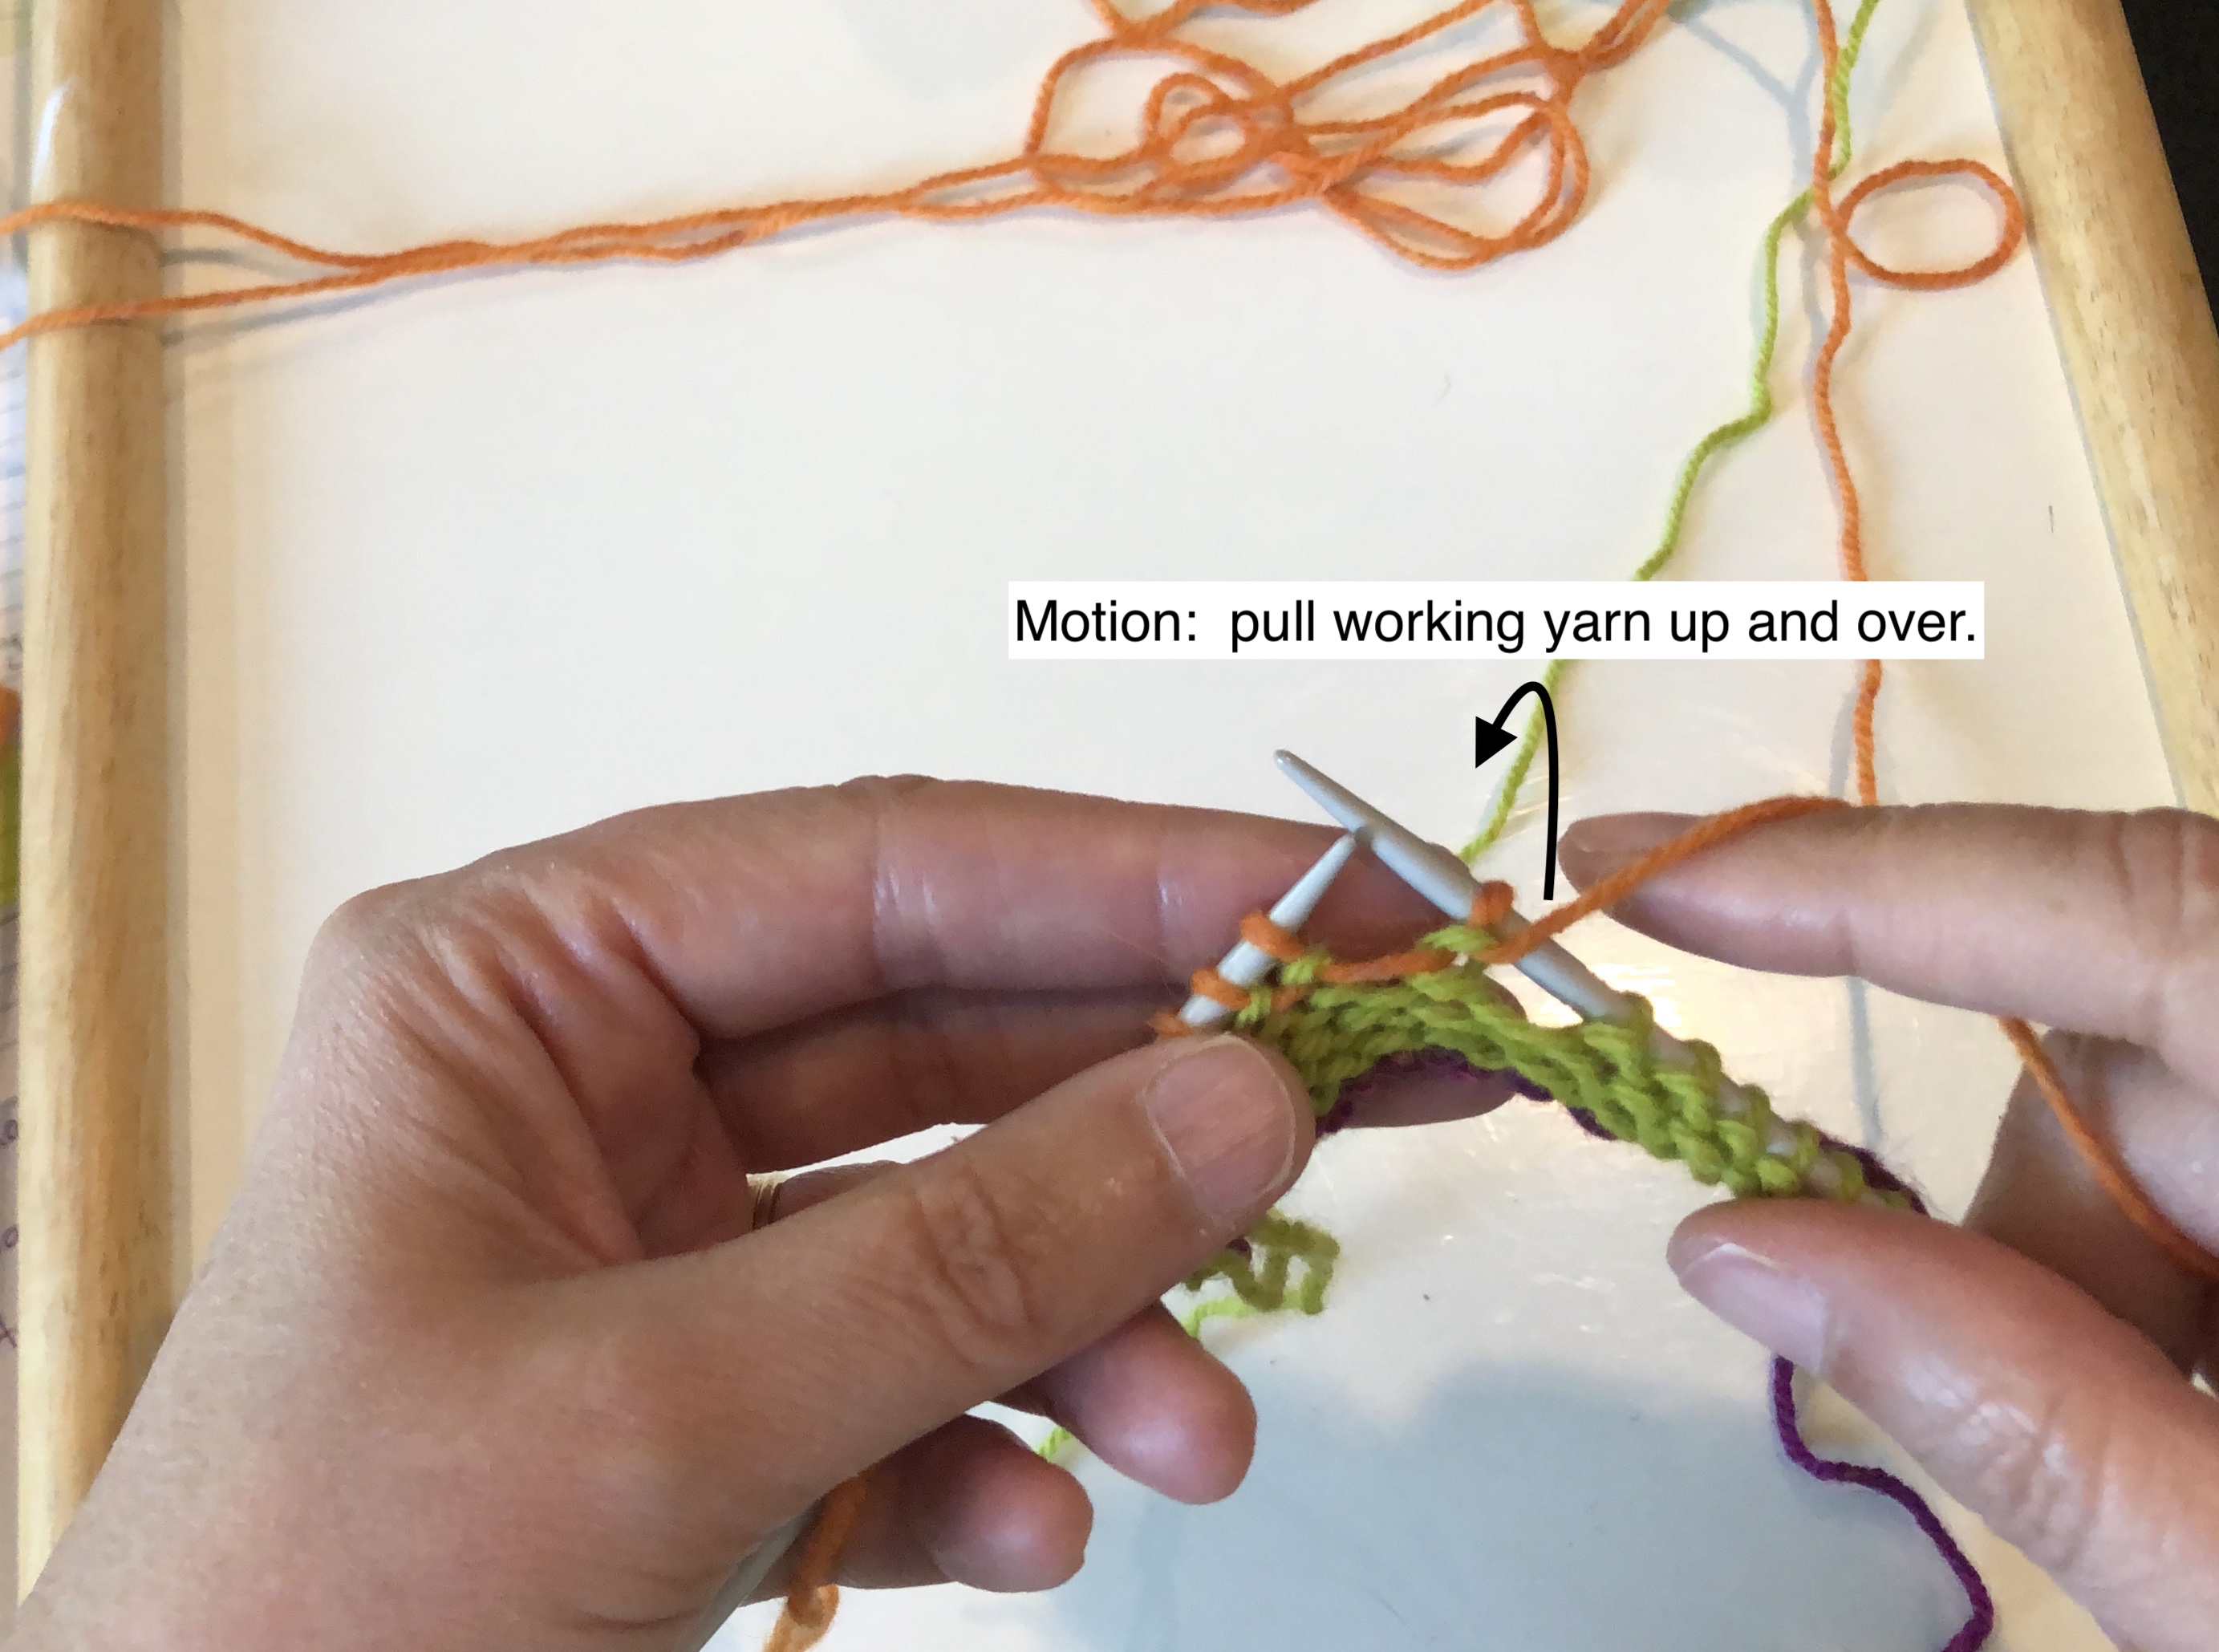
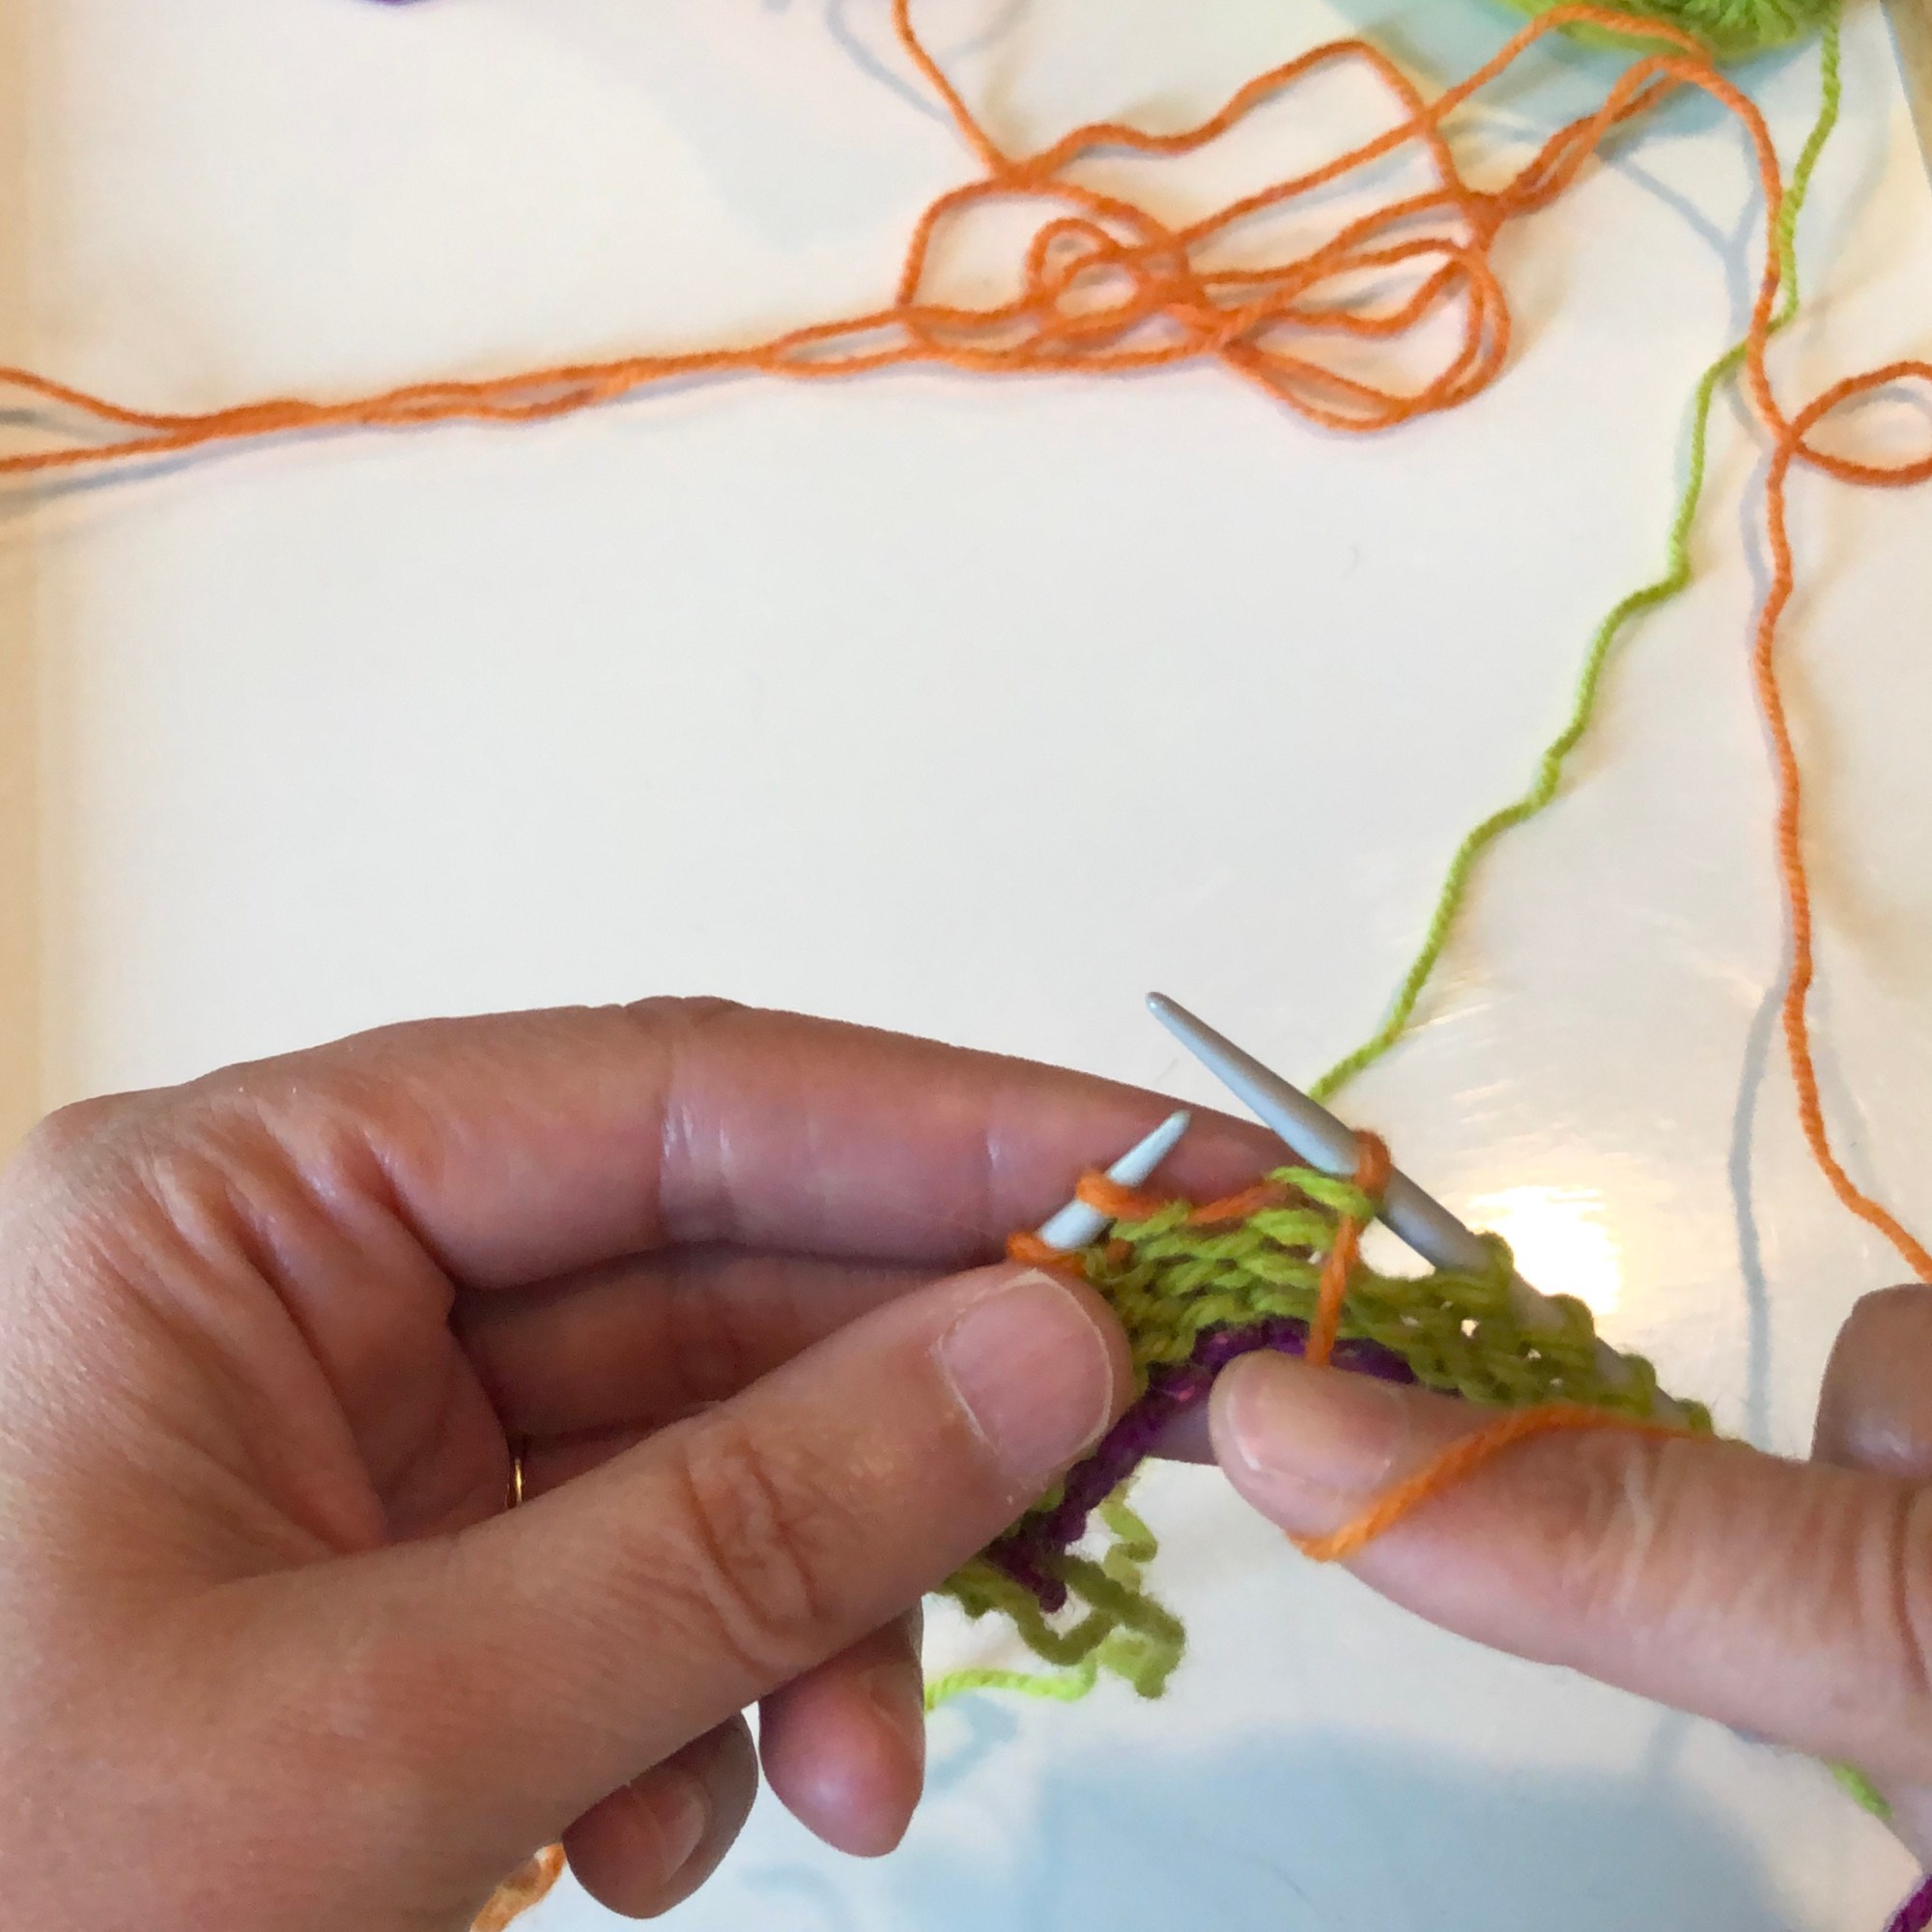
After you have transferred the stitch, you pull the working yarn up-and-over the right-hand needle, and then move the working yarn back to the front to begin purling the stitches in the wrong side row.
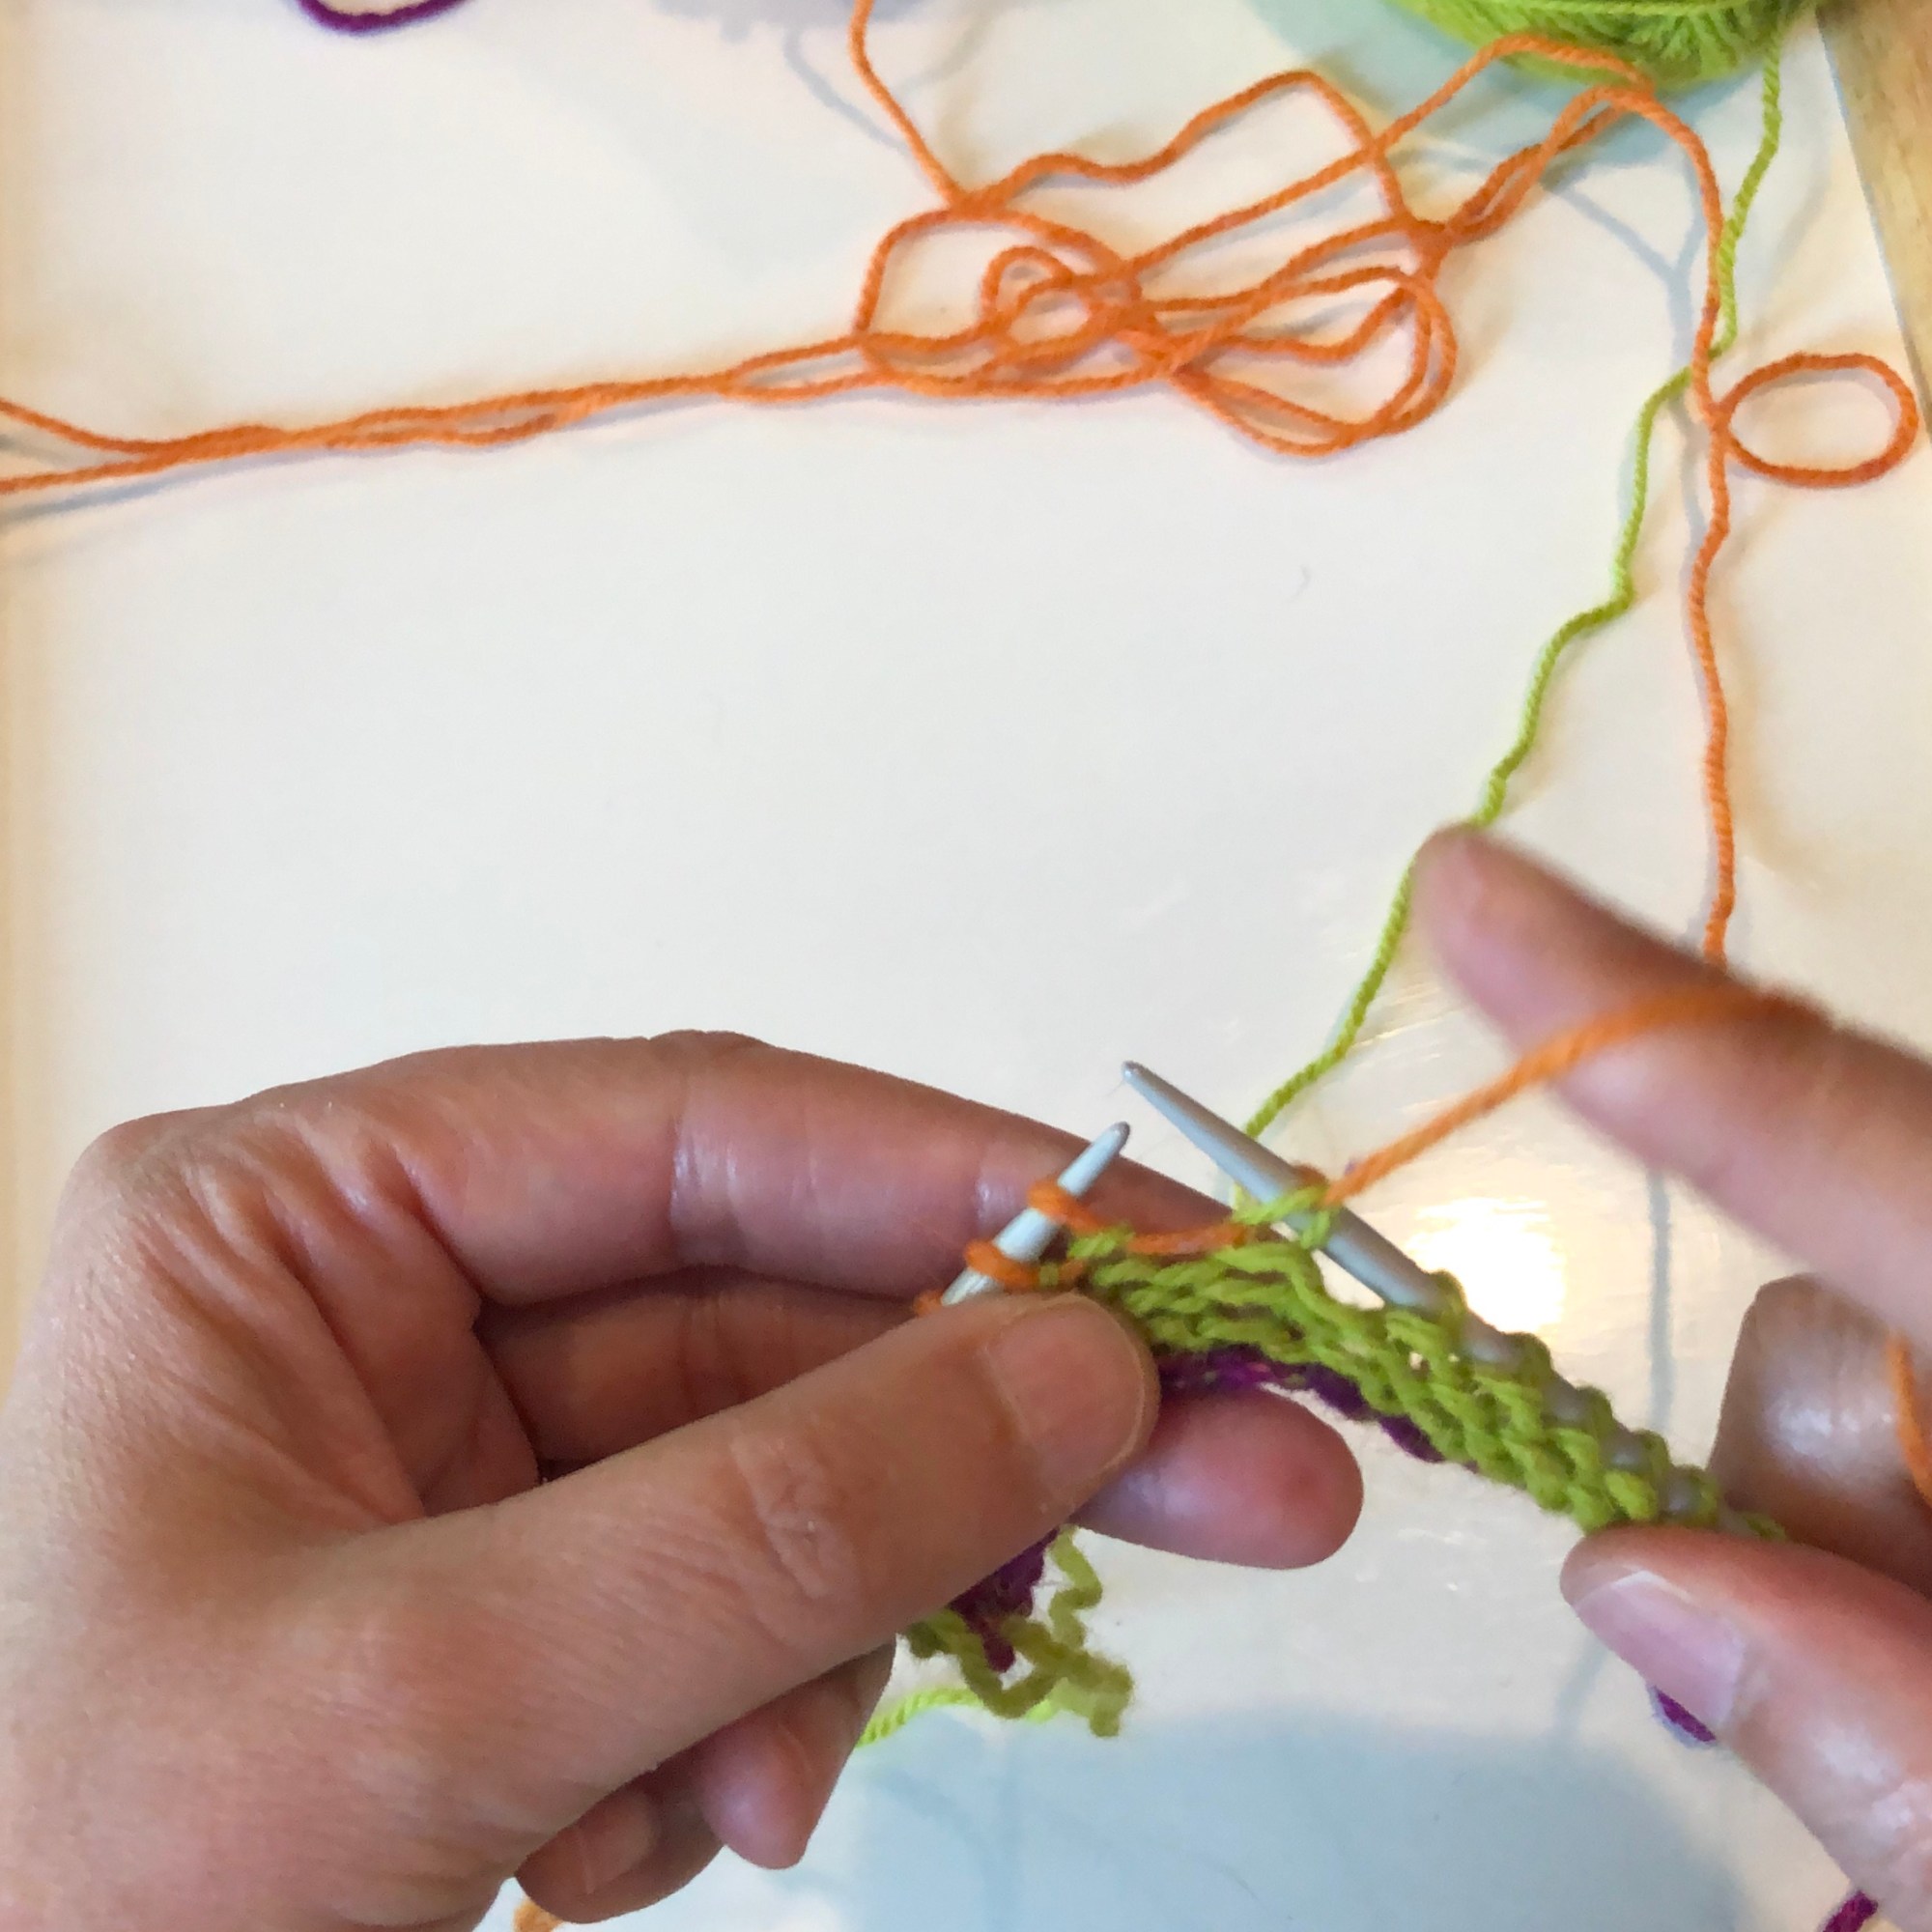
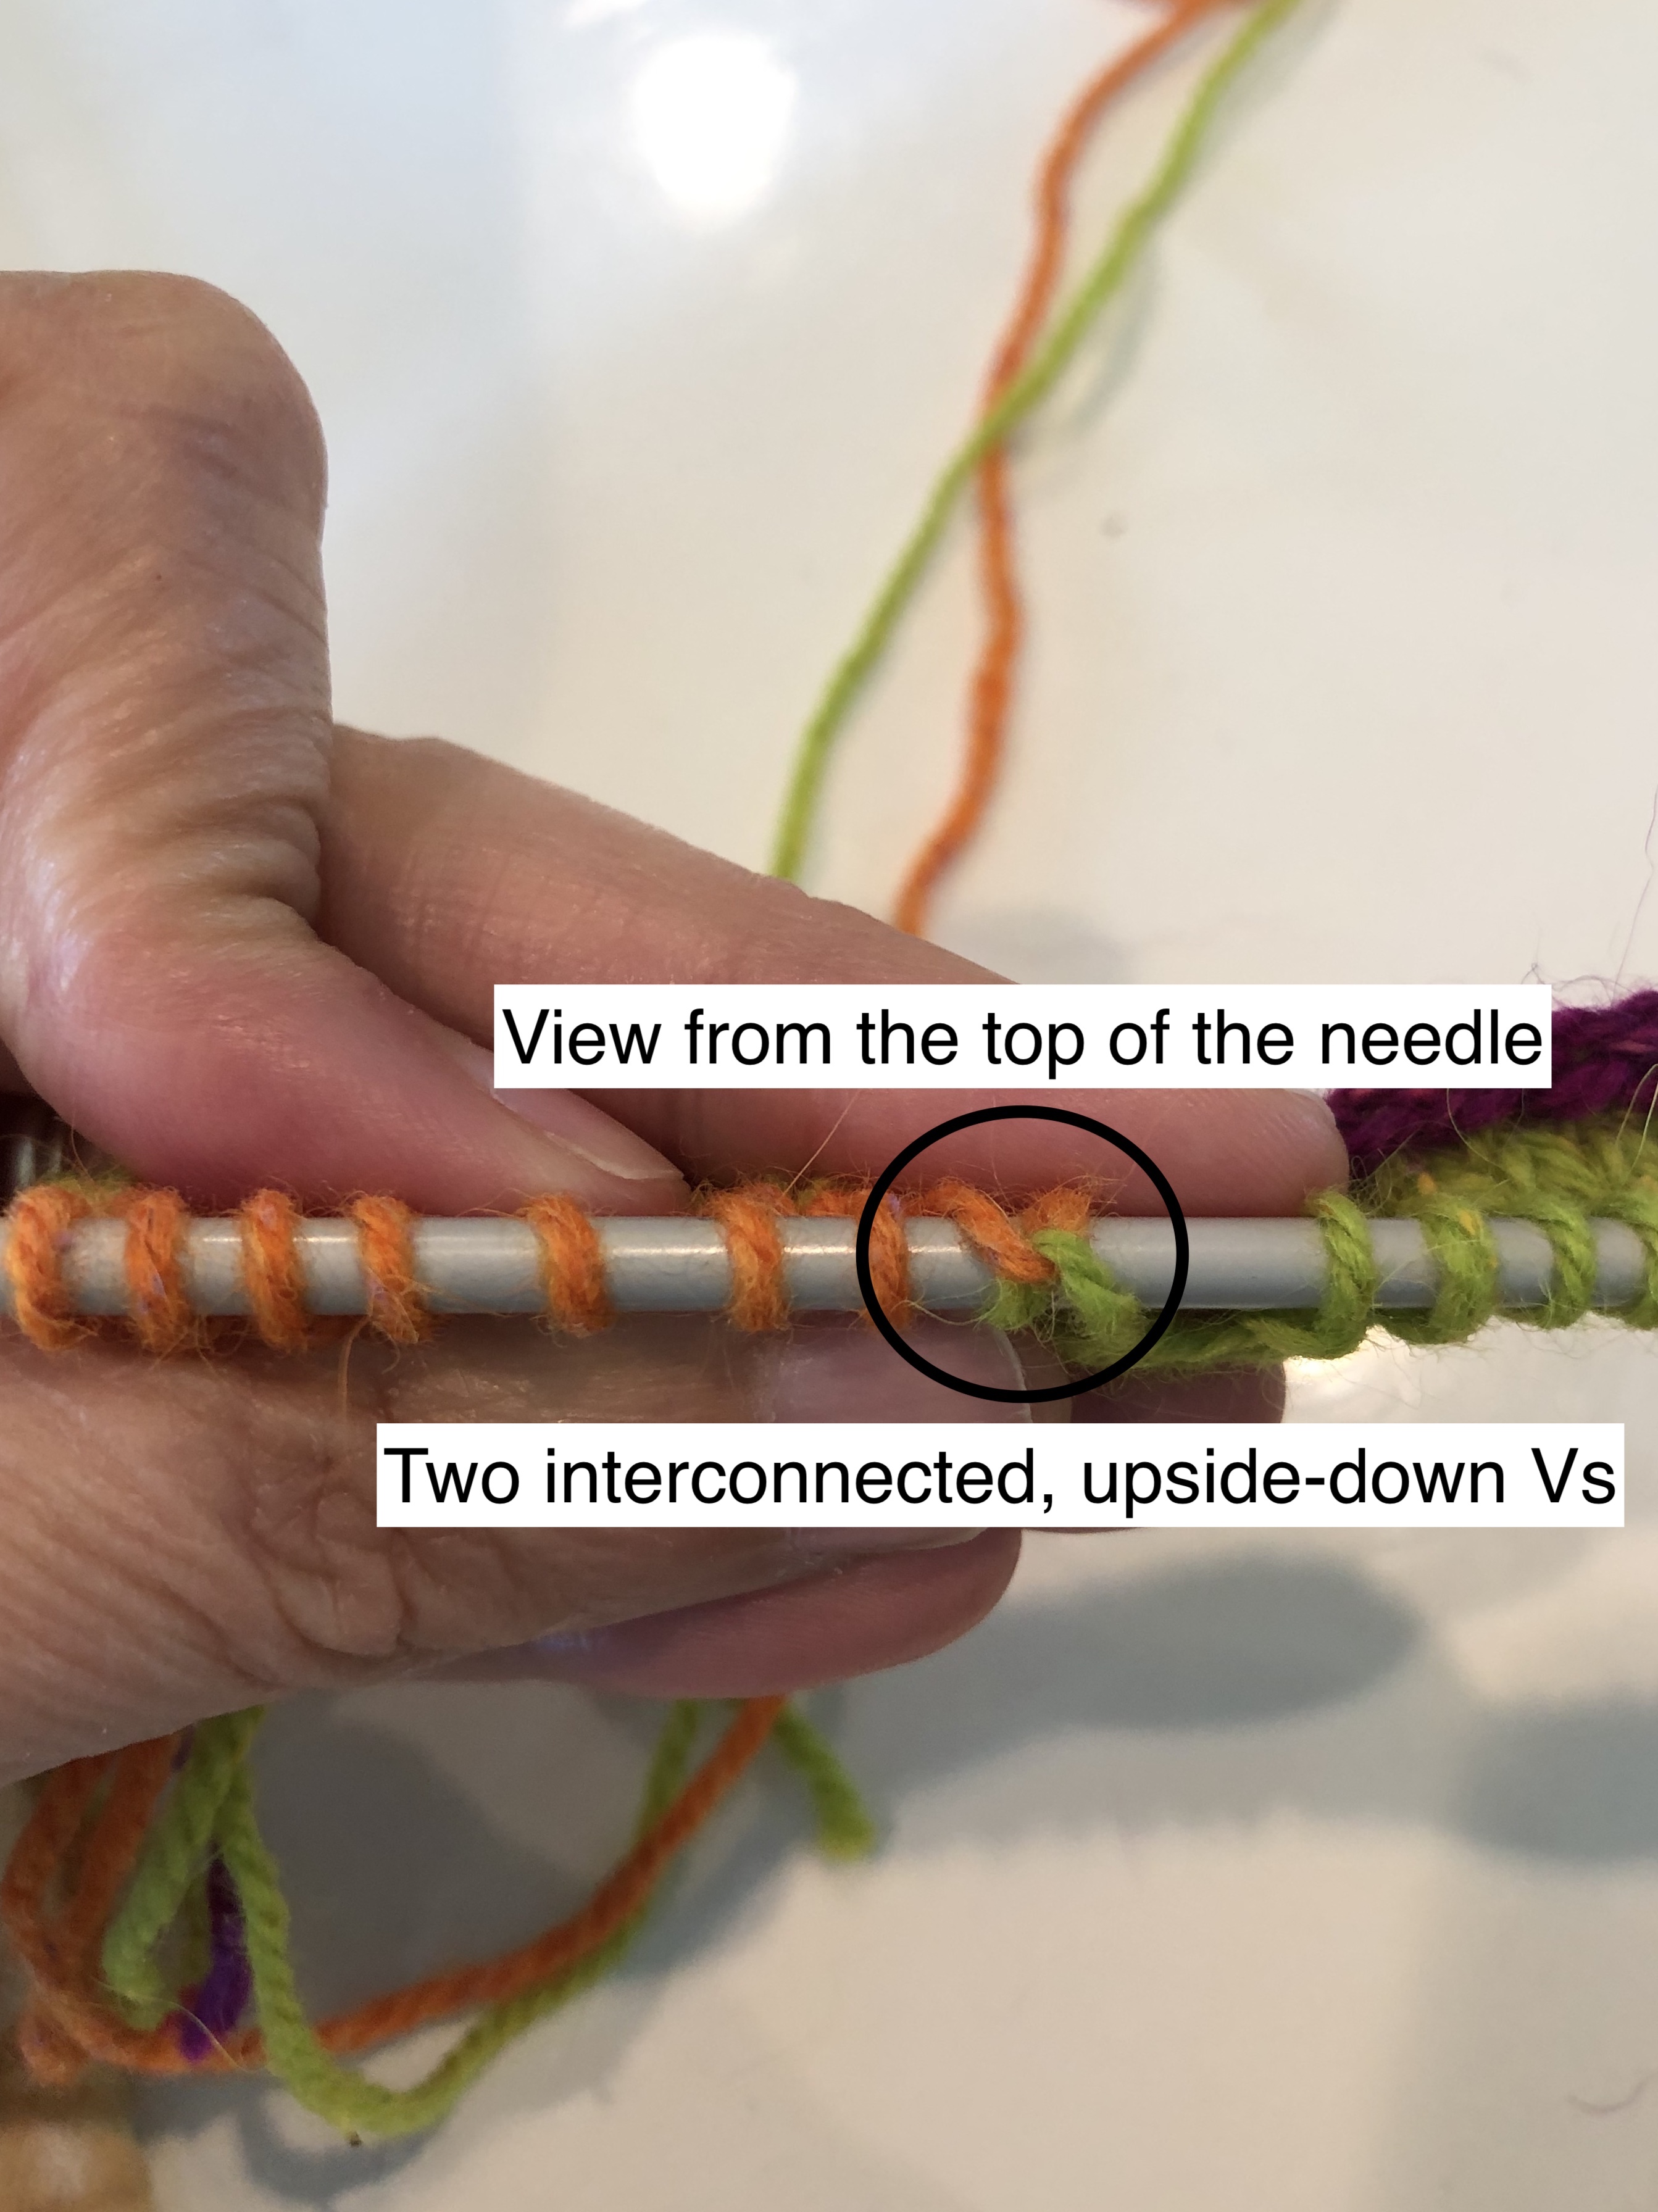
The stitch that you pulled up-and-over will look a little funky – kind of like two interconnected upside-down Vs straddling the needle. You will definitely recognize it when you go to work through the short row.
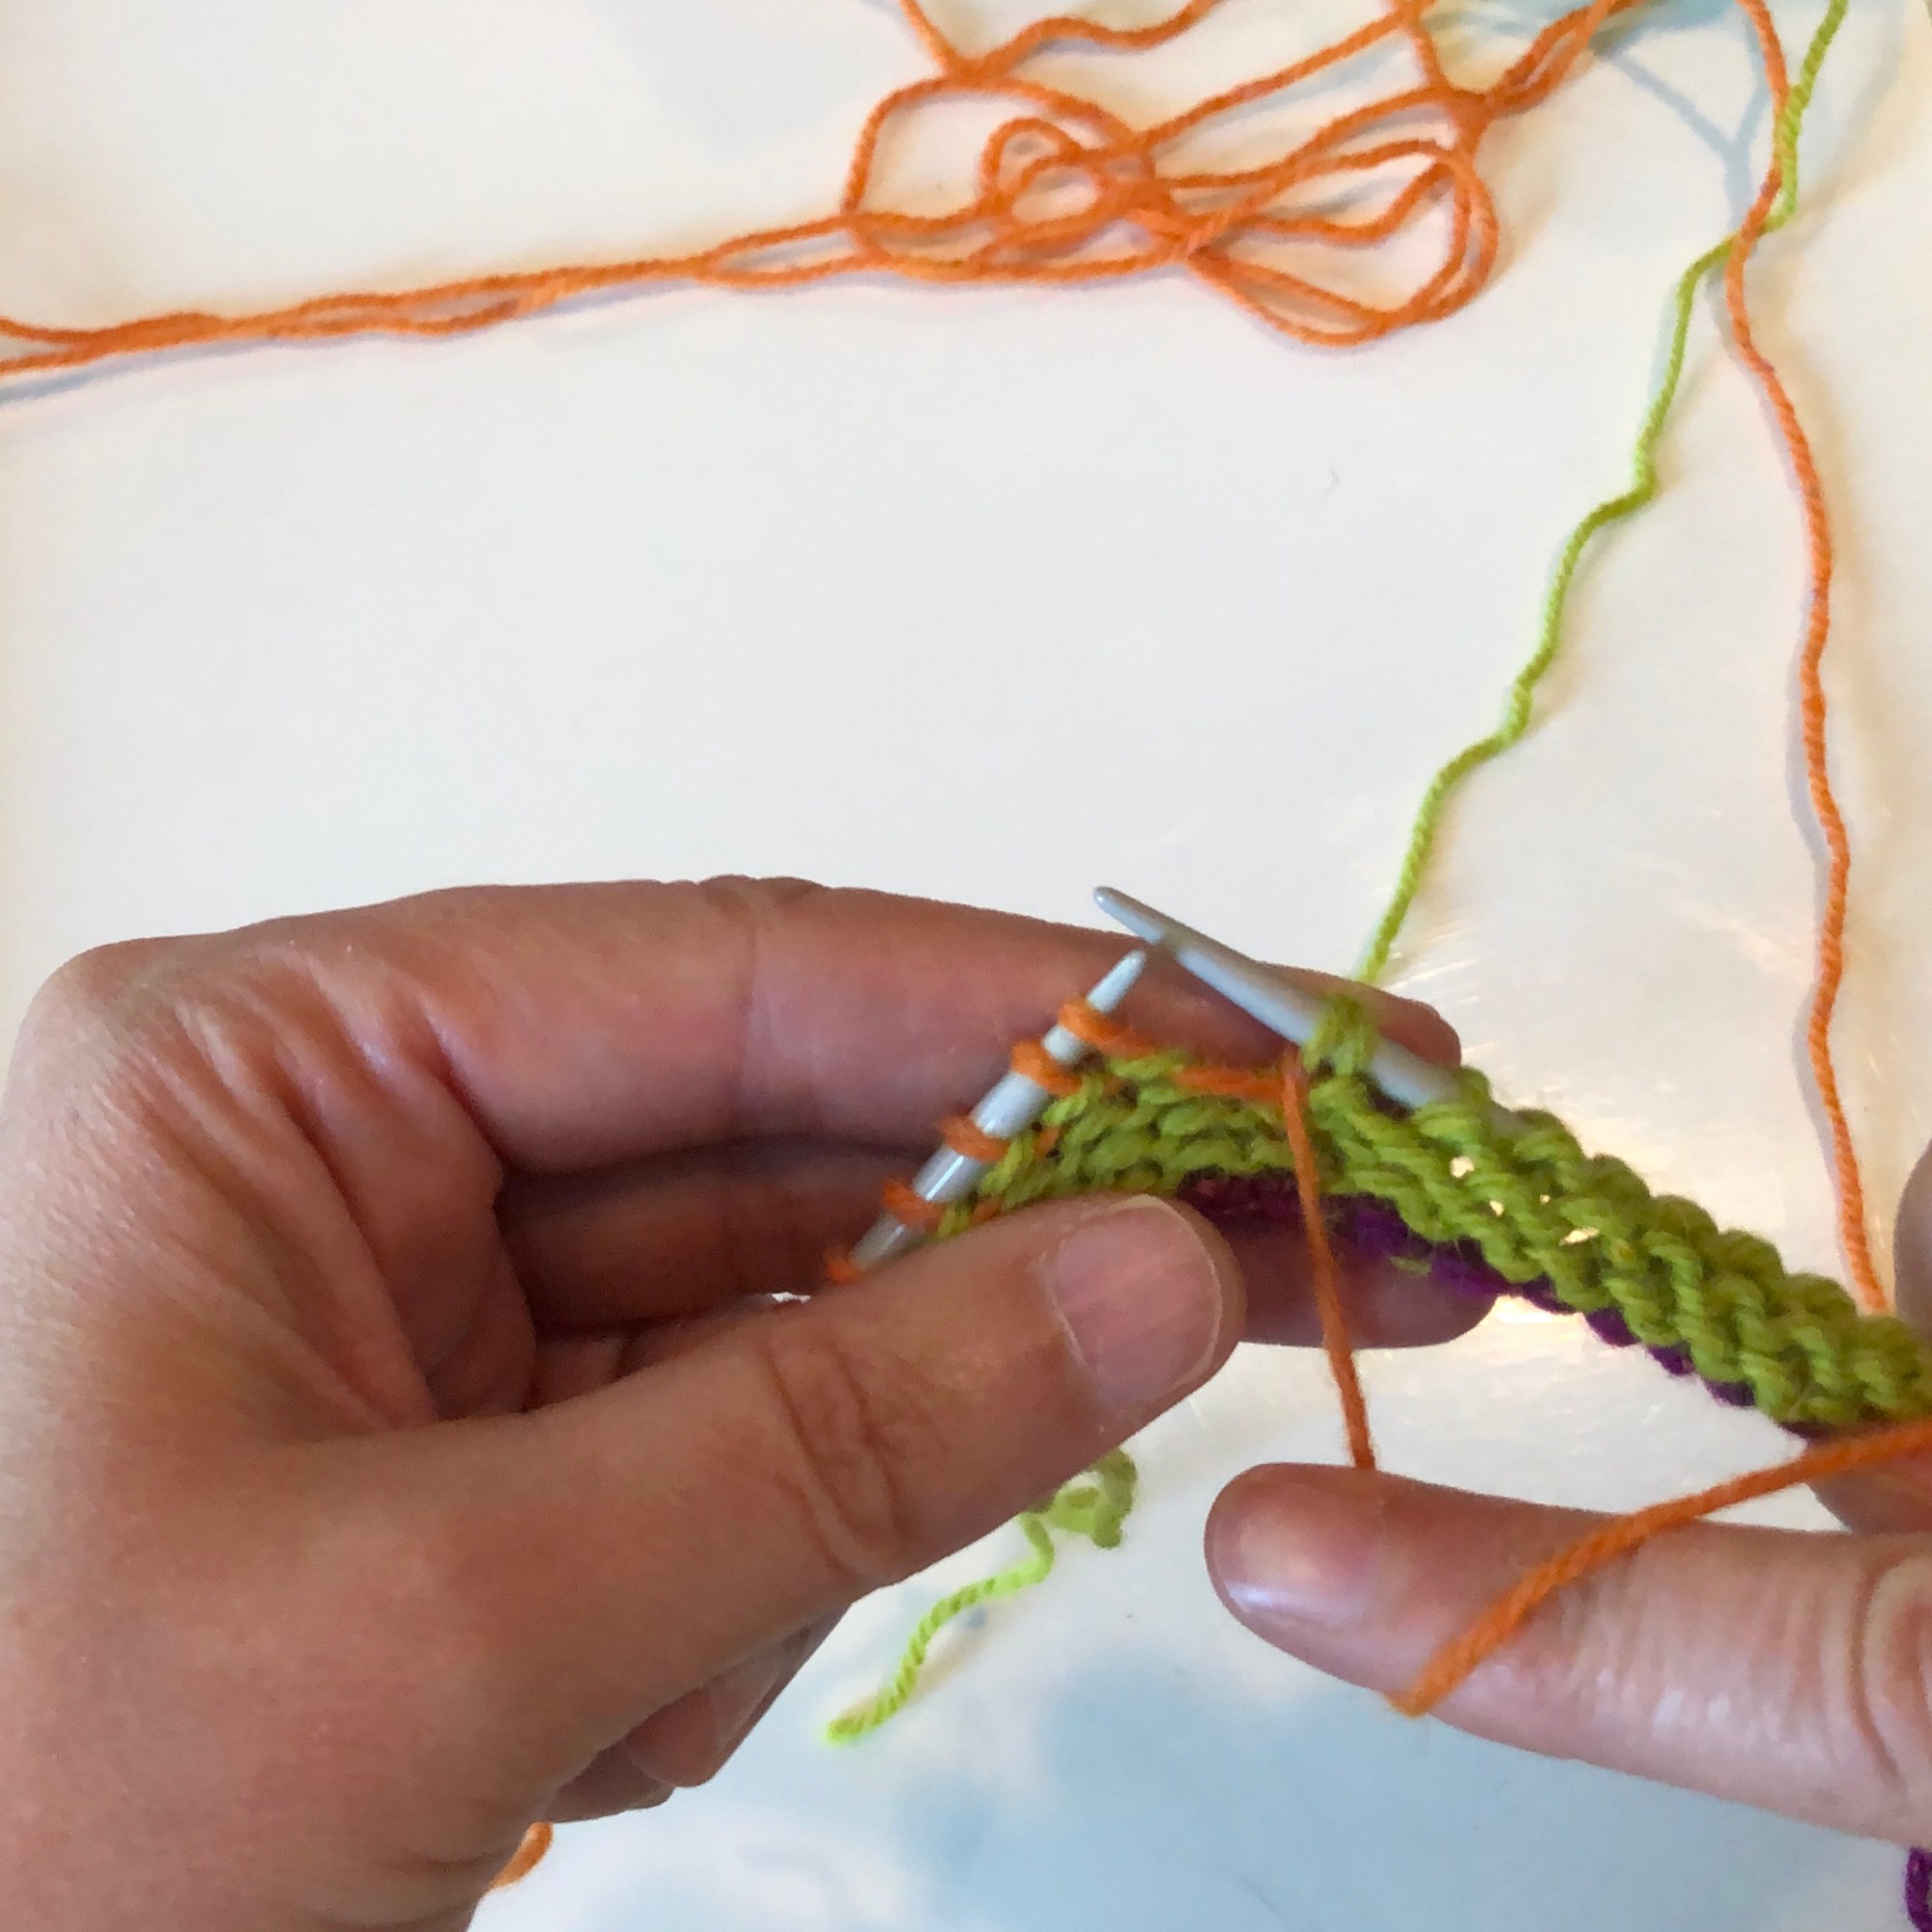
Working Through the Turn
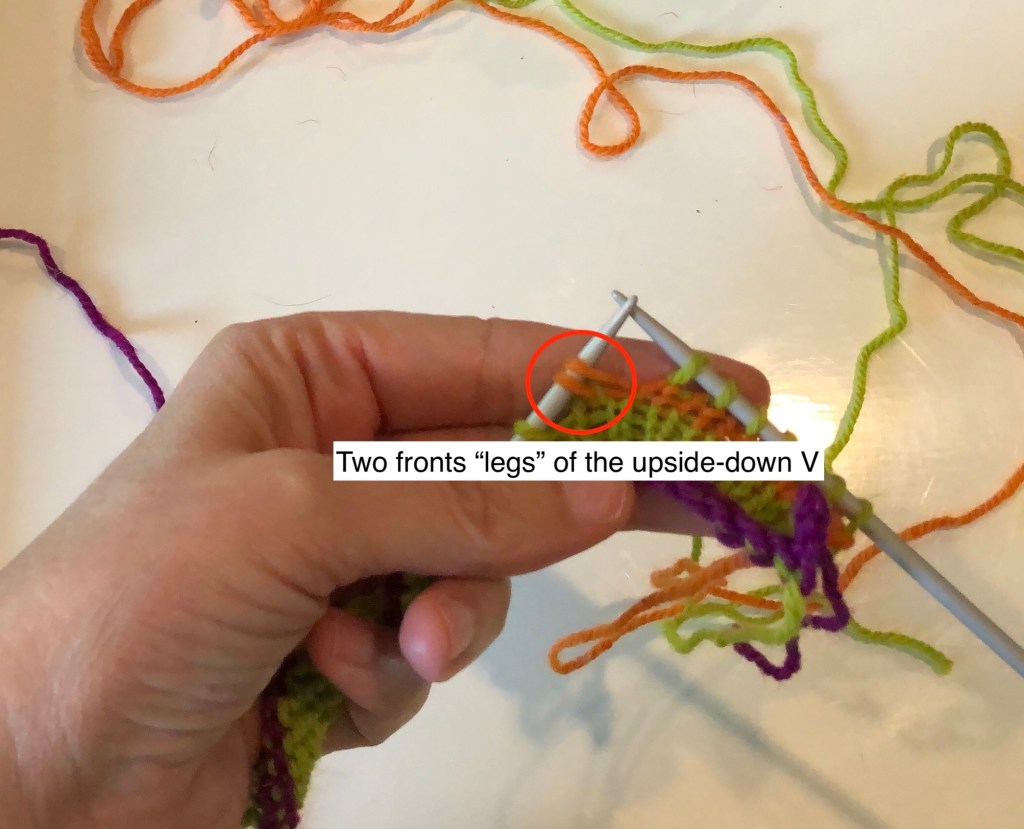
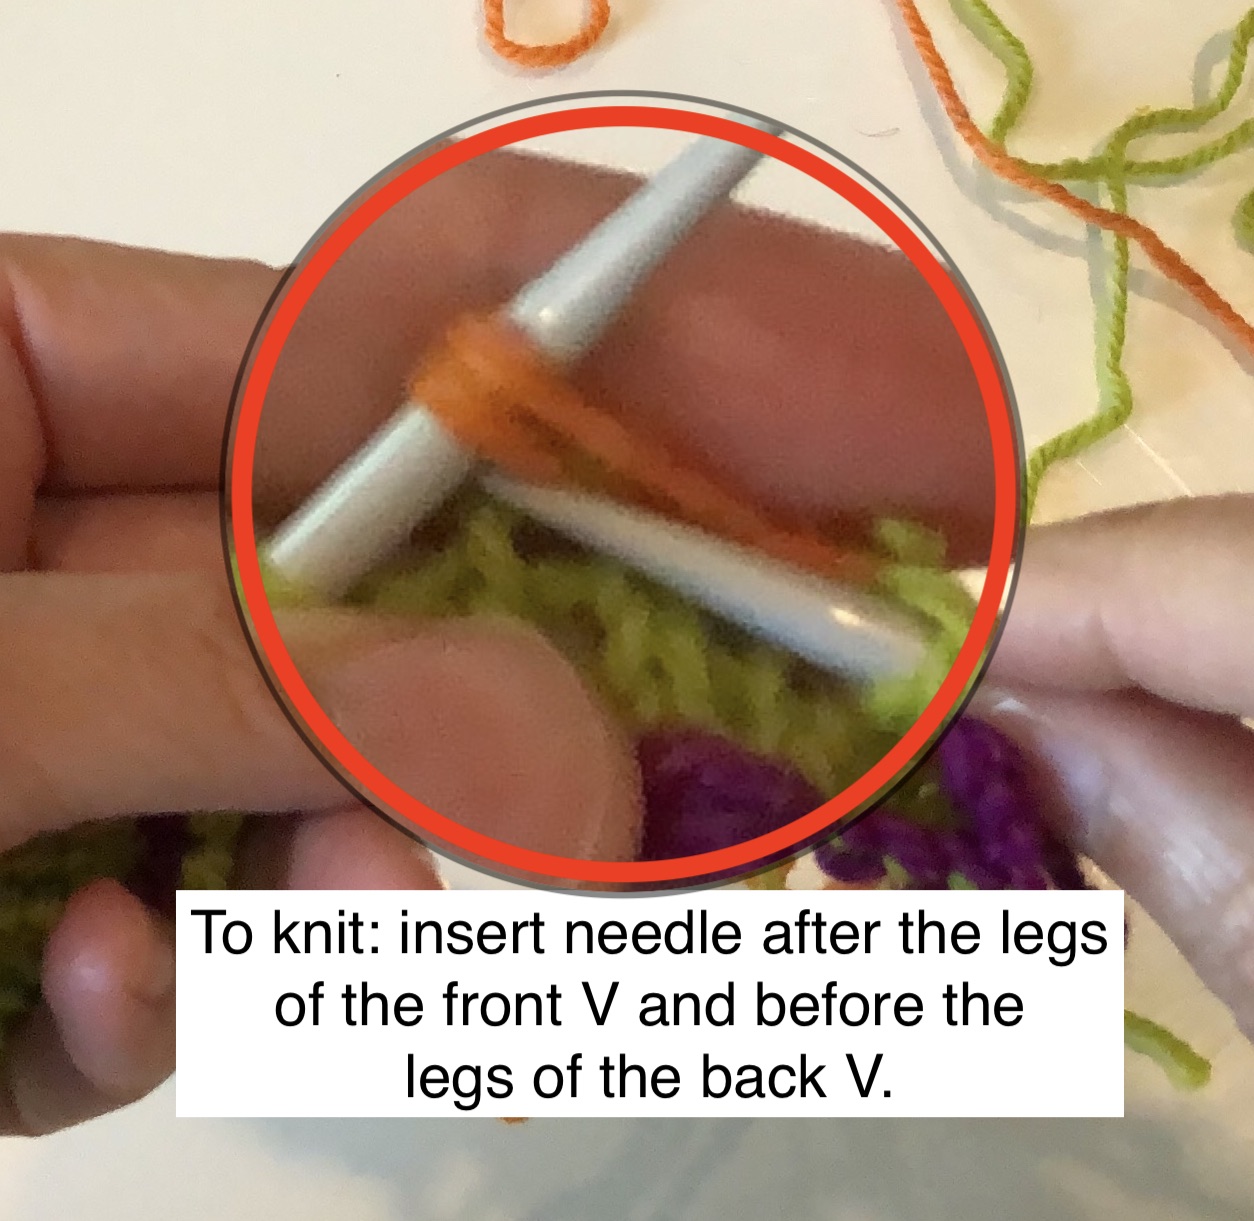
To work up to the “up-and-over” stitch, insert the needle (as if to knit) after the two “legs” of the front V and before the “legs” of the back V and knit the stitch. The two legs of the front V will be on the right side of the inserted needle and the two legs of the back V will be on the left side of the inserted needle. Like magic, the stitch looks like a normal knitted stitch. You should be able to see a second loop nestled behind the stitch.
Finished Look: Front and Back
Working the Turn: Wrong Side of Stockinette
Work up to the turn on the wrong side and turn the work so that the right side is facing you. Move the yarn to the front of the work, as shown below.
Transfer the next stitch (purlwise) to the right-hand needle.
Pull the working yarn up-and-over the right-hand needle so that it is now at the back of the work.
Knit the next stitch as you normally would, and continue knitting stitches until the next turn or the end of the row.
The up-and-over stitch will look like two interconnected, upside-down Vs, this time with a twist.
Working through the Up-and-Over Stitch
With wrong side of work facing you, purl up to the up-and-over stitch. Insert the right hand needle between the front and back legs of the interconnected Vs and purl as you normally would.
Purl up to up-and-over stitchInsert the right-hand needle with both legs of the V in front of the inserted needle.
Continue working the row to the next turn or the end of the row.
View From Front and Back
Up-and-Over stitch from the right side.
Working through the up-and-over stitch on the wrong side.
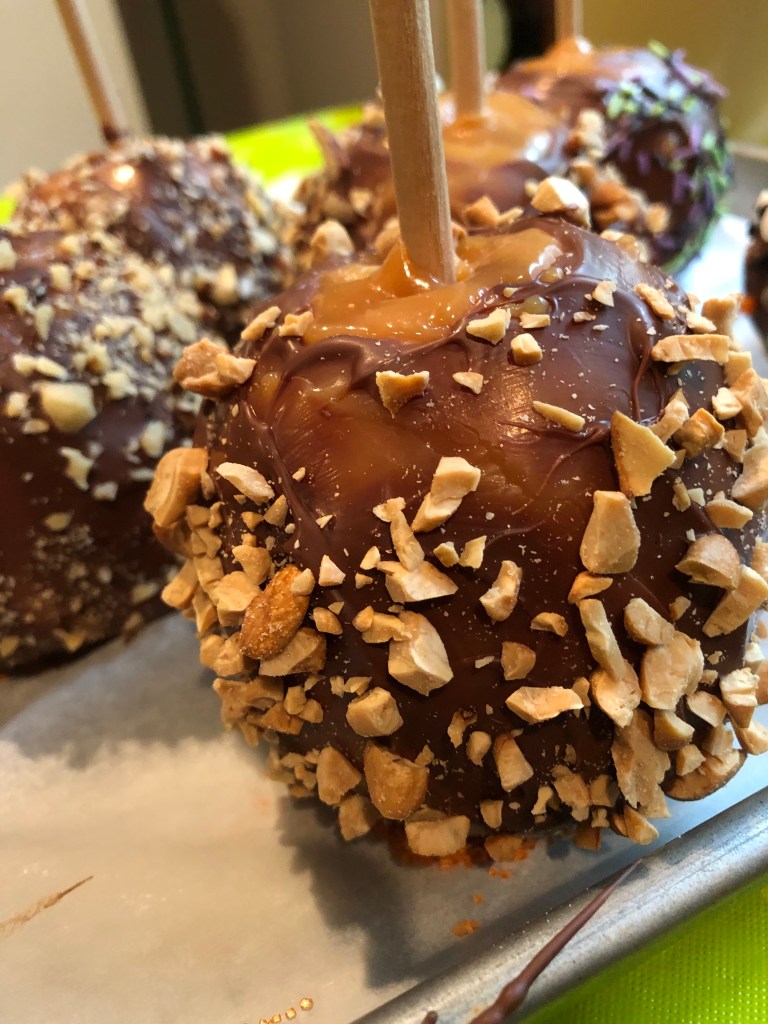
Caramel apples are delicious. Chocolate covered caramel apples are divine. The first time I tried to make caramel apples I got frustrated. And burned. Nothing burns like sticky, hot caramel. I now have an aversion to and a healthy fear of working with hot caramel, so I figured out how to make caramel apples without using hot caramel. Here are my cheats and simplifications.
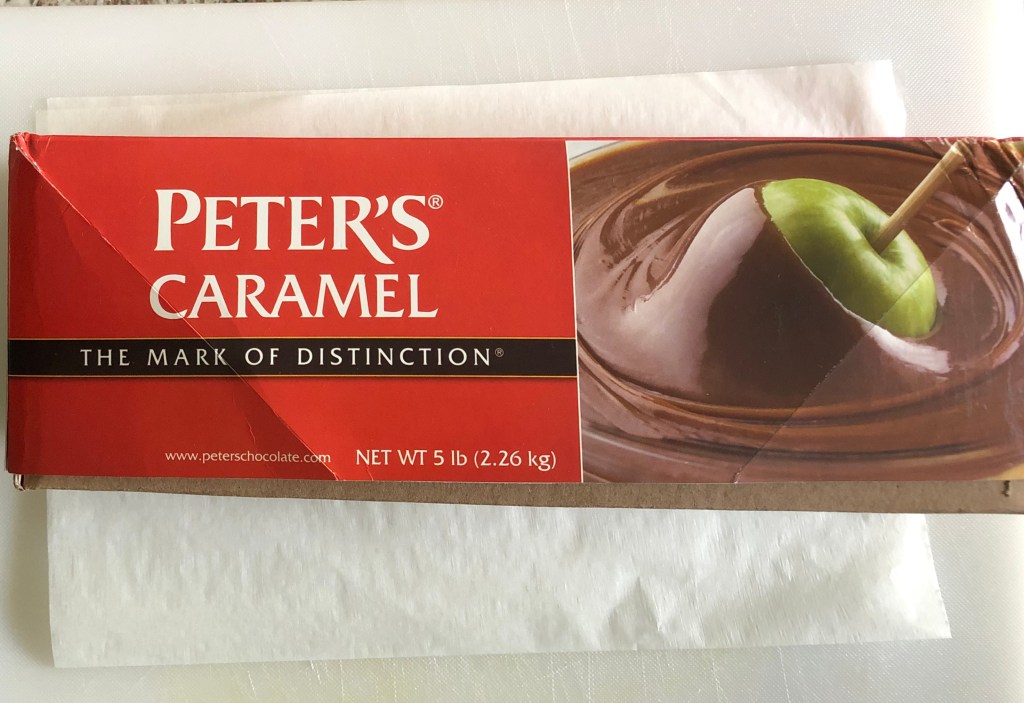
First cheat/simplification: I don’t make my own caramel. There are so many variables when making caramel that don’t include the variables in the ingredients – the exact temperature, the humidity, how quickly the mixture is cooled. The list goes on. So, I found a good source of caramel – Peter’s Caramel – and have used it ever since. It tastes good. It has a consistent quality. I know what I’m getting. Homemade caramel might be more delicious, but this is easier. Plus, I’m coating it with chocolate – high quality chocolate. The taste and texture of the caramel is sandwiched between the taste of the apple and the taste of the chocolate. My palette is not discriminating enough to tell the difference. So for me, it’s just not worth the effort to make my own caramel. My local kitchen store (Garlic Press in Uptown Normal, IL), local cake decorating store (Decorator’s Grocery in Bloomington, IL), and local-ish pastry supply center (Sweet Treat Supply of Gridley, IL) all carry Peter’s Caramel. Both the Garlic Press and the Decorators’ Grocery sell it in smaller quantities in addition to the five-pound loaf.
Yummy. Easy.
Second cheat/simplification: I don’t heat the caramel or dip the apples, as shown in the picture on the box above. There is a recipe for caramel apples on the box but I don’t use it, because – hot caramel. Ouch. Plus, when you melt the caramel and dip the apples, the hot caramel tends to slide off the apples, and there ends up being a lot of wasted caramel.
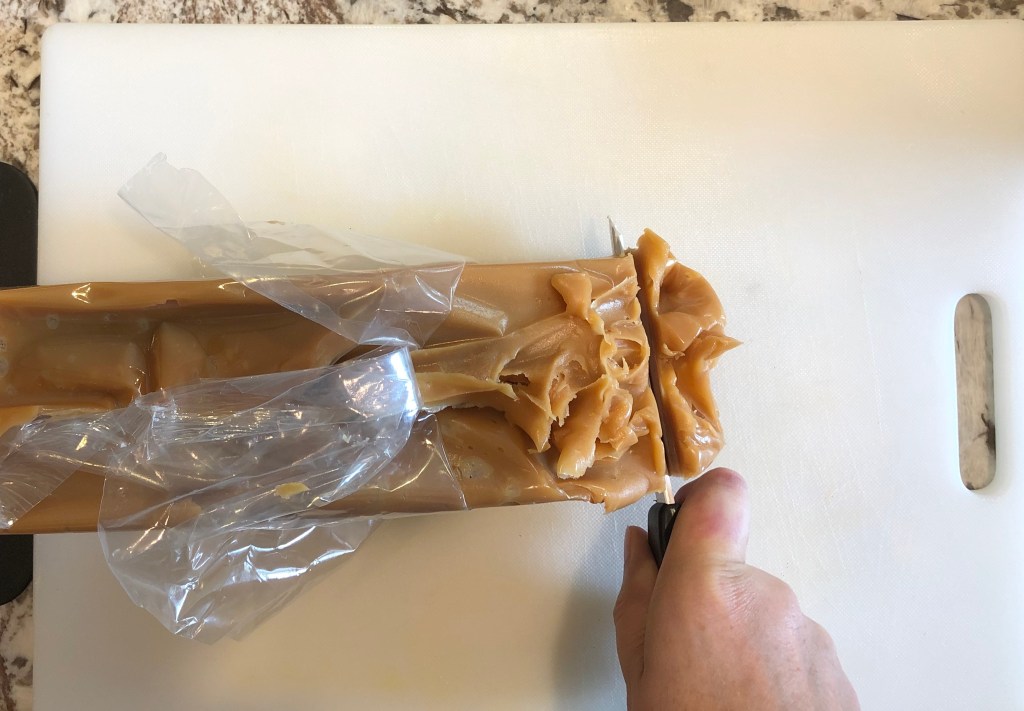
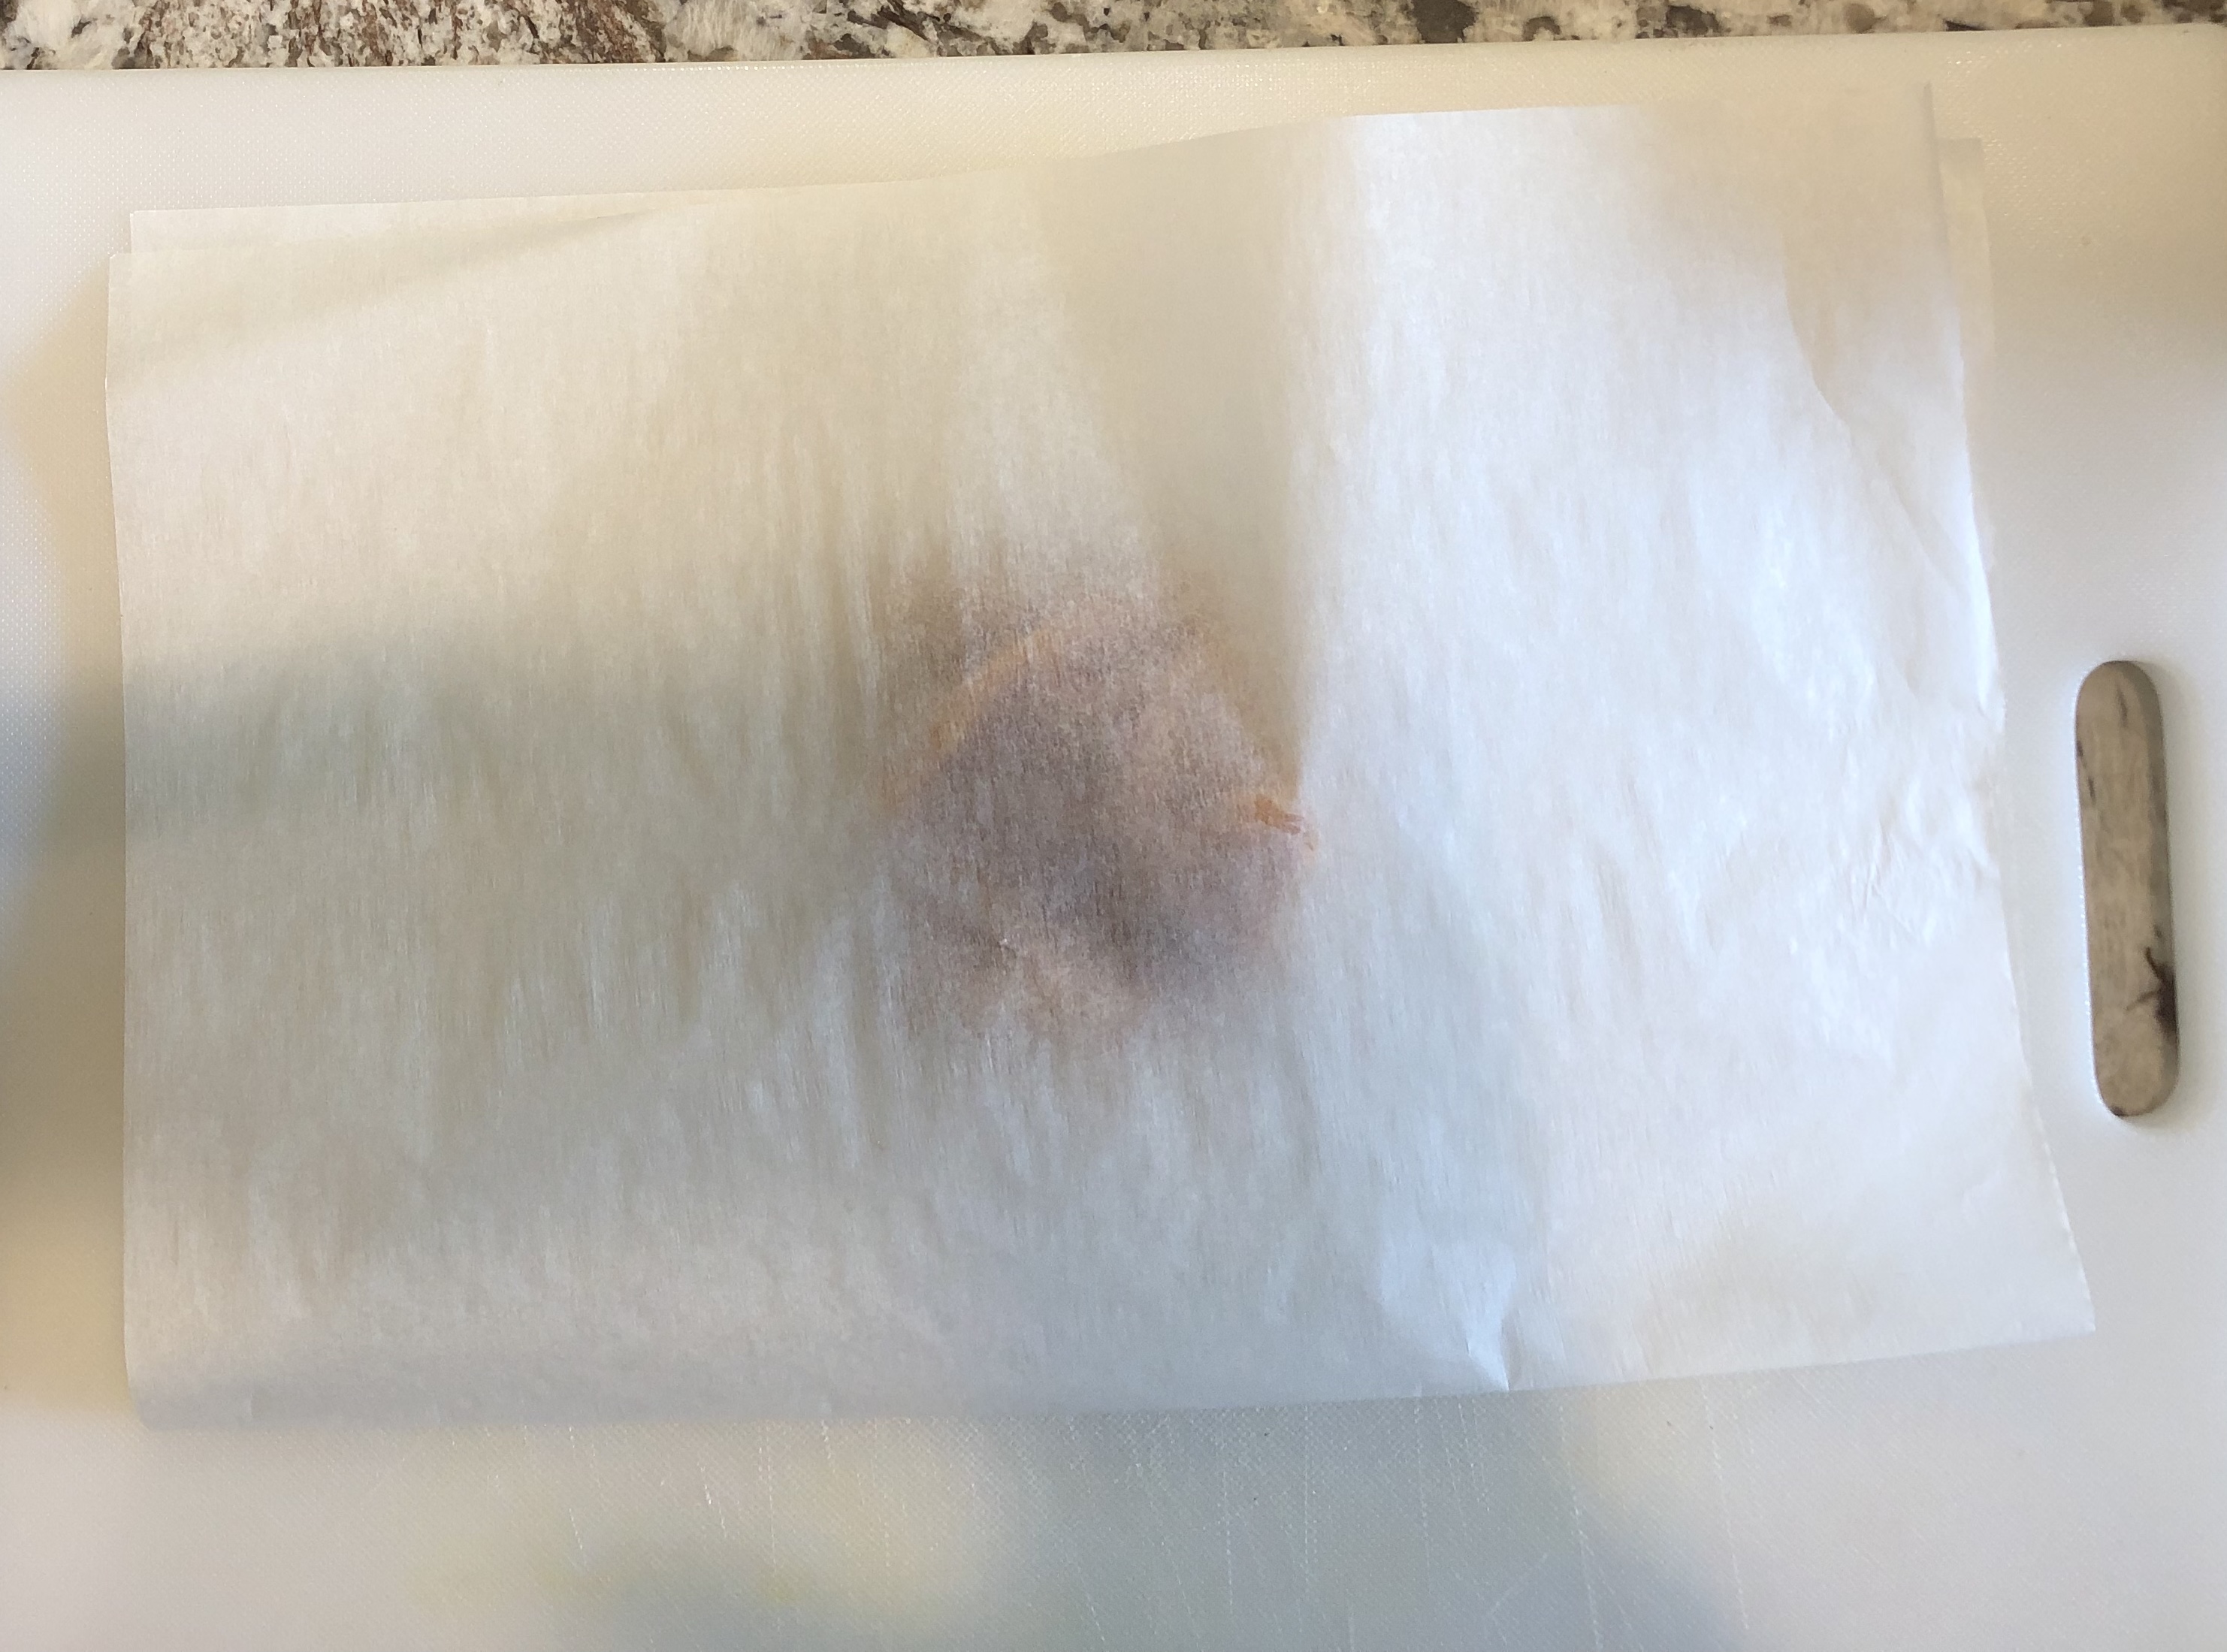
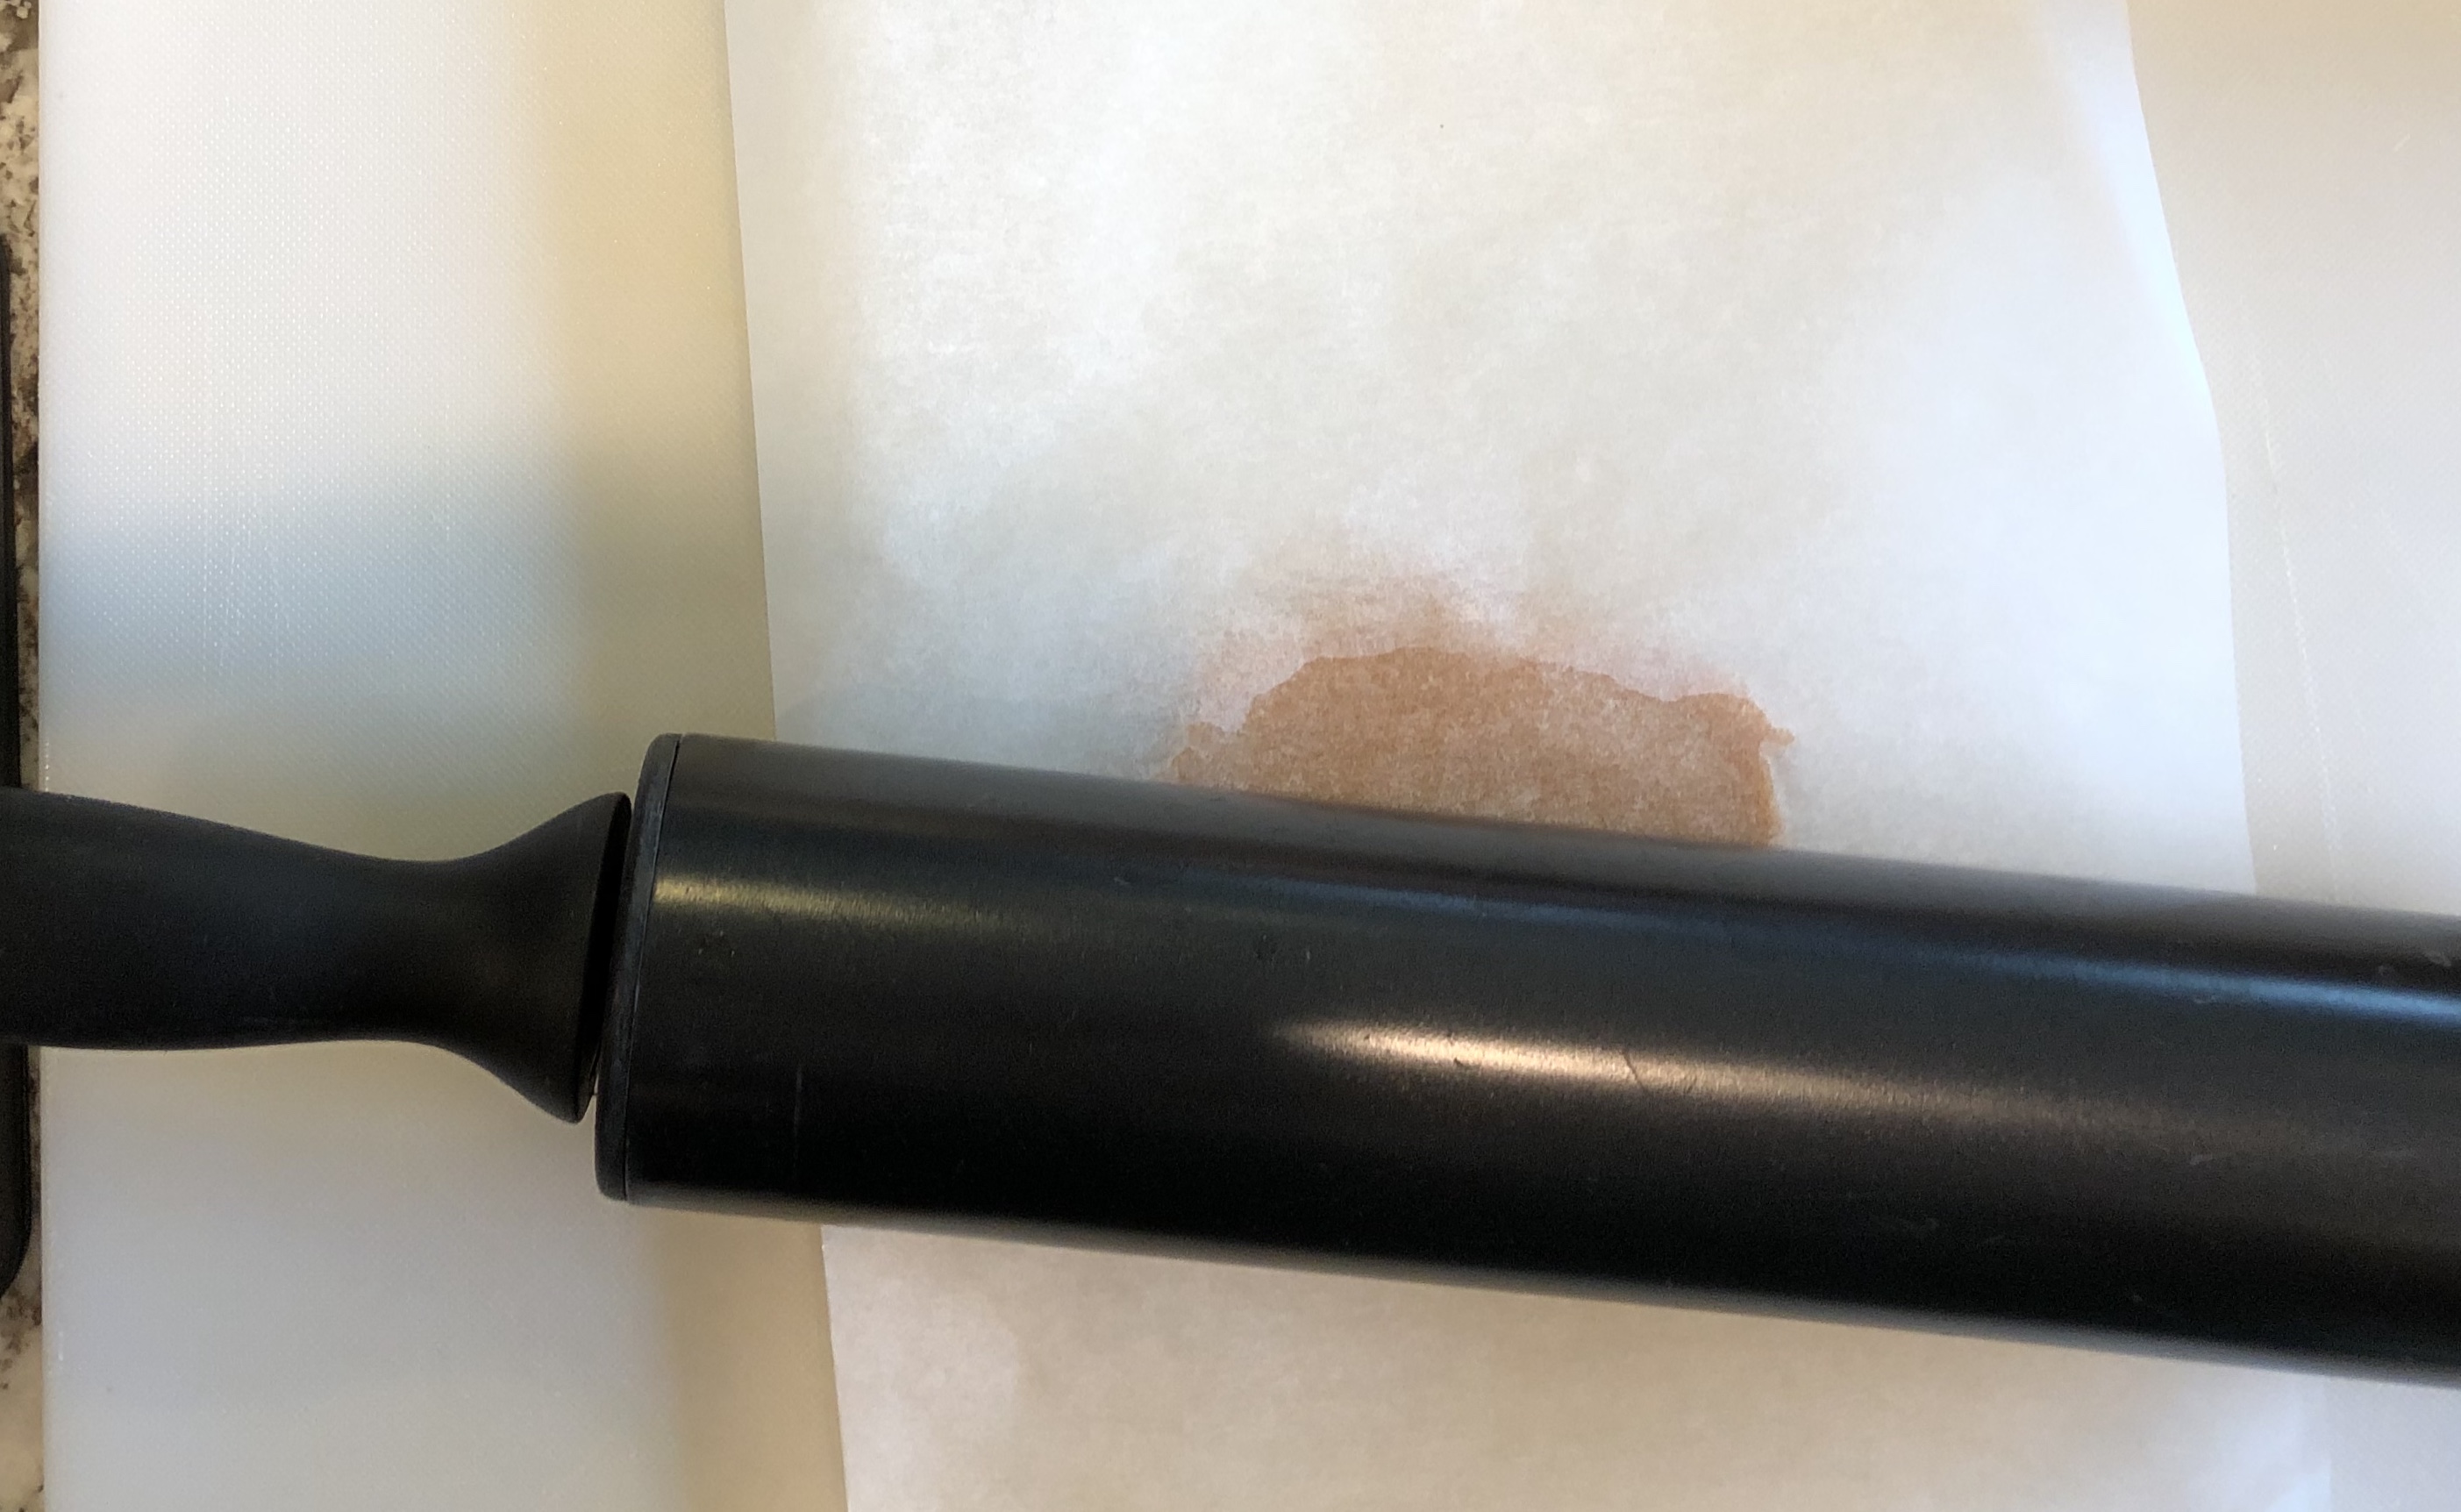
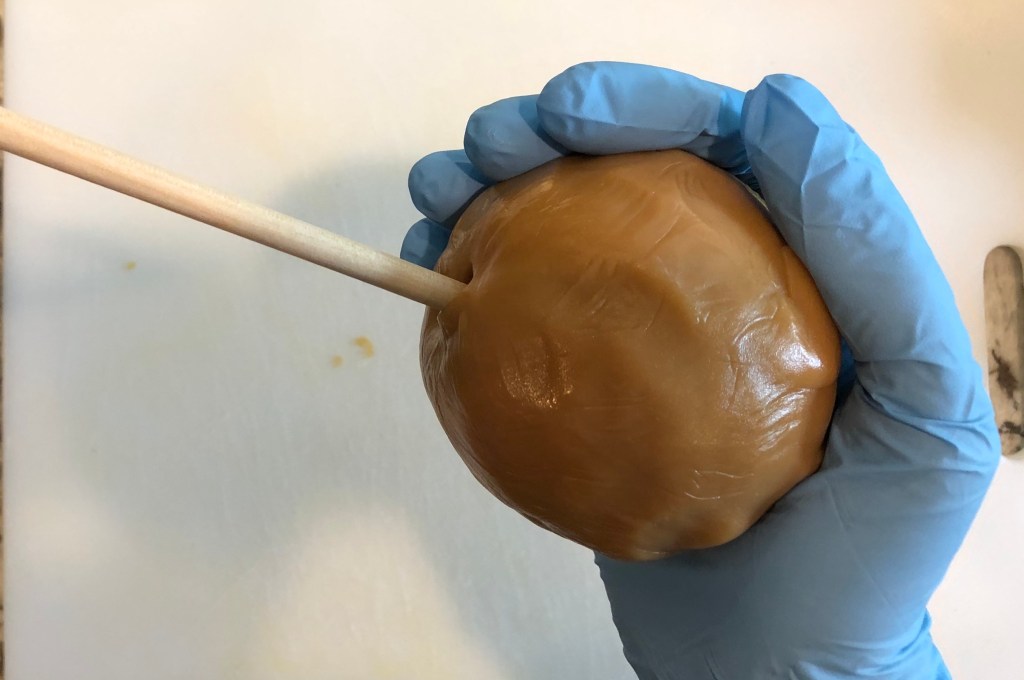
Instead, I portion just enough caramel for one apple (I cut about 1/4 inch of caramel from the loaf – this is between 60-75 g of caramel). I place the caramel between two sheets of parchment paper and microwave for 8 seconds on 50% power – just long enough to make the caramel malleable, but not hot. I roll the caramel into a rough circle about 1/8 inch thick, and place it in the refrigerator for a few minutes to cool.
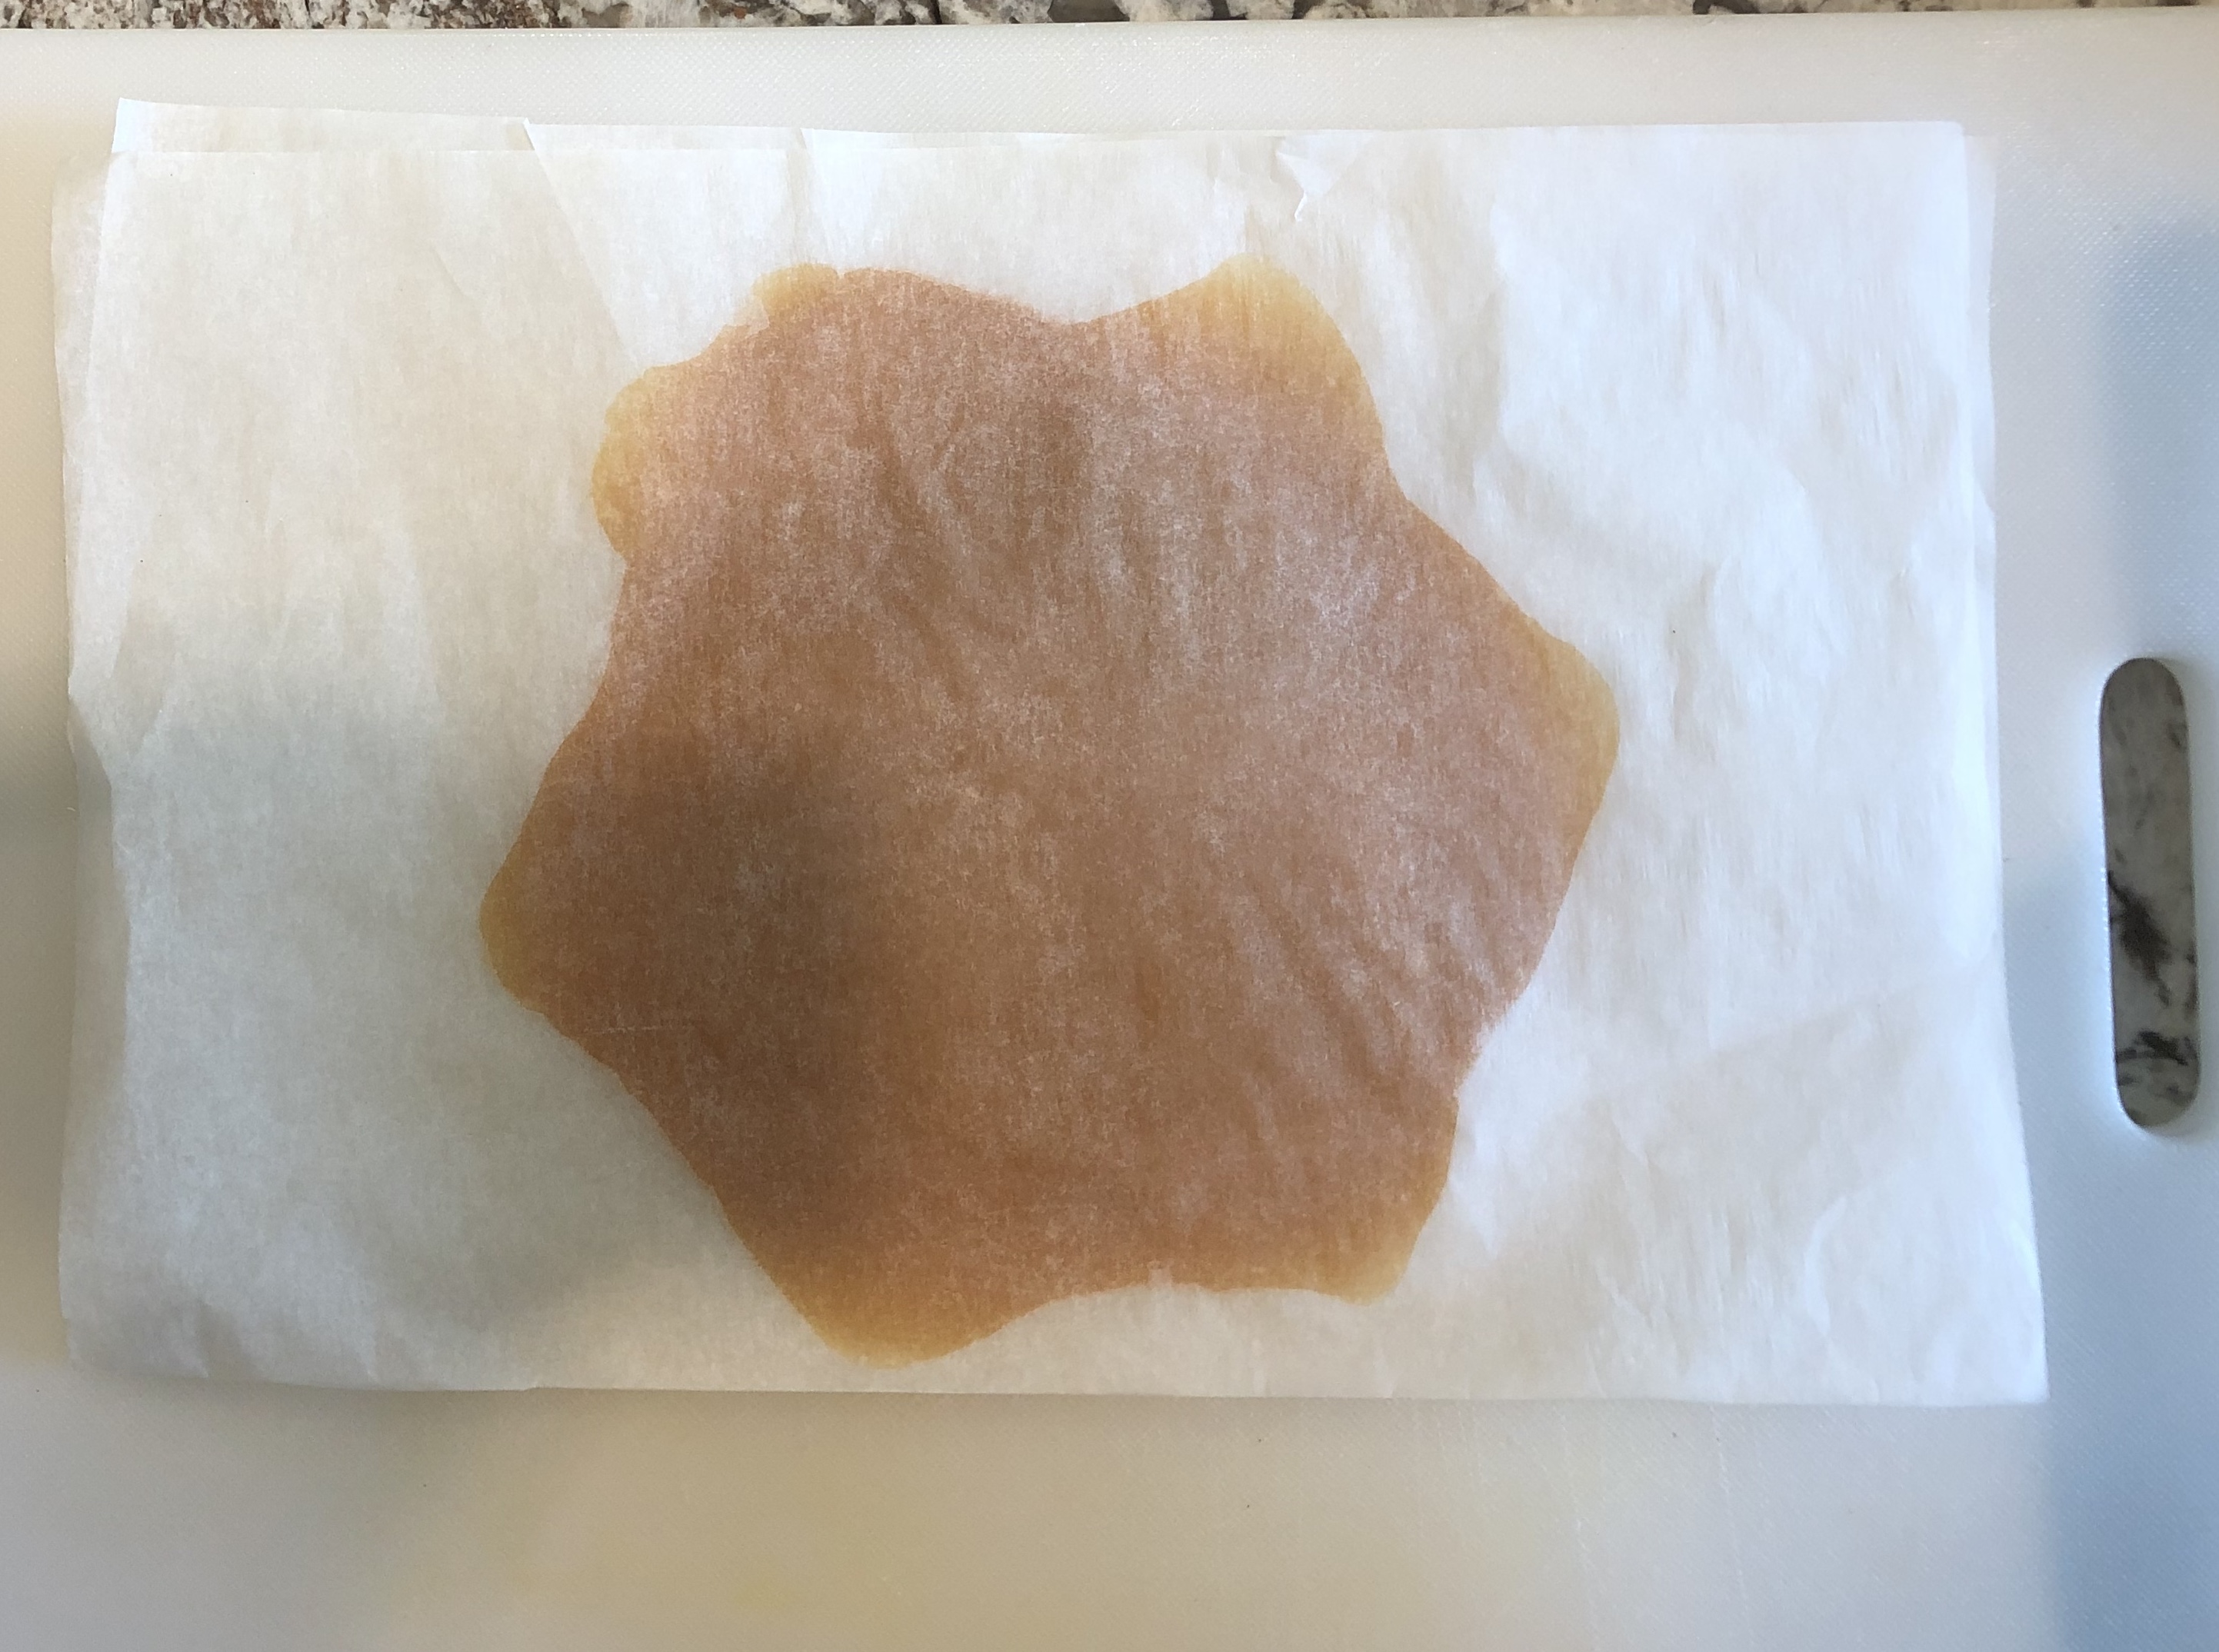
The cooled caramel releases easily from the parchment paper.
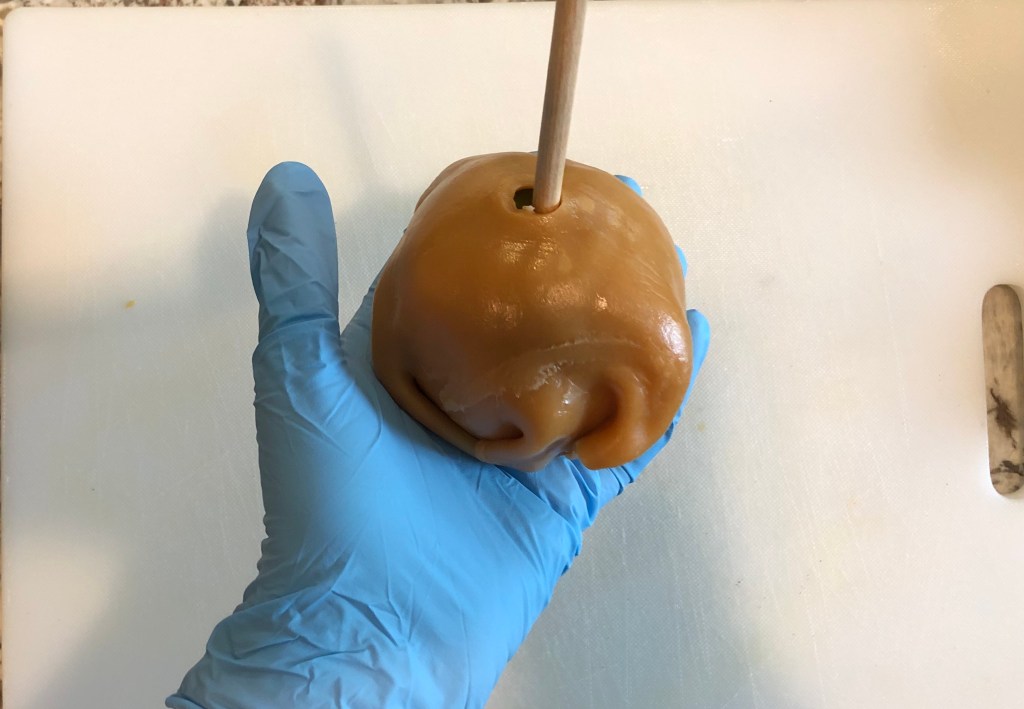
Essentially, I’m making my own caramel wrap and there is very little wasted caramel in the process. Definitely no hot caramel. Each caramel circle is then wrapped around an apple. I place it over the stick, but you could easily wrap the apple and then place the stick into the apple. I use gloved hands to move and smooth the caramel around the apple. I pinch the caramel together at the bottom of the apple.
After coating the apple with caramel, I leave them at room temperature. The caramel will smooth out, and the wrinkles on the surface will disappear.
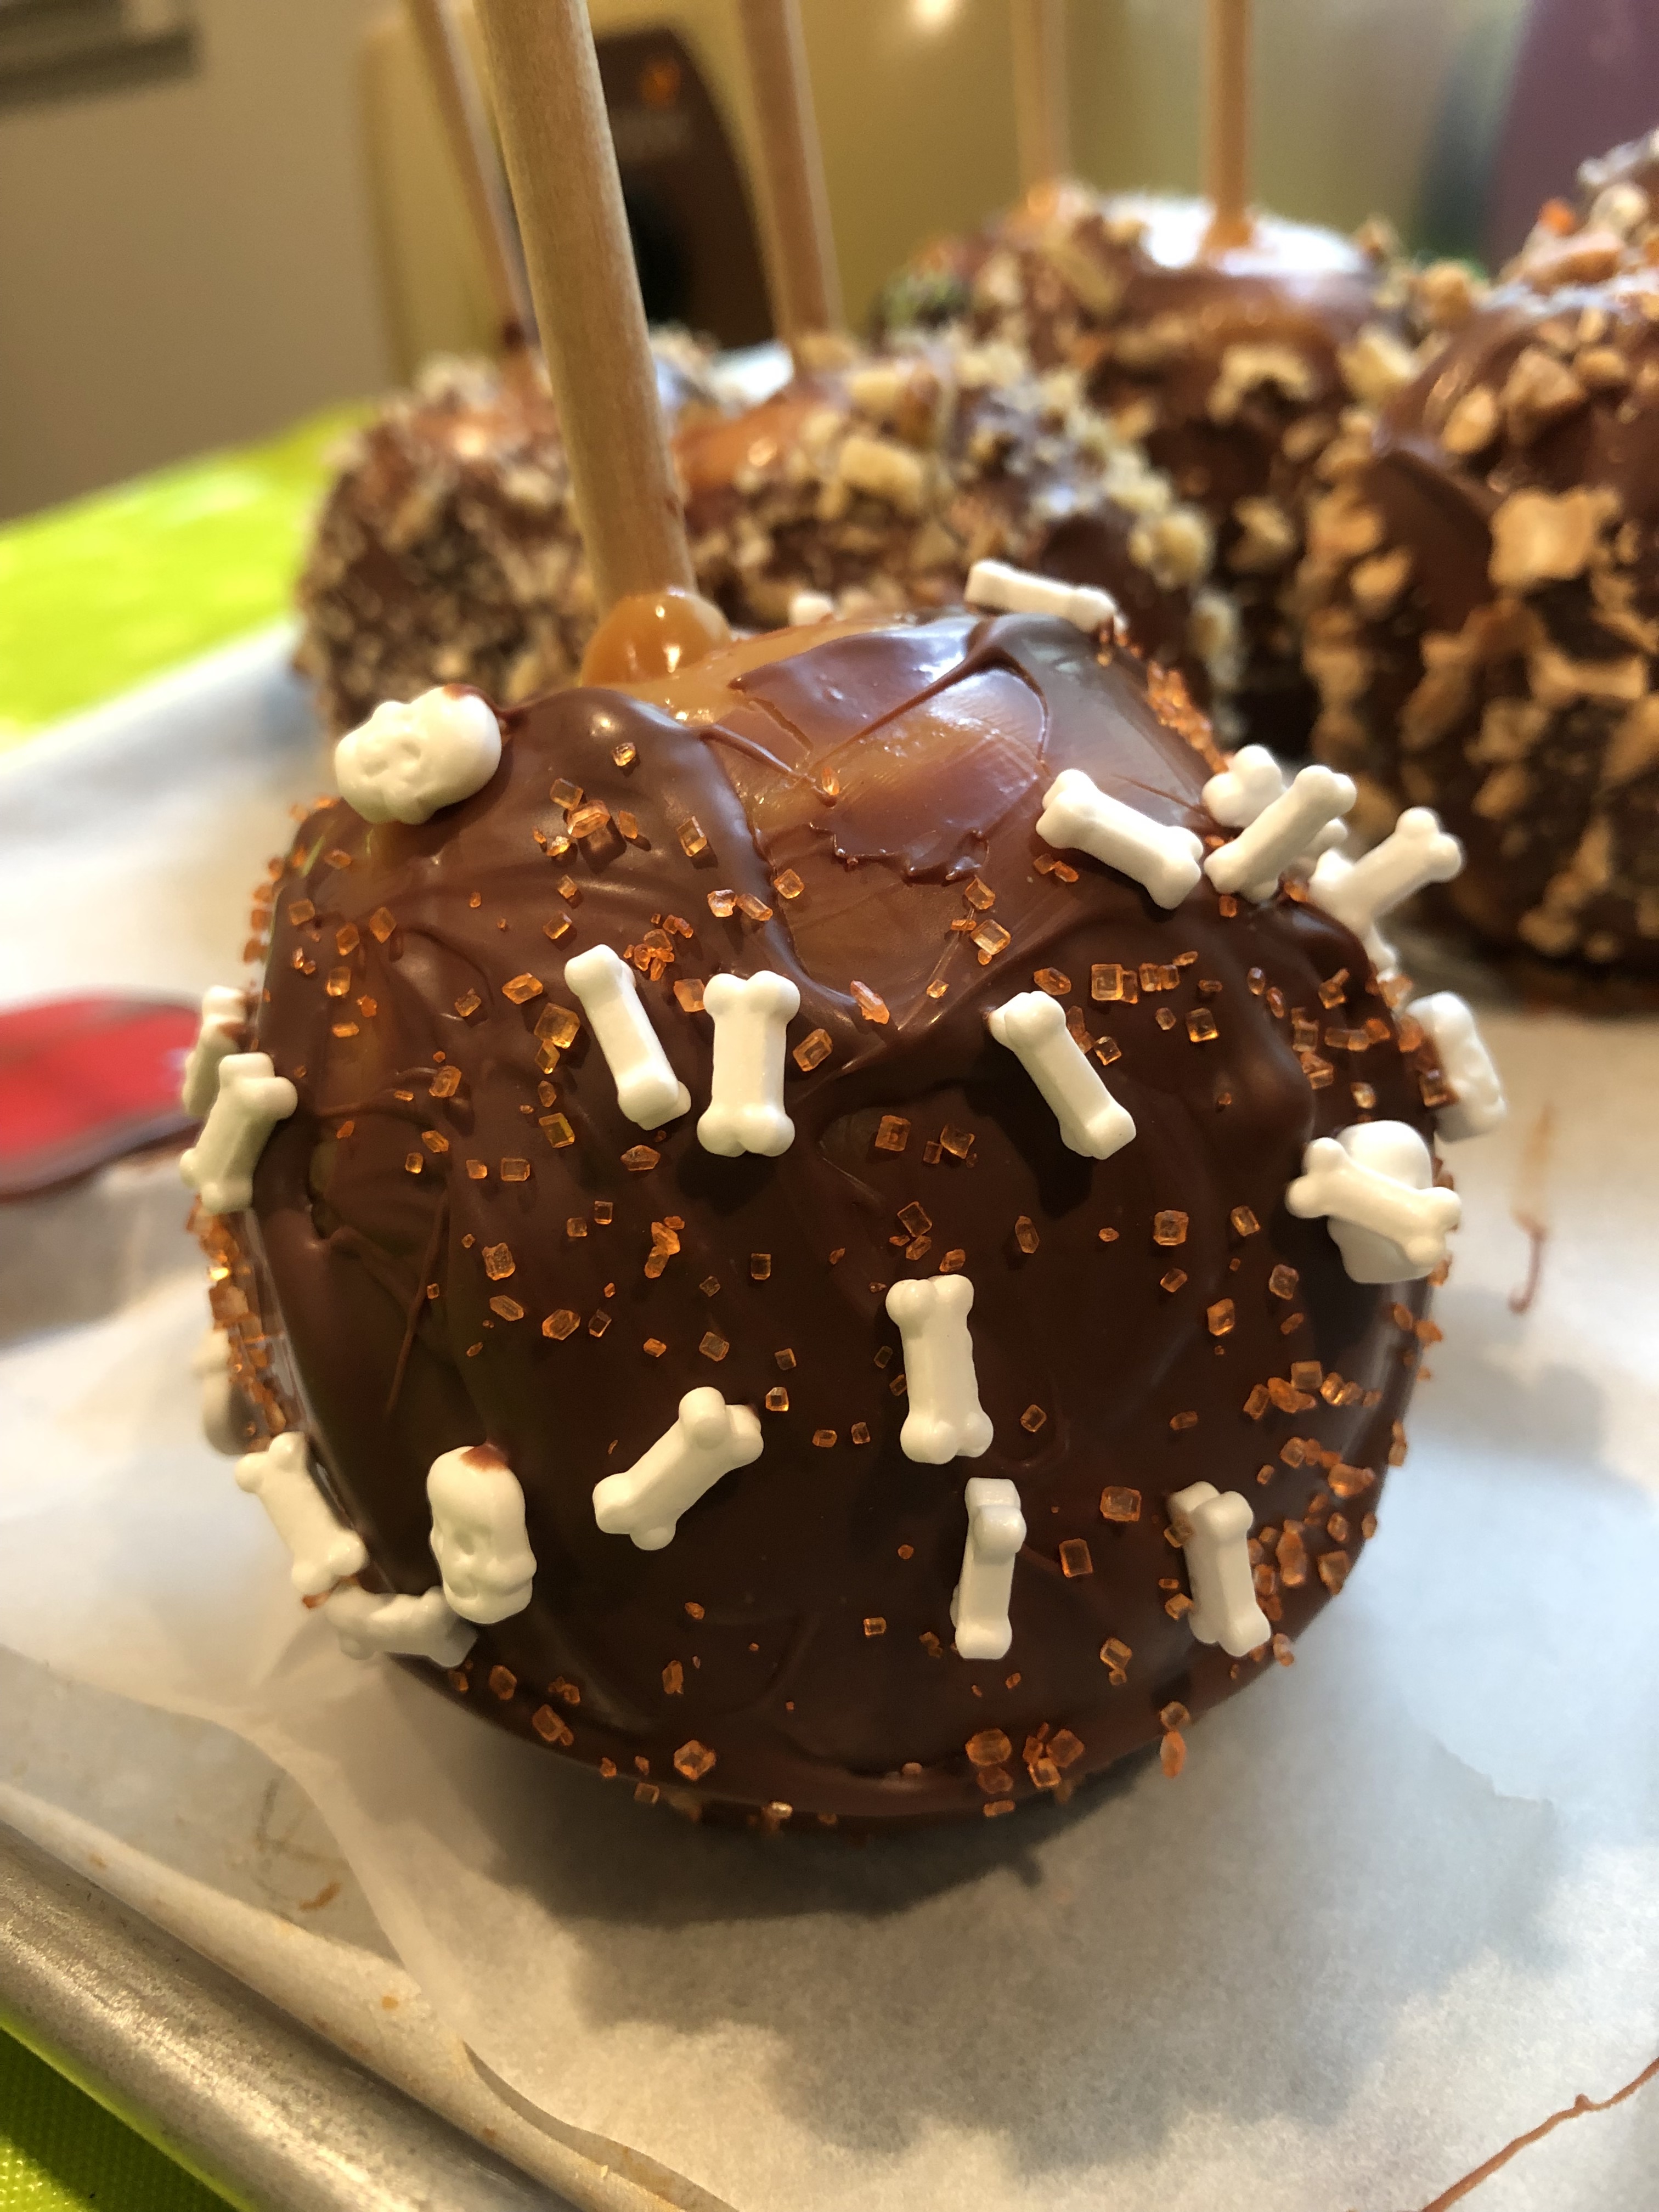
Third simplification: I don’t dip the apples in the chocolate. Dipping anything in the chocolate is always risky as you can loose the temper if the dipped item is 1) a different temperature – for example, if it just came out of the refrigerator or freezer, or 2) if it is wet with water – like freshly washed strawberries. Either of these two things will cause both chocolate AND confectioners coating to seize up, but chocolate is especially sensitive. So I avoid dipping altogether.
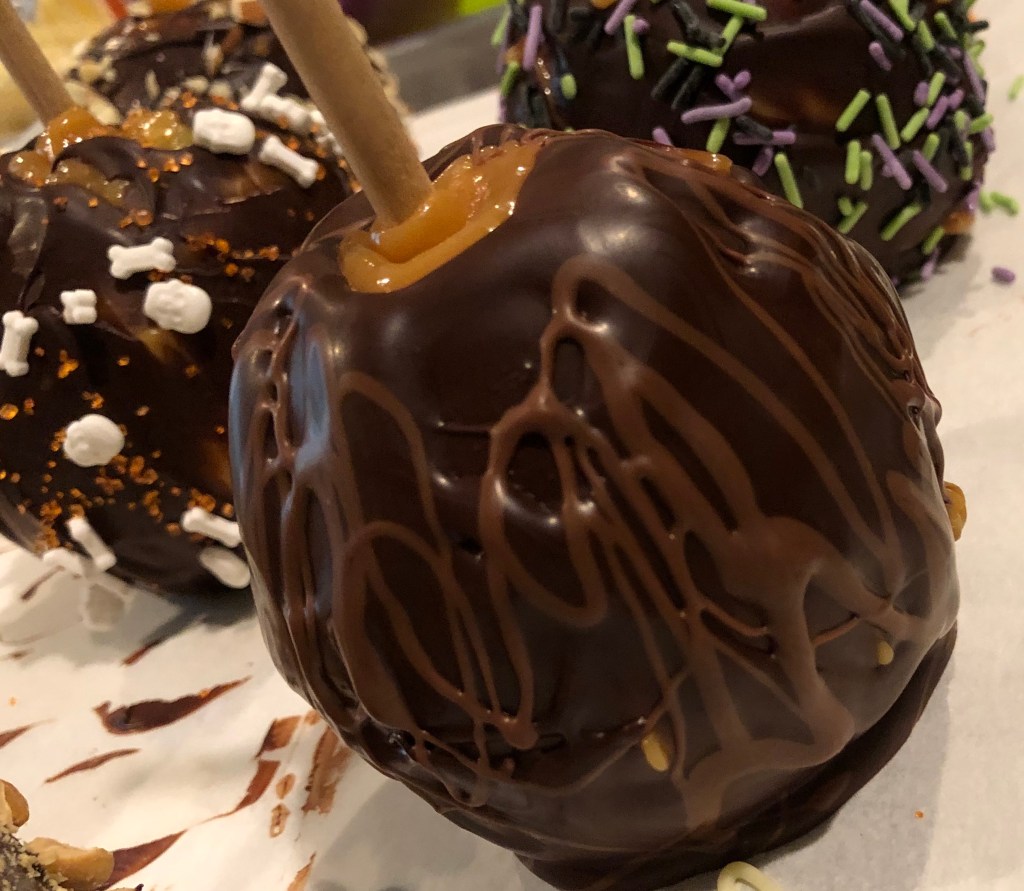
Instead, I carefully apply the chocolate to the apple using a spatula. Sometimes the bottom of the apple will have drops of apple juice on it, especially if the stick is poking all the way through the apple. After carefully inspecting the apple and removing any obvious liquid, I apply the chocolate to the apple. I typically hold the apple over the melted chocolate so any drips go right back into the melted chocolate and very little, if any, chocolate is wasted. If you dip the apple in the chocolate, it takes a long time and a lot of shaking for the excess chocolate to drip off. If you don’t wait long enough, the excess chocolate on the apple will slowly move down the apple and eventually form a large “foot” at the base of the apple. Unsightly, but still delicious.
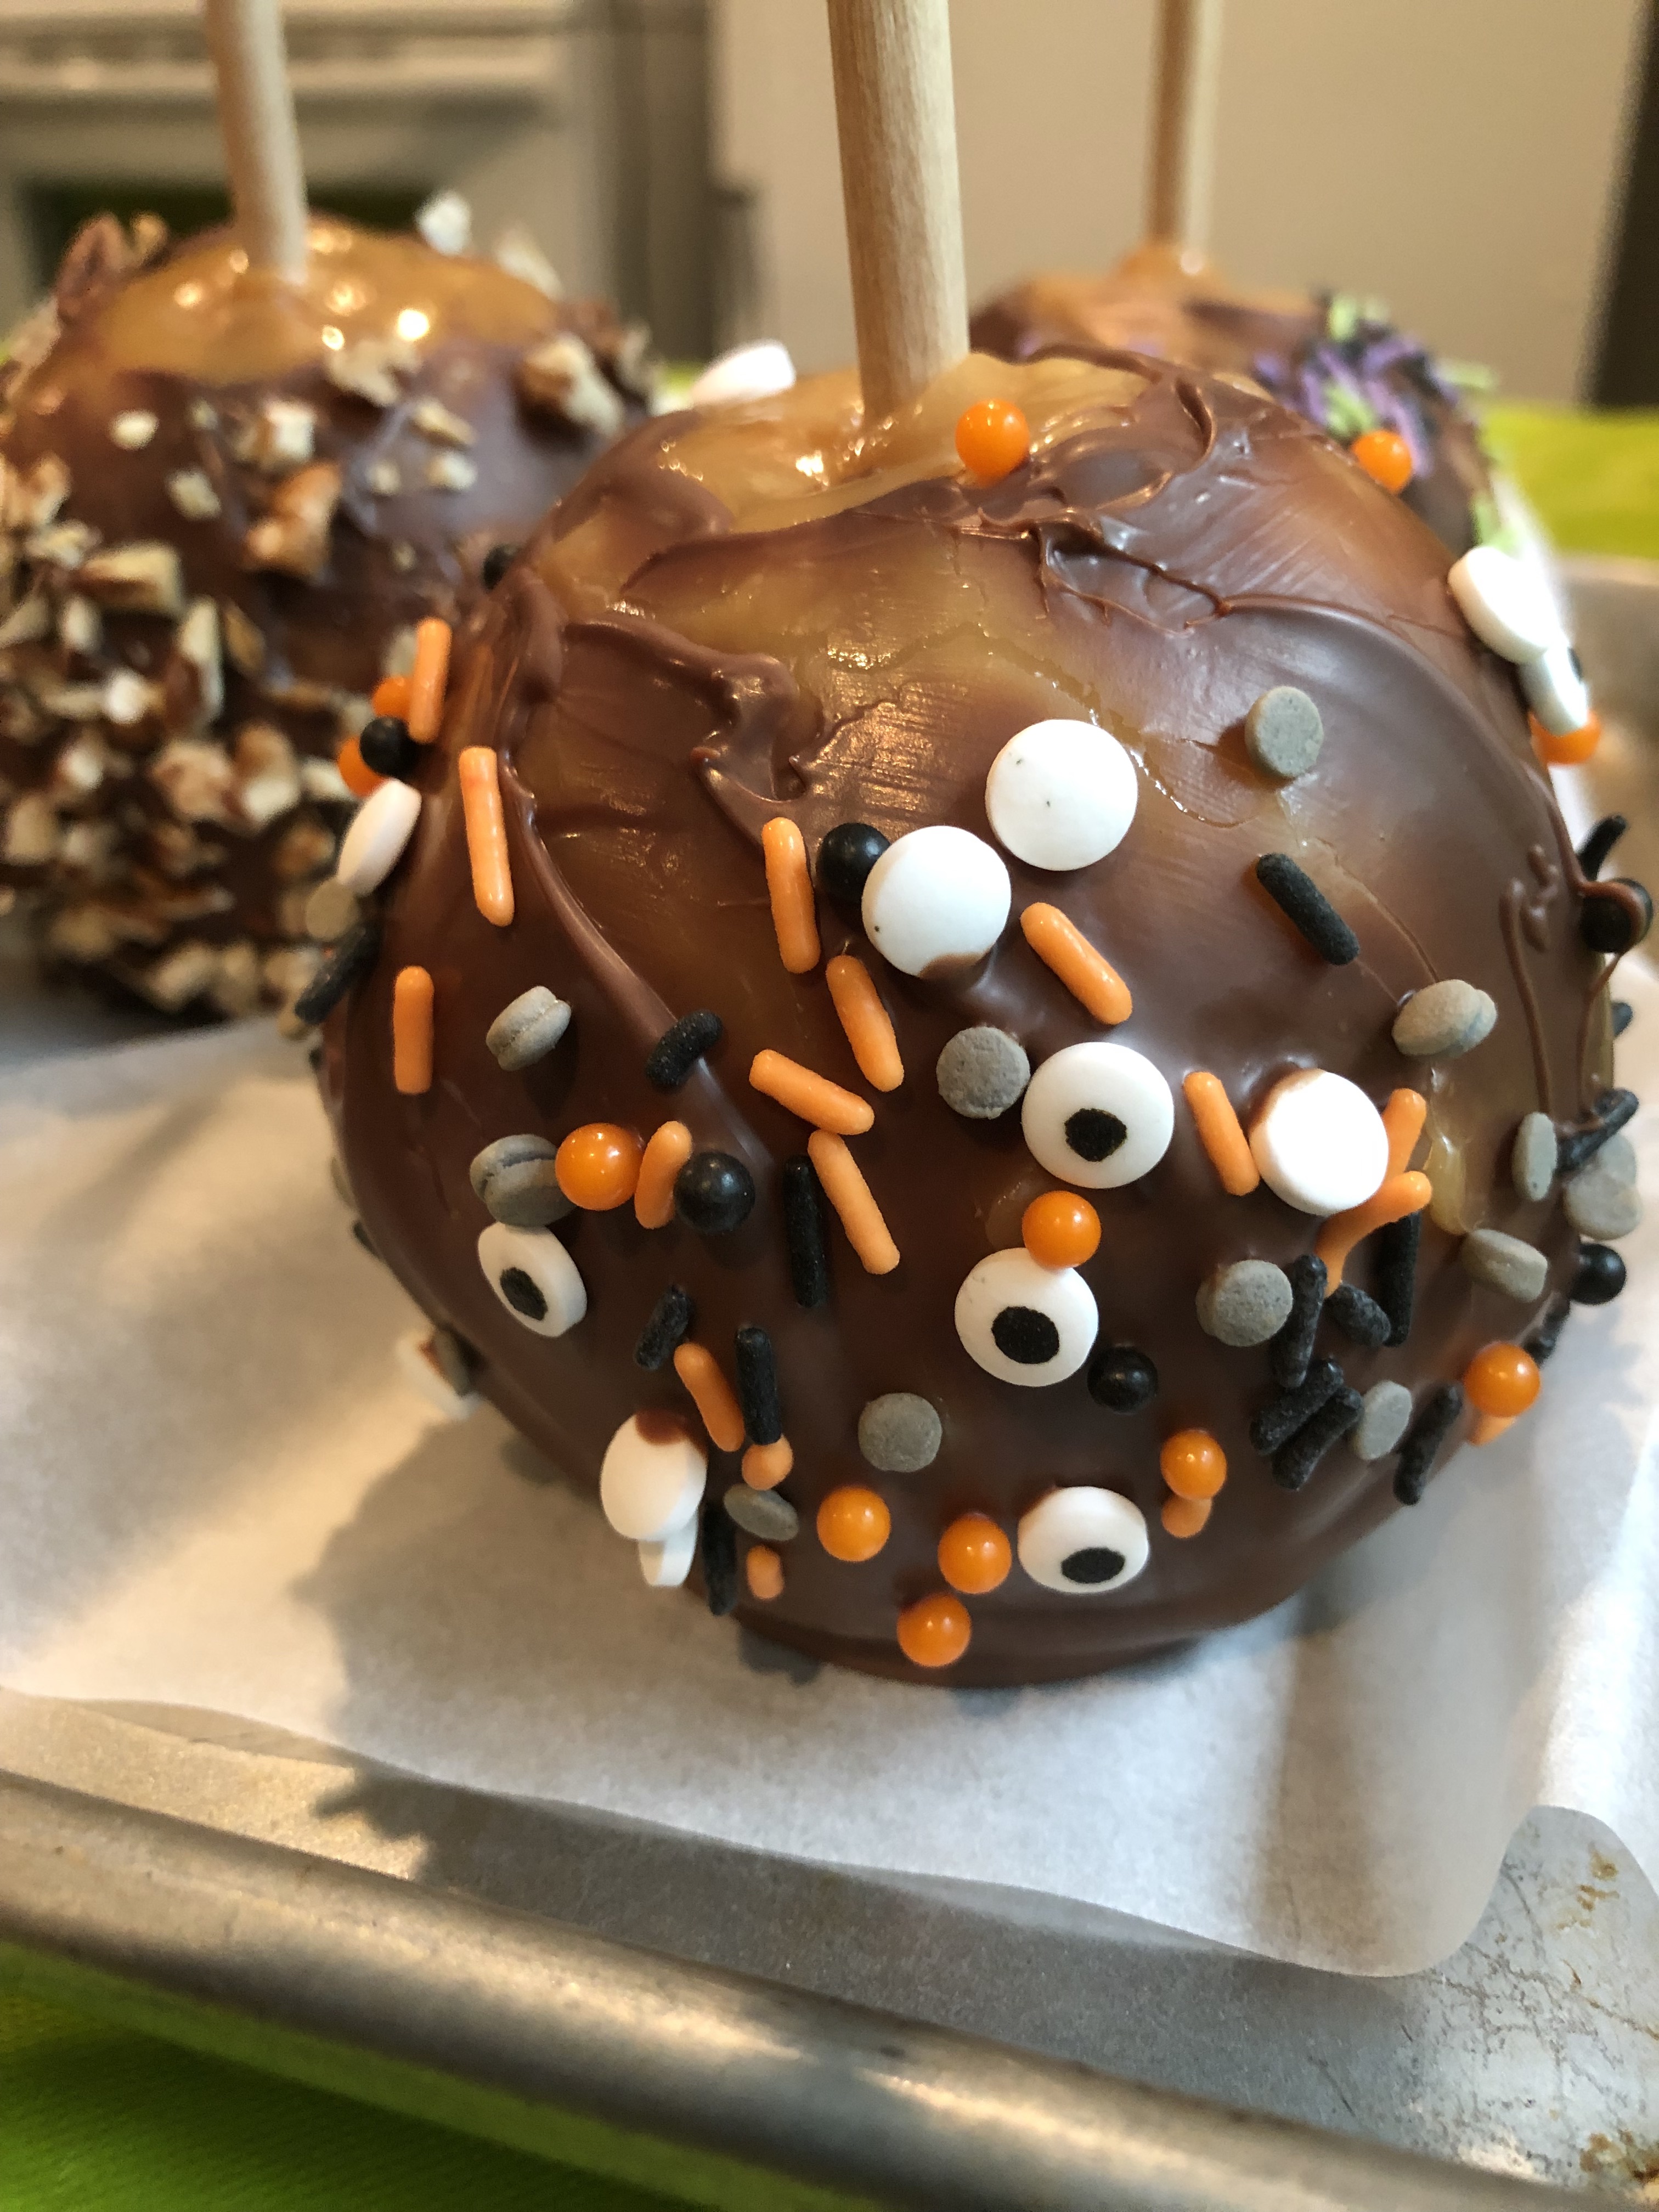
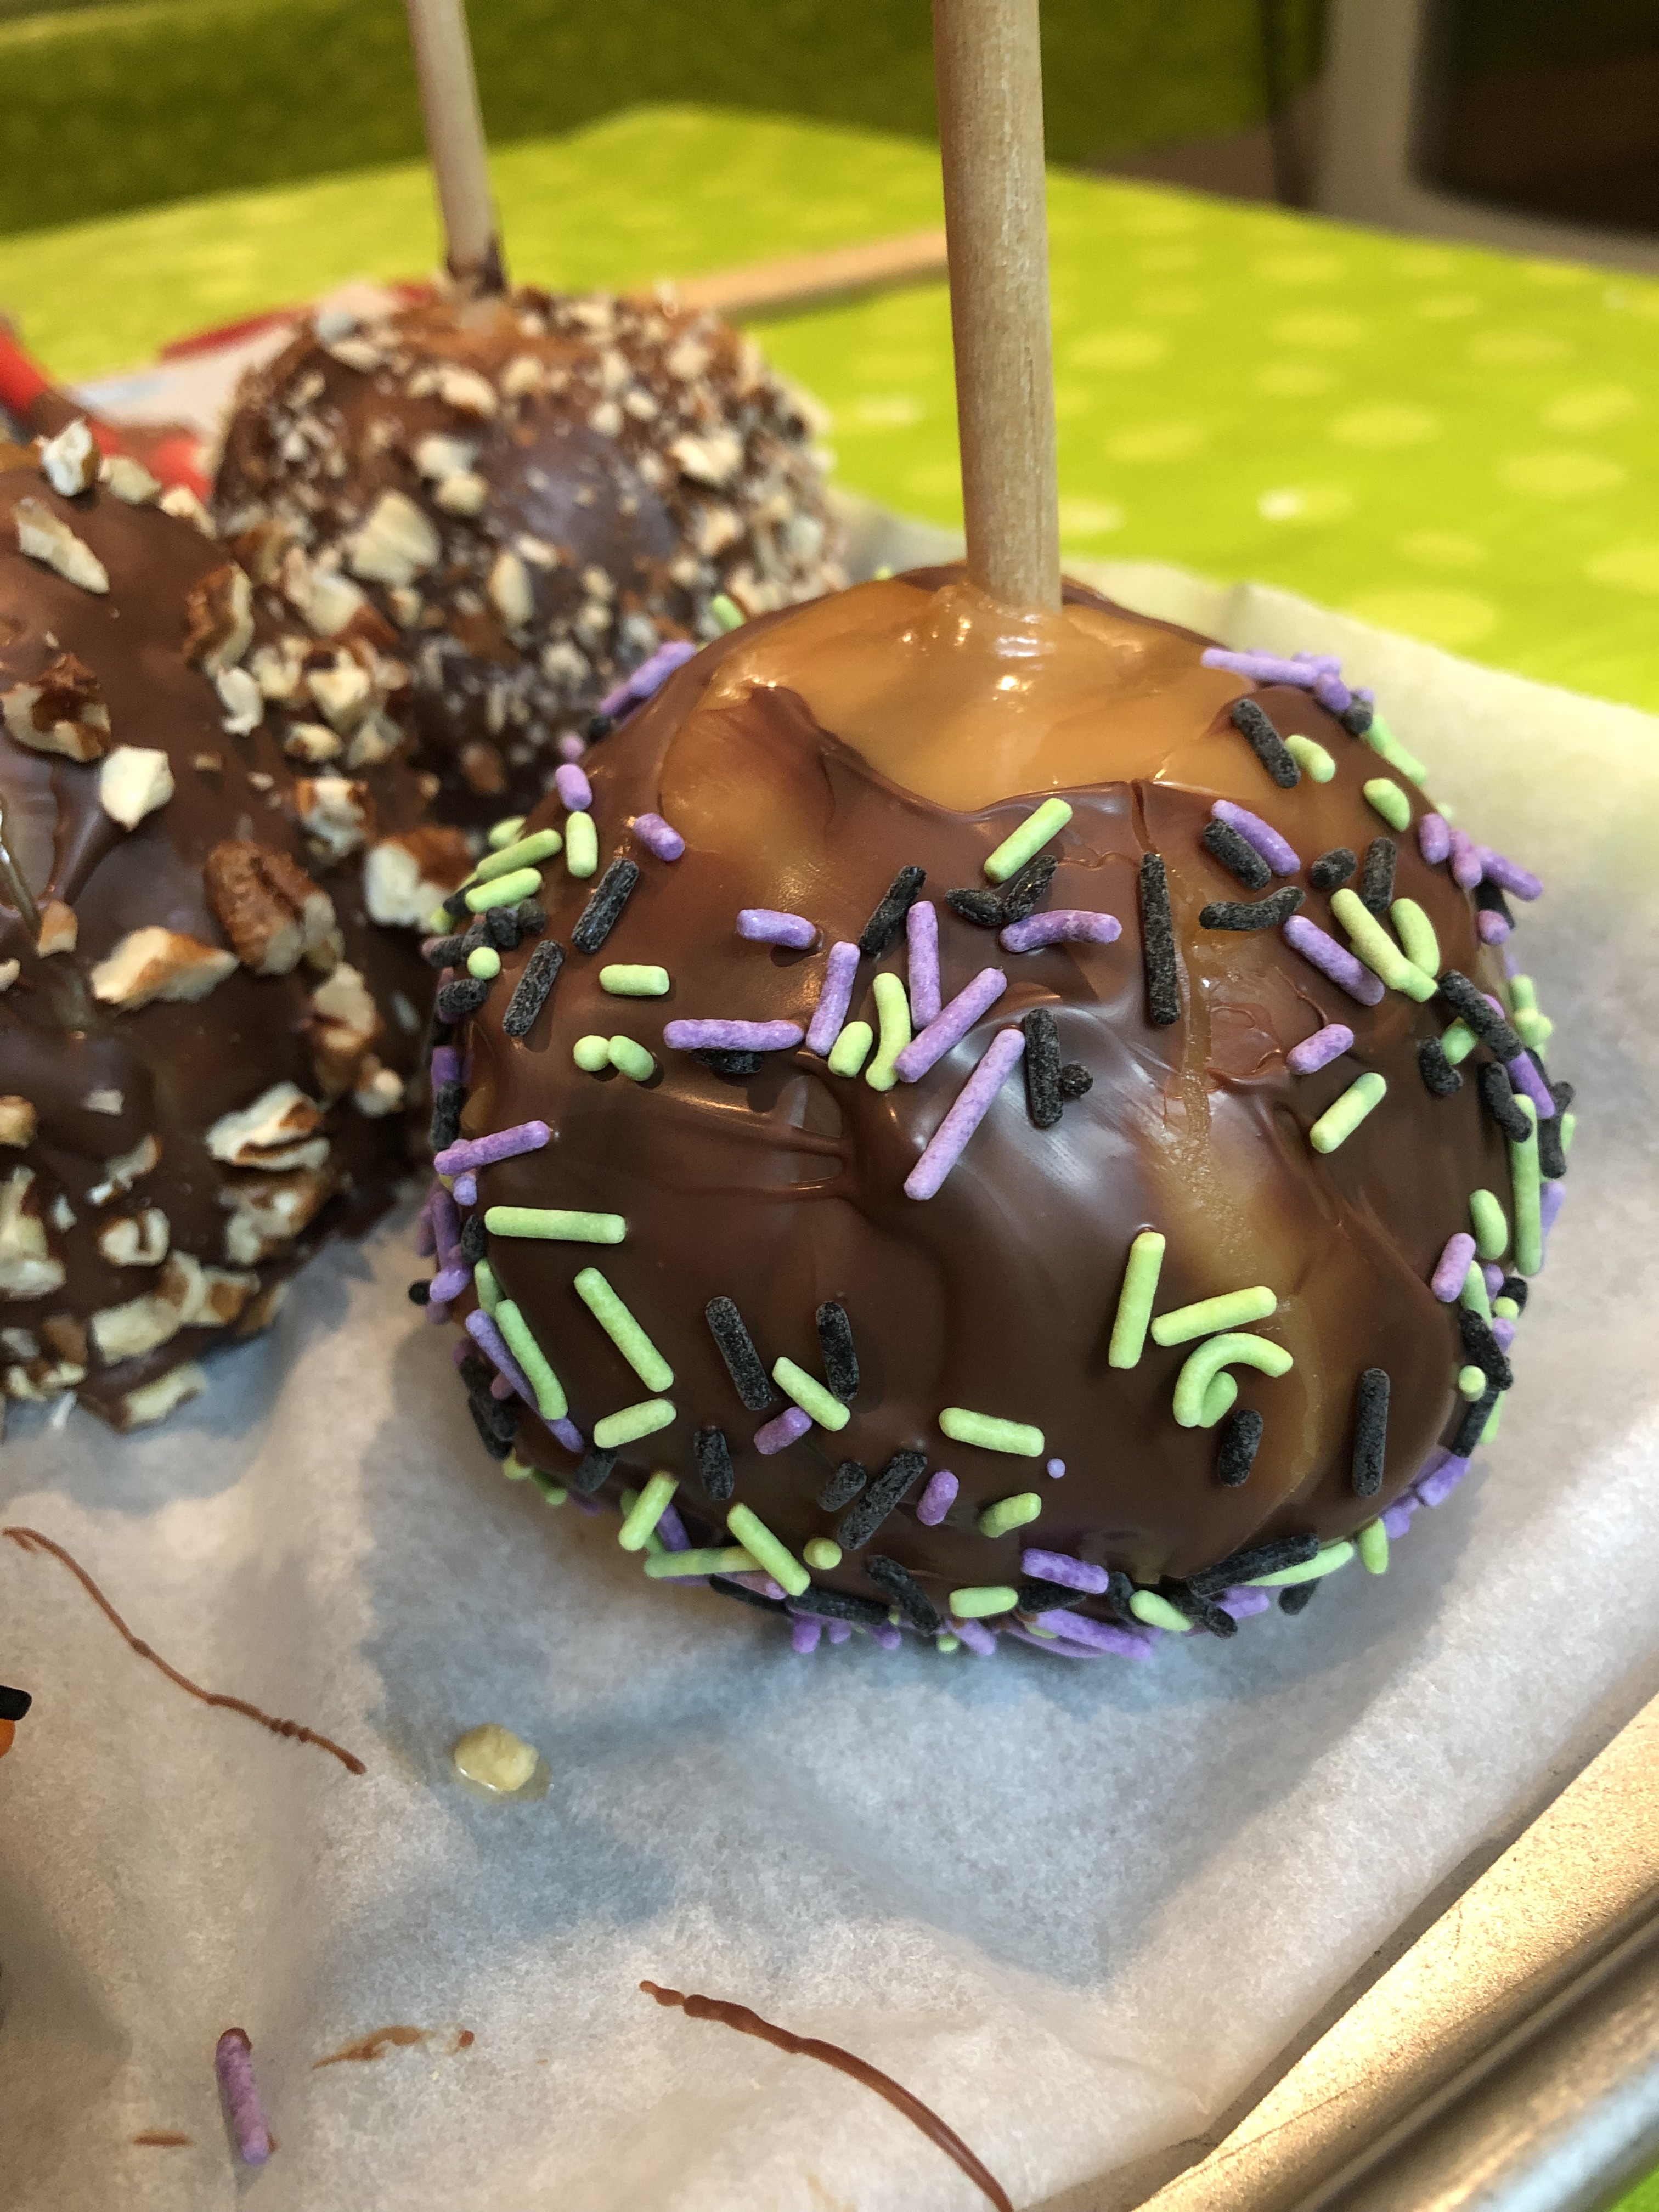
By placing the chocolate on with a spatula, I can control the amount of chocolate that is applied. The chocolate also begins to set up and holds sprinkles, nuts, and other garnishes better. With more chocolate, the nuts and sprinkles tend to slide off the apple and onto the baking sheet.
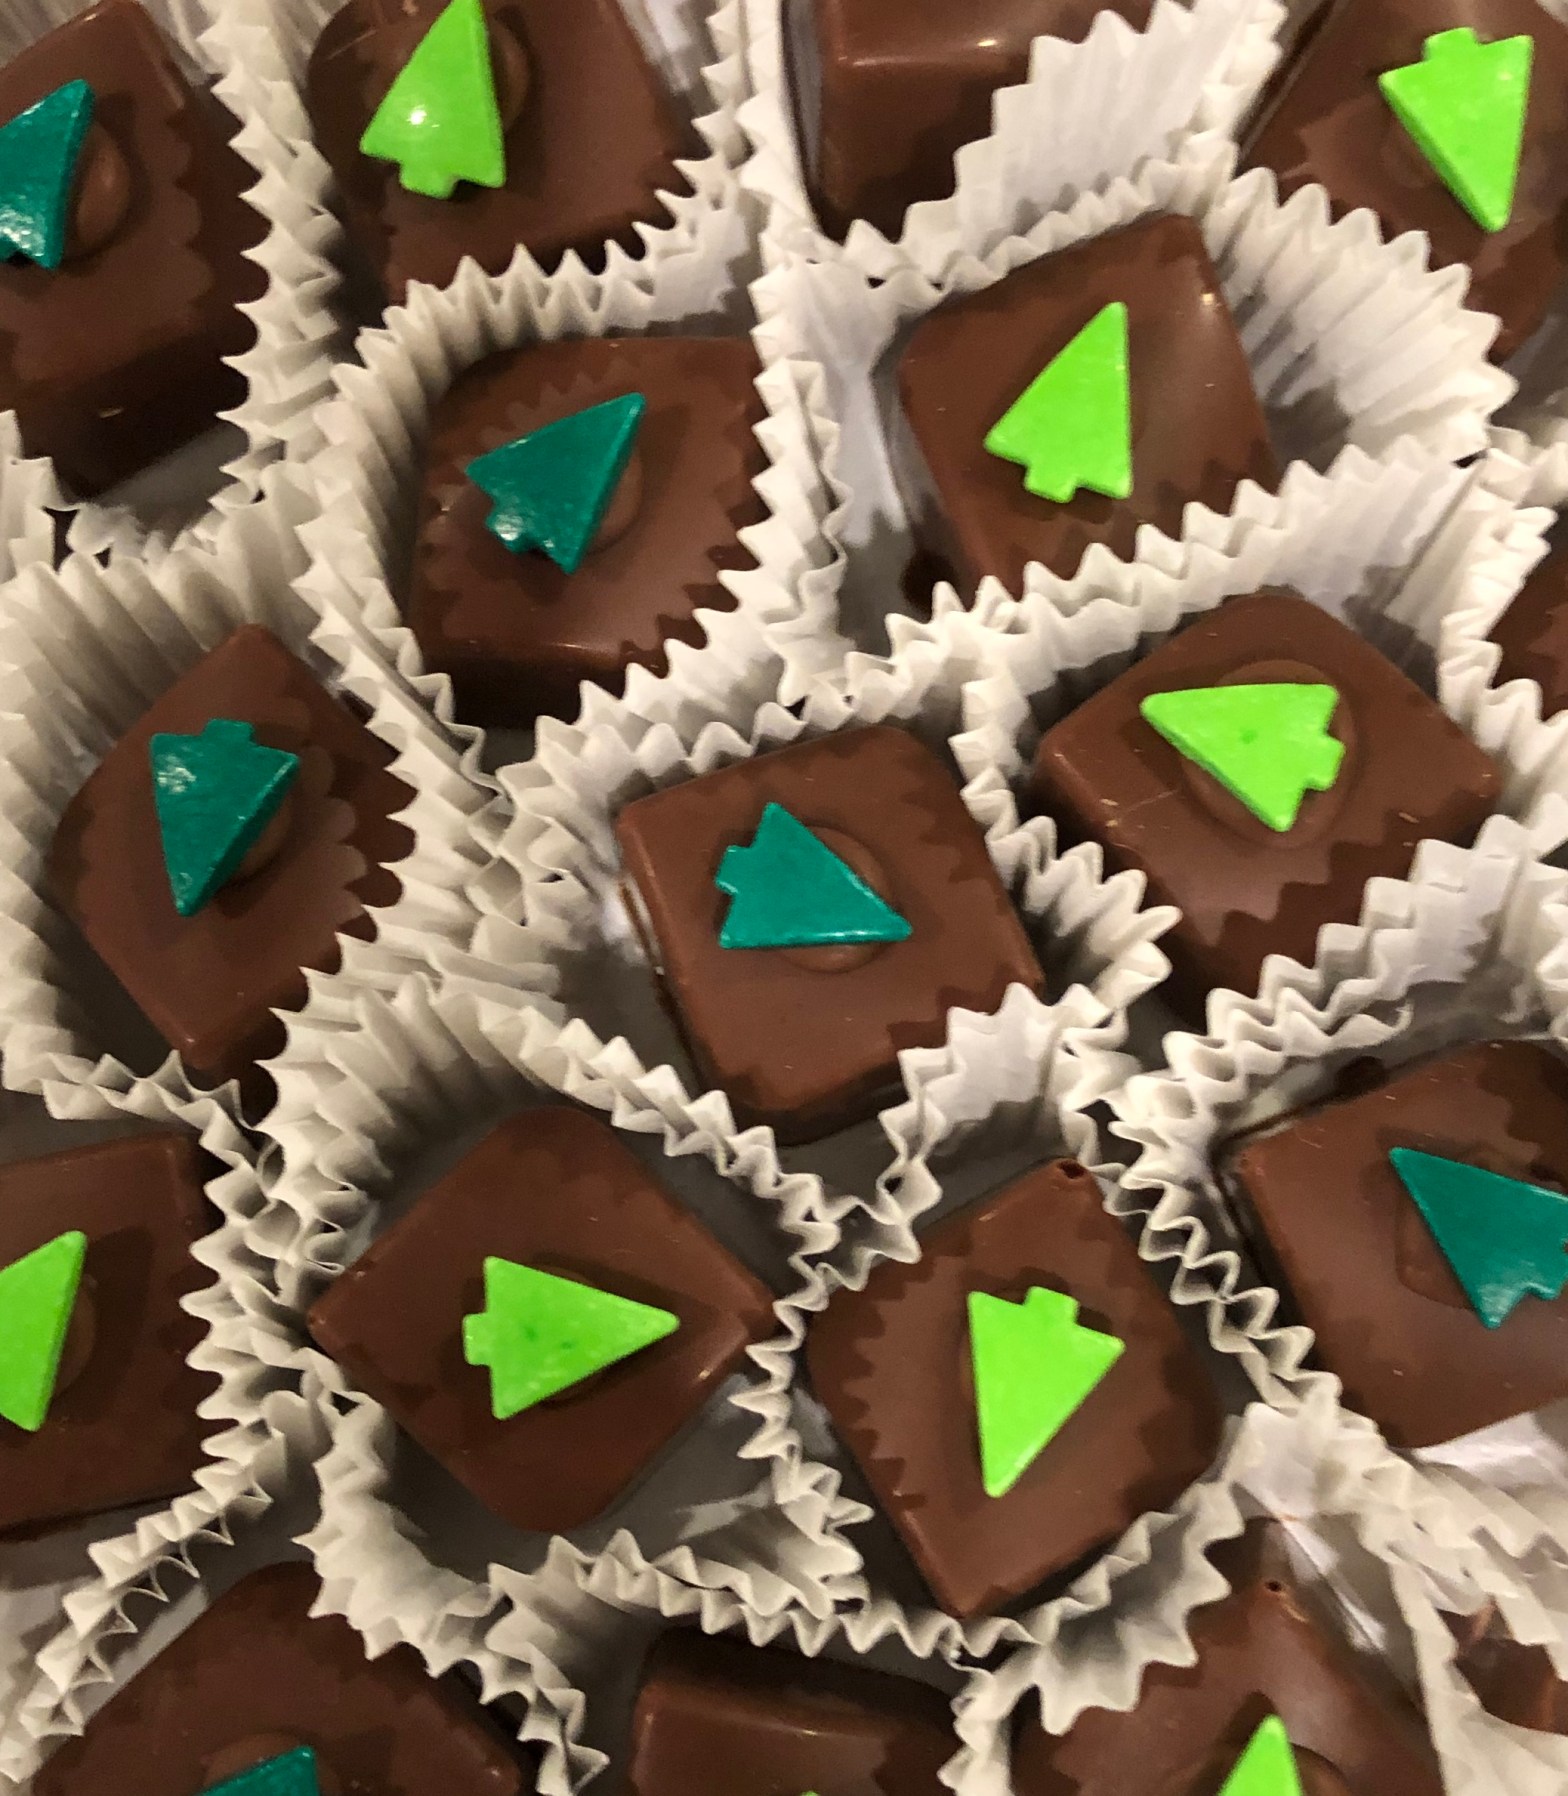
Milk chocolate with cashewsBittersweet chocolate with milk chocolate swirls
This poncho is modular–it is knit in one piece, with each section connected to another section. There are no seams, but many, many short rows. My original poncho was a free style, work-as-you-go wrap that began with a crude plan which was modified many times as I worked to complete the poncho. I hope that you will also embrace the free-style nature of the poncho. Don’t stress too much about counting stitches. If you work fewer rows or more rows, it should not affect the final fit of the poncho (it will affect the length, however).
Yarn: Leading Men Fiber Arts Diva (fingering weight, 150g/600 yards in each hank of yarn) in colors: Dust in the Wind (lightest color, Color 1 in the pattern), Can’t Quit Ewe (medium color, Color 2 in the pattern), and Fireball (darkest color, Color 3 in the pattern). [Note: I had ~95 grams of yarn remaining after completing: 49g of Dust in the Wind, 20 g of Can’t Quit Ewe, and 26 g of Fireball].
I used size US4/3.5mm needles.
Stockinette Gauge = 23.9 sts x 32 rows in 4×4 in/ 10x10cm swatch.
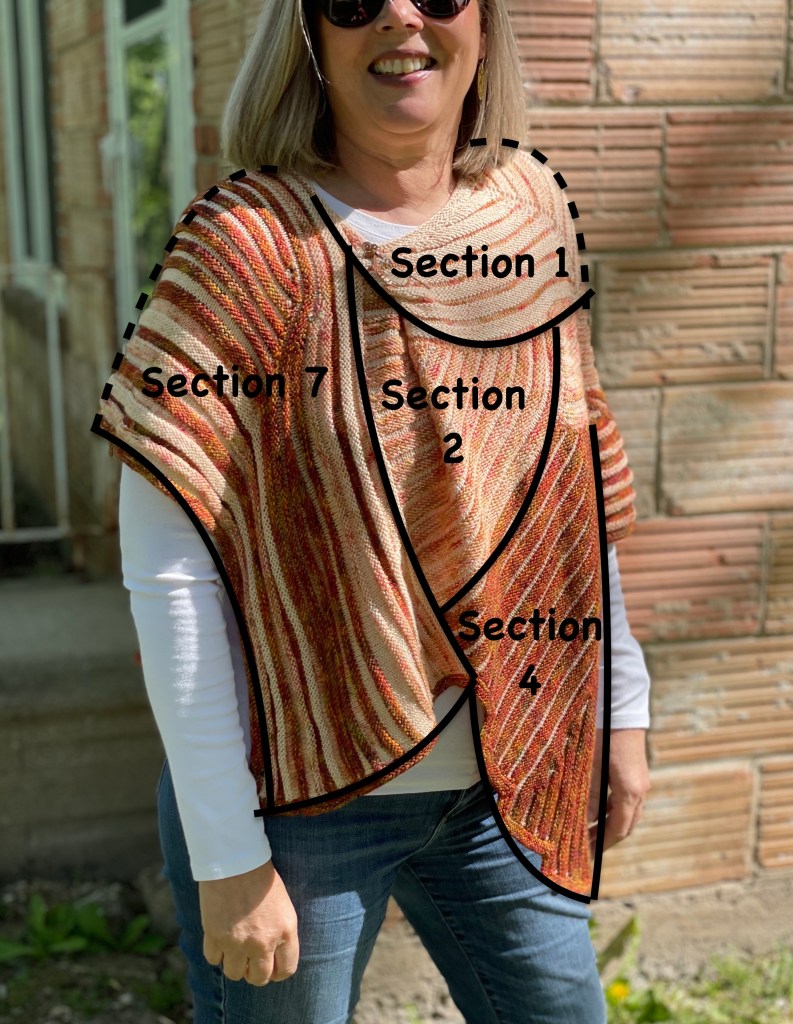
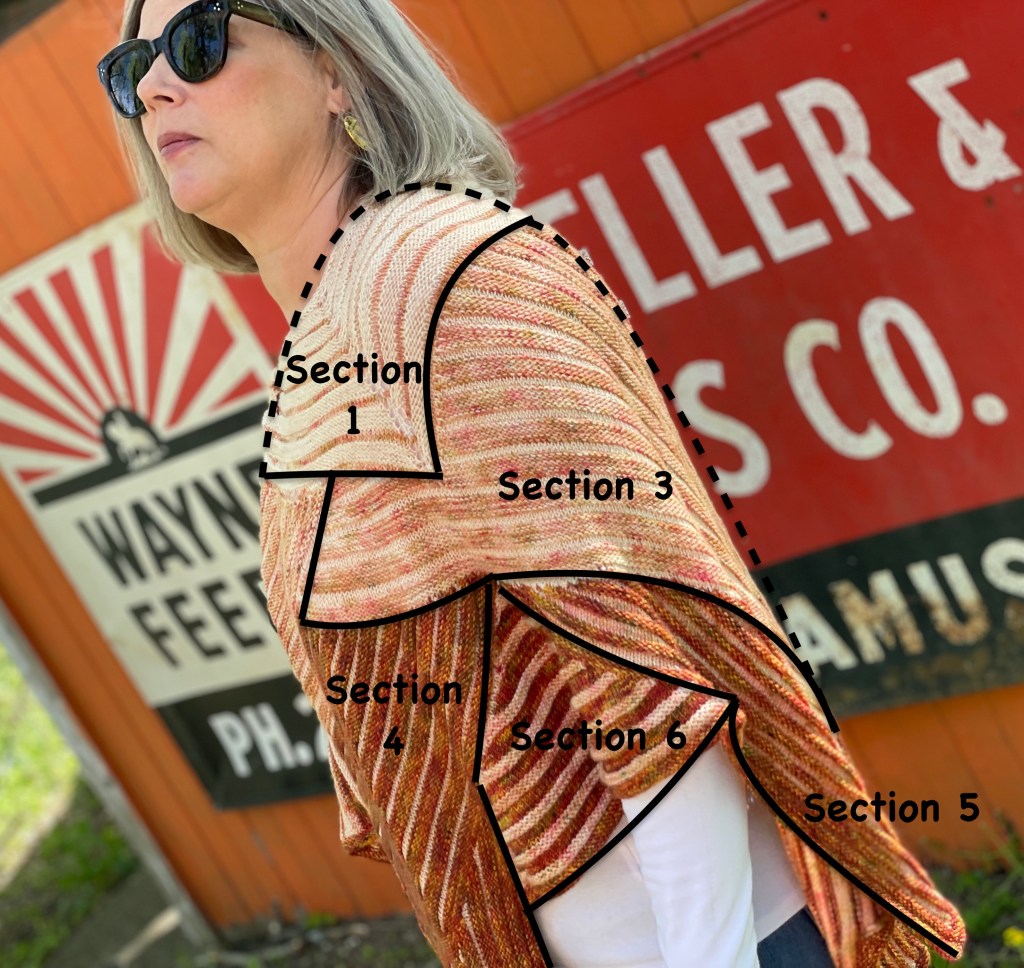
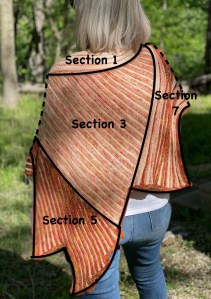
The photos below show each of the sections as they fall in the finished poncho.
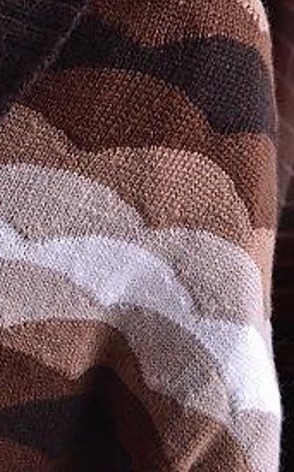
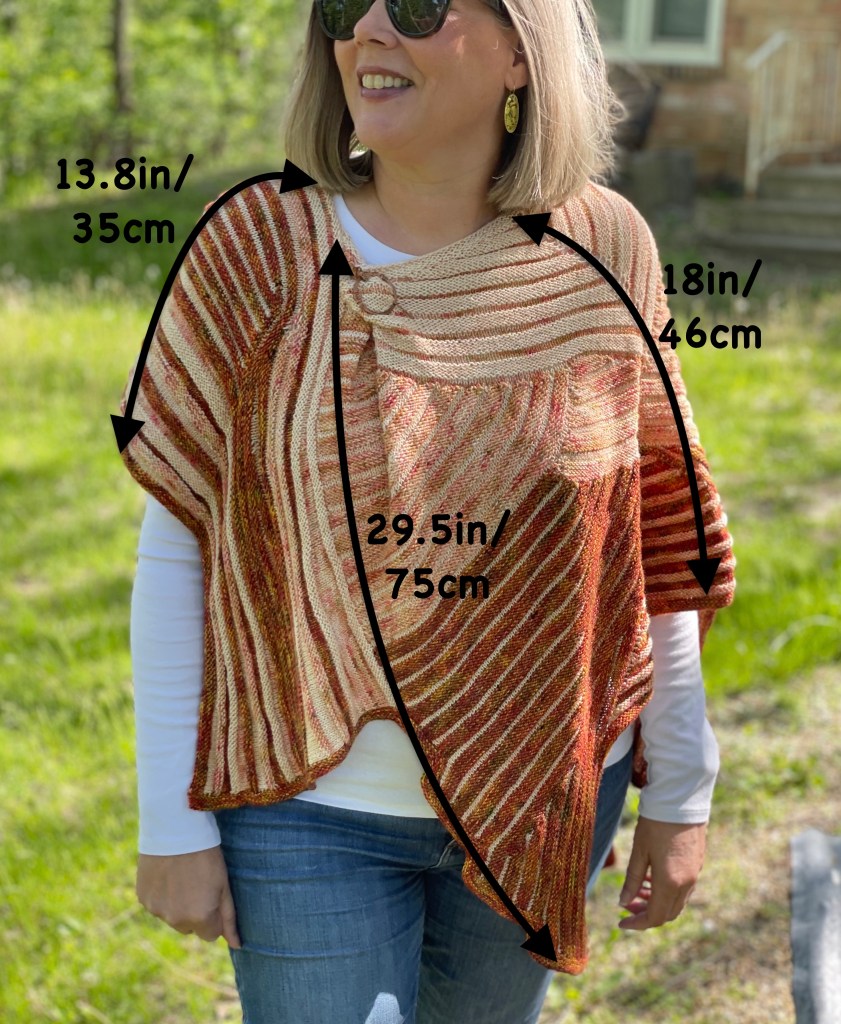
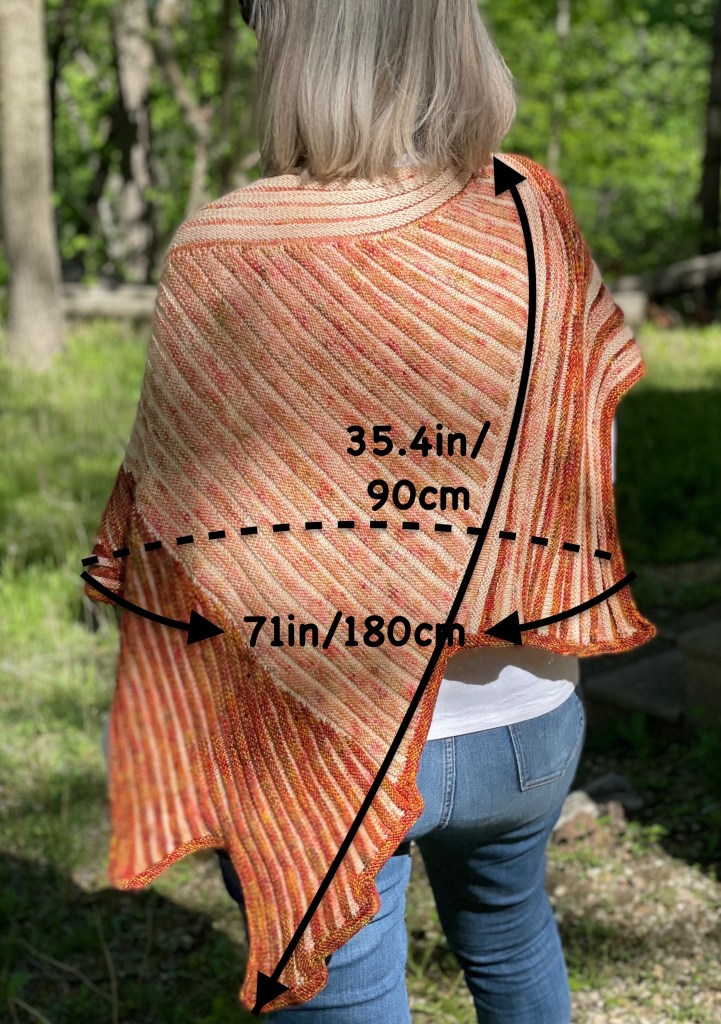
The overall length and width of the finished poncho is shown below. Because of the alternating rows of stockinette and reverse stockinette stitches, the poncho can expand quite a bit (lengthwise) after blocking.
Finished Dimensions
Video Introduction to the Antelope Canyon Poncho
Wrap and Turn Short Rows – A Review
You can find many descriptions and photos of wrap and turn short rows in the blog post linked below. I’ve linked the summary videos below as well. If you haven’t worked short rows in awhile, it’s probably a good idea to review the techniques. The most important thing to remember about working short rows is that there are slightly different techniques for working them on the right side/public side (RS) vs. wrong side/private side (WS), especially if you want to conceal them. If you prefer an alternate method of working short rows (besides the wrap and turn), go for it! Use whichever technique you like the best.
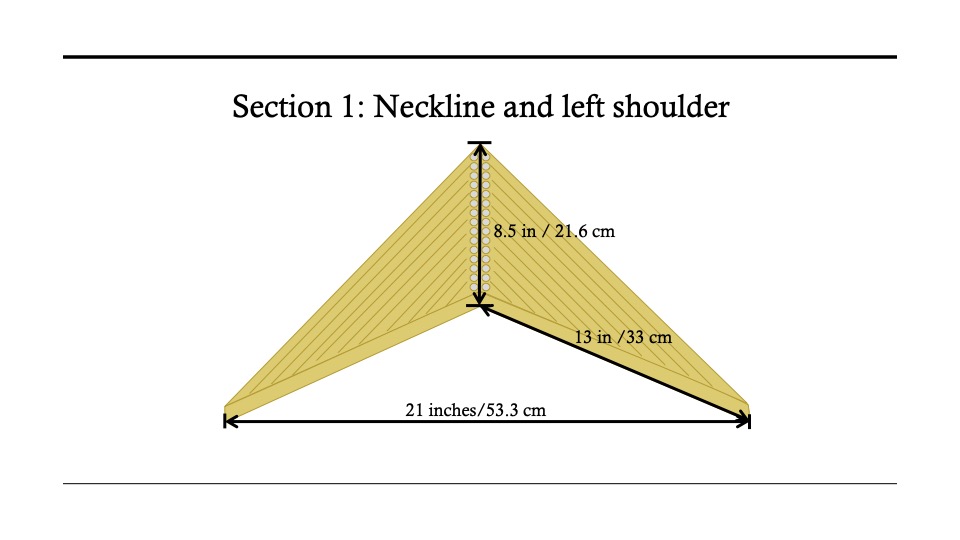
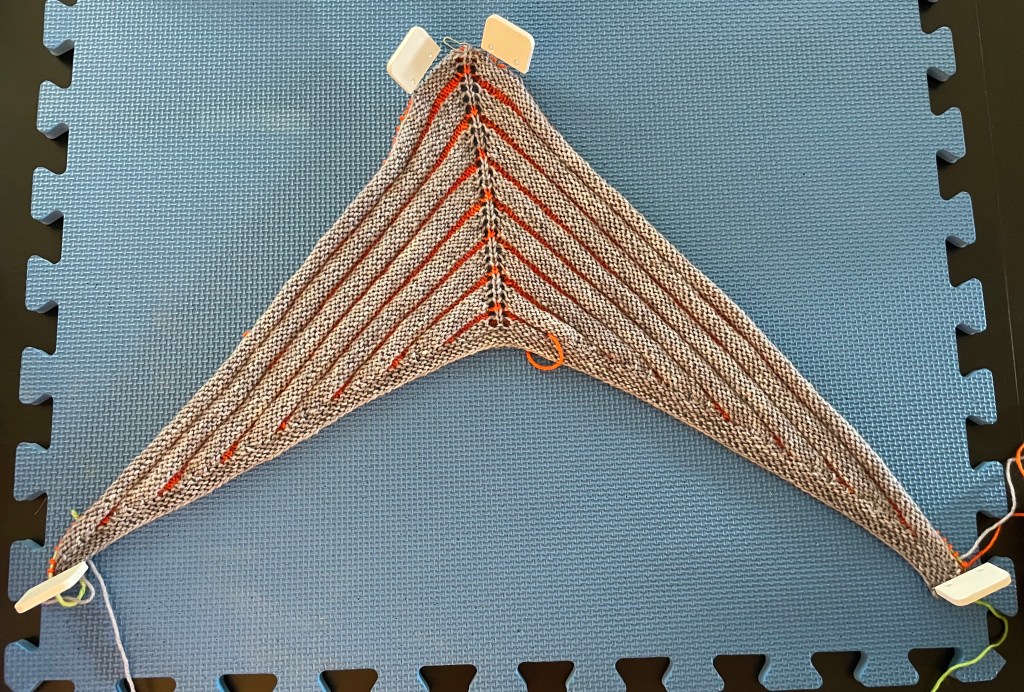
Section 1 is roughly triangle/crescent shaped (boomerang-shaped?) section that forms the neckline and left shoulder of the poncho.
Sections that are visible on the front of the poncho.
The section begins with the neck edge created by working a total of 6 rows in garter stitch (3 garter ridges, including the cast on row). After the neck edge, the short rows and center double increases (yarn overs) form the overall boomerang shape.
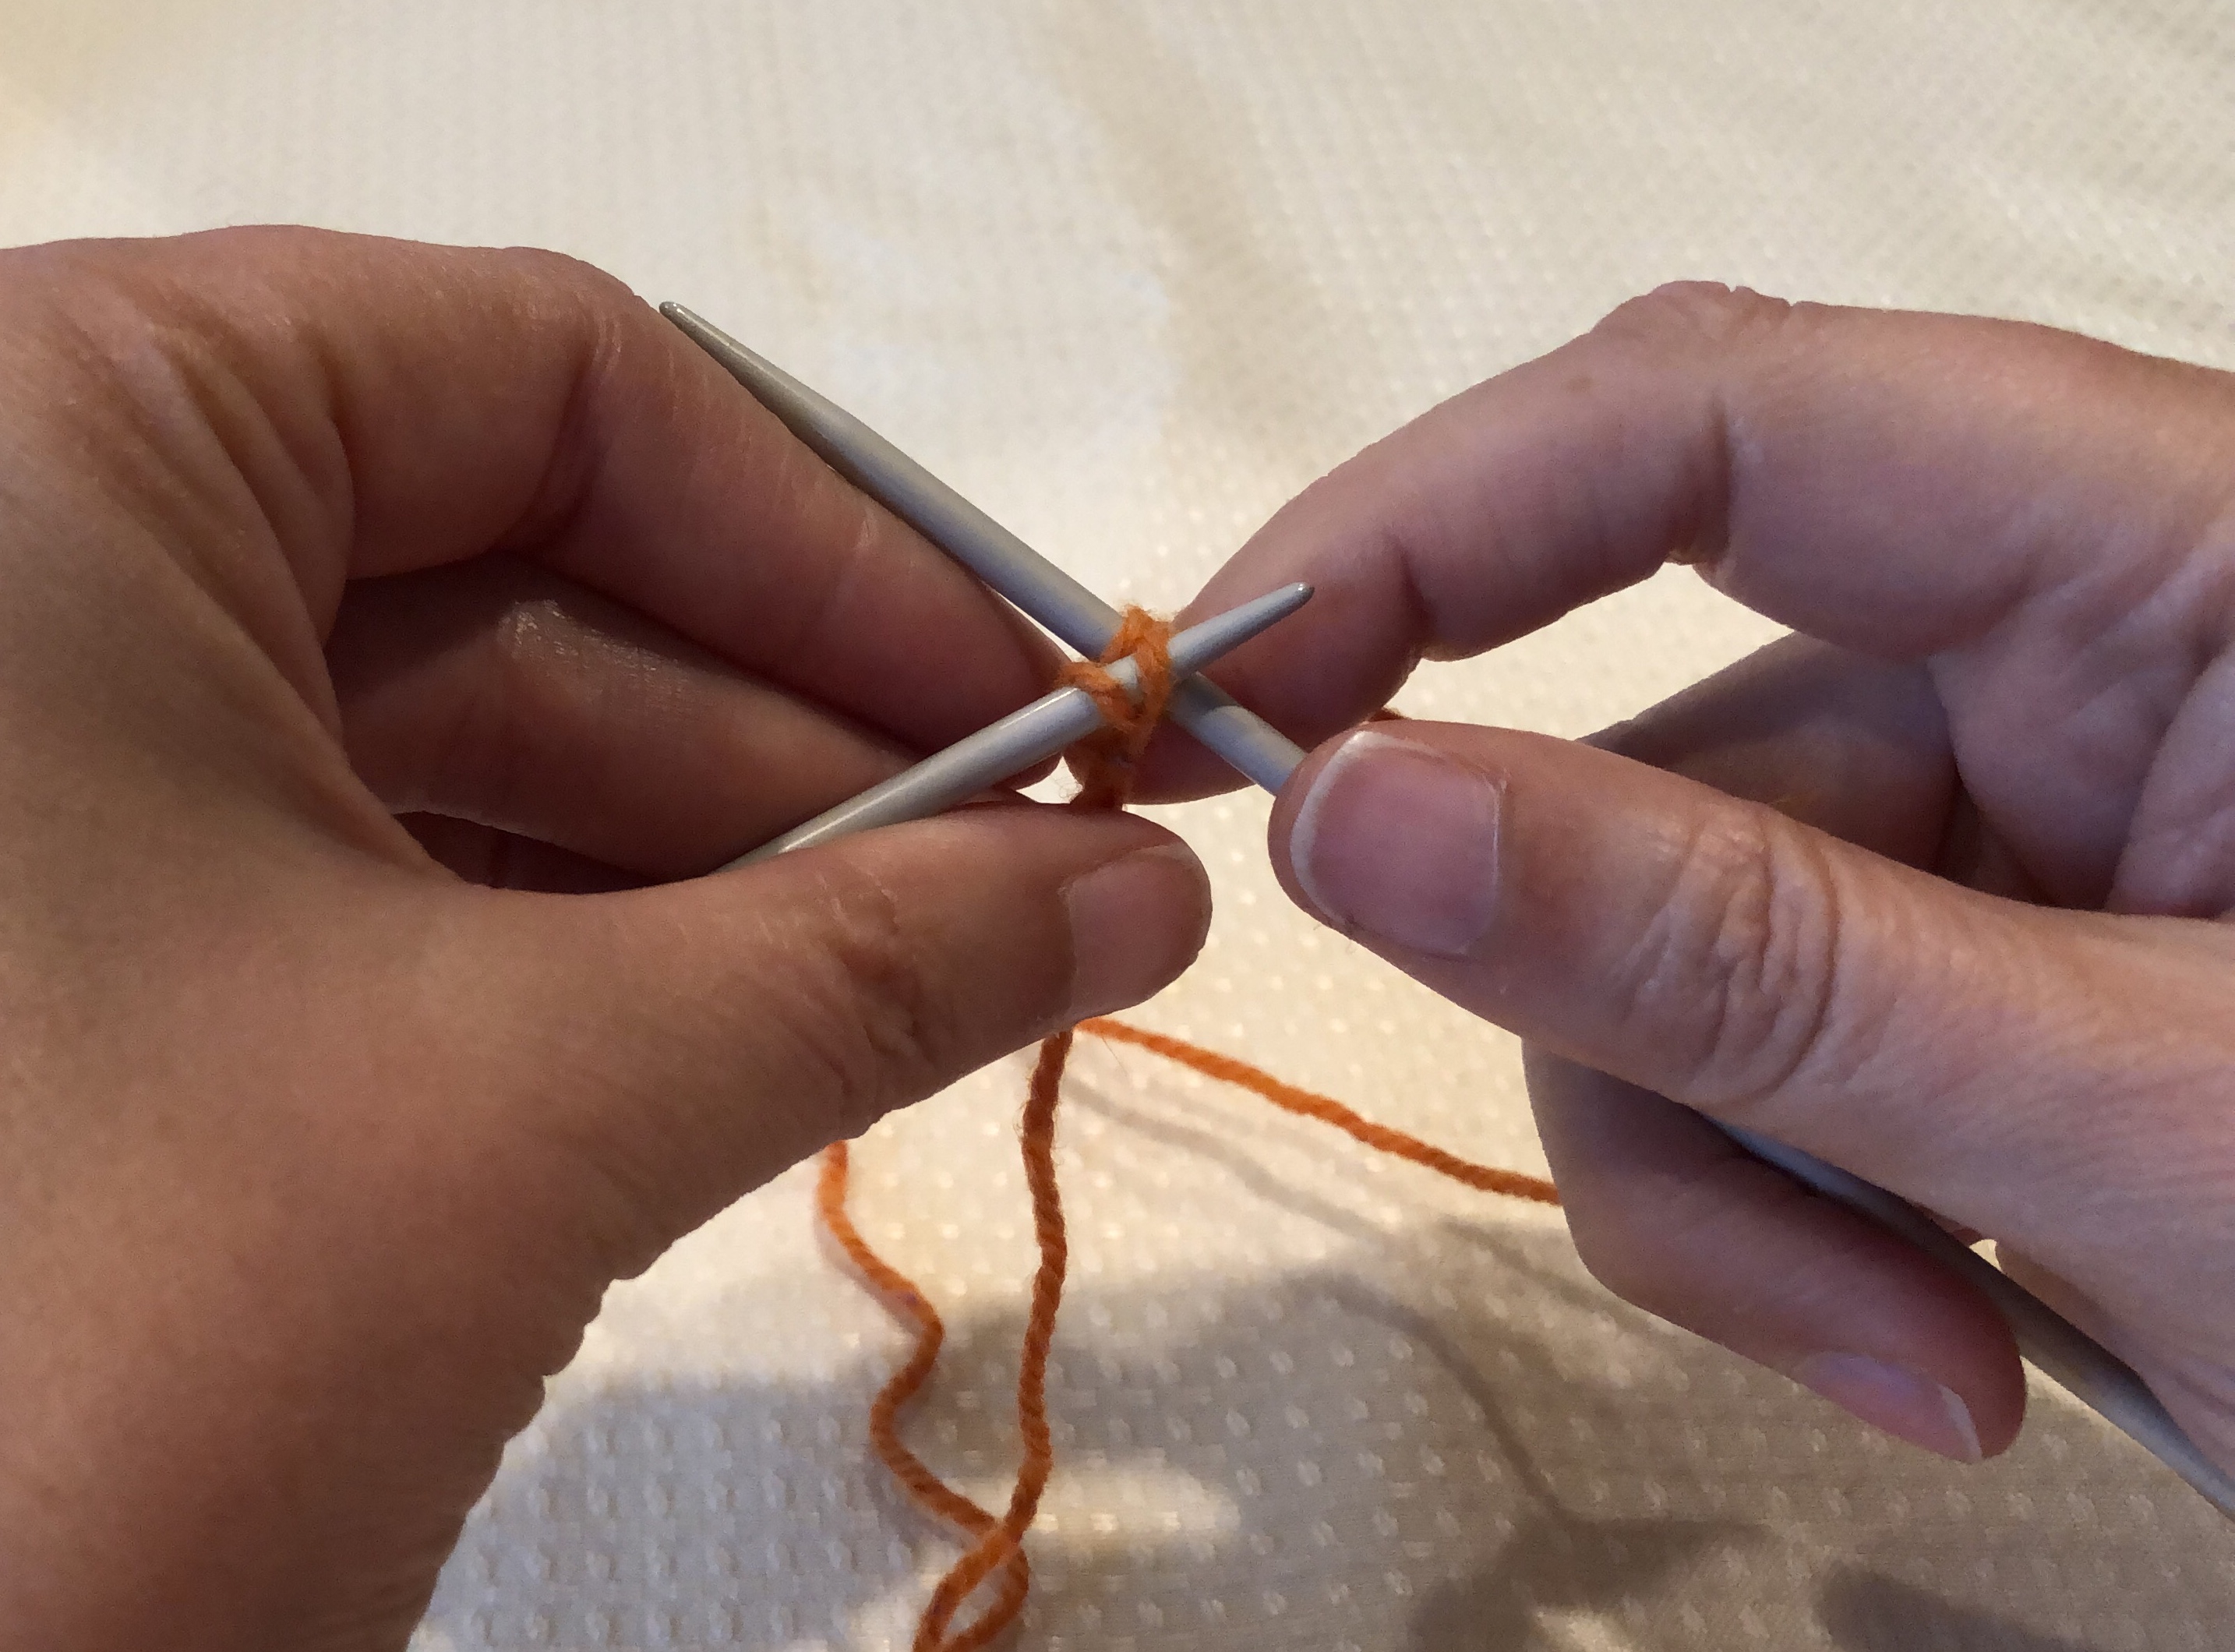
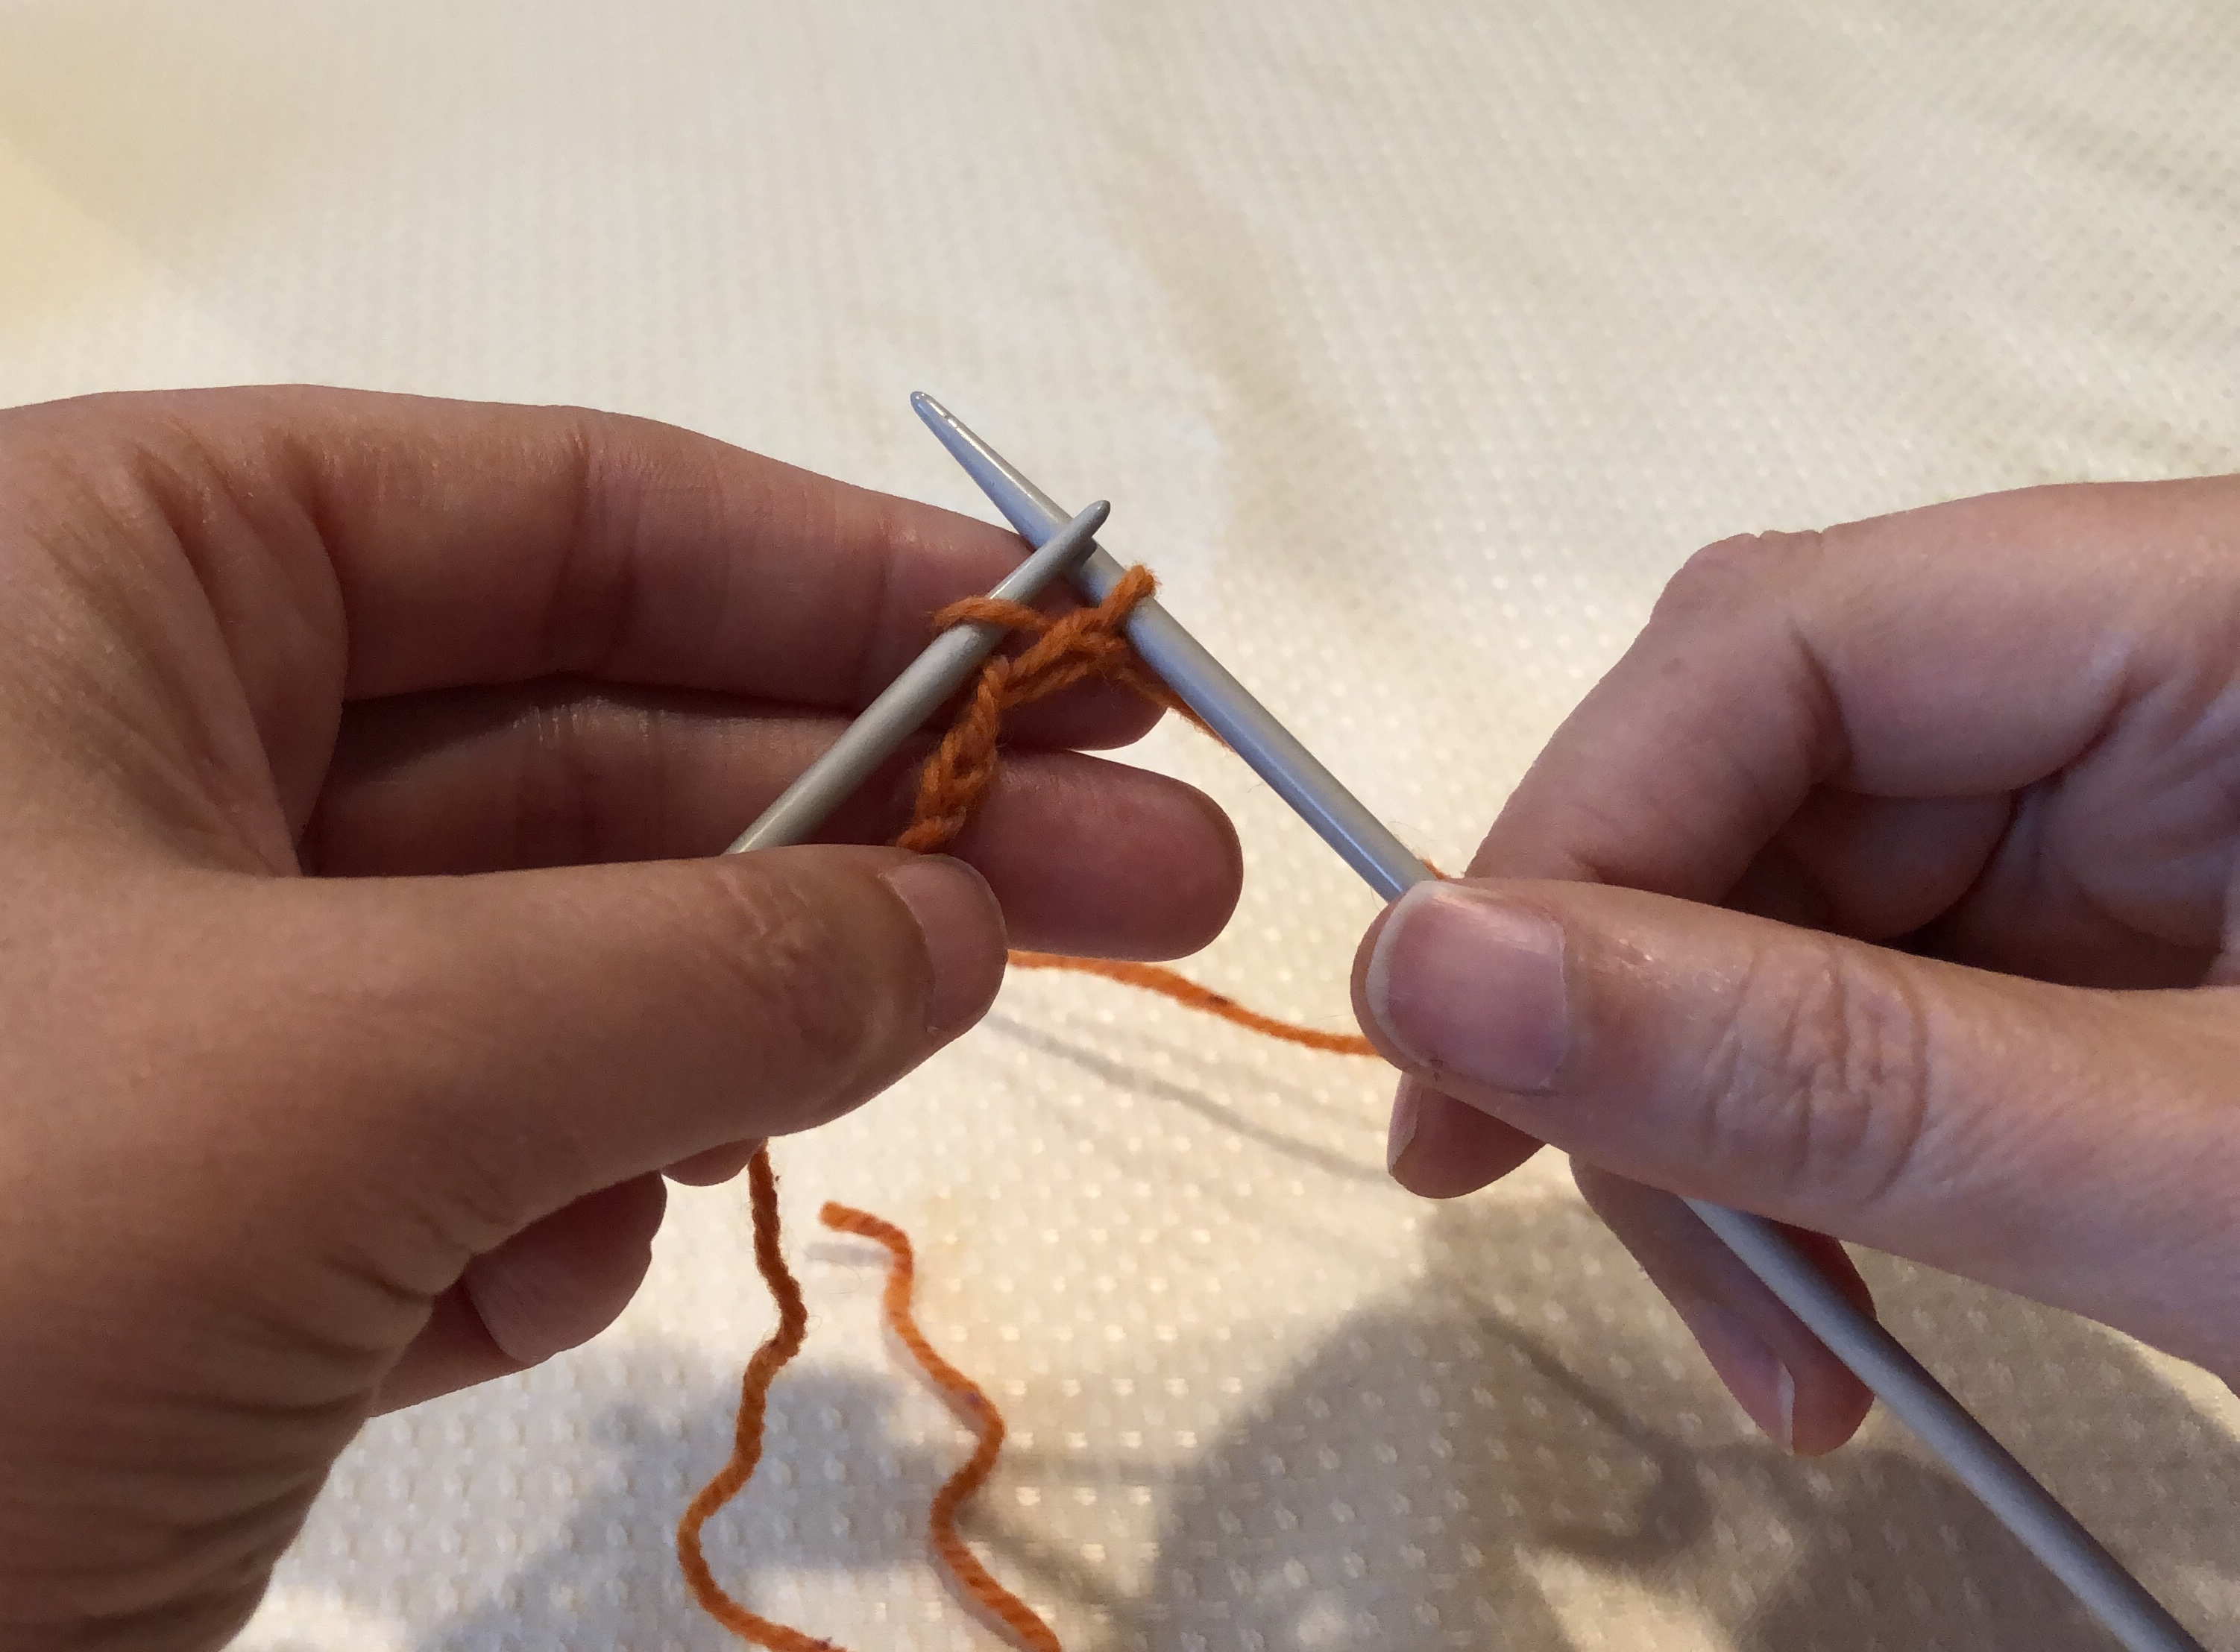
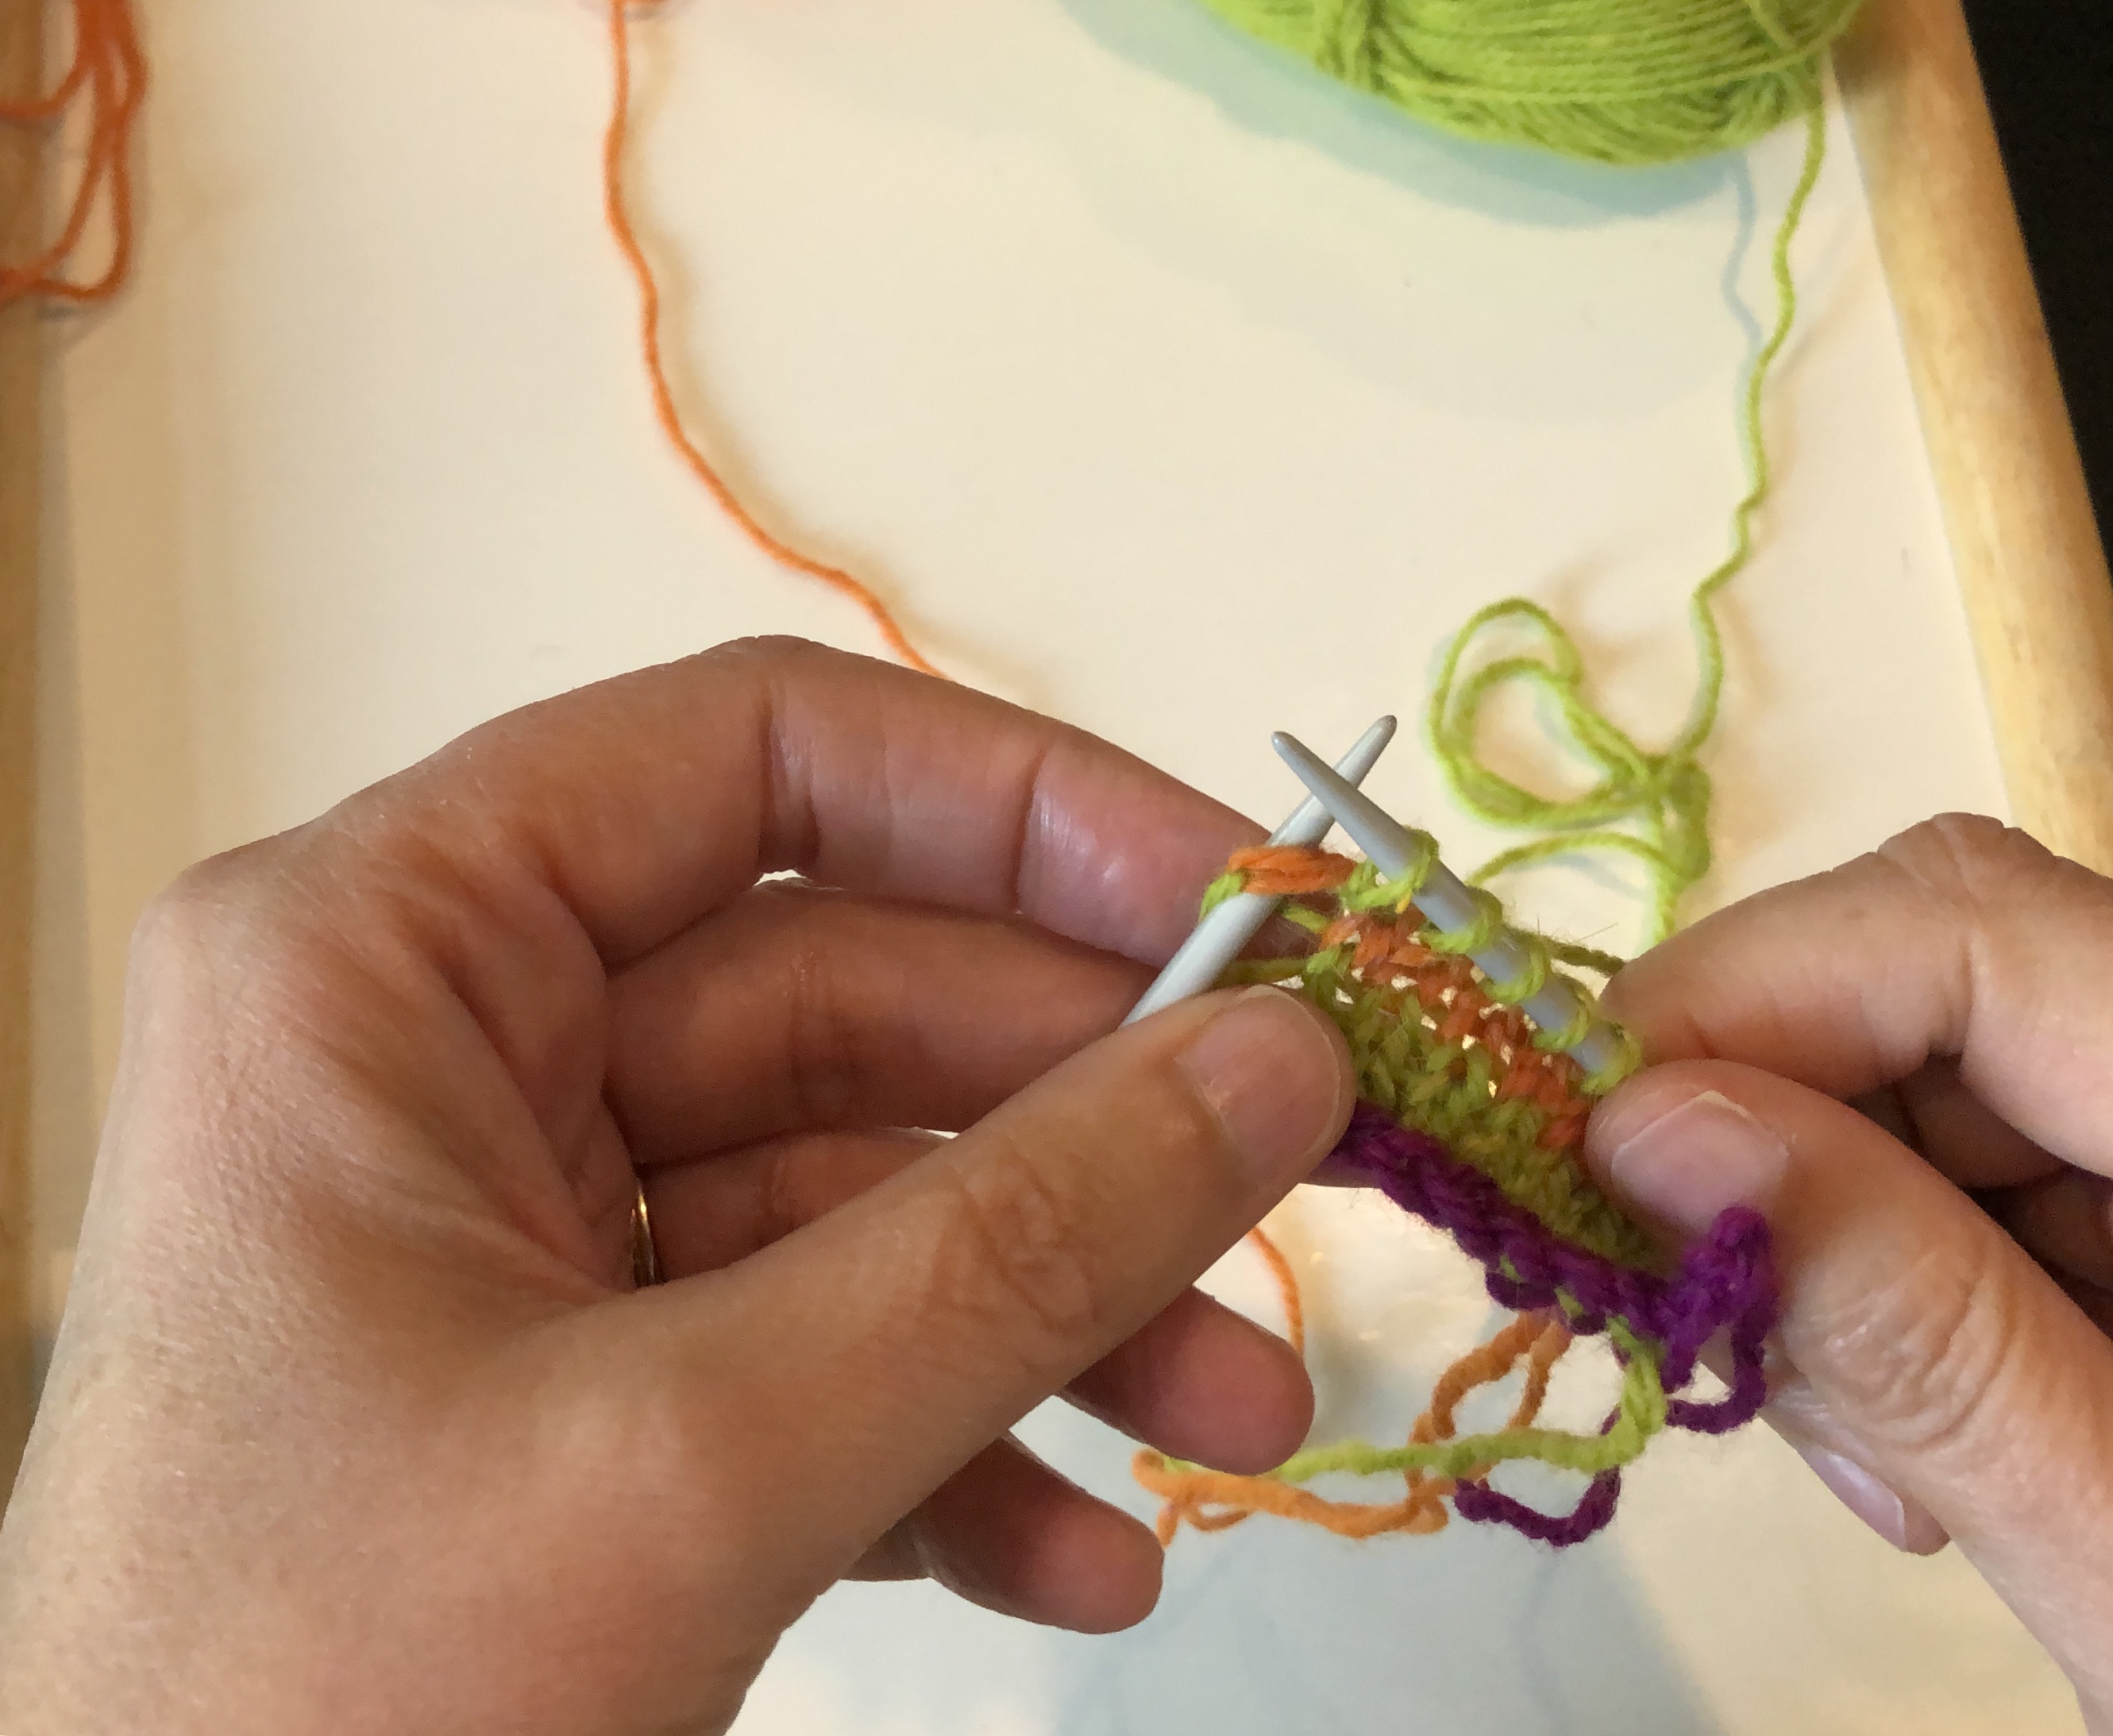
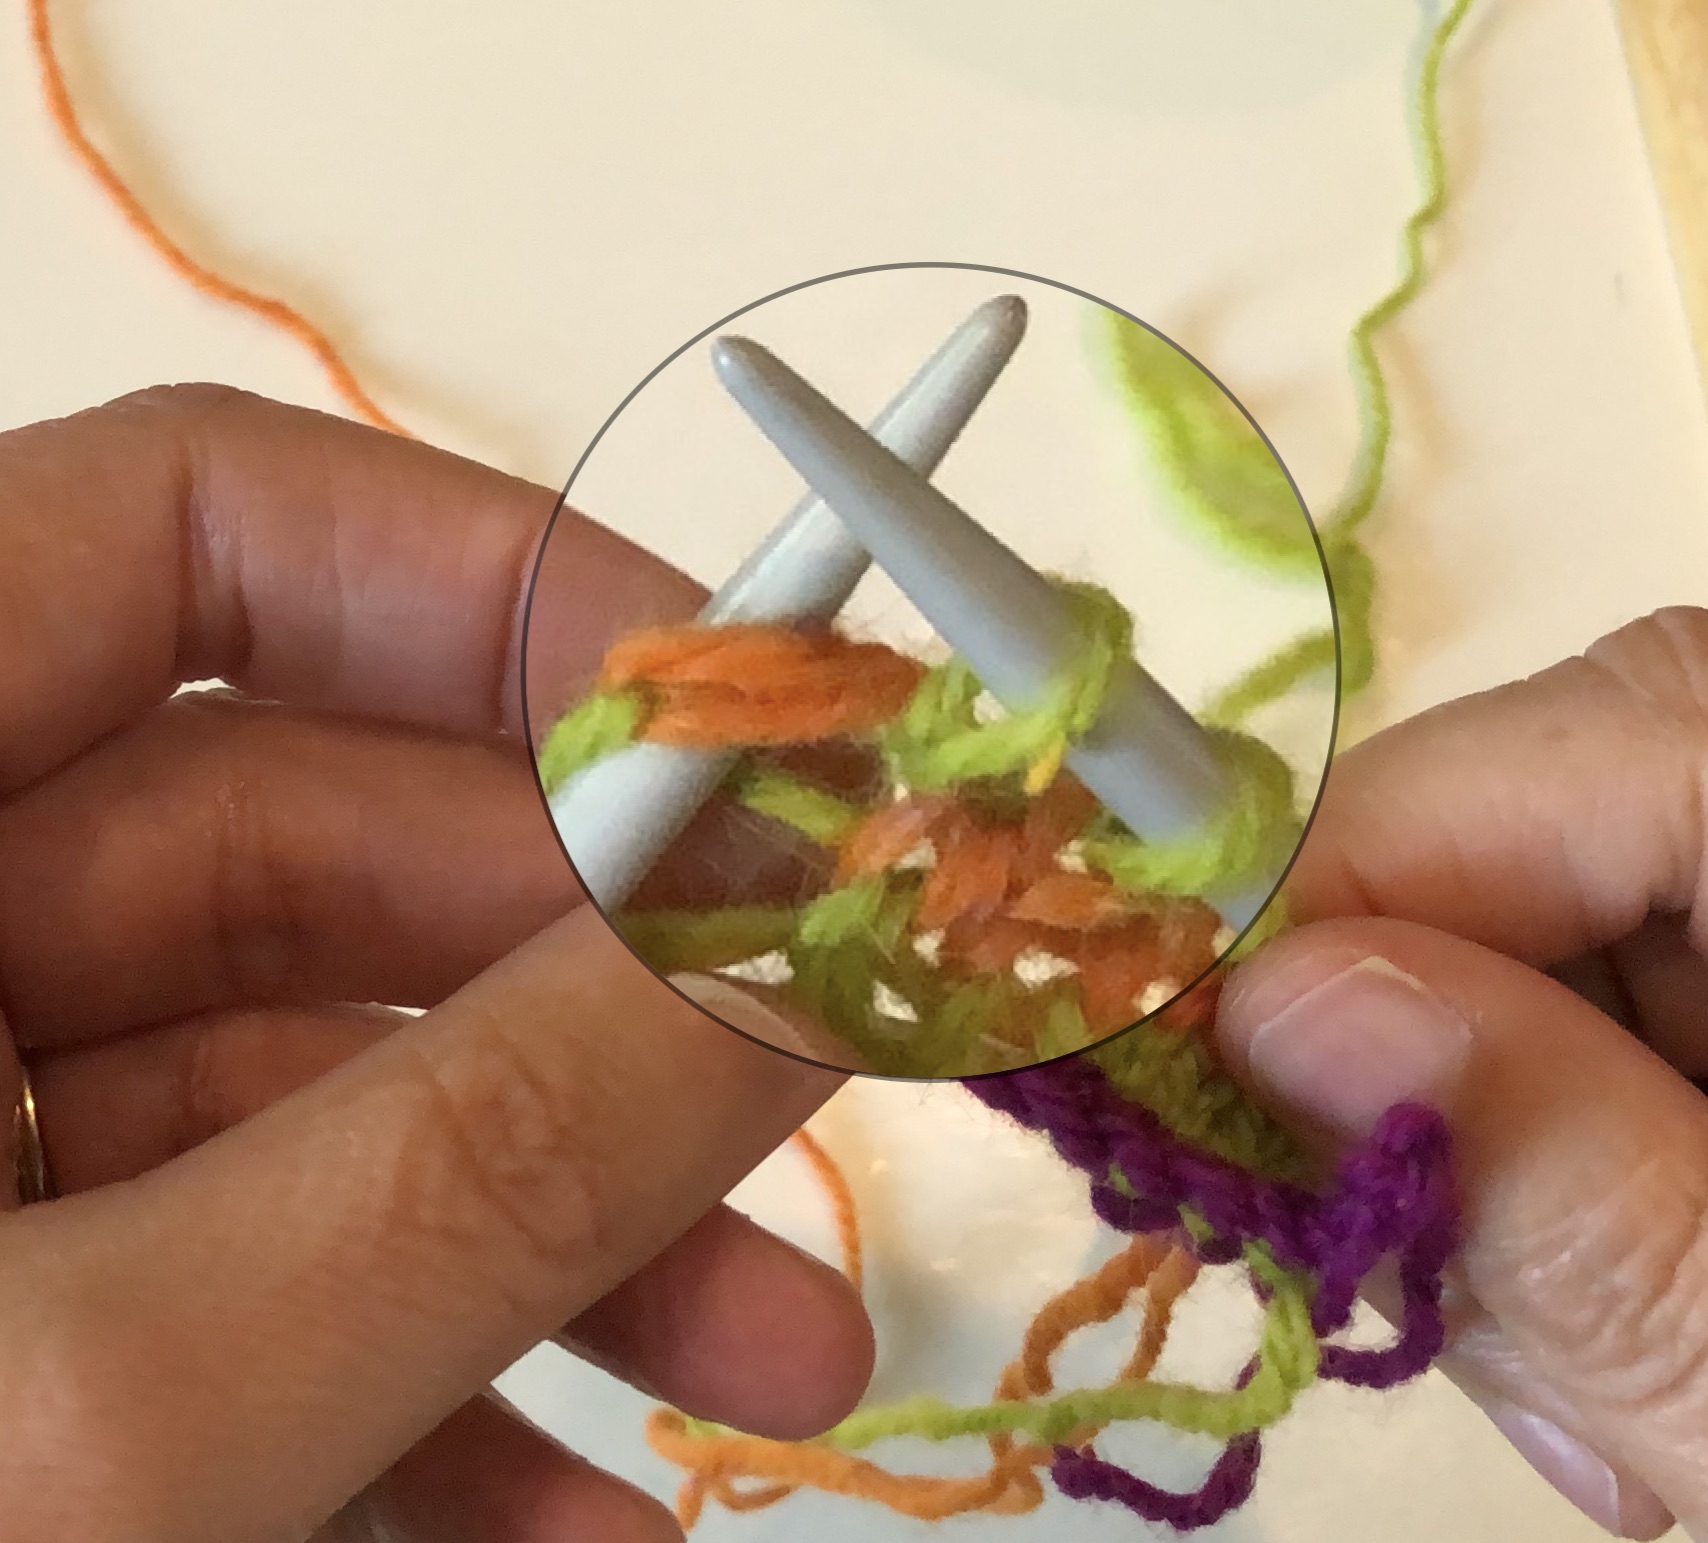
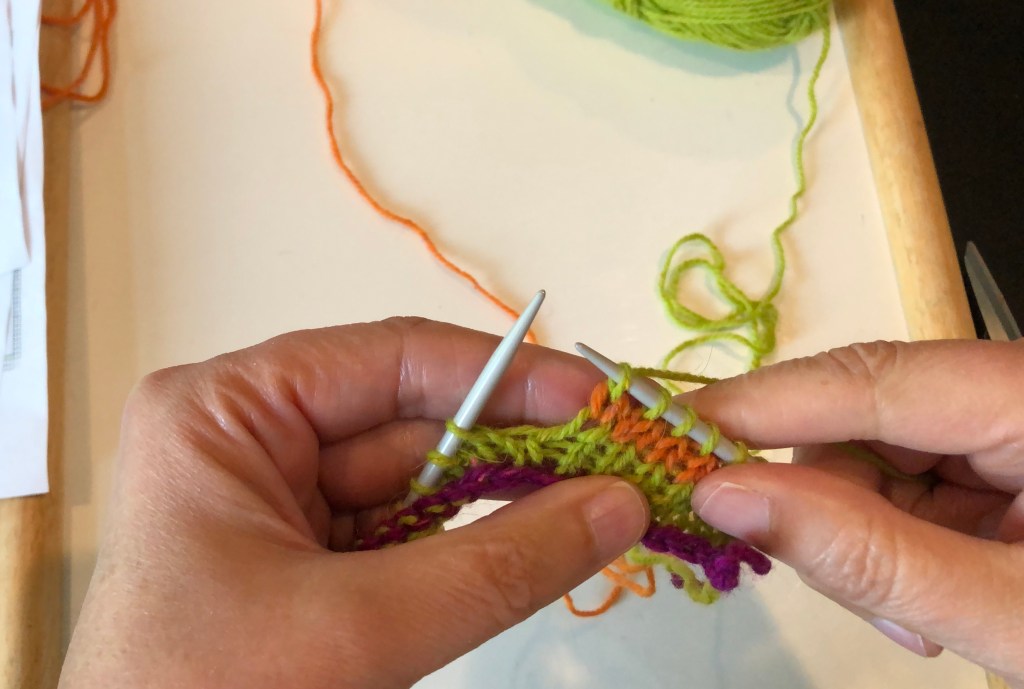
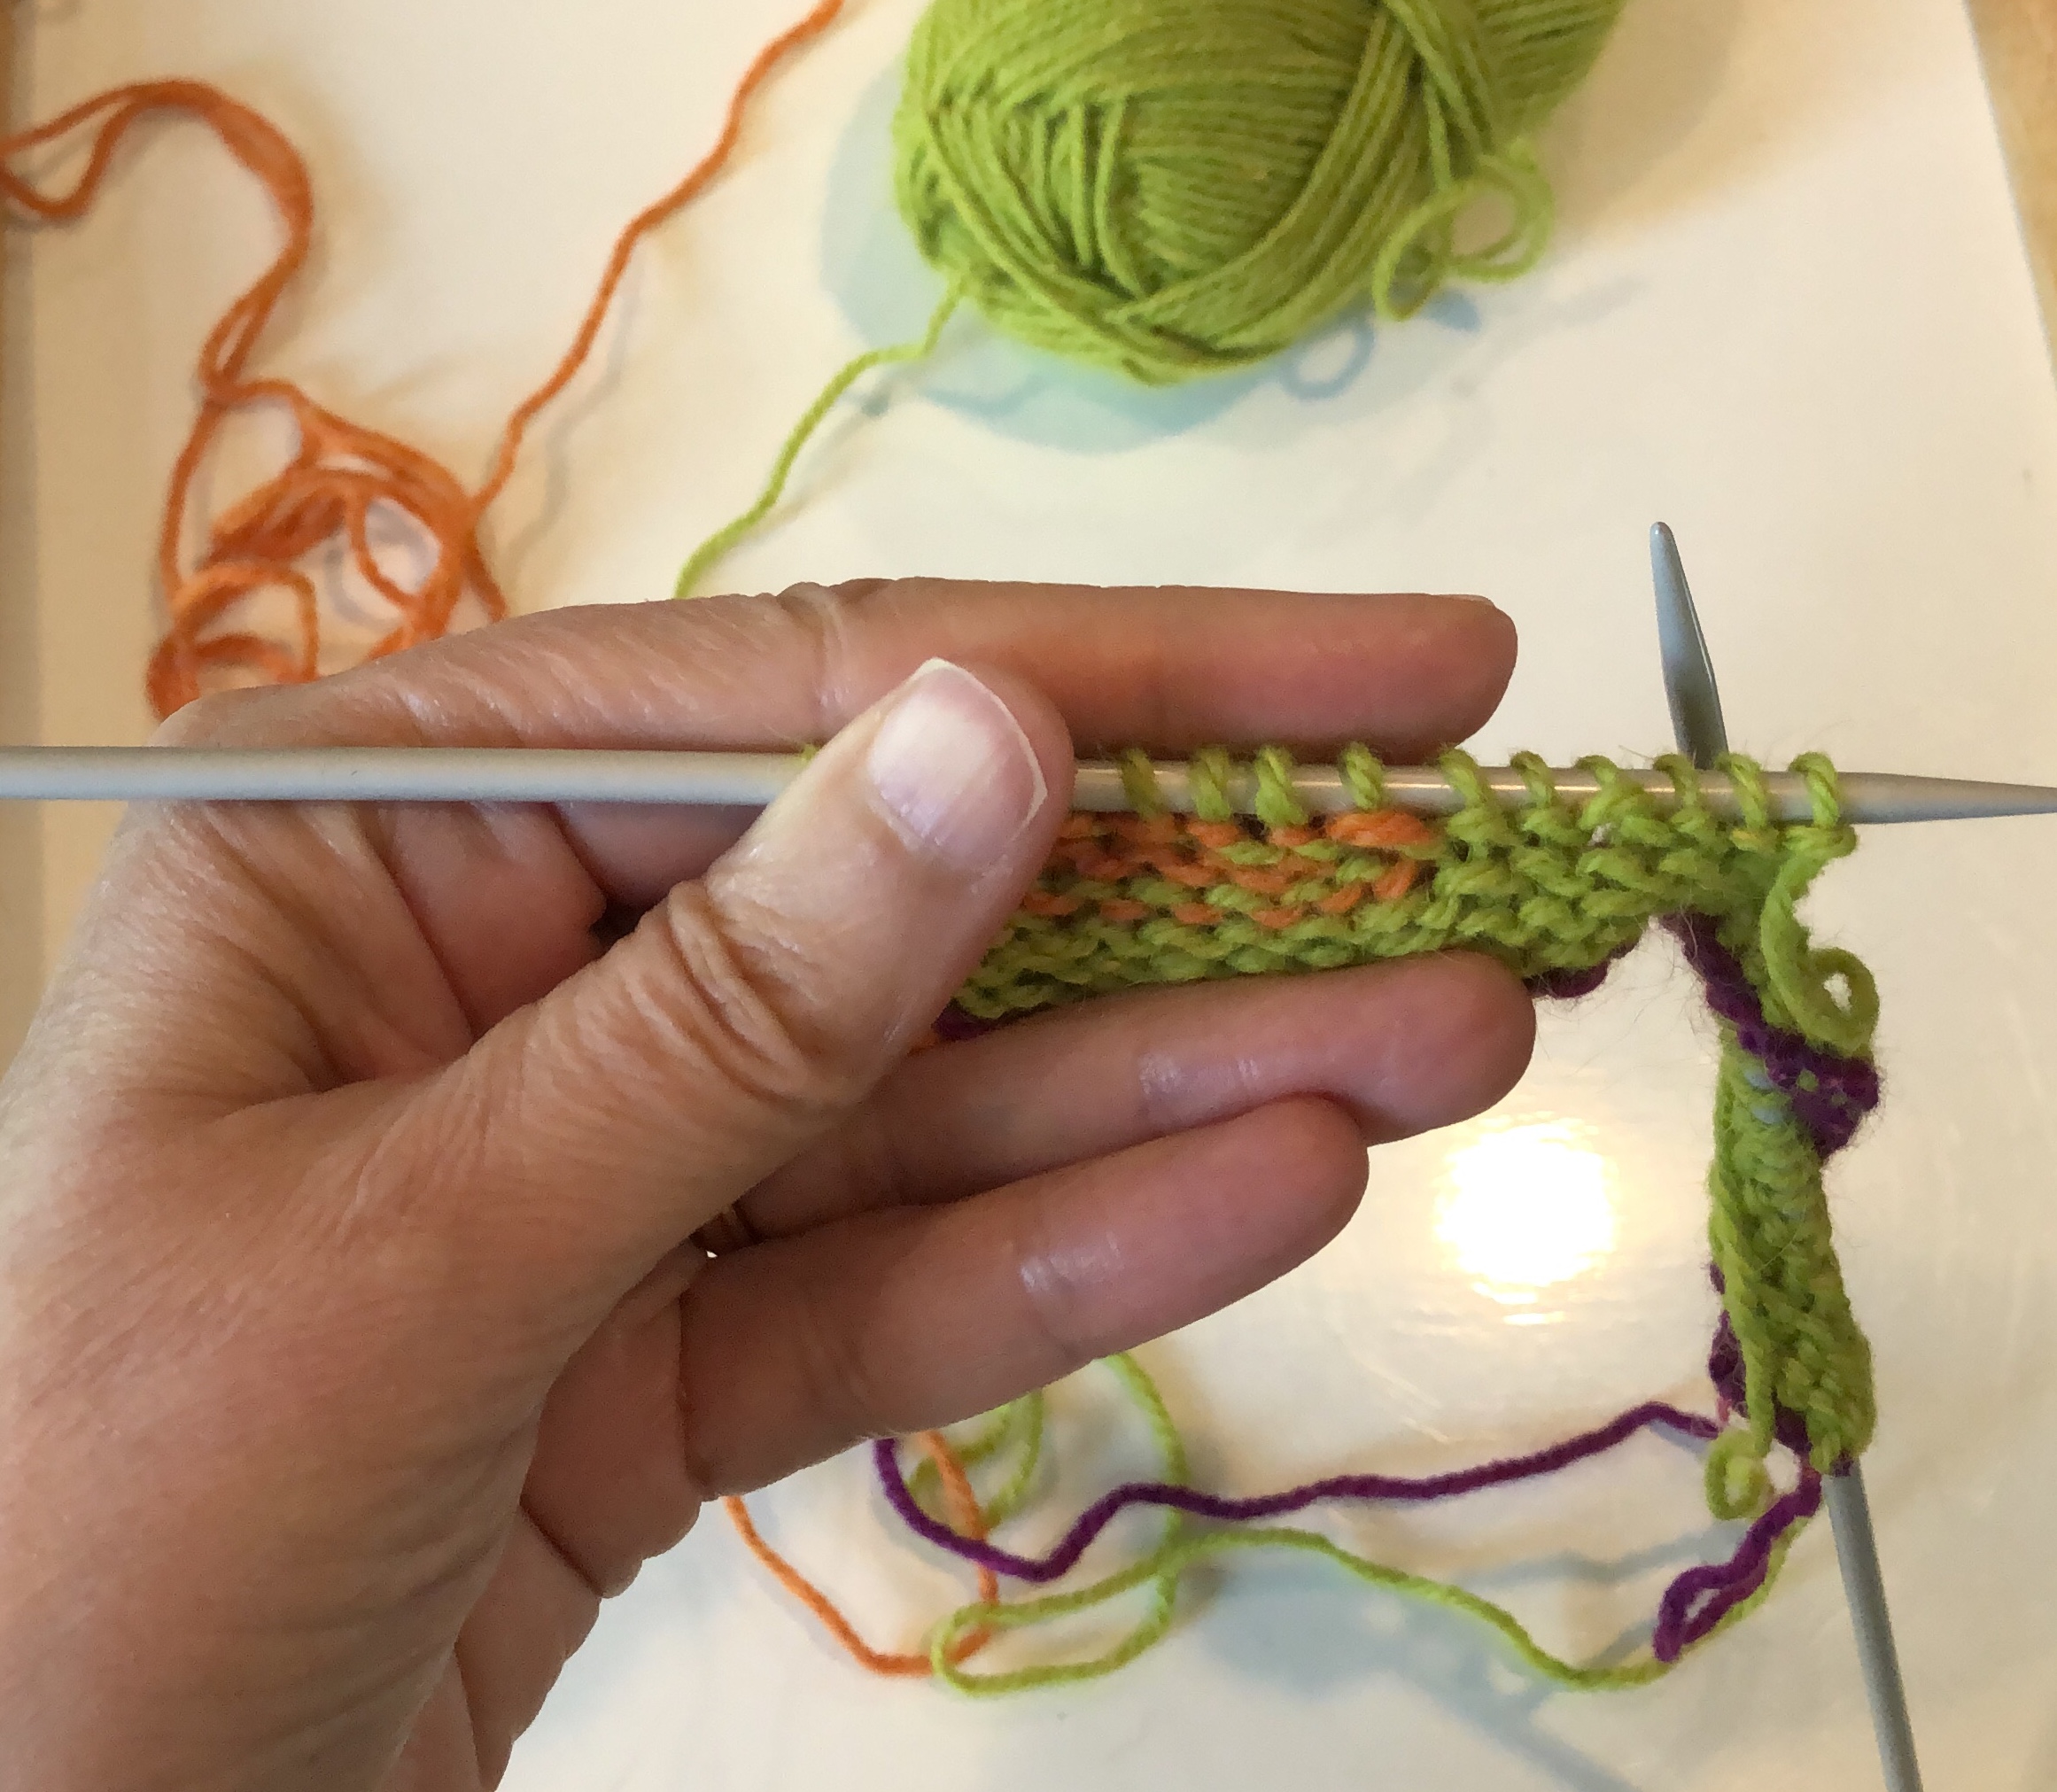
Catching the float
Section 1 Pattern
Finished Shape of Section 1.
Section 2
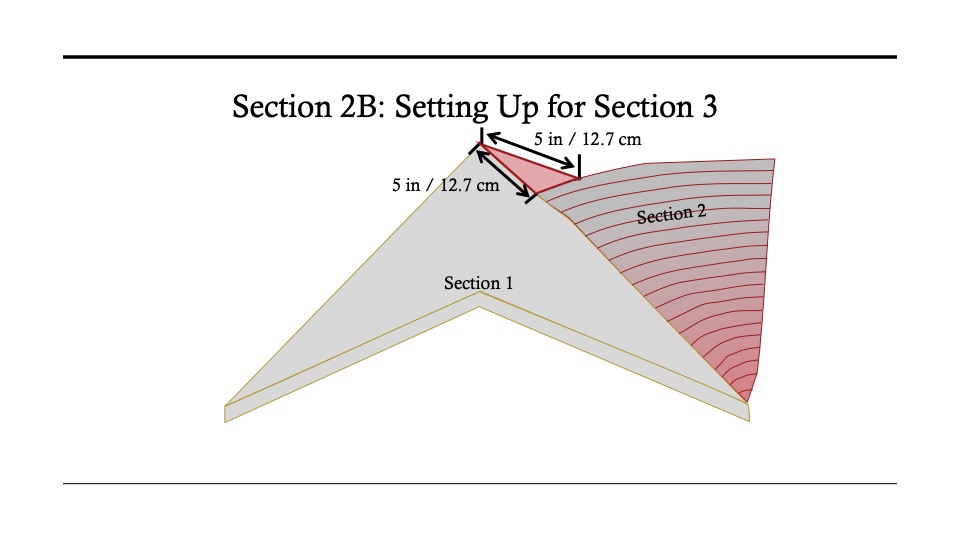
Section 2B: Setting Up Section 3
Section 3
Section 3 makes up most of the back and left side. It will eventually join up and be continuous with Section 2B. The pattern repeat is alternating two rows of stockinette stitch in color 1 and six rows of reverse stockinette stitch in color 2 and at the same time working one additional stitch and a wrap and turn short row on every wrong side row.
Note: Remember when working wrap and turn short rows with the WS facing you, you should slip the stitch knit-wise before you wrap it. When working through these wrapped stitches, work them through the back of the loops to avoid twisting the stitches.
Section 4
Section 4 makes up the right front of the poncho. It is worked in two sections (4A and 4B) with a similar row pattern and a similar pattern of worked short rows.
Section 5
Section 5 is the bottom of the left side and back. It is the longest part of the poncho, so if you want to reduce the overall length, this is a good place to do it. Work your desired number of rows (use your gauge to calculate).
Section 6
Section 6 is a crescent-shaped section, worked between sections 4 and 6, with a row pattern repeat and short rows worked on both ends of each row. The short row pattern for part 6B changes at the intersection of parts 4A and 4B.
Section 7
Section 7 makes up the right shoulder and the right front and back sides. It is worked by picking up stitches along the edge of section 3 and the corner of section 1, casting on a few stitches, and then picking up stitches along the other corner of section 1, and then along the edges of sections 2 and part of section 4.
Border and Finishing
Finally, a garter stitch border is worked on all the edges. To begin the border, first you should transfer all the live stitches from the bottom of sections 4, 5, and 6 to your needle. You will then pick up stitches along each of the exposed edges, placing markers at each corner. I recommend using two different colors or types of stitch markers at the corners–one for working an inside corner (a double centered decrease) and one for working an outside corner (double centered increase).
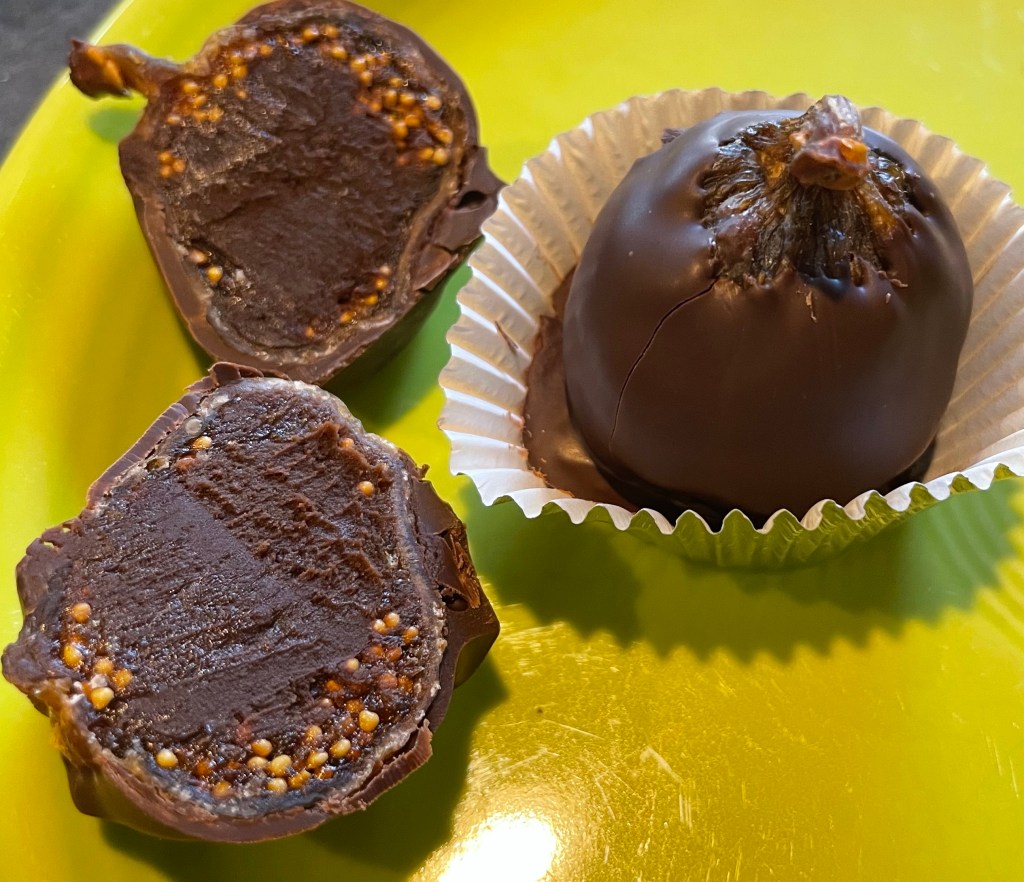
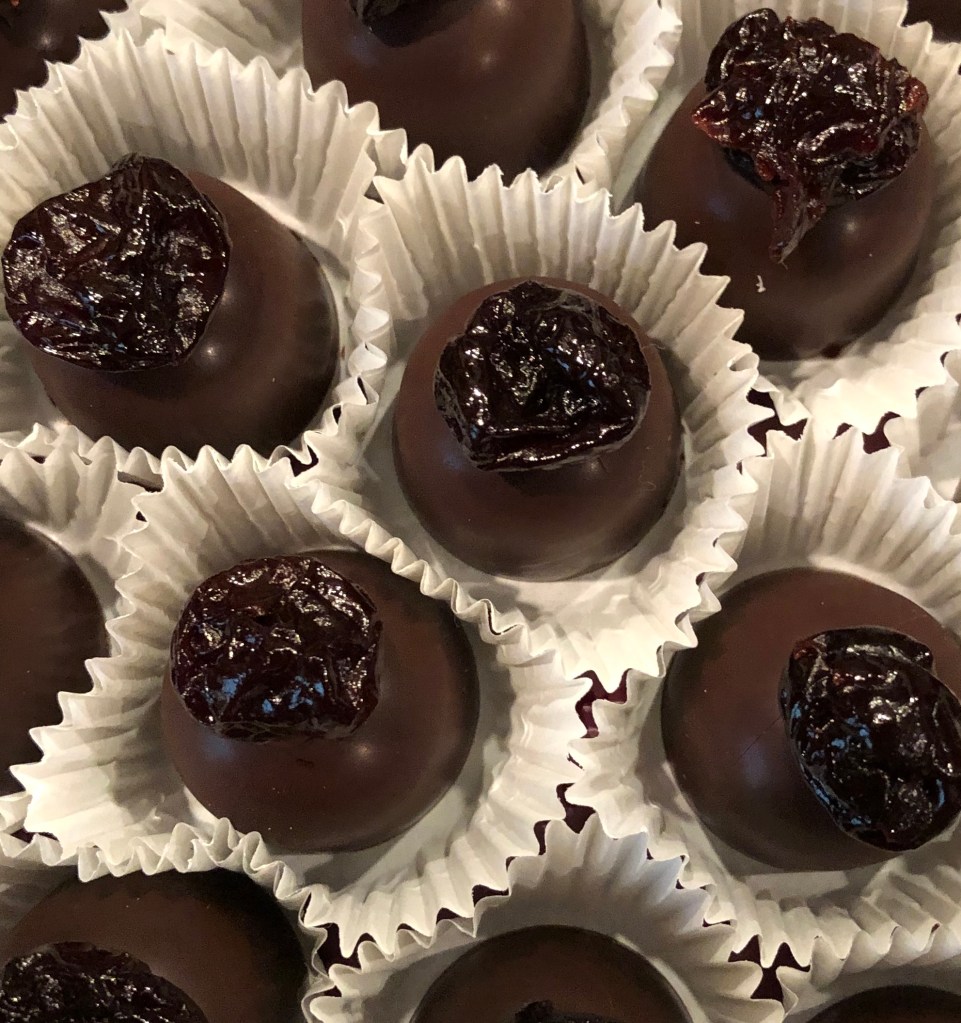
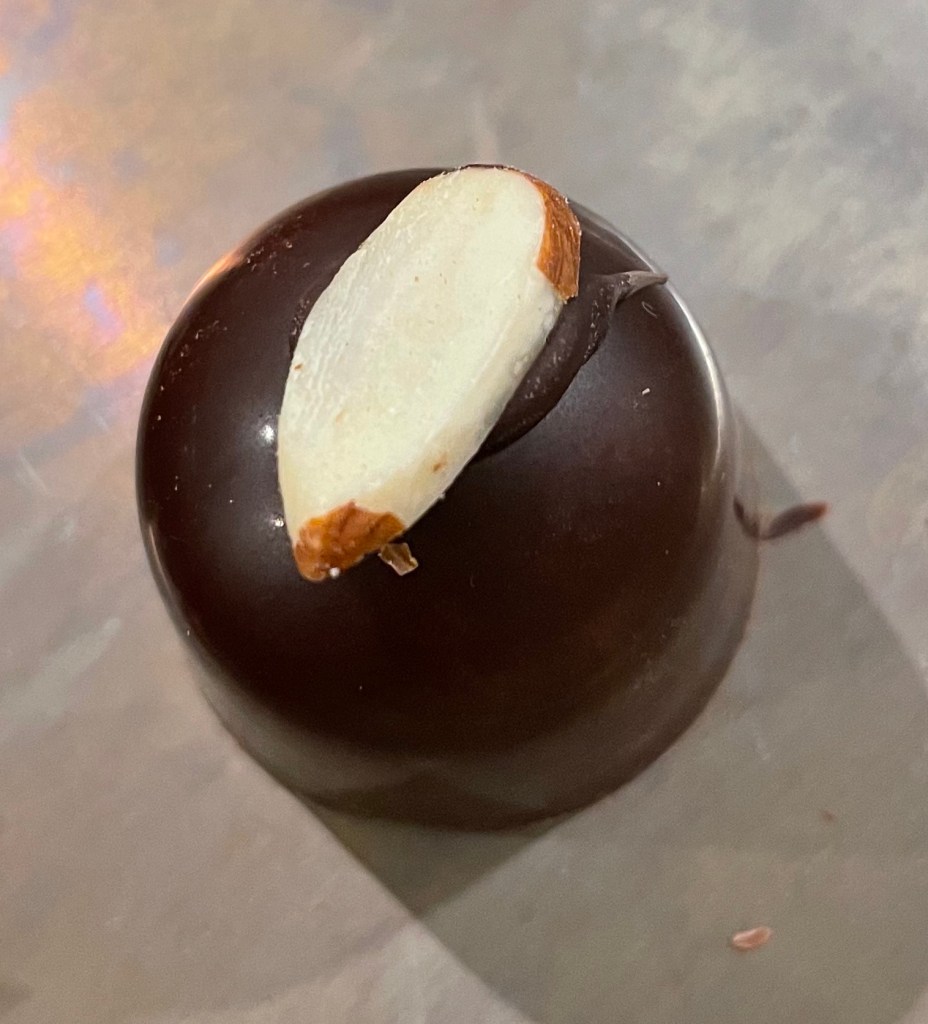
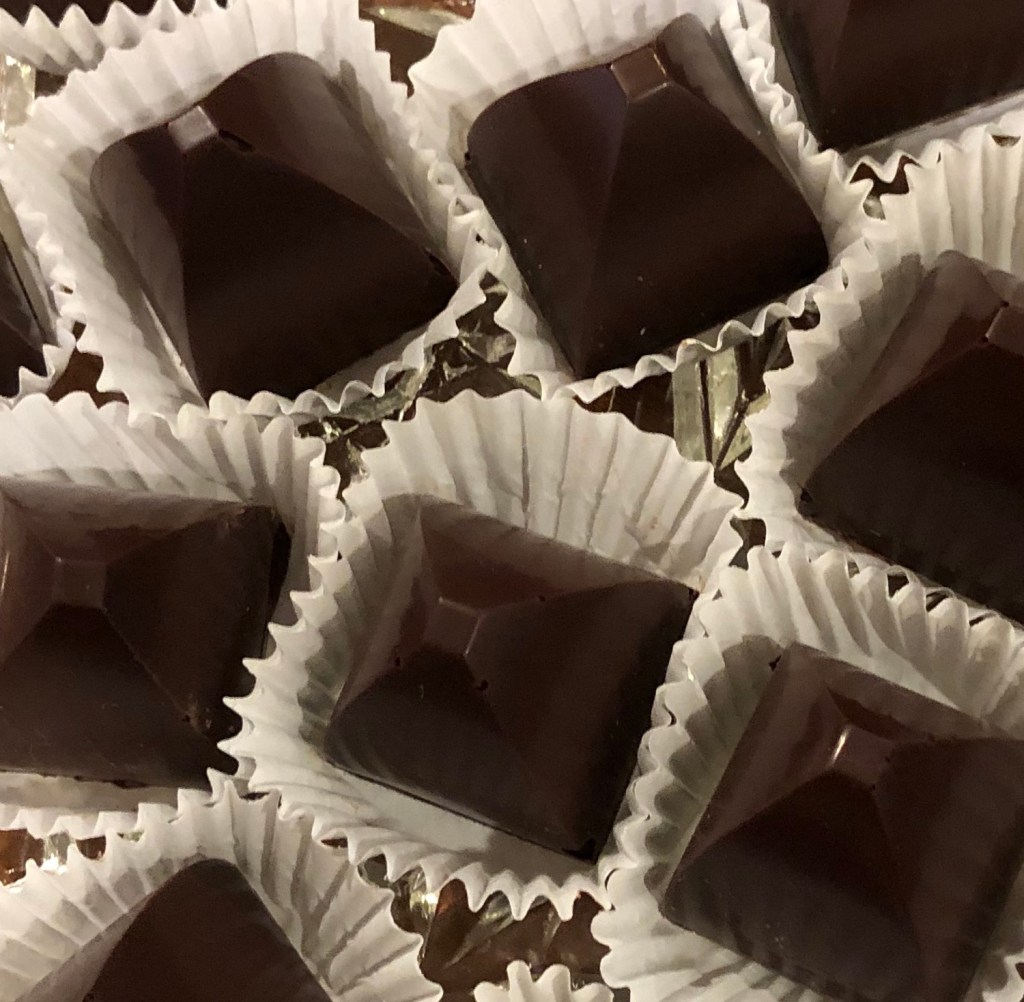
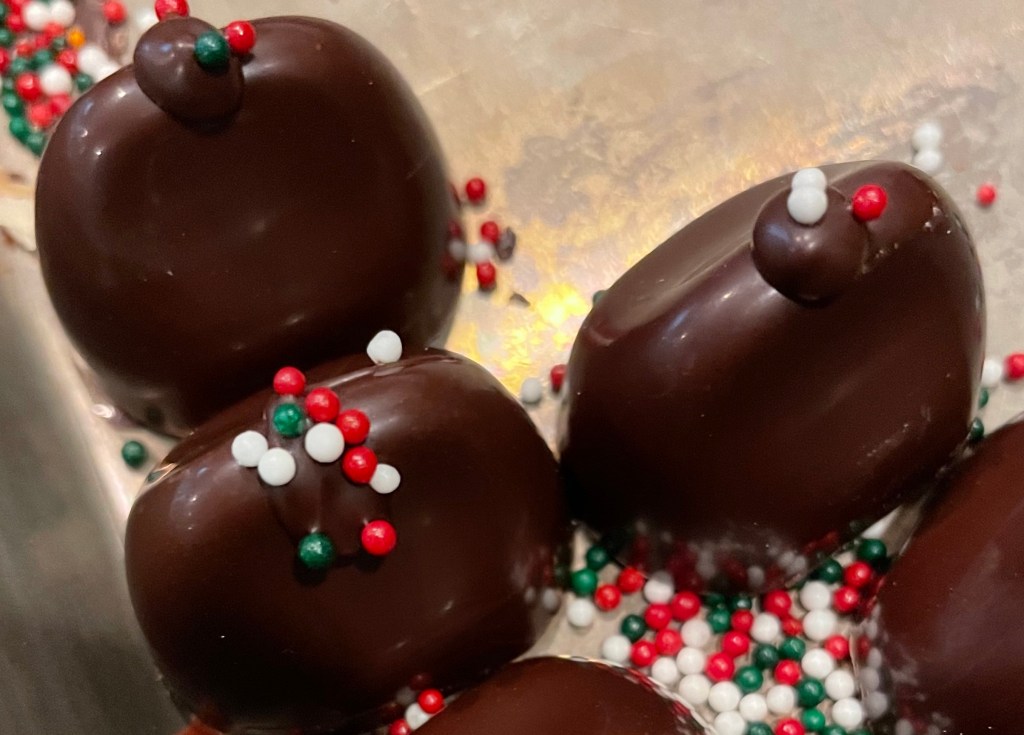
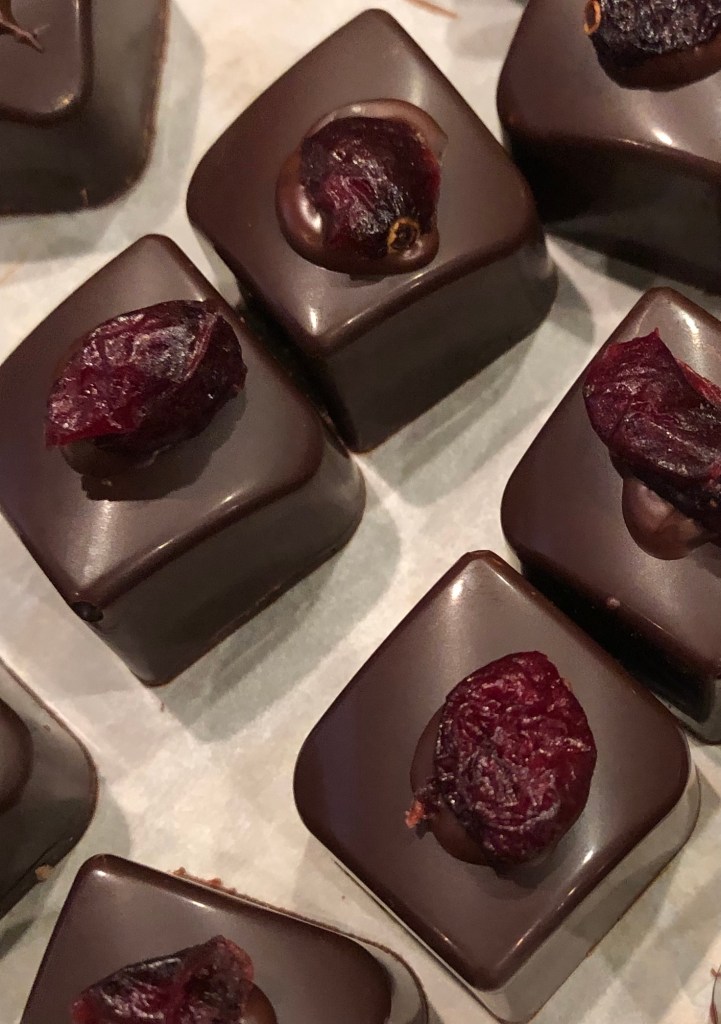
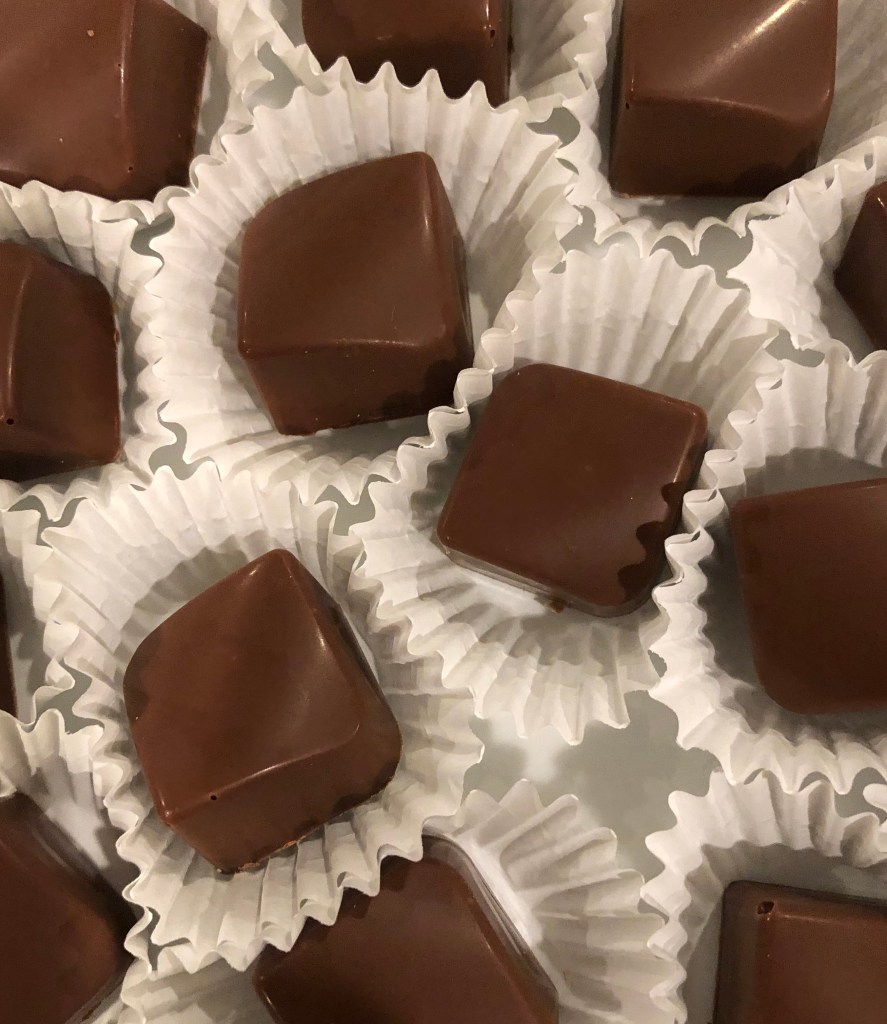
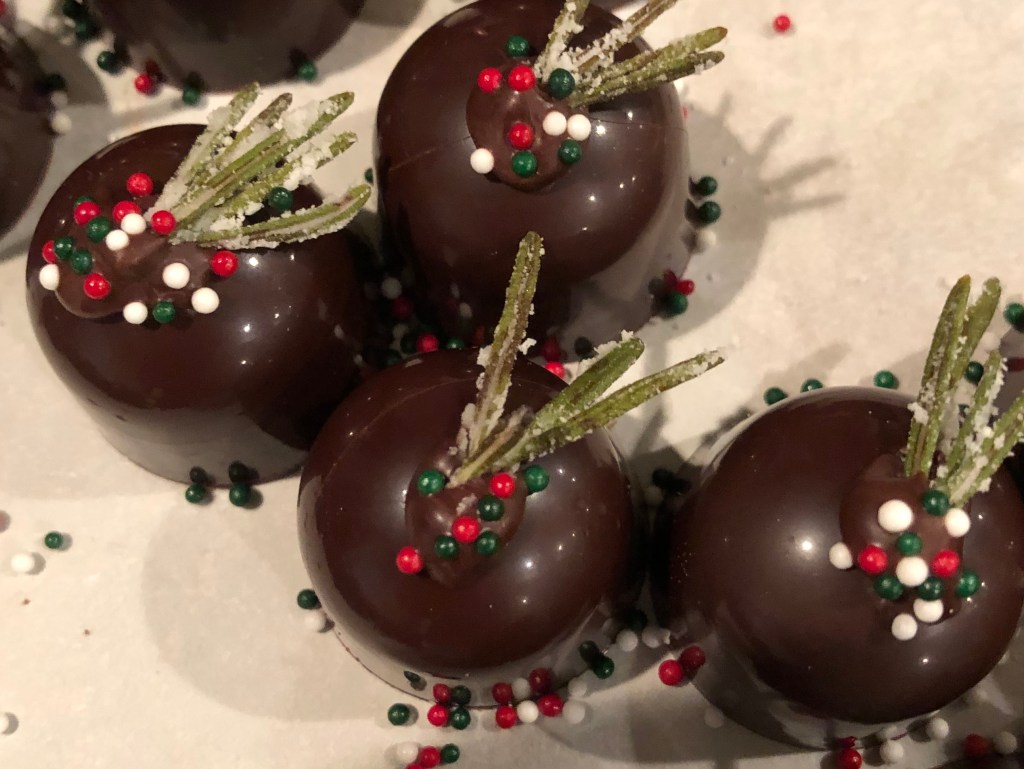
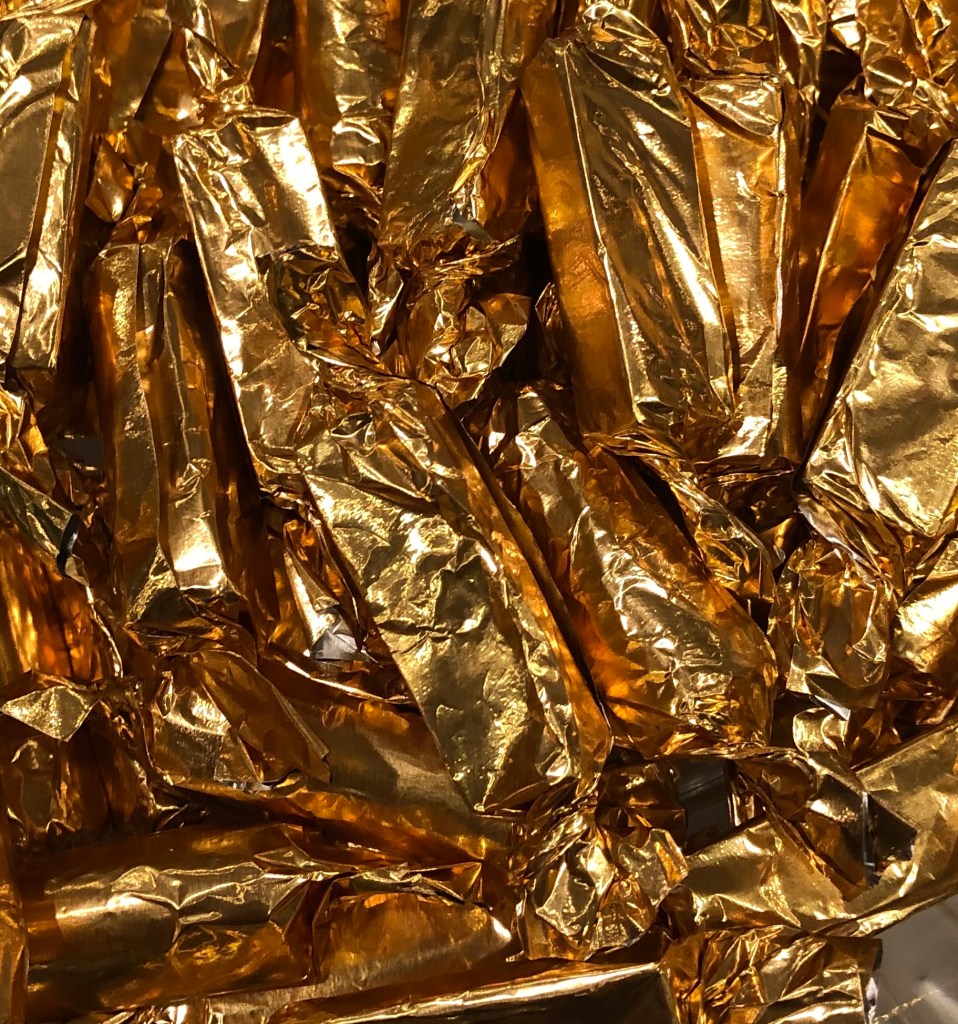
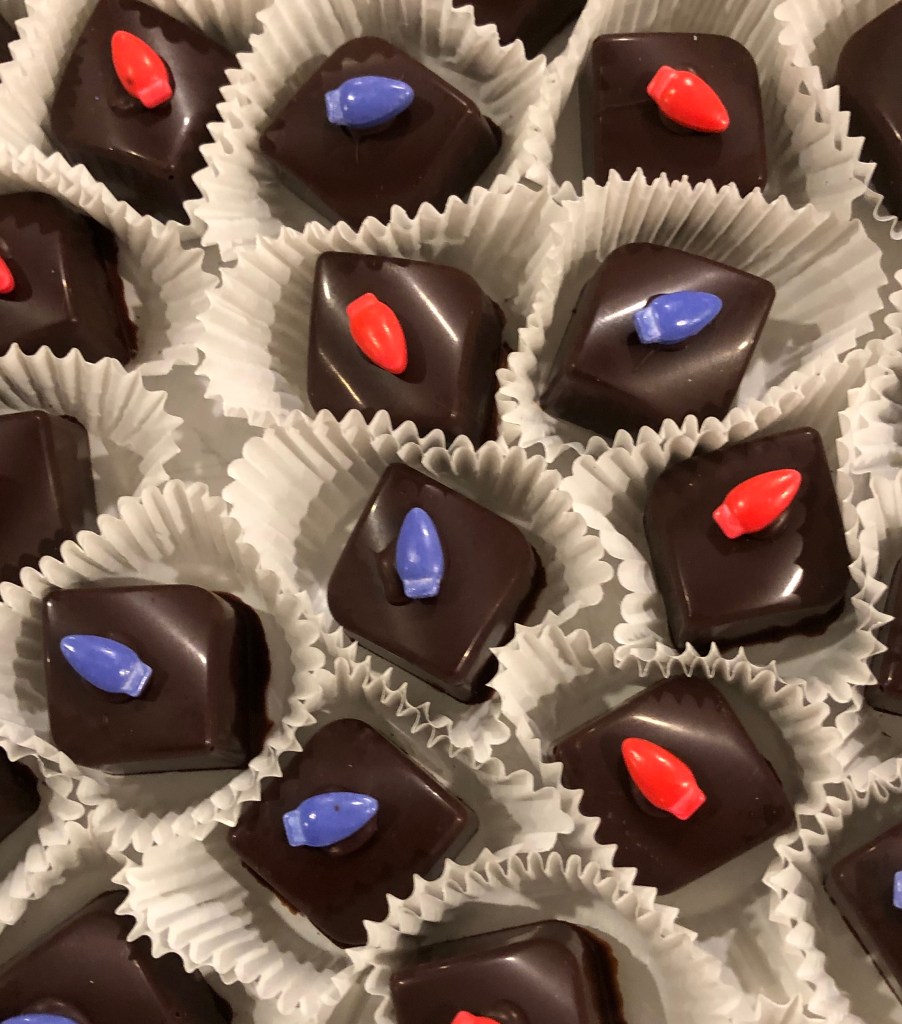
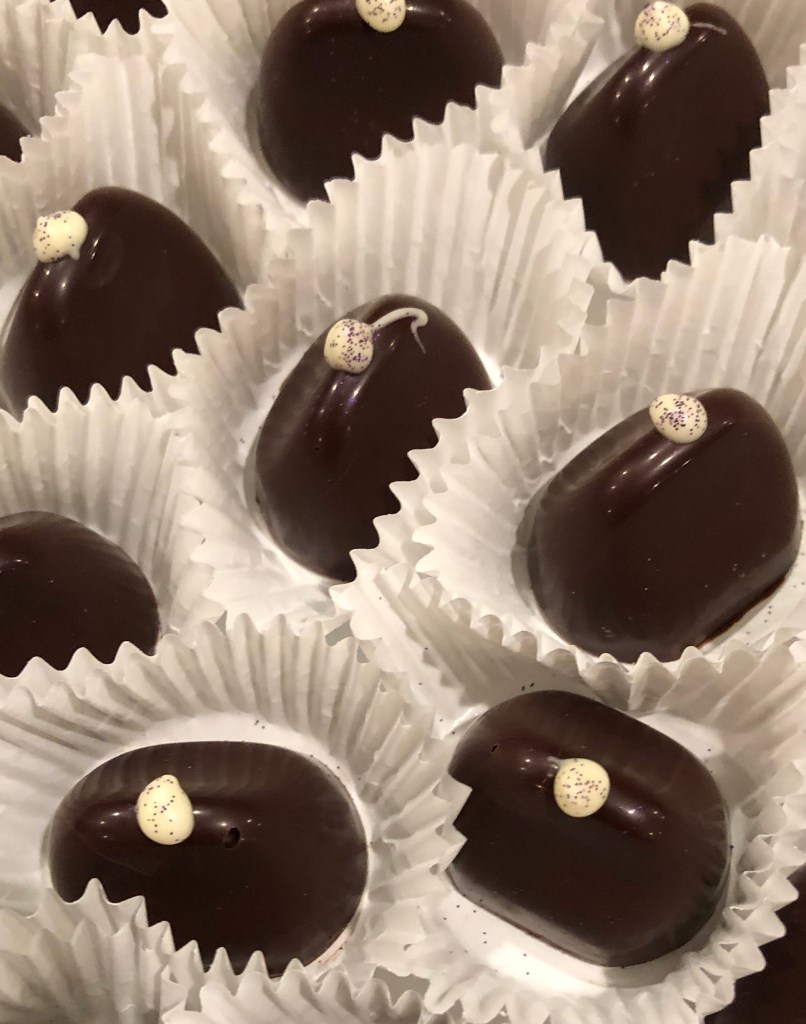
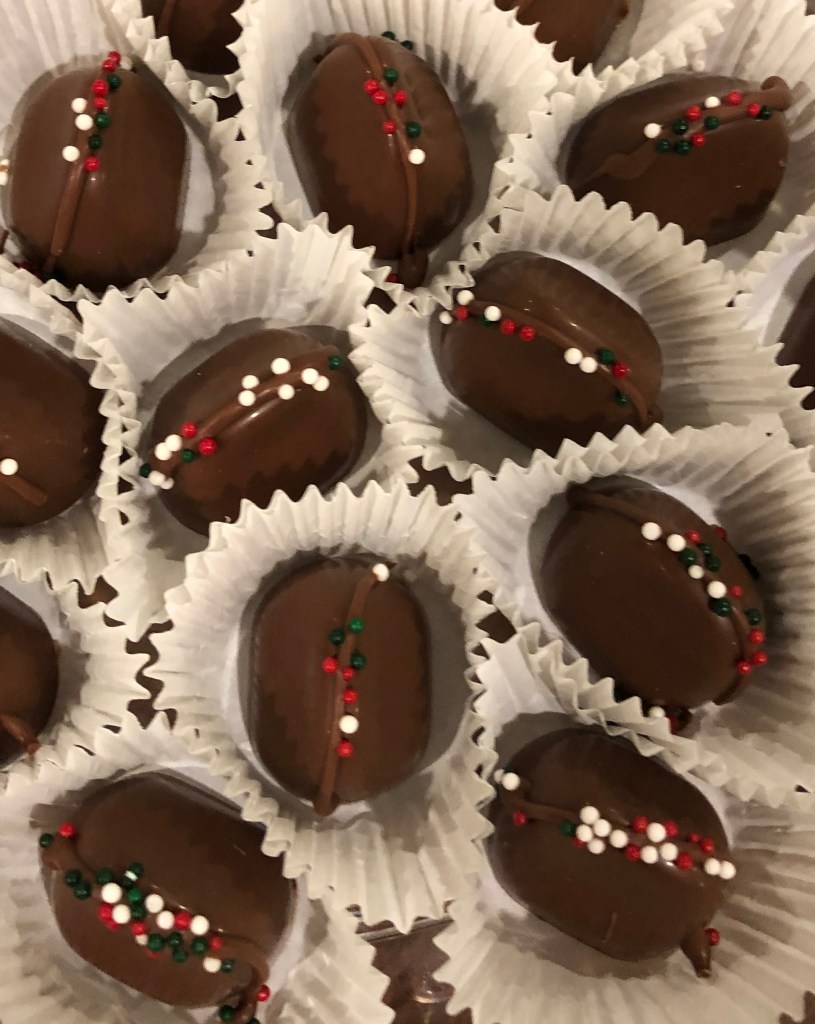
Chocolate season is here! I dipped back in (literally and figuratively) with some small scale chocolate caramel apples in October, got my bulk chocolate delivered in November, and now I am ramping up production for the holidays.
We won’t have a huge chocolate open house this year, but I’m working on creative ways to get the chocolates out and have a chance to see some friends as well! I’m anticipating having them ready for pick up the week of December 13-17.
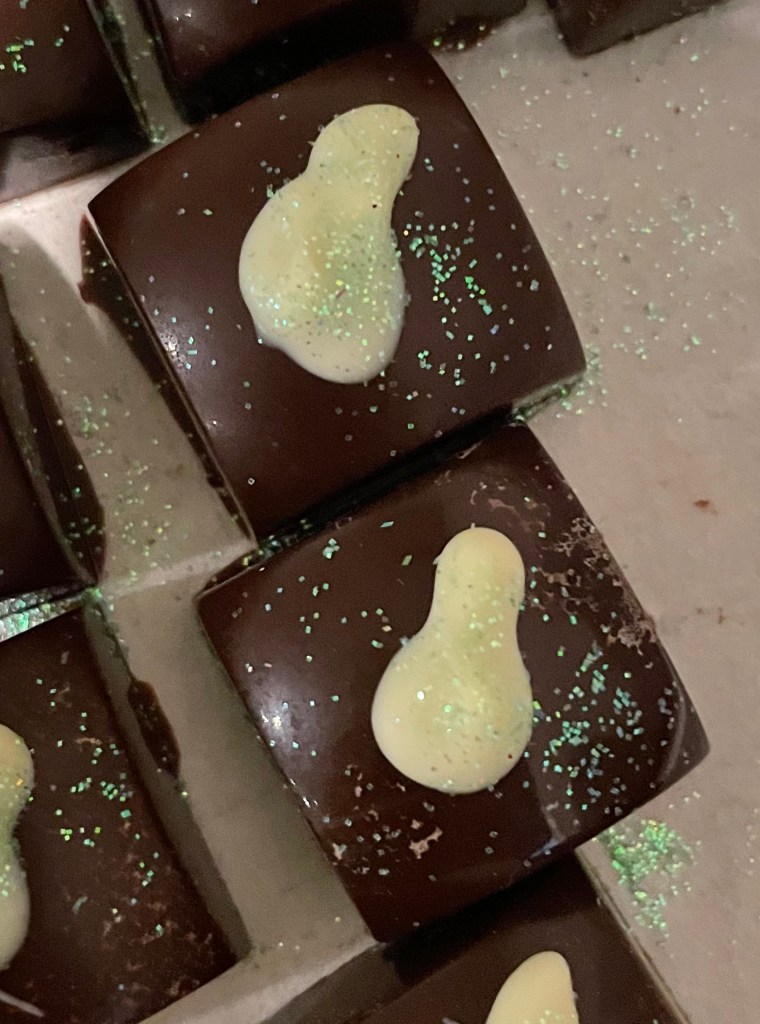
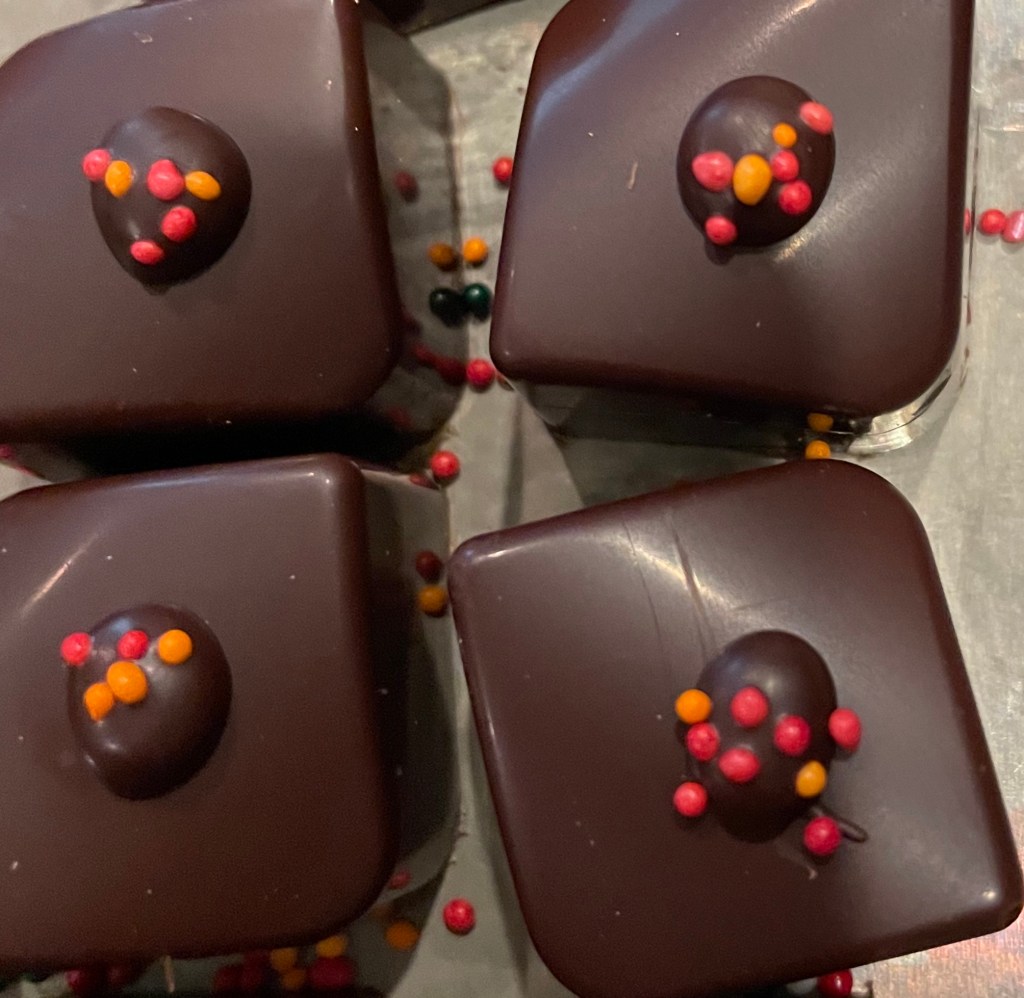
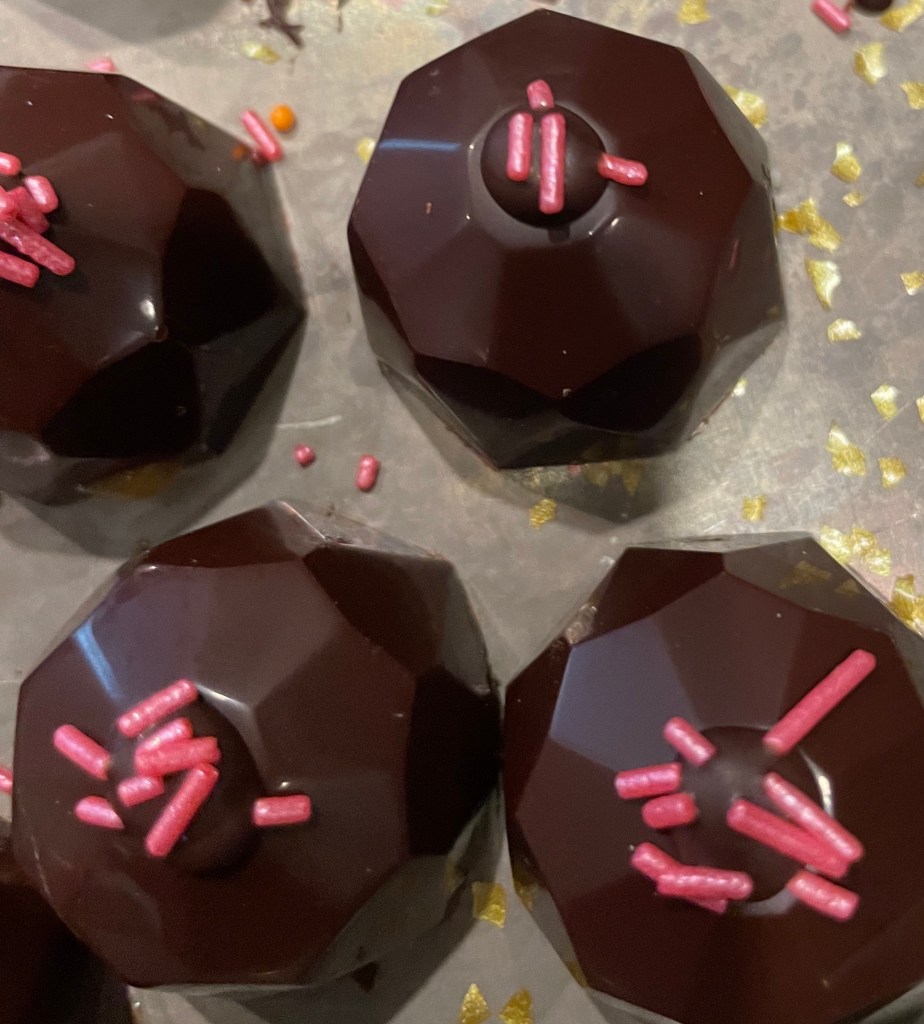
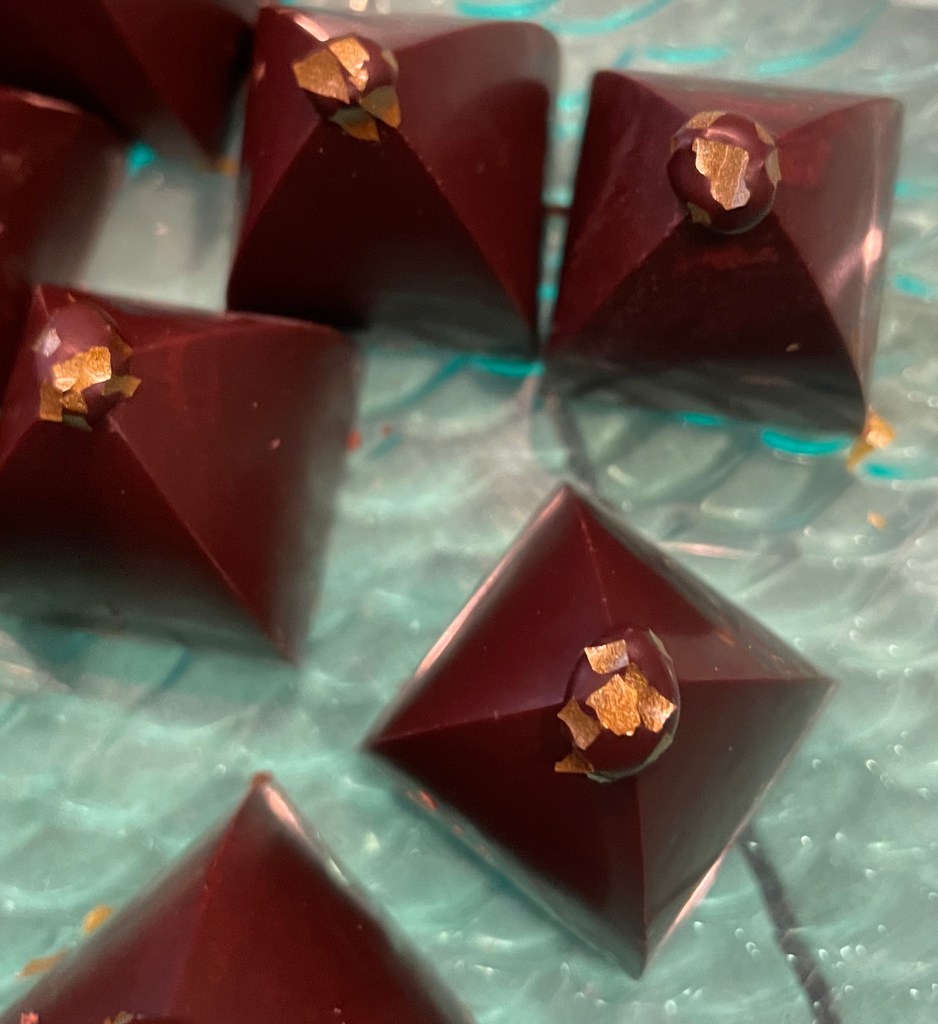
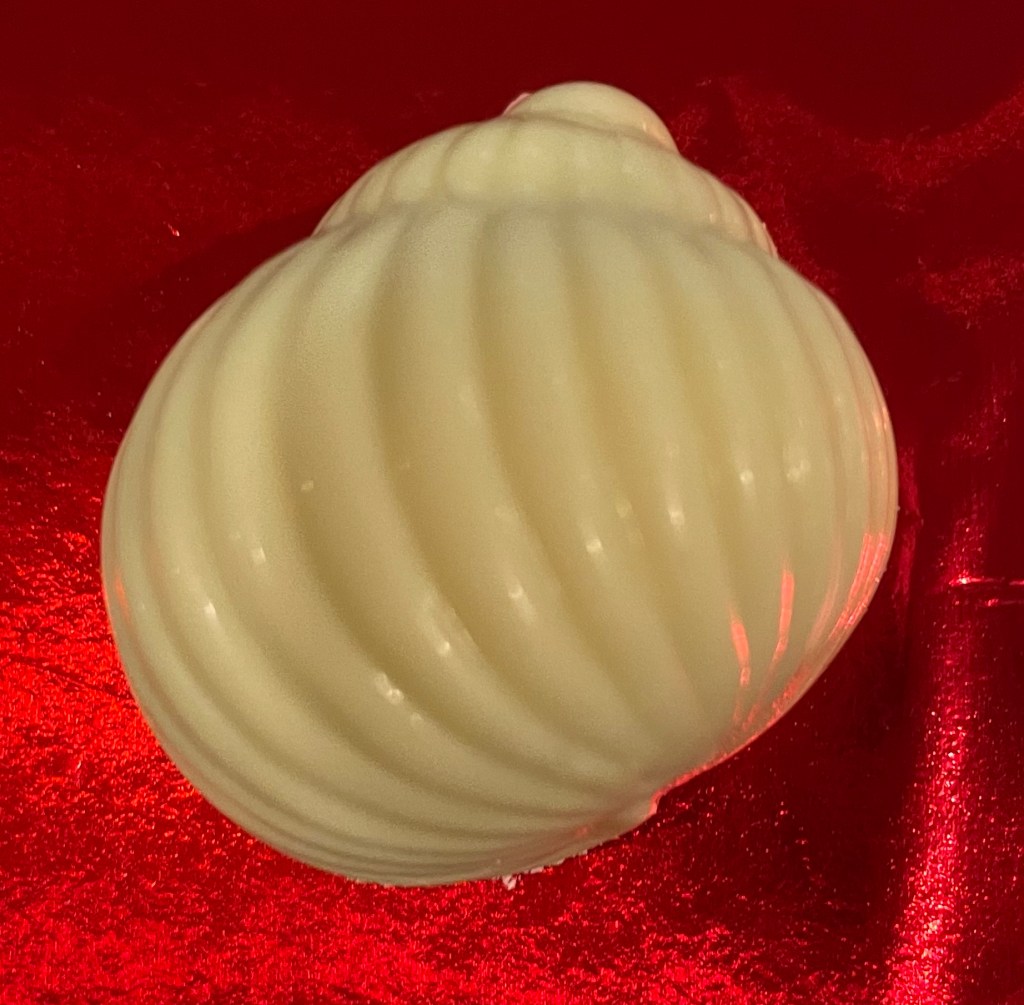
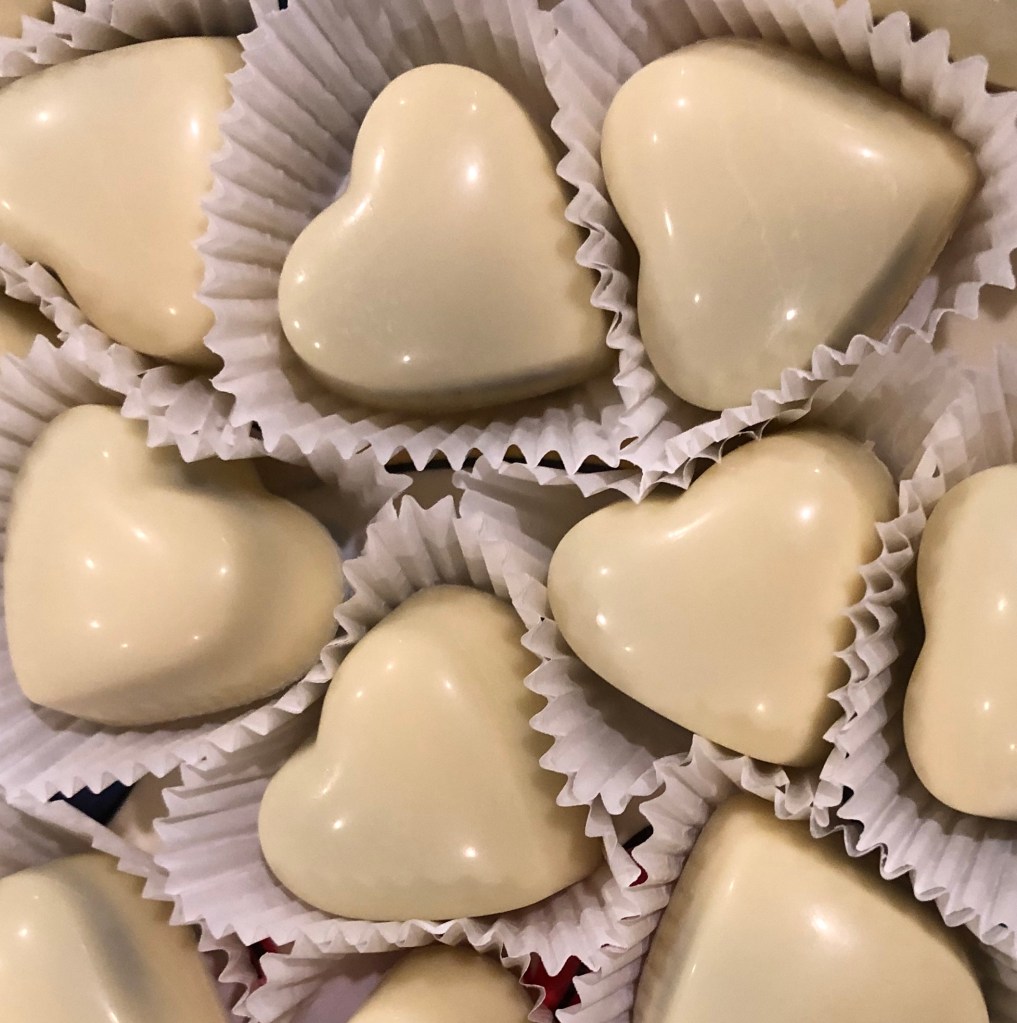
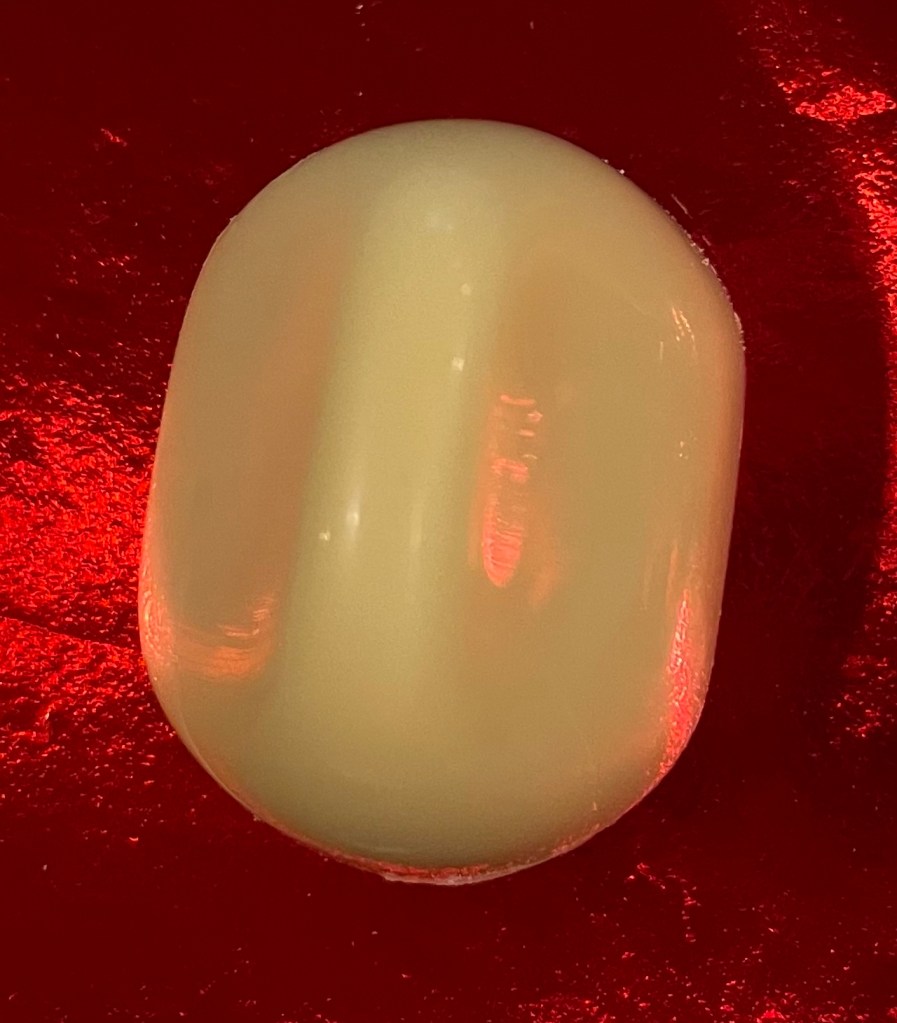
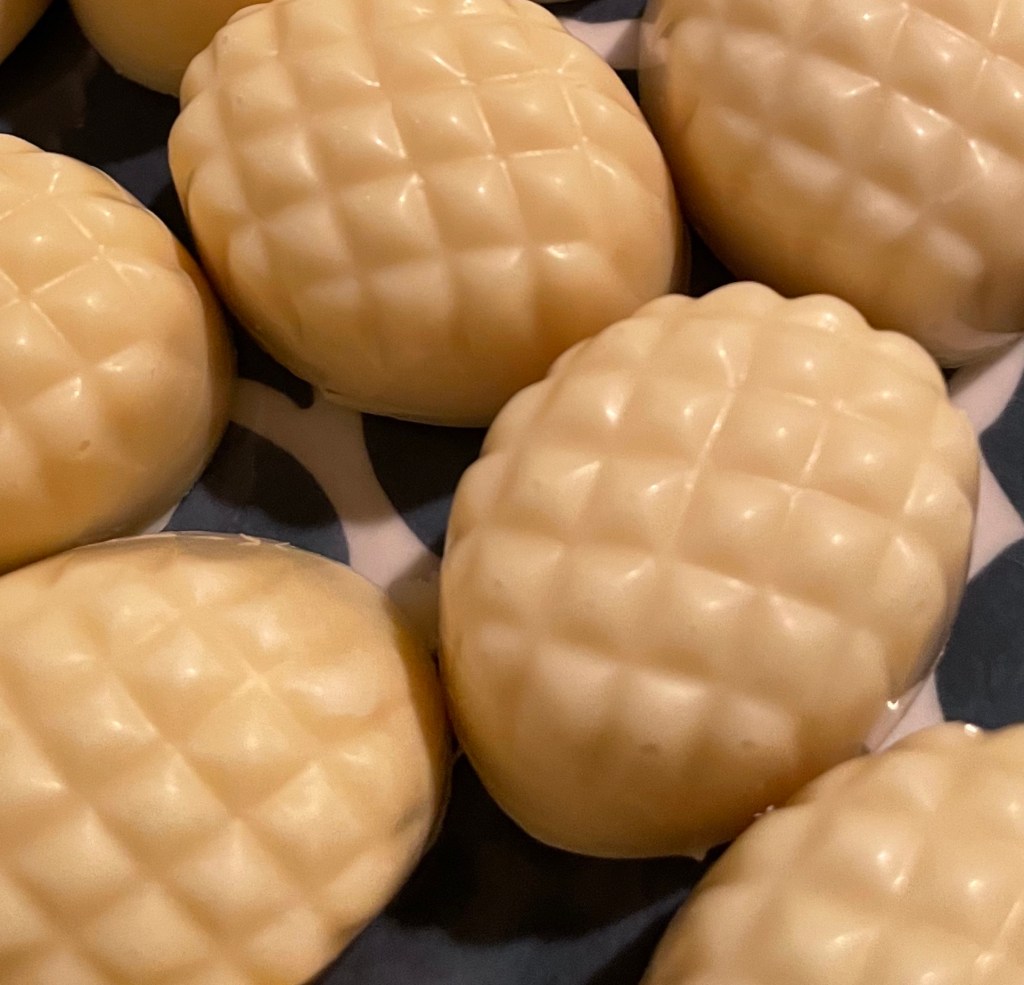
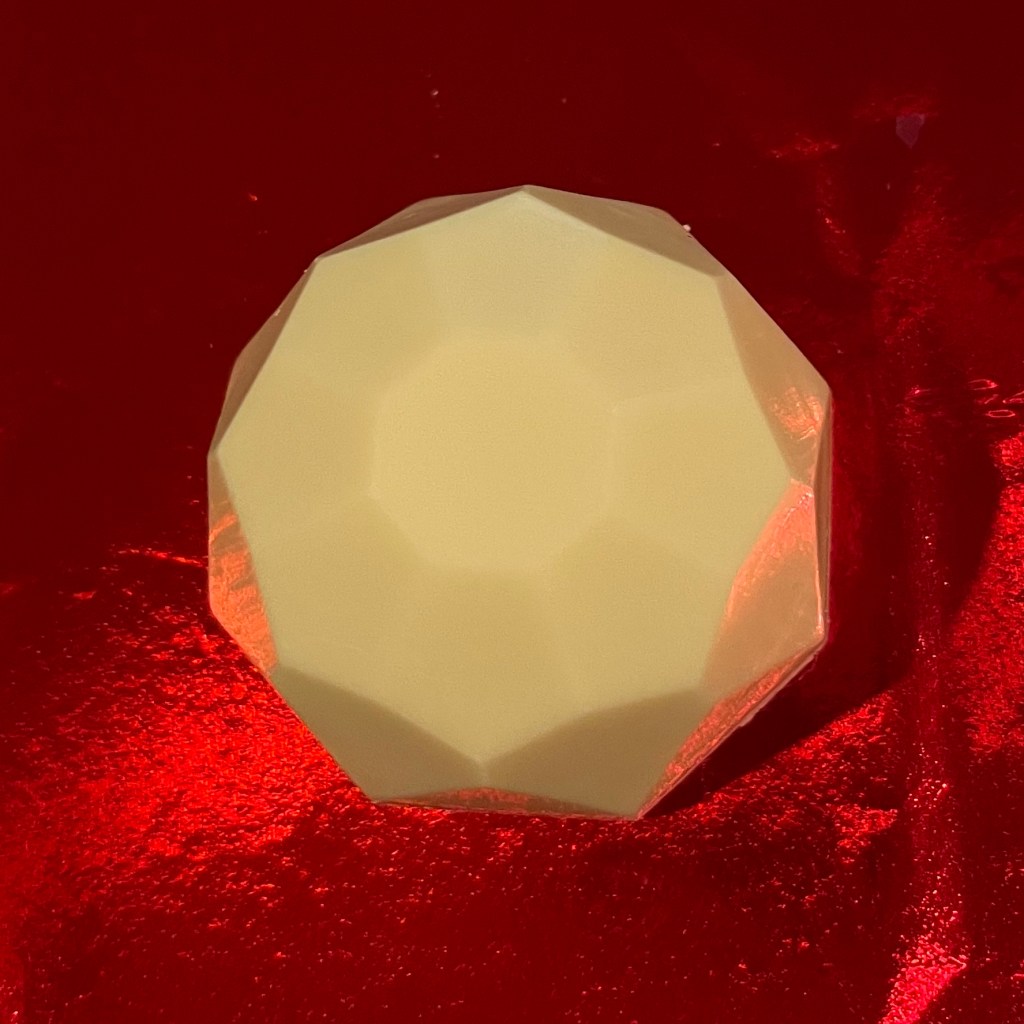
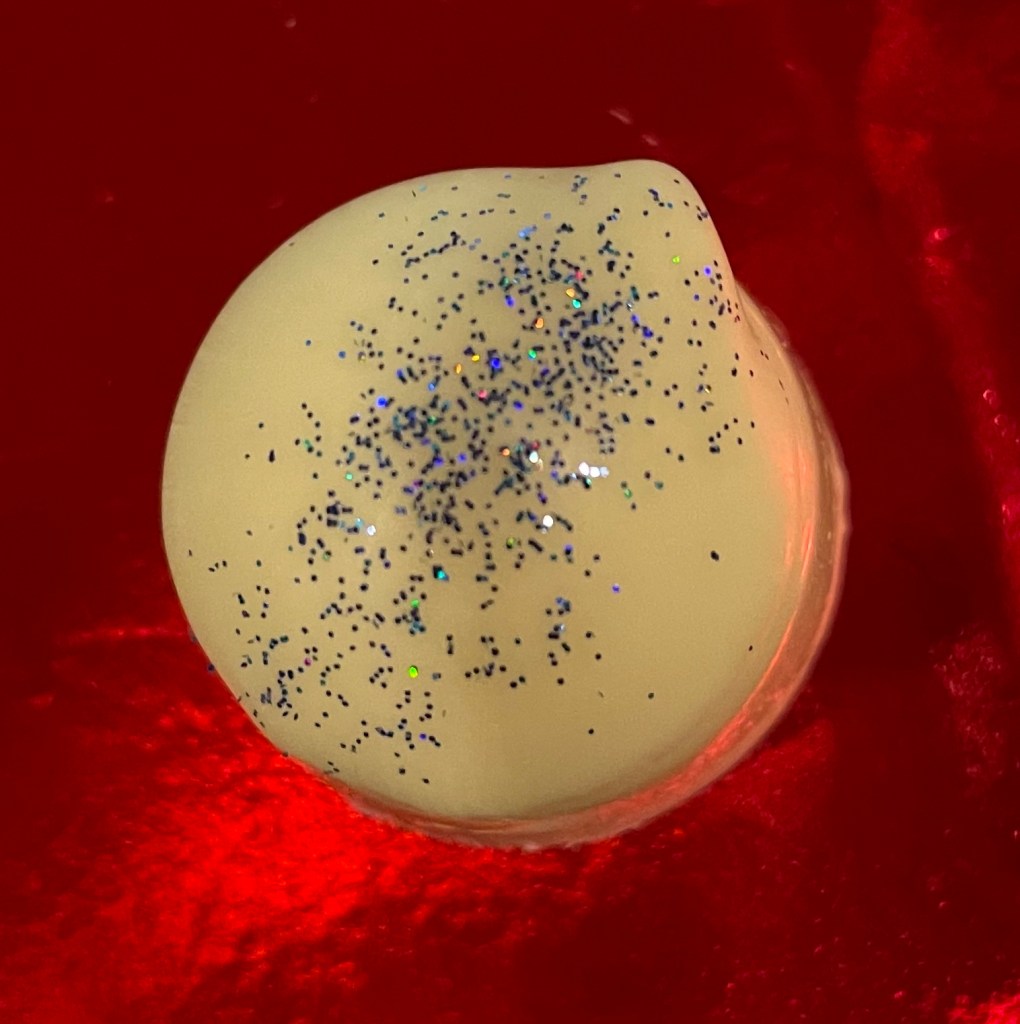
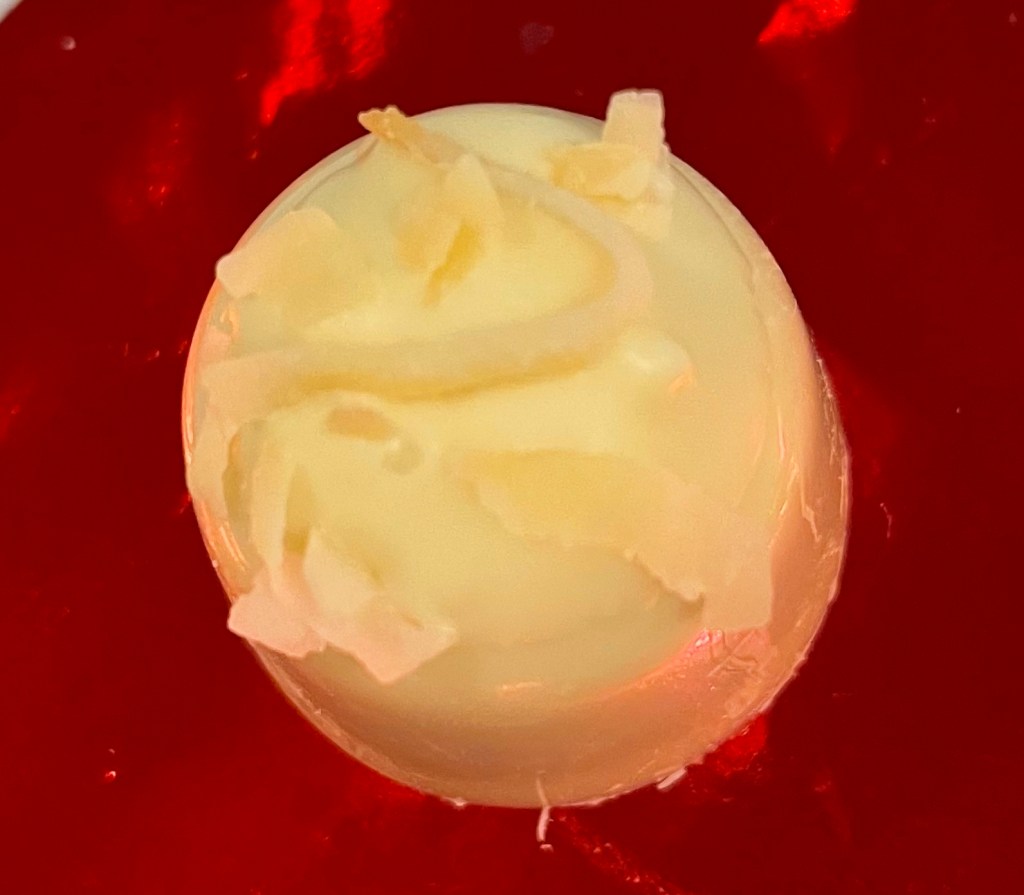
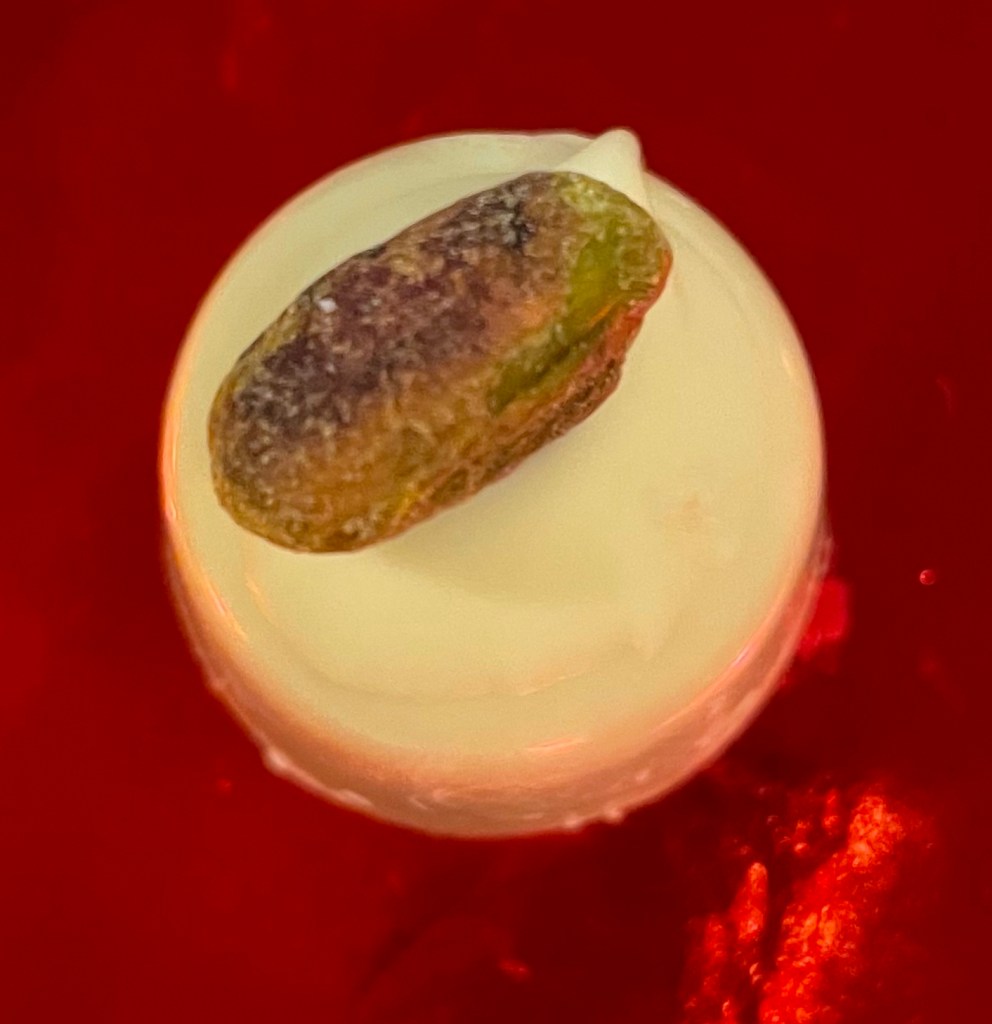
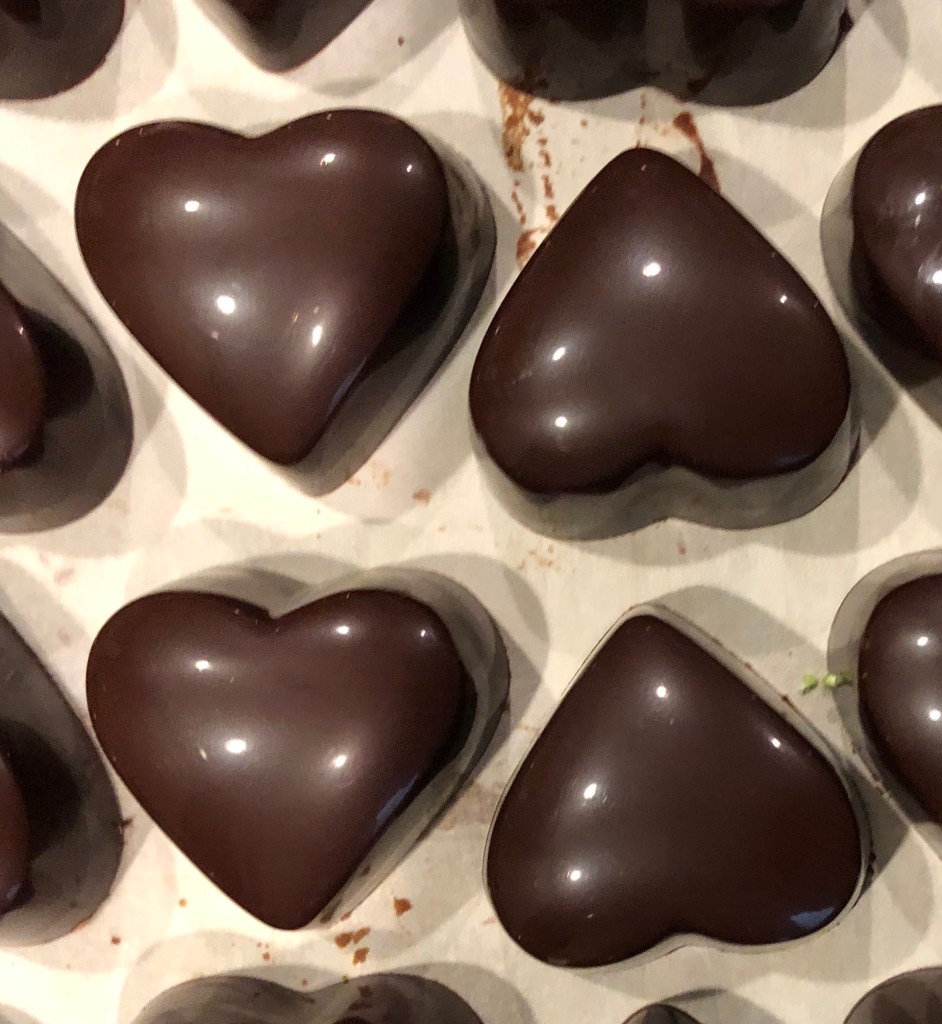
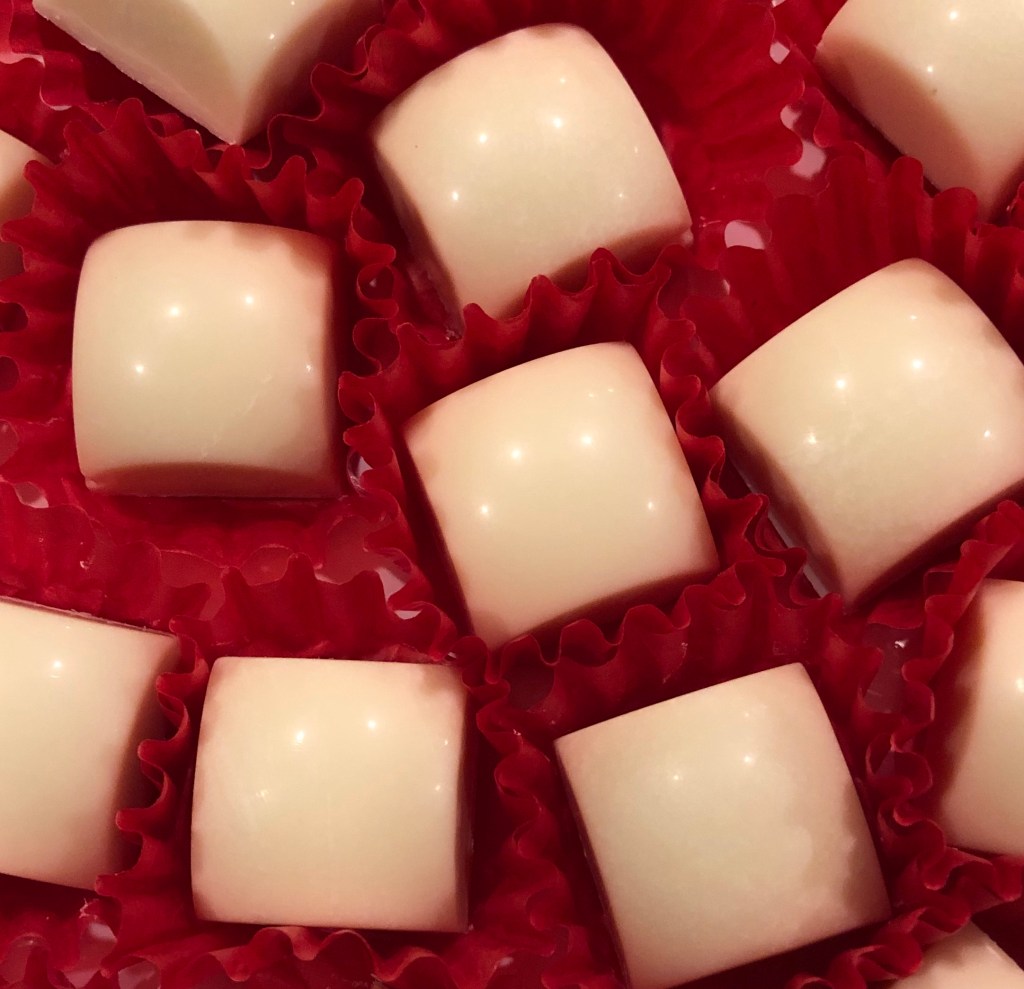
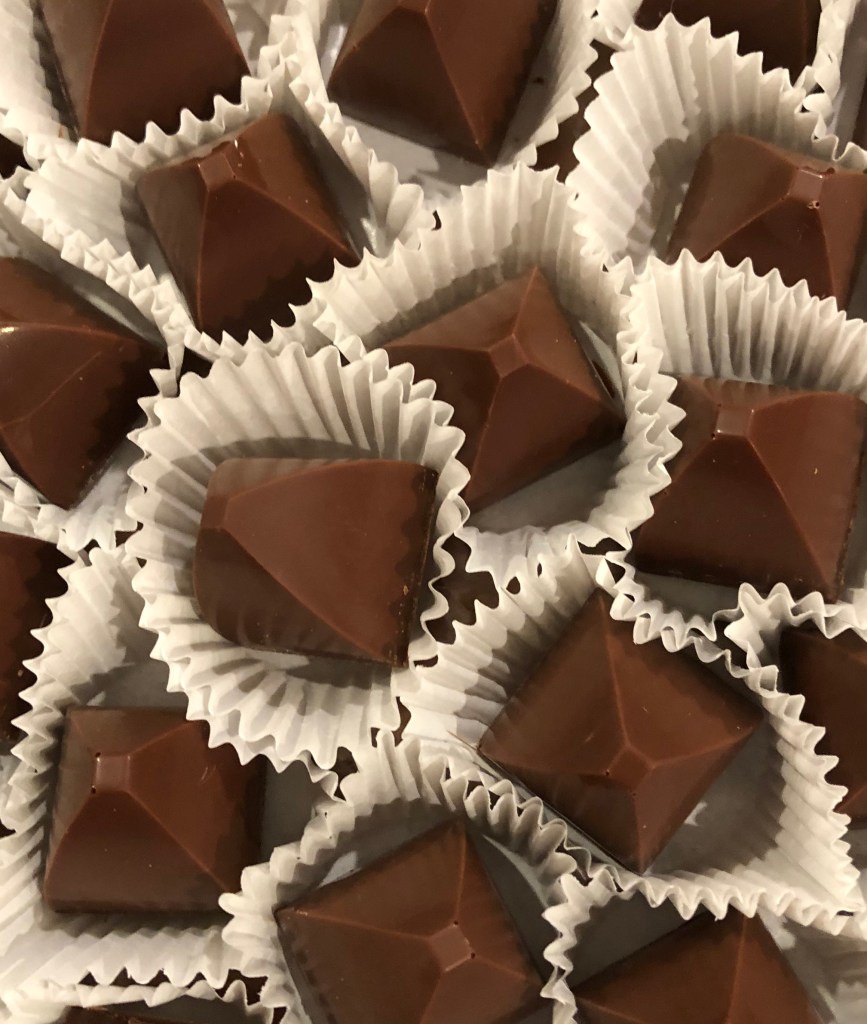
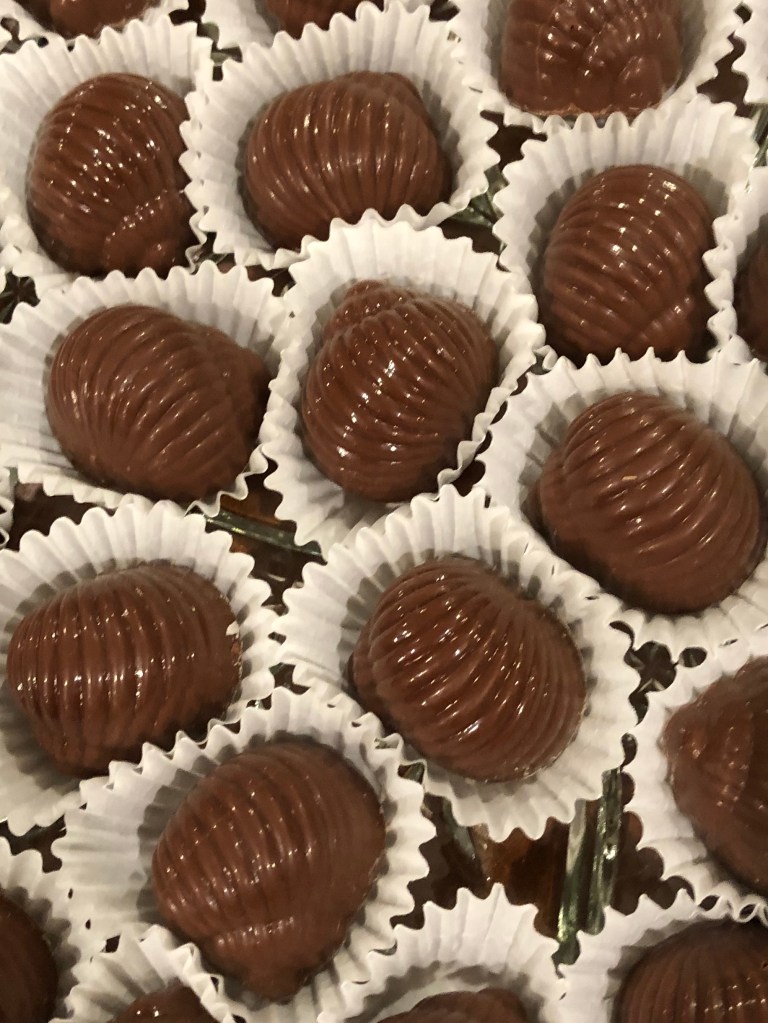
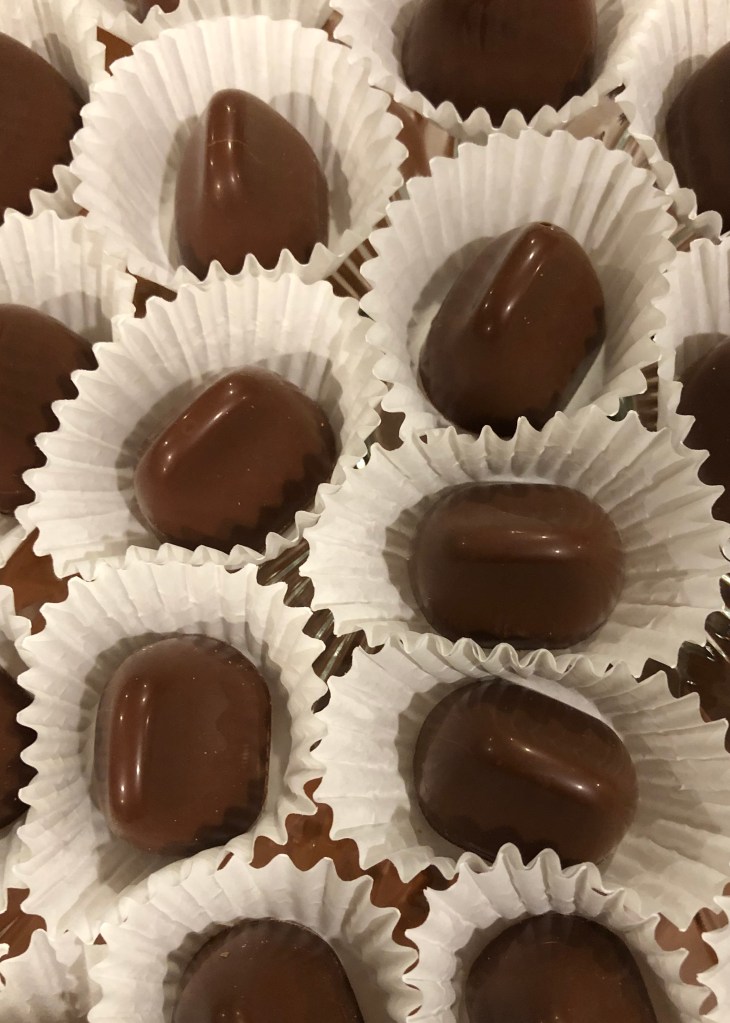
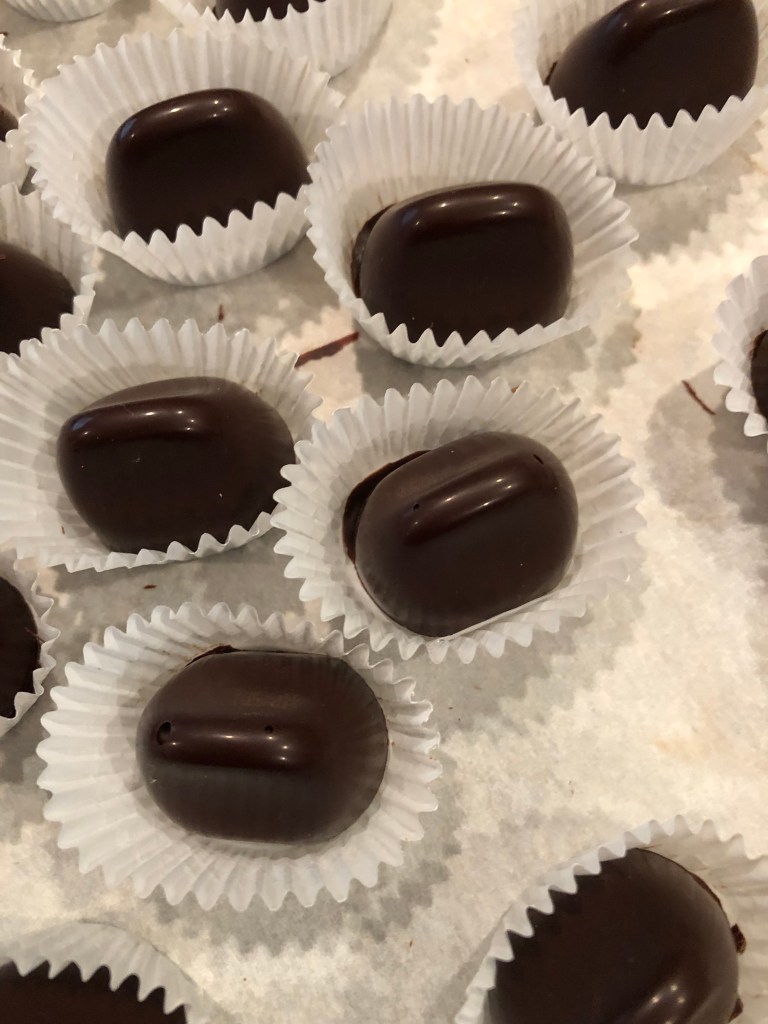
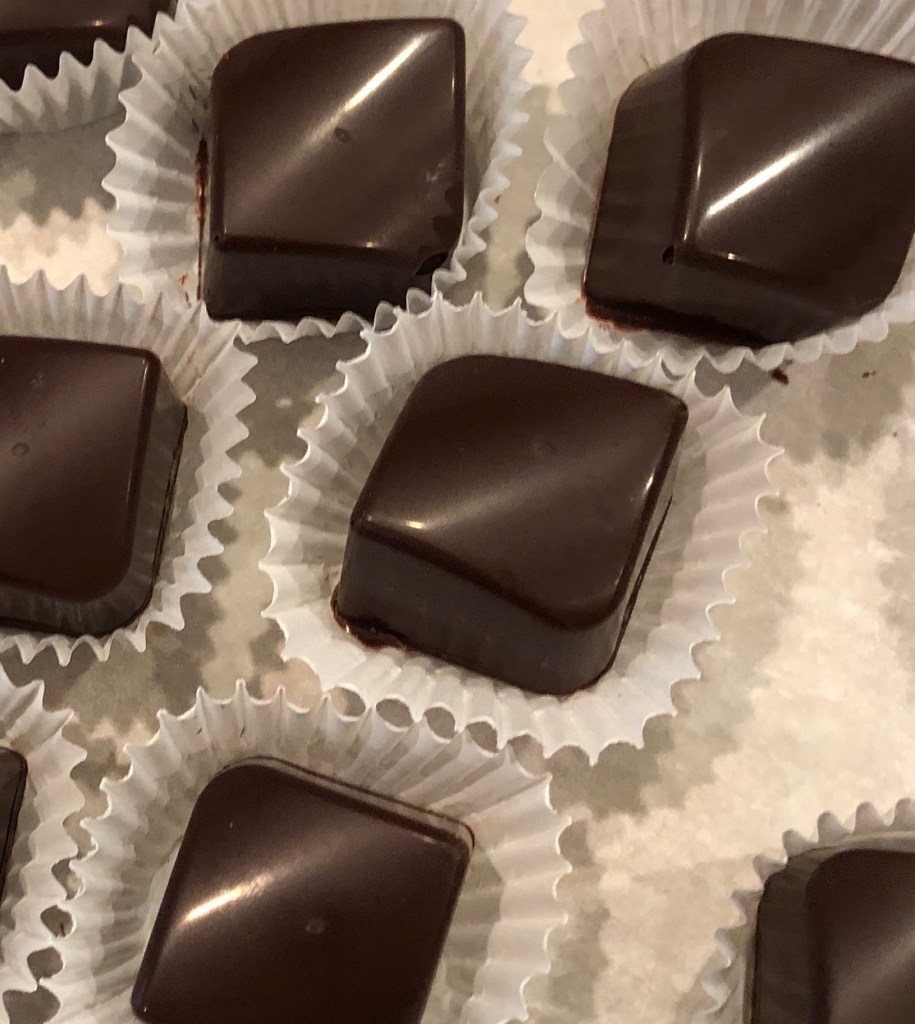
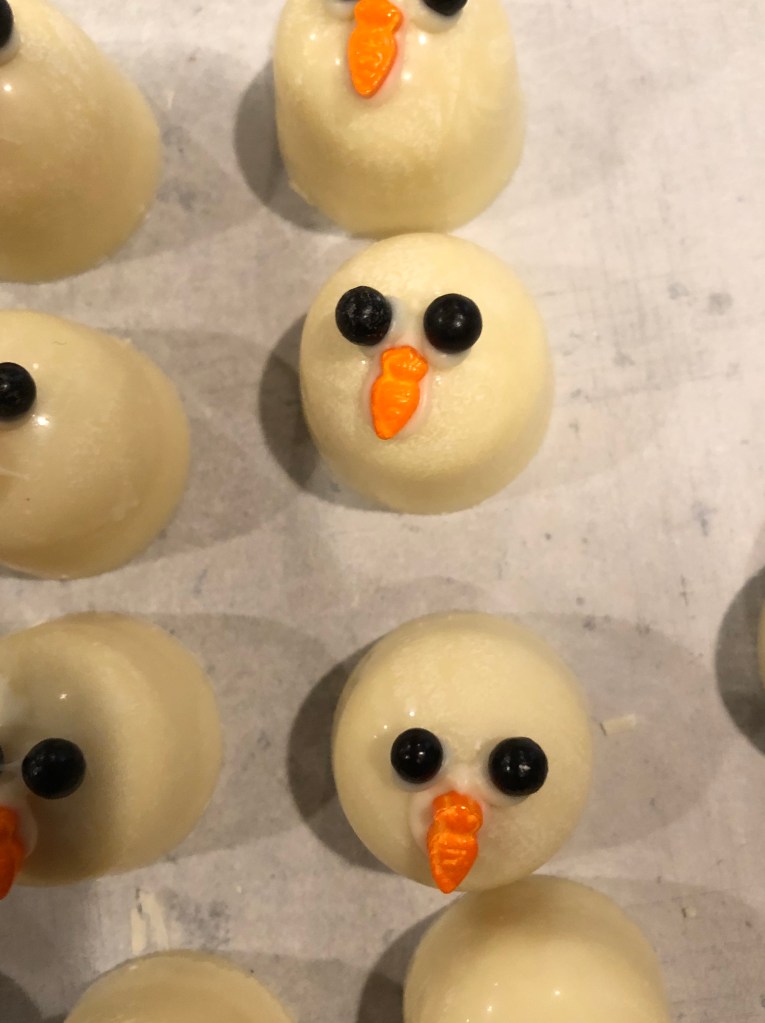
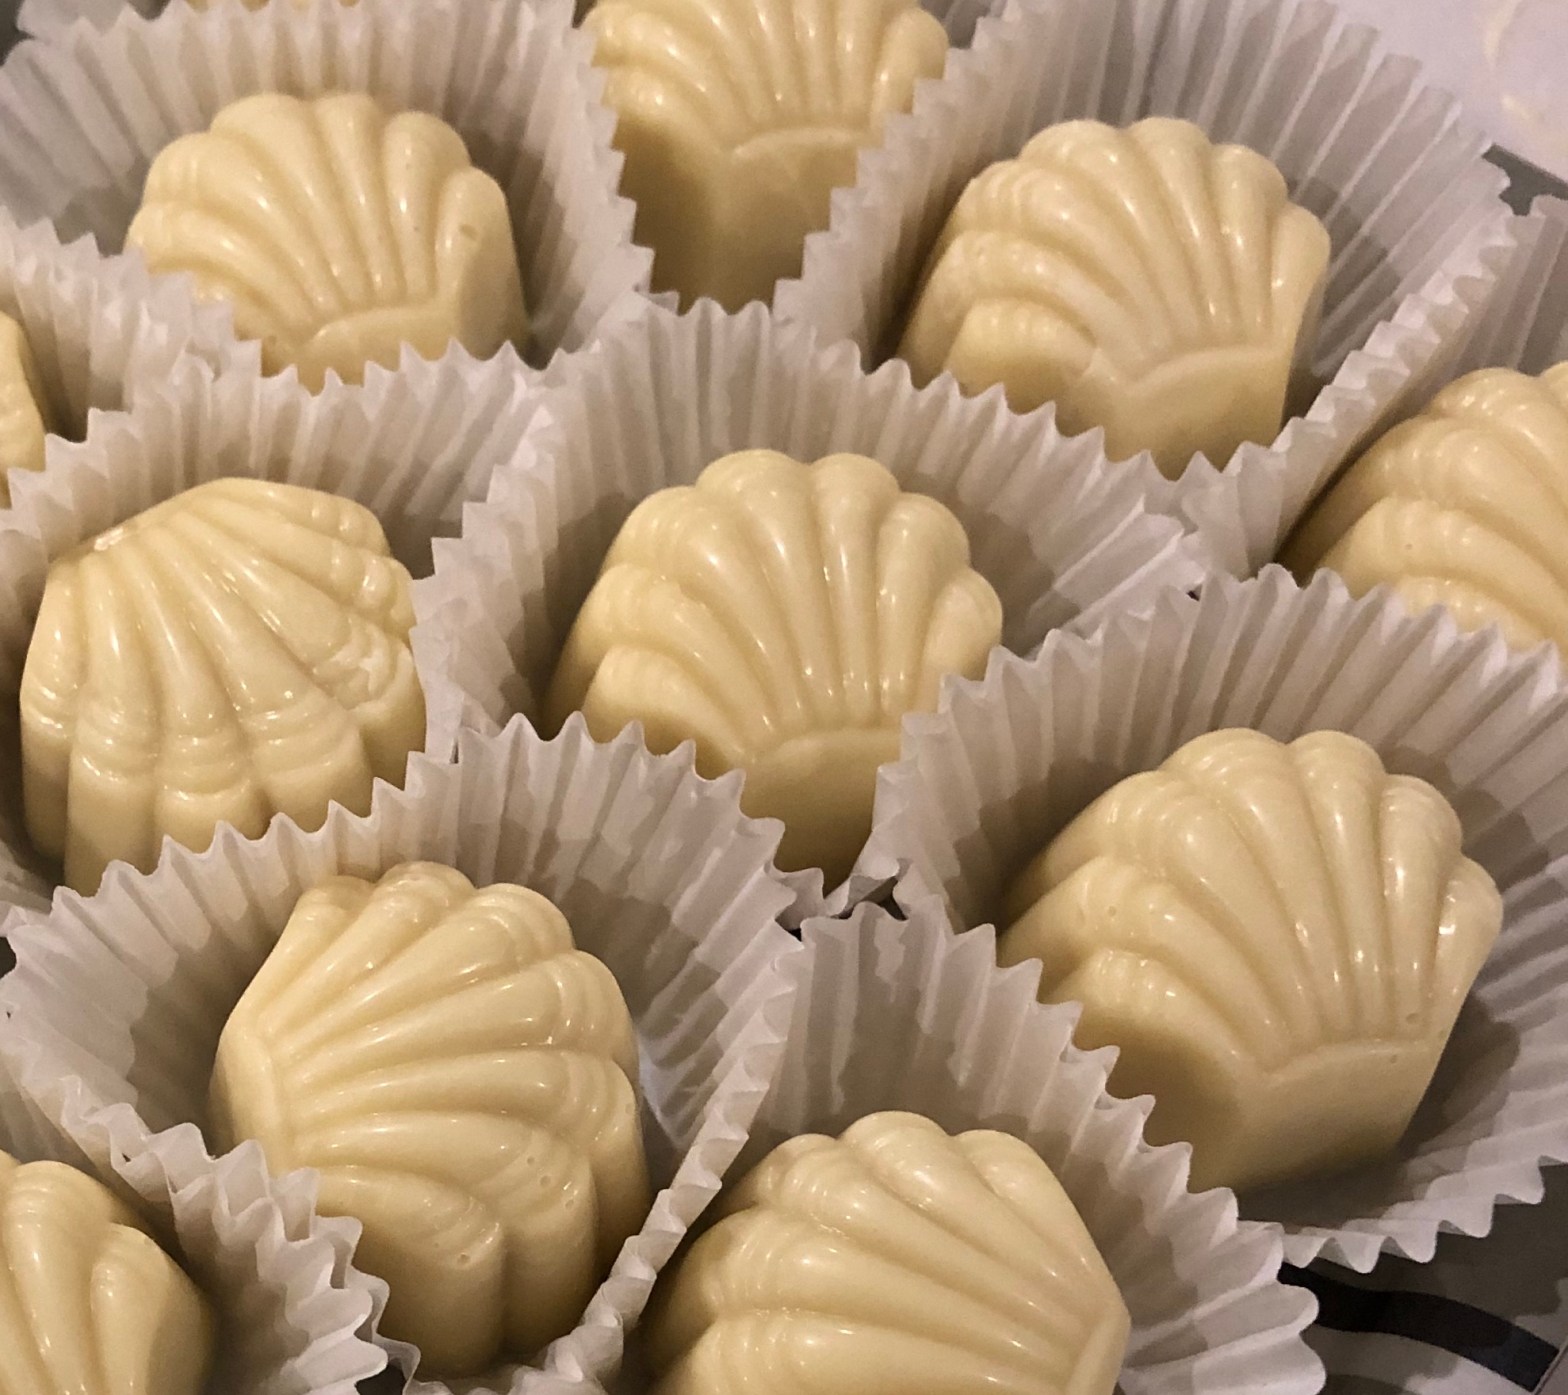
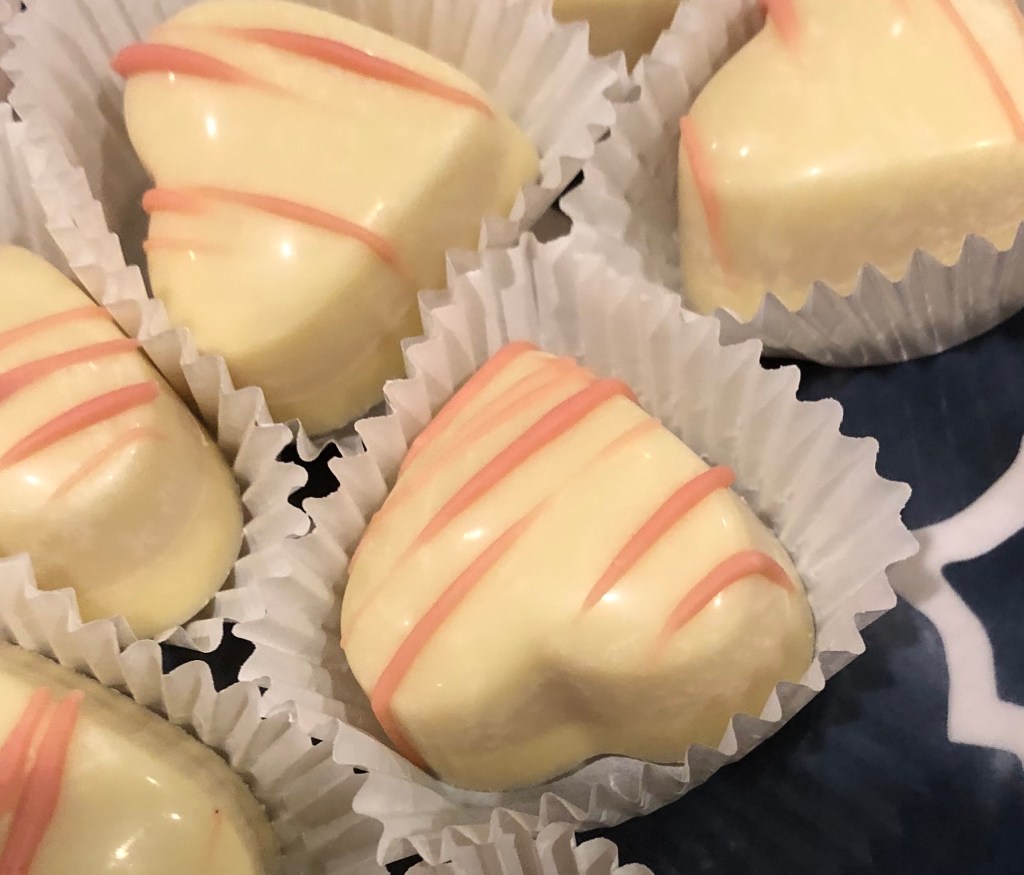
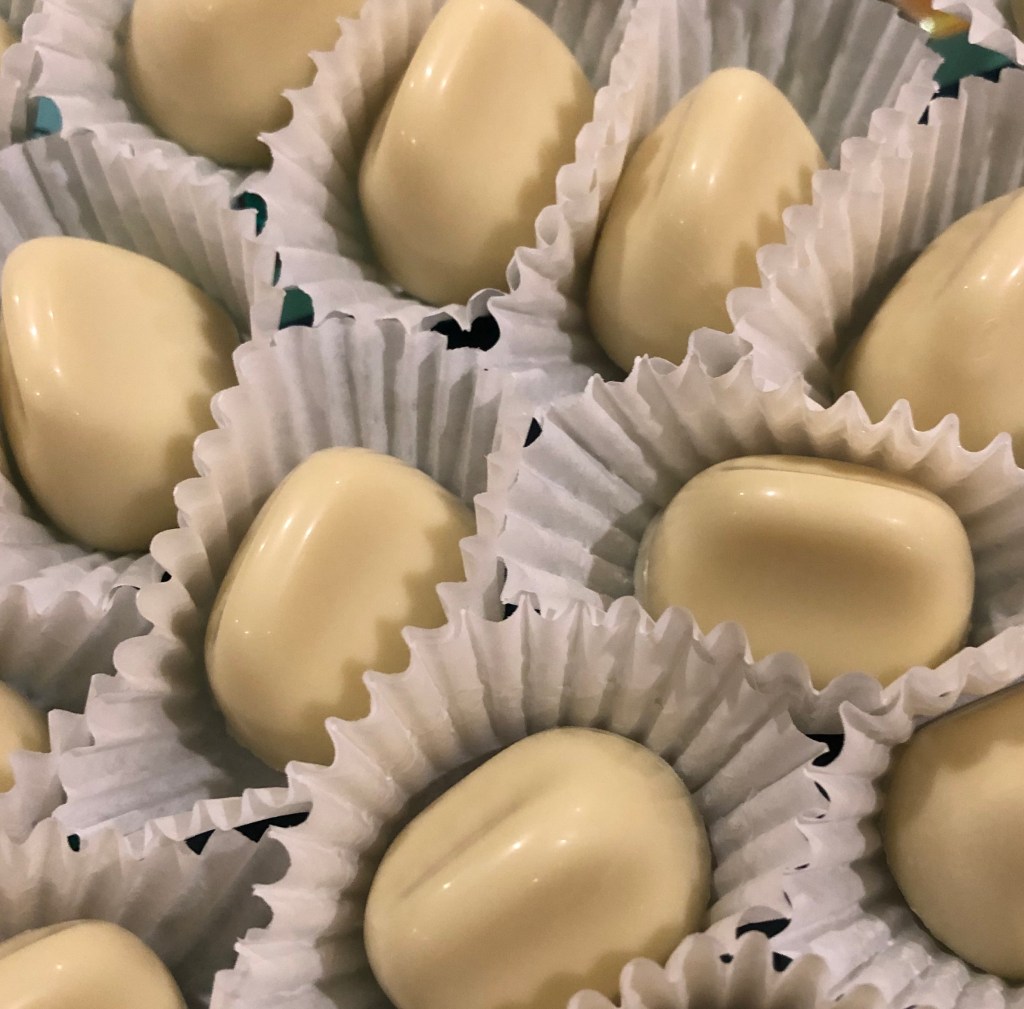
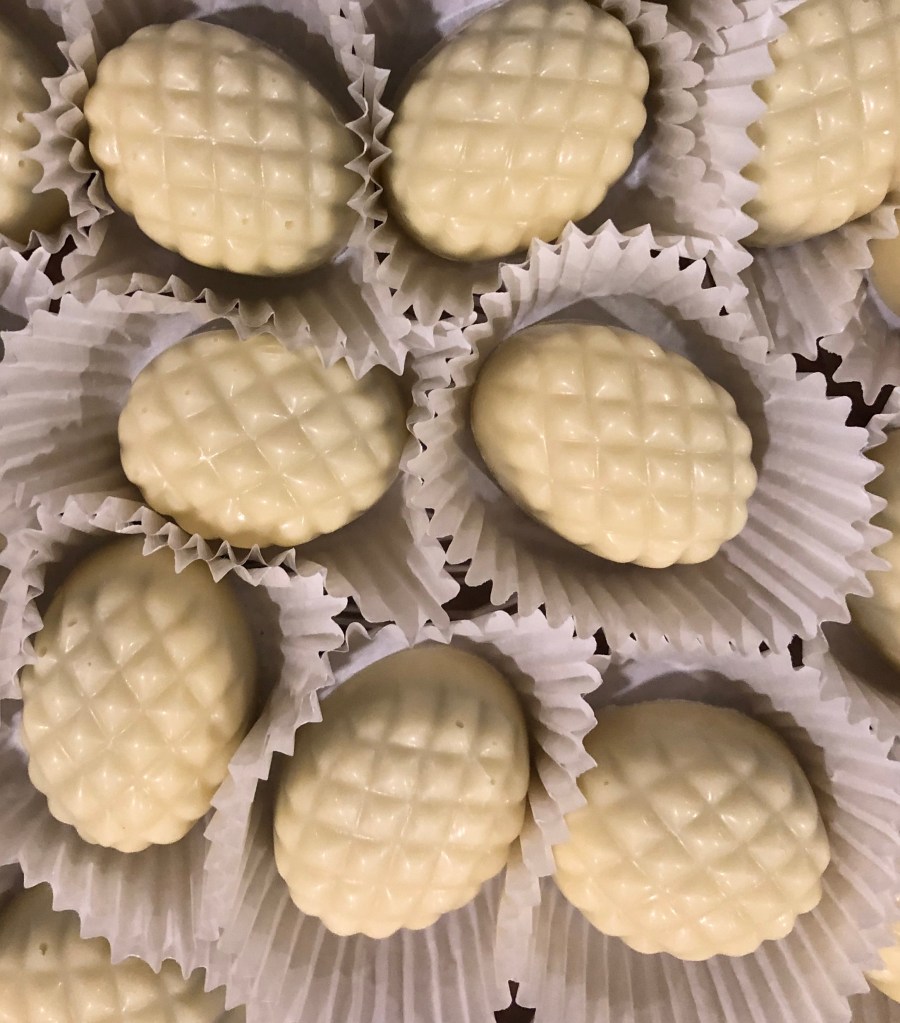
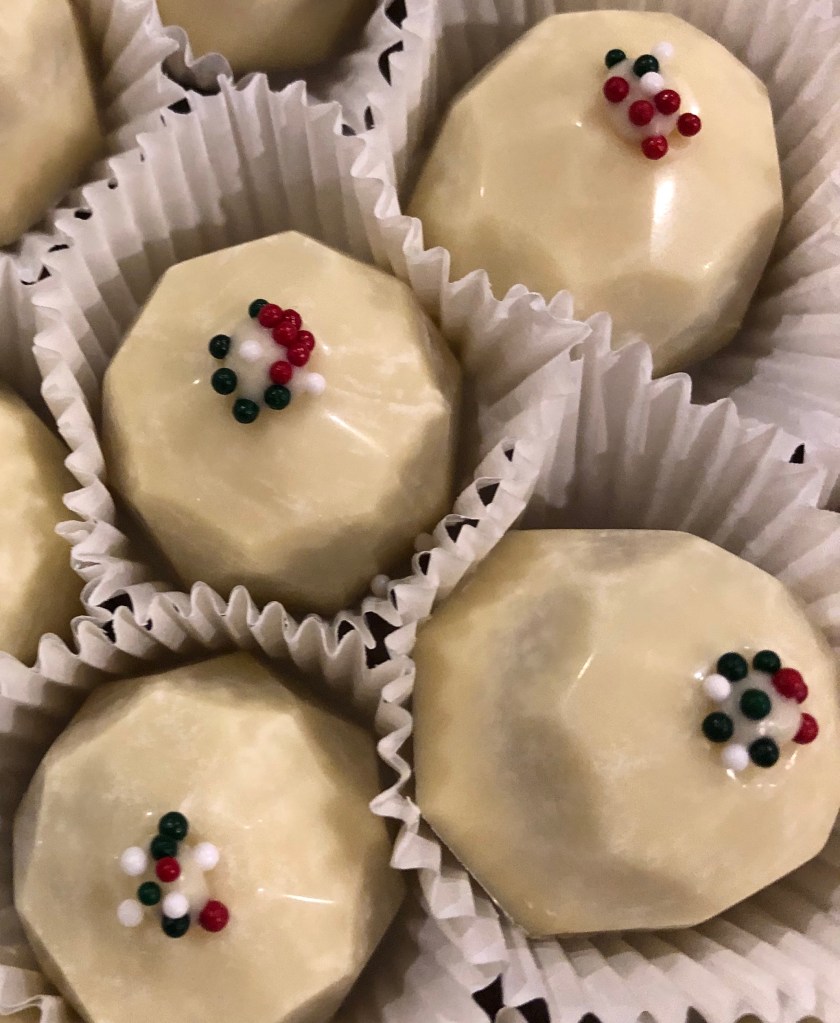
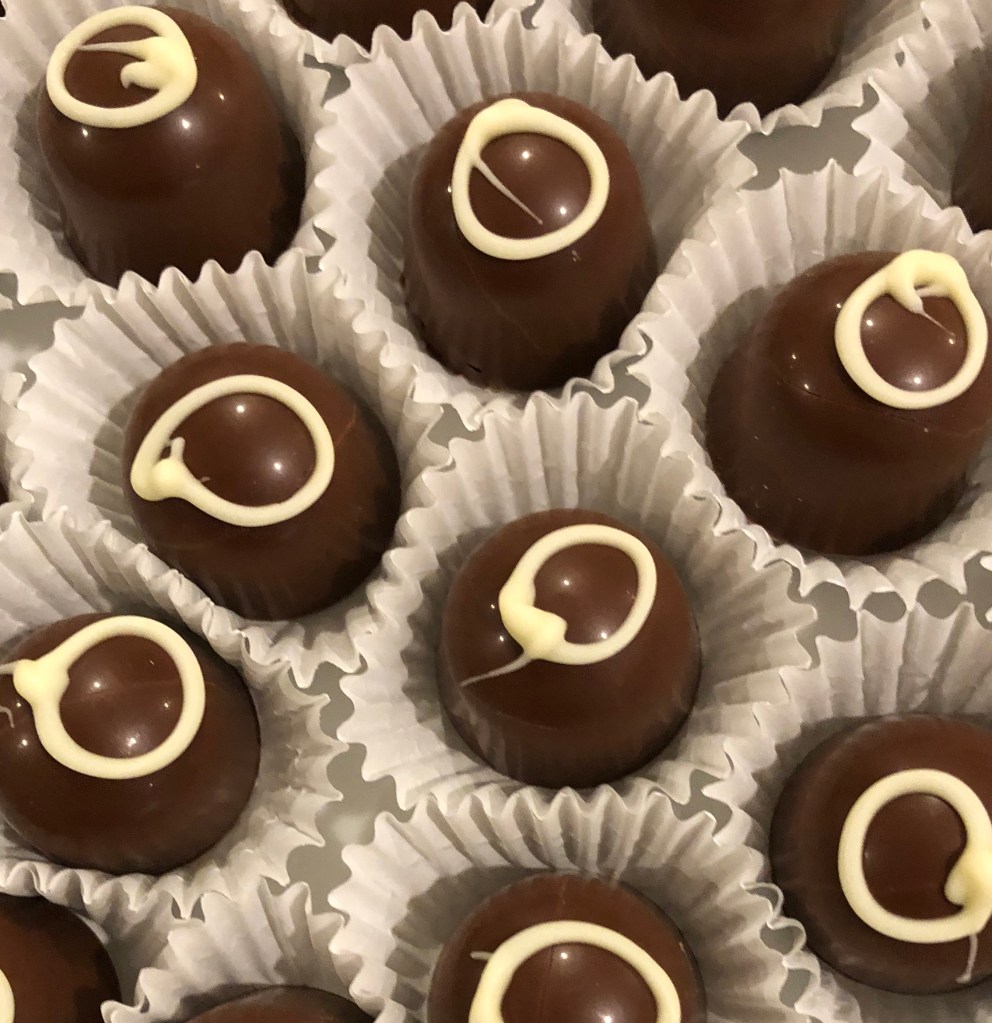
I tried some fun new flavors (of course) this year: prickly pear, blueberry cheesecake, and honey lavender are a few of the colorful centers in white chocolate.
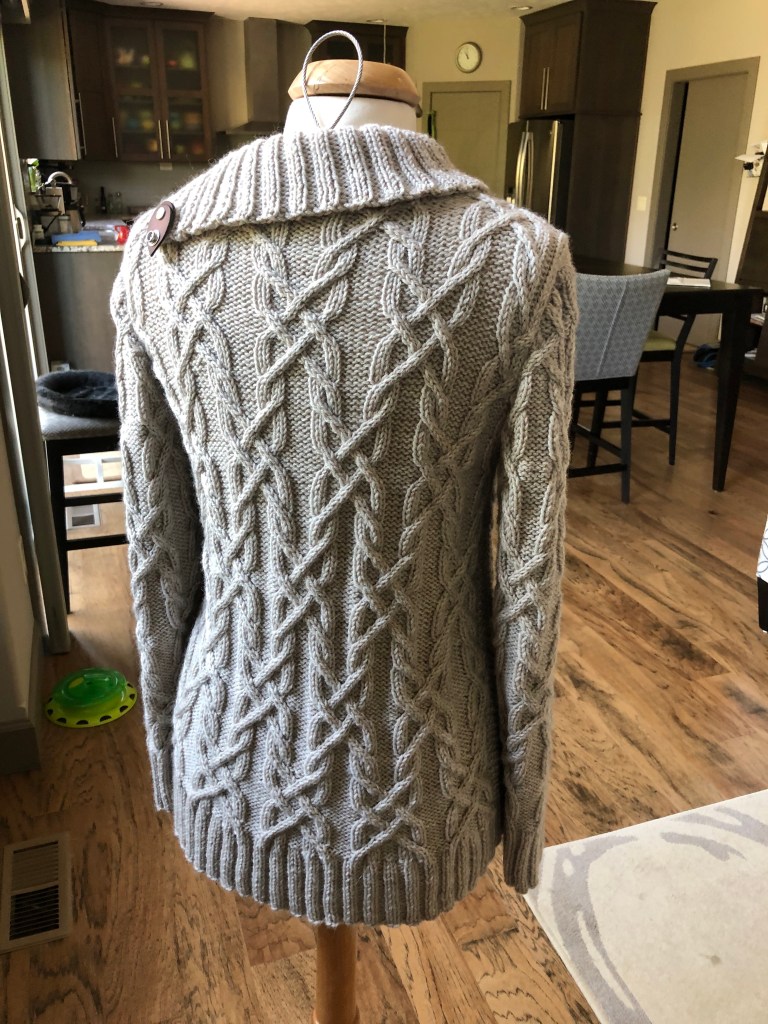
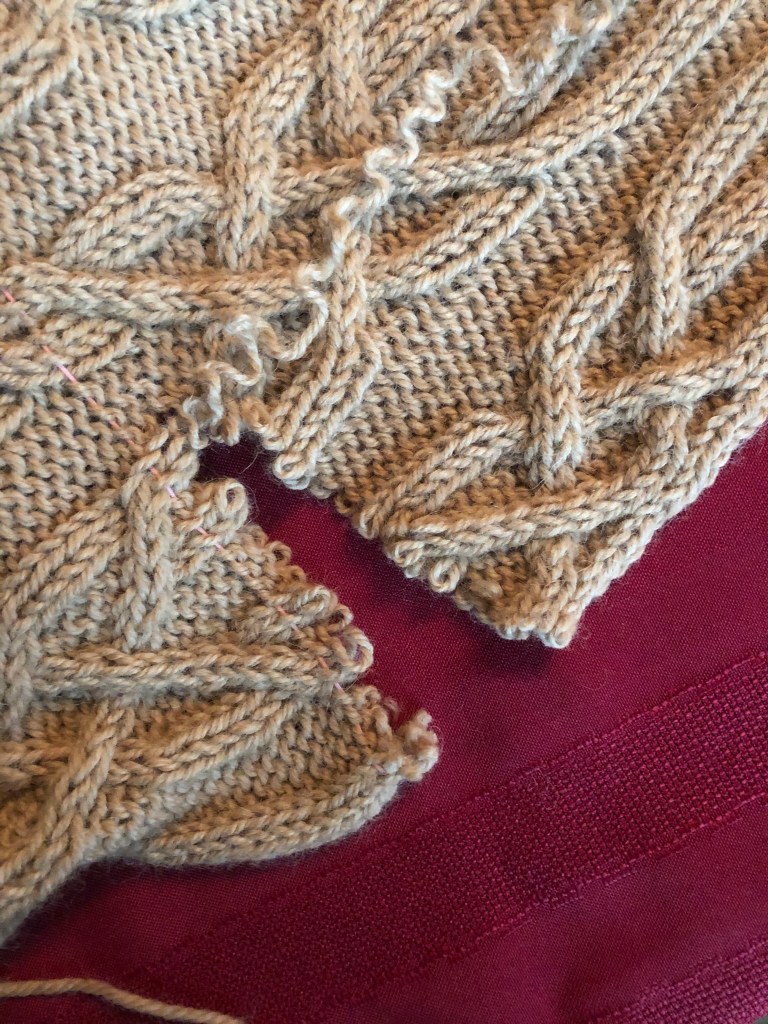
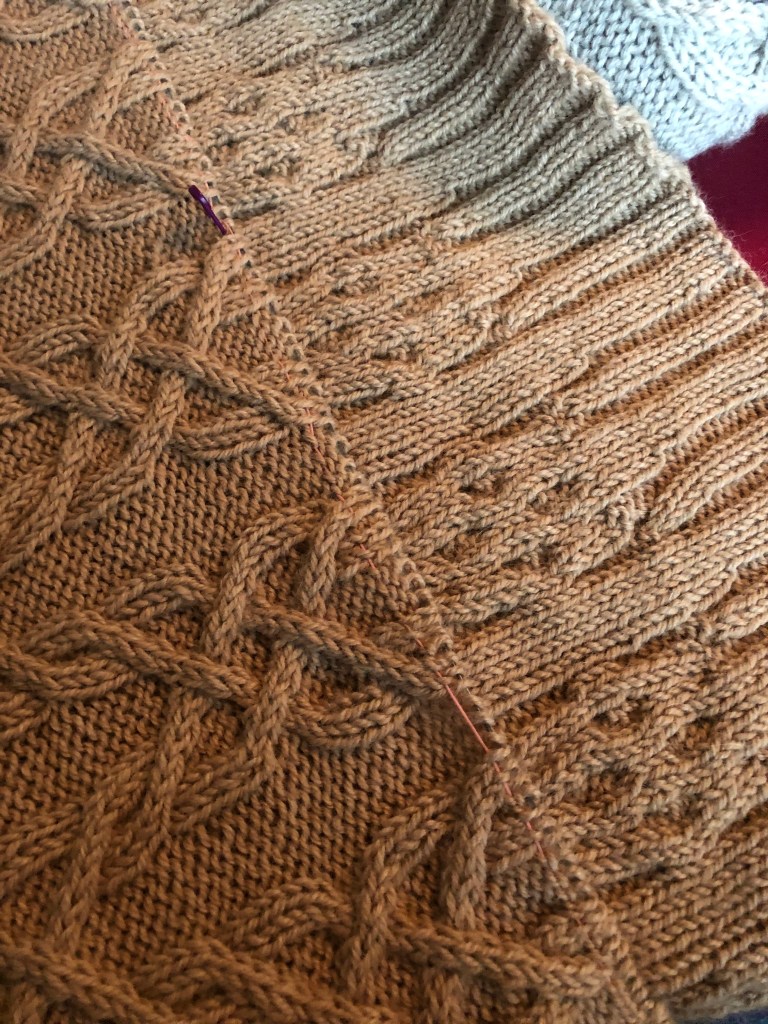
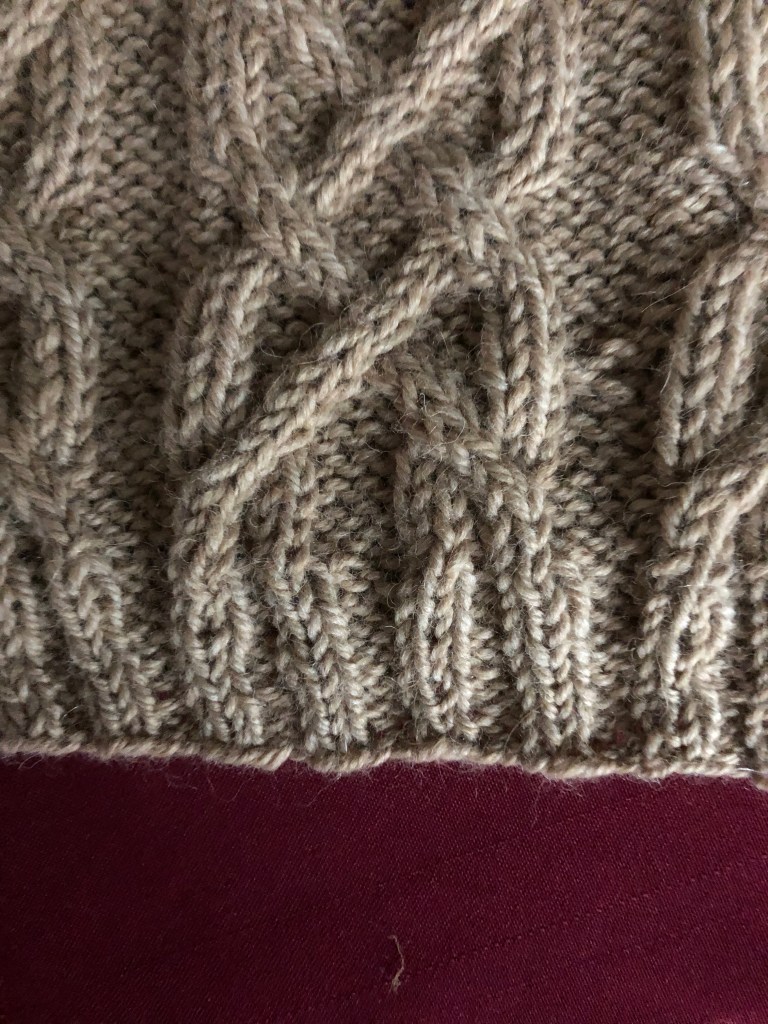
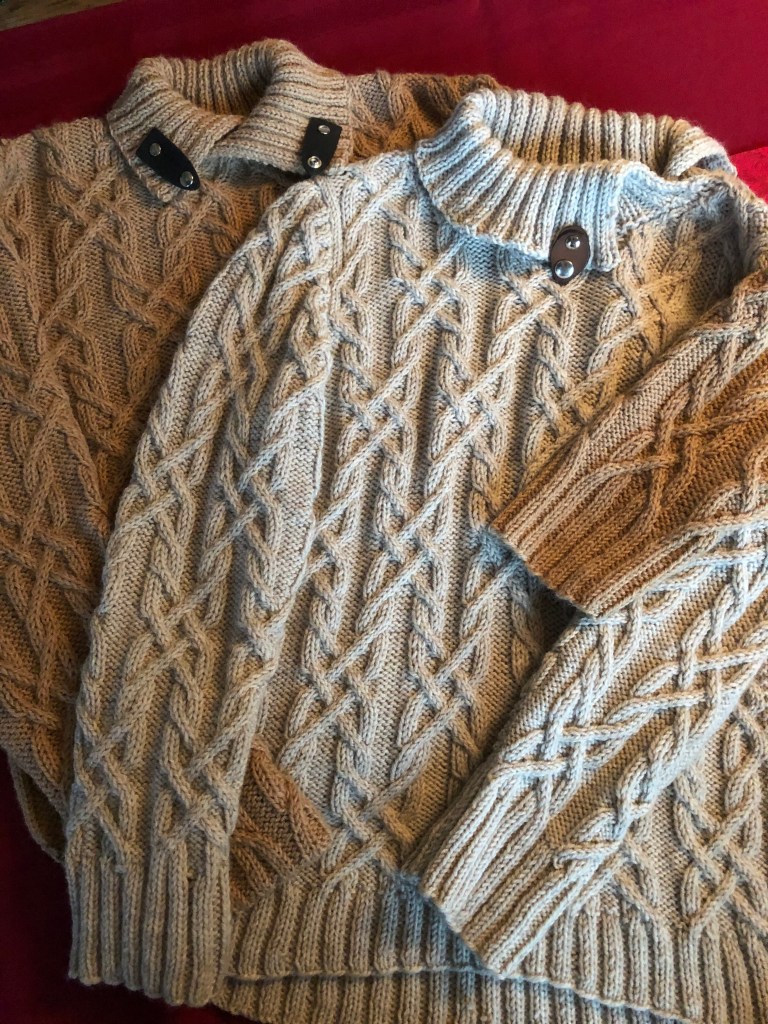
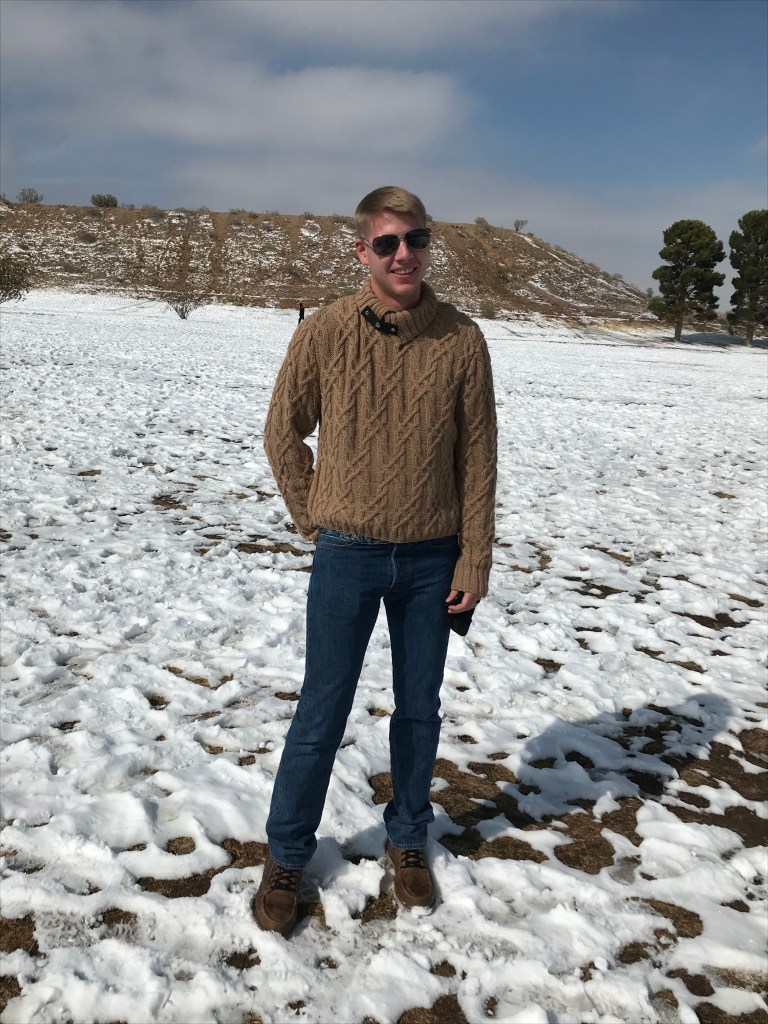
When we visited our son and daughter-in-law at Christmas 2019, I offered to make them sweaters for Christmas 2020. After a bit of back and forth, we decided on a matching cable pattern, but not matching colors.
I began working on Chloe’s sweater in April when I realized that we were going to be stuck at home for quite a while due to the pandemic. I ordered yarn for both sweaters and began working on the first one. I finished that sweater pretty quickly–by early June.
Chloe’s completed sweater.
Over the summer, I worked on lots of other projects, thinking that I would have plenty of time in the fall to complete my son’s sweater. So time went by…
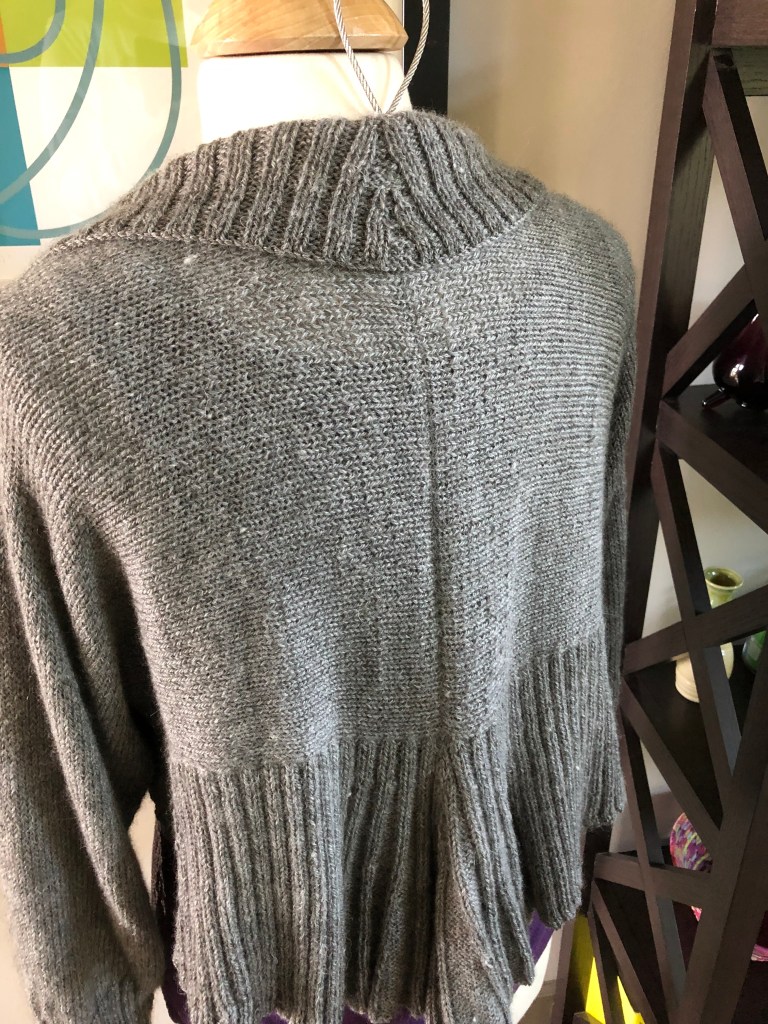
November: I made a new gauge swatch for Ben’s sweater, because I was using a different brand of yarn than I had used for Chloe’s sweater. After knitting, blocking, and measuring the new gauge swatch, I did my calculations for the new sweater and began knitting. At one point, as I was changing from the smaller interchangeable needles used for the ribbing to the larger needles used for the body, that small voice inside warned me that I had used different needles for the swatch. But I ignored this voice. I should not have ignored it, because while I thought I had used US8 needles for the swatch, I had actually used US7 needles for the swatch. The needles had been misplaced in the interchangeable needle set. I just kept merrily knitting with the US8 needles, not realizing that I had exchanged the needles in the kit. It was not until I was blocking the finished pieces, that I thought to myself, “my, that looks a lot larger than it should.” And then I remembered that hesitation a month prior, when I was pulling the needles out of the interchangeable needle kit… Oh, [expletive].
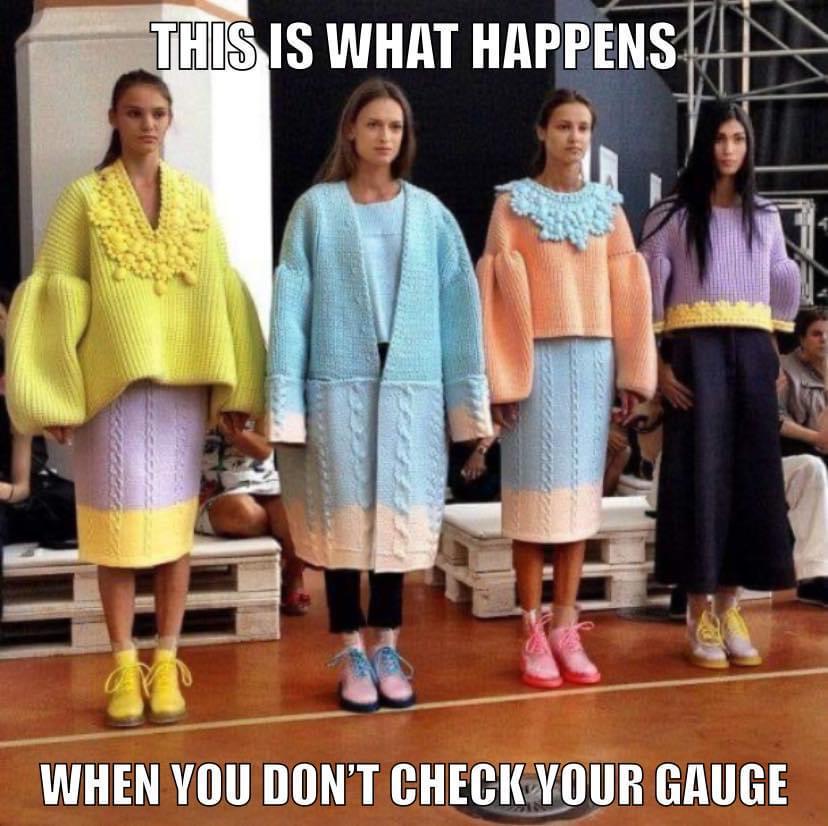
But I DID check my gauge!
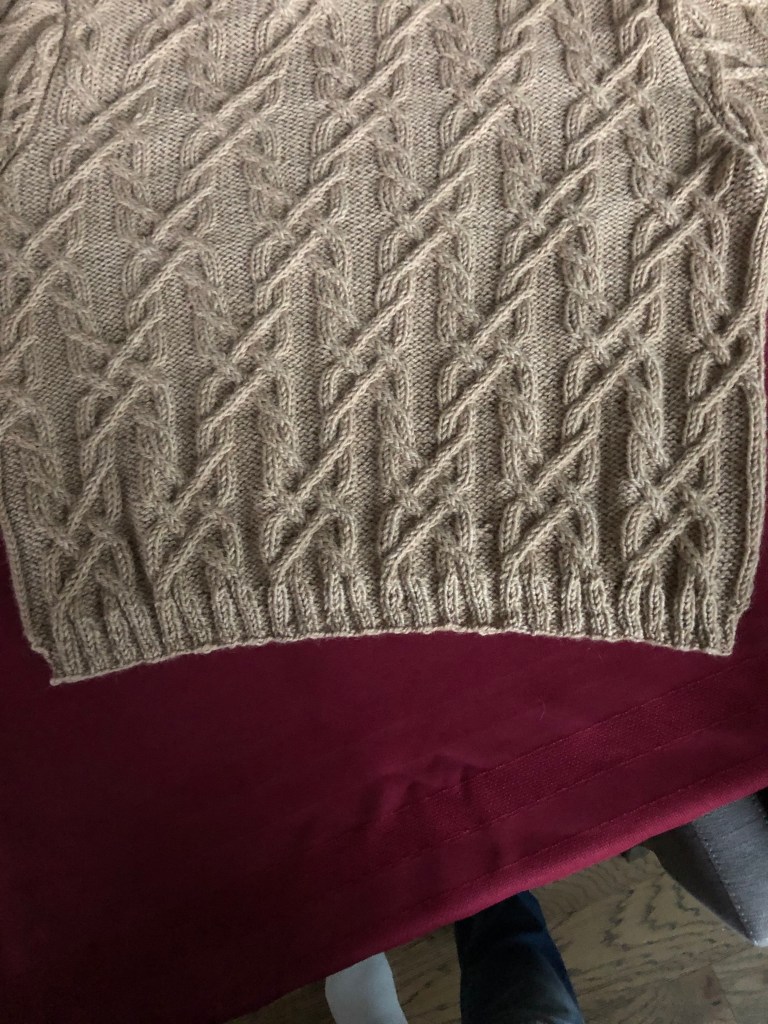
It’s really big!
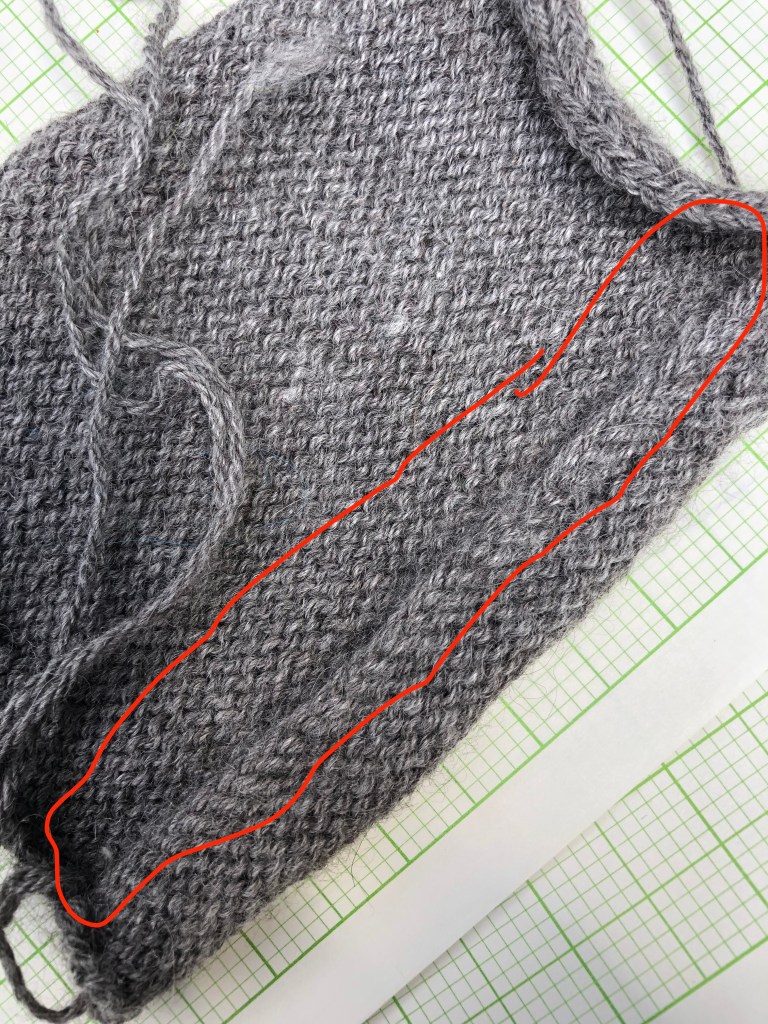
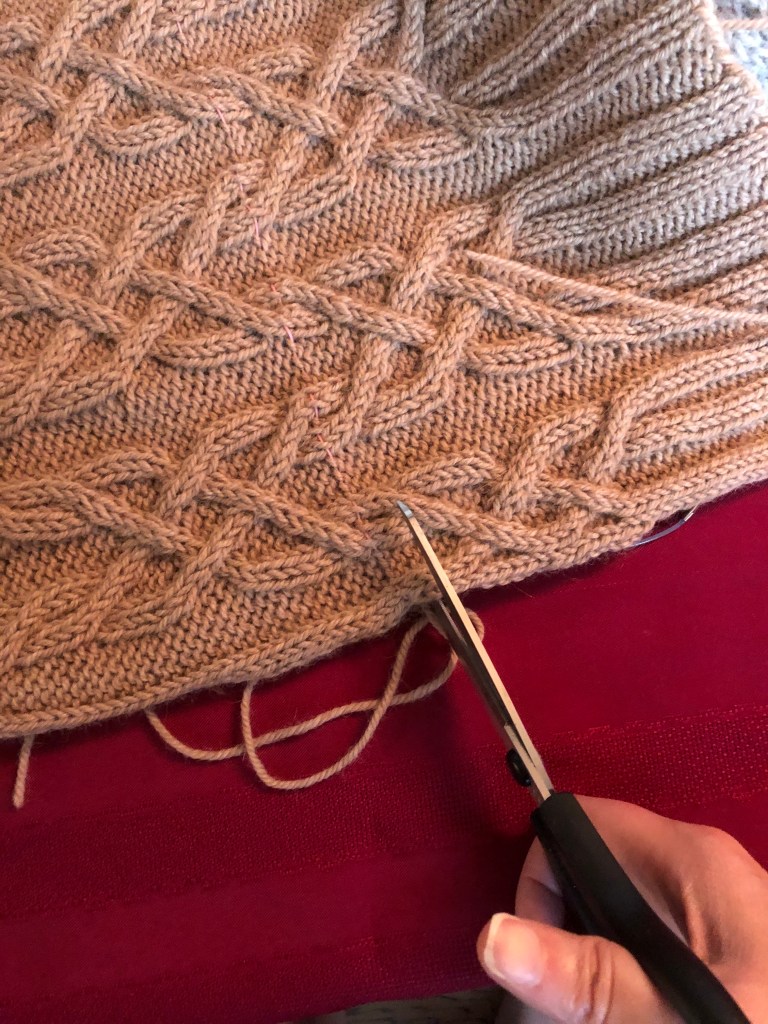
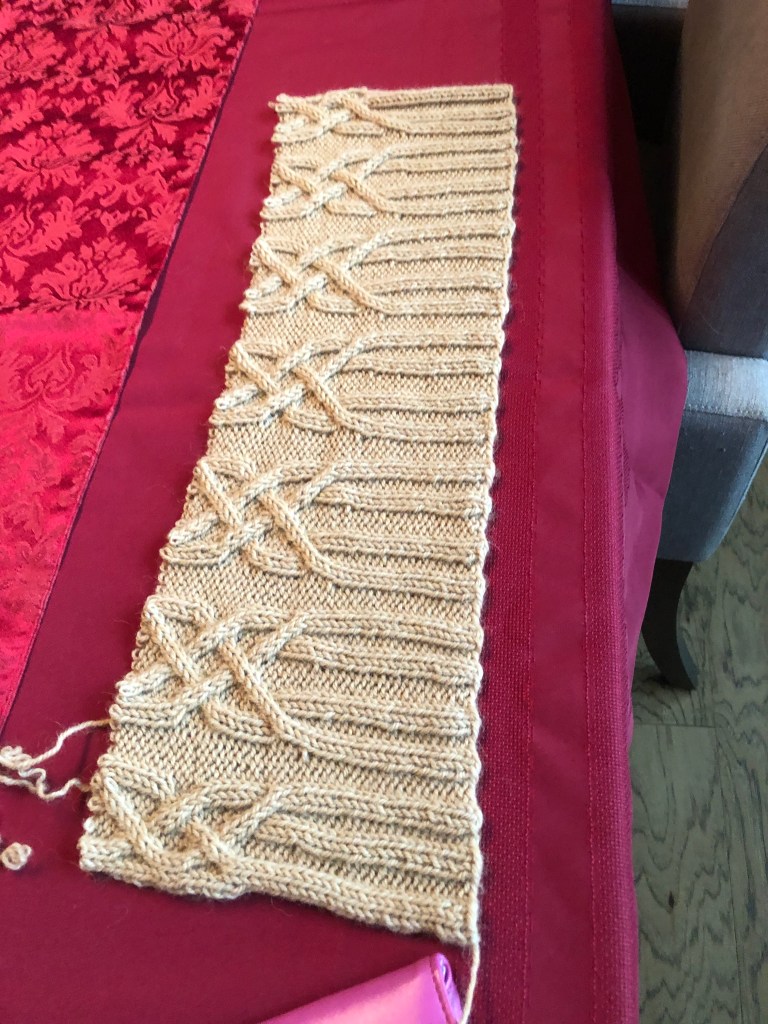
The sweater was clearly going to be too big – both too long and too wide. Too wide was probably okay, too long was not. While I would welcome wearing a longer sweater, men just don’t wear their sweaters long enough to cover their backsides. And, I didn’t have time to knit another one. So, first I had to confess my rookie mistake(s) to my son and confess that the sweater may not be finished for Christmas. I had some ideas of how I might be able to fix it, without re-knitting it all, but I didn’t know if those ideas would work. Fortunately, Ben was understanding and up for a bit of experimentation with his present. Out came the scissors. My plan was to cut off the bottom several inches, pick up stitches and work a new ribbing from the top down. I did insert a lifeline yarn to ensure that I didn’t lose stitches. Once I had cut of the bottom, I quickly got the live stitches onto a needle and began re-working the ribbing. It worked! Not ideal, but definitely easier than re-knitting the sweater! And, I will always check and double check the sizes of my needles – both for the gauge swatch and for the sweater!
At that point, I didn’t shorten the sleeves, but I could, now that I know that it can be done.
Life line inserted and cutting.
The stitches are well-defined, and not unraveling.
Got the front set of stitches onto a circular needle!
Dissection complete.
Front and back on the needles.
The new bottom edge.
The new stitches don’t align perfectly, but you would have to be very close to notice this.
Removing the bottom 6 inches of sweater.
With this fix, I was able to package up and send both sweaters before Christmas! Yay!
That sweater is still to big, but maybe he’ll grow into it ;)!