Since I learn best by visuals, I like to use charts when I knit. Charts help me identify patterns quickly and that allows me to knit without referencing the pattern as often. Another advantage to using charts is that I can identify mistakes more quickly, because I have a visual reference for how the stitches in the current row are stacking up on the previous rows. Identifying mistakes earlier makes fixing them easier.
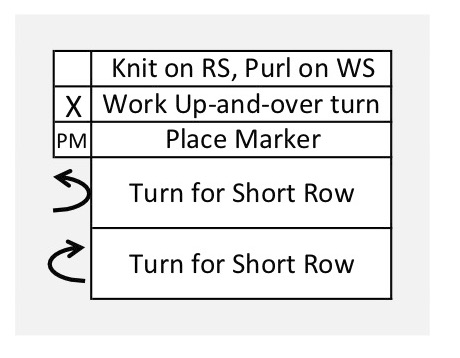
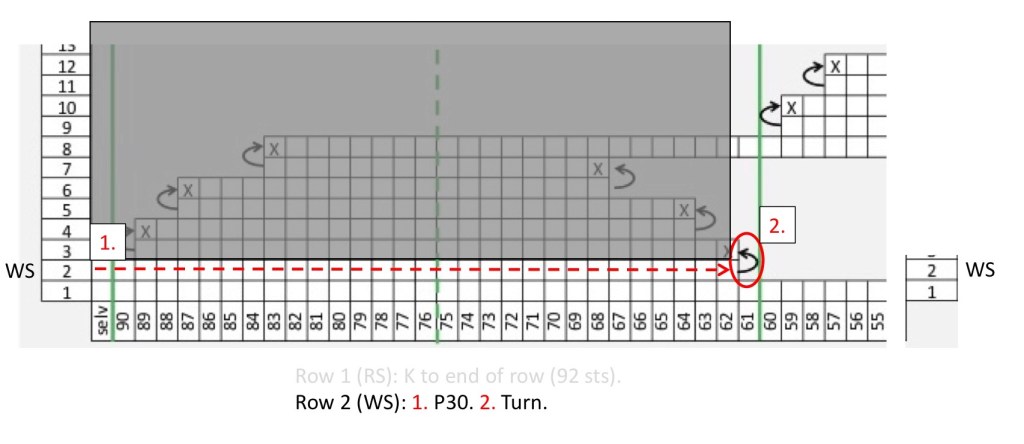
The charts for the Chocolate Cascade Cowl show all the rows, that is, both right side (knitted, odd-numbered) and wrong side (purled, even-numbered) rows. The right side rows are read from right to left (<——). The wrong side rows are read from left to right (——->). Each blank square in the chart represents a stitch (knit on right side, purl on wrong side). I used German short rows for this project, so the German turned stitch is marked with and X in the chart. I used an X to represent this stitch because if you look at the top of the worked stitch, it looks like an interconnected X or two upside-down Vs. Curved arrows on the chart show where to turn the work.

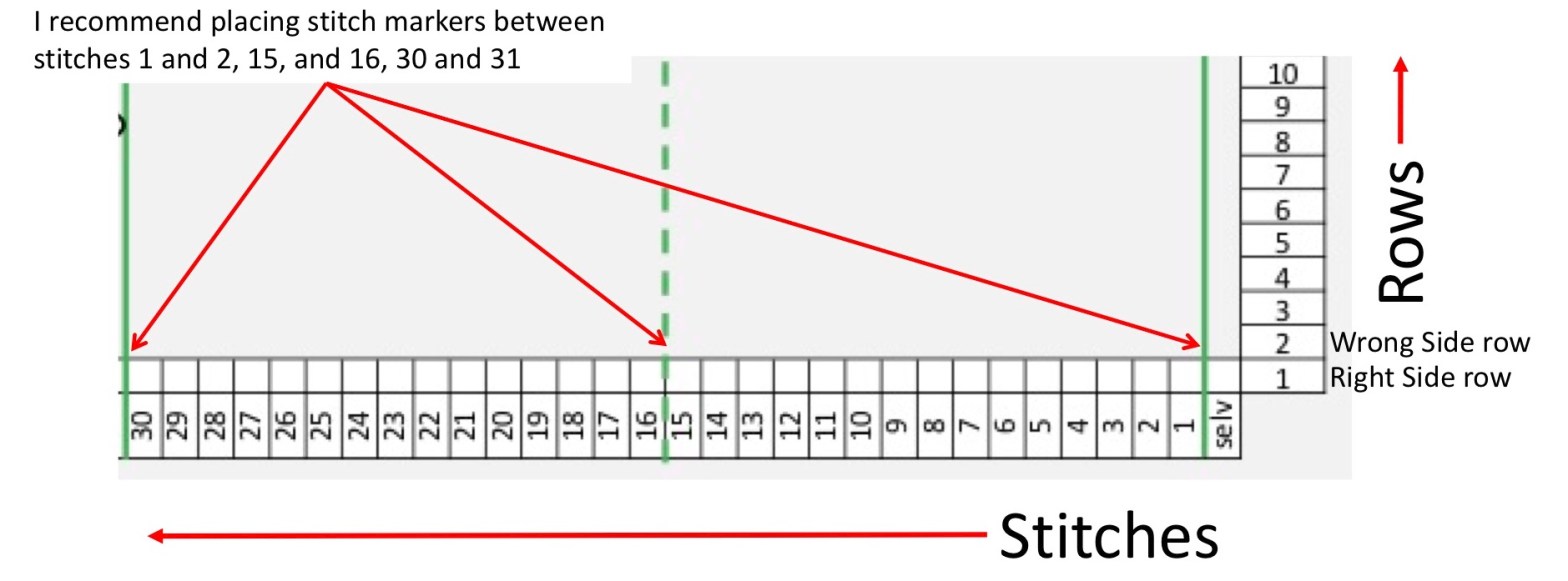
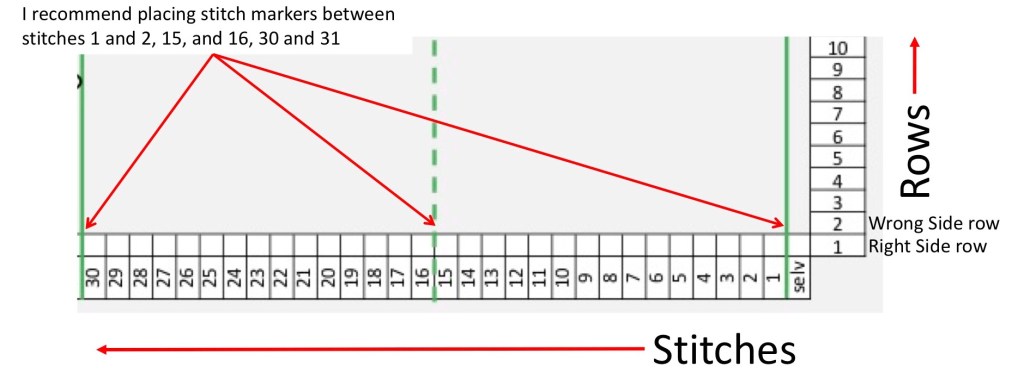
In each of the charts, the stitches are numbered at the bottom and the rows are numbered on the side. There are 90 stitches in the pattern plus two selvedge stitches – one on each side – for a total of 92 stitches across the full row. The figure below shows a portion of Chart 1 – the set up chart. The green lines show the recommended placement of stitch markers. The stitch markers help you to keep track of your place in the row. I highly recommend using them.
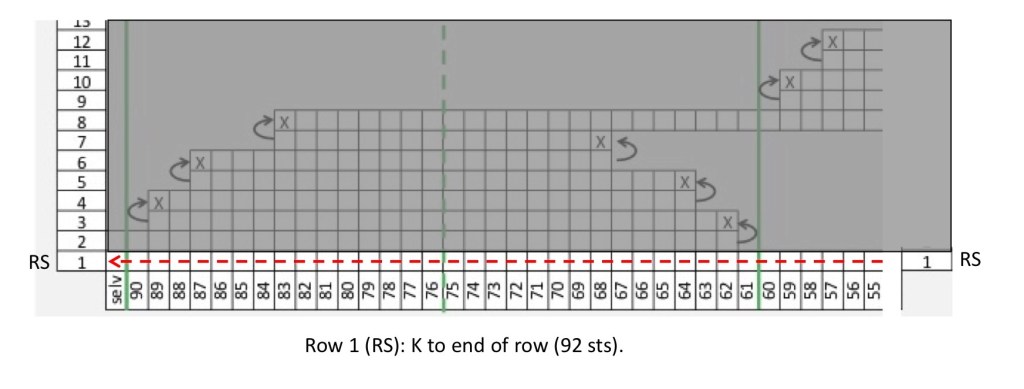
The charts for this pattern look a bit different because they show the short rows (and a lot of empty space) since not every row has 92 stitches. In fact, in the chart shown in Figure 2 above, only row 1 has stitches shown in it in this small section of the chart. Figures 3.1-3.4 below show how the turns and short row stitches are represented in the charts.


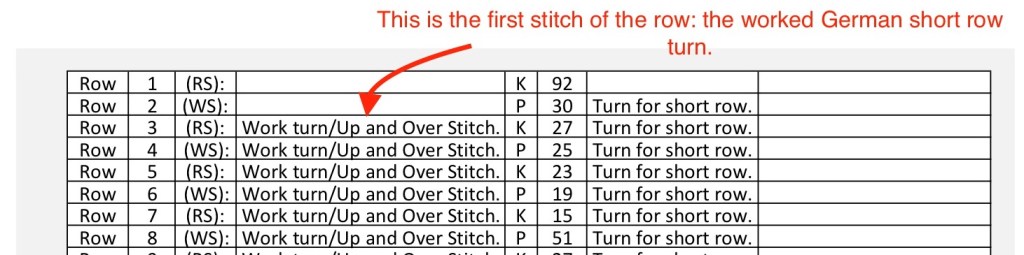
In this pattern, I’ve also included row-by-row directions. These are a handy reference to use along with the charts since the number of stitches are given in each short row.
I also like to use the stitch markers as a reference for where to turn. I find it easier to count 1, 3, or 7 stitches from the stitch markers rather than 27, 25, and 23 worked stitches. For example, in the chart below for row 2, I would work up to one stitch before the third stitch marker and turn. Row 3 work up to one stitch before the last stitch marker and turn. Row 4: work up to 3 stitches before the third stitch marker, turn… continuing to use the stitch markers as my reference points.

Once you have worked through the first chart, the second, third, and fourth charts are set up the same way. The pattern is the same, but offset, for charts 2 and 3, so there is a lot of repetition. It’s a great way to practice those short rows!
