Introduction
This poncho is modular–it is knit in one piece, with each section connected to another section. There are no seams, but many, many short rows. My original poncho was a free style, work-as-you-go wrap that began with a crude plan which was modified many times as I worked to complete the poncho. I hope that you will also embrace the free-style nature of the poncho. Don’t stress too much about counting stitches. If you work fewer rows or more rows, it should not affect the final fit of the poncho (it will affect the length, however).
Yarn: Leading Men Fiber Arts Diva (fingering weight, 150g/600 yards in each hank of yarn) in colors: Dust in the Wind (lightest color, Color 1 in the pattern), Can’t Quit Ewe (medium color, Color 2 in the pattern), and Fireball (darkest color, Color 3 in the pattern). [Note: I had ~95 grams of yarn remaining after completing: 49g of Dust in the Wind, 20 g of Can’t Quit Ewe, and 26 g of Fireball].
I used size US4/3.5mm needles.
Stockinette Gauge = 23.9 sts x 32 rows in 4×4 in/ 10x10cm swatch.
The photos below show each of the sections as they fall in the finished poncho.


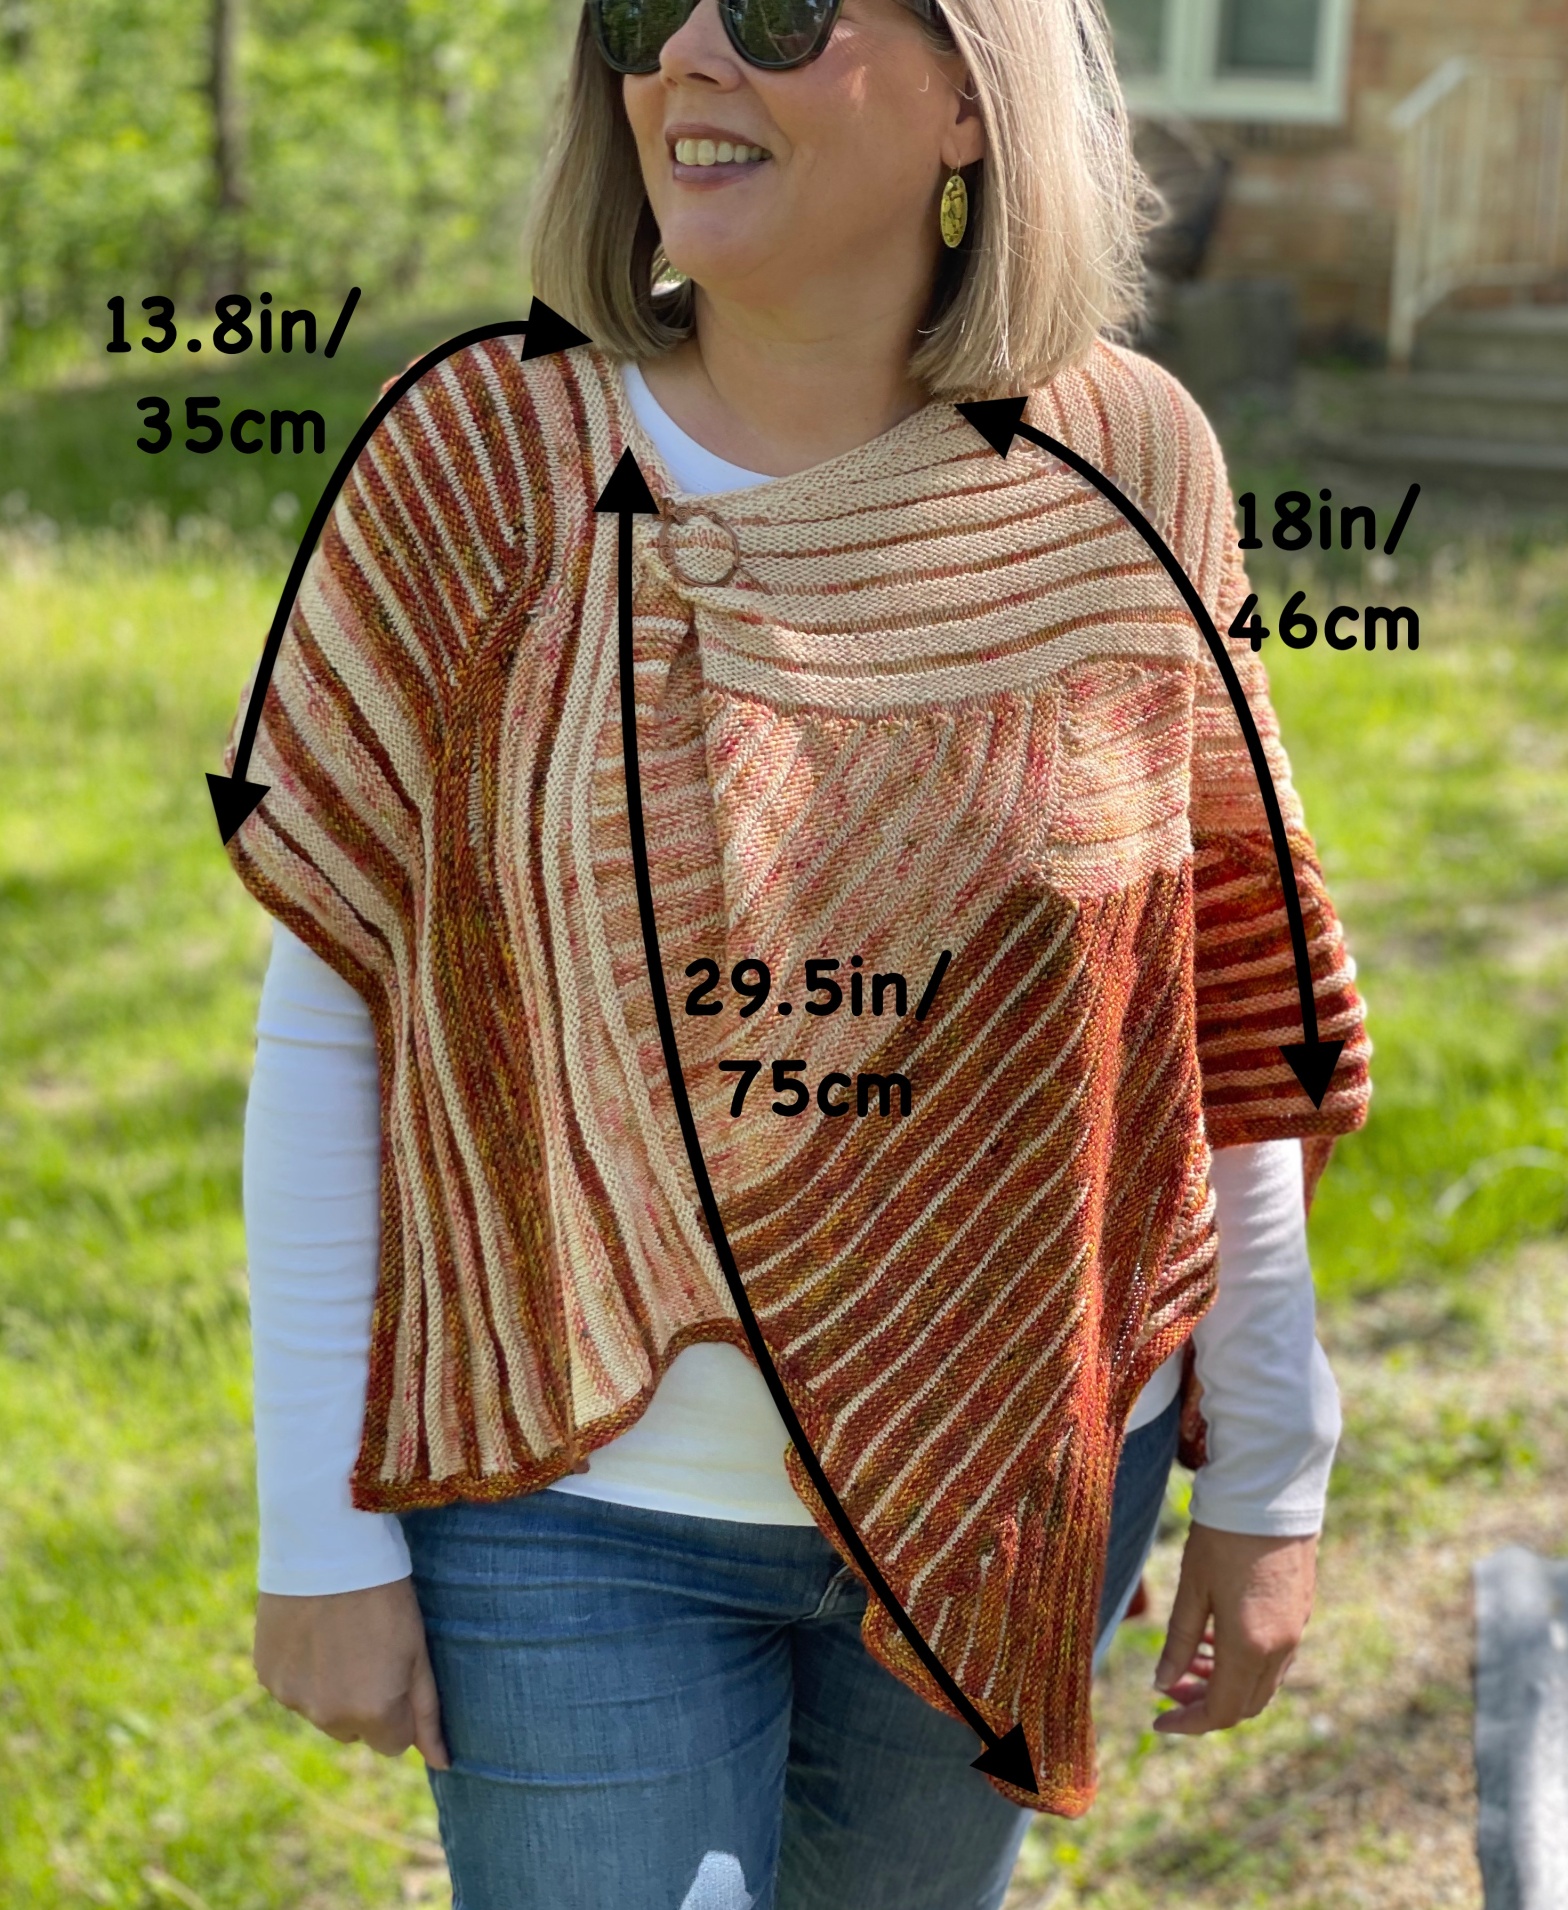
The overall length and width of the finished poncho is shown below. Because of the alternating rows of stockinette and reverse stockinette stitches, the poncho can expand quite a bit (lengthwise) after blocking.


Video Introduction to the Antelope Canyon Poncho
Wrap and Turn Short Rows – A Review
You can find many descriptions and photos of wrap and turn short rows in the blog post linked below. I’ve linked the summary videos below as well. If you haven’t worked short rows in awhile, it’s probably a good idea to review the techniques. The most important thing to remember about working short rows is that there are slightly different techniques for working them on the right side/public side (RS) vs. wrong side/private side (WS), especially if you want to conceal them. If you prefer an alternate method of working short rows (besides the wrap and turn), go for it! Use whichever technique you like the best.
SECTION 1
Section 1 is roughly triangle/crescent shaped (boomerang-shaped?) section that forms the neckline and left shoulder of the poncho.


The section begins with the neck edge created by working a total of 6 rows in garter stitch (3 garter ridges, including the cast on row). After the neck edge, the short rows and center double increases (yarn overs) form the overall boomerang shape.
Catching the float
Section 1 Pattern

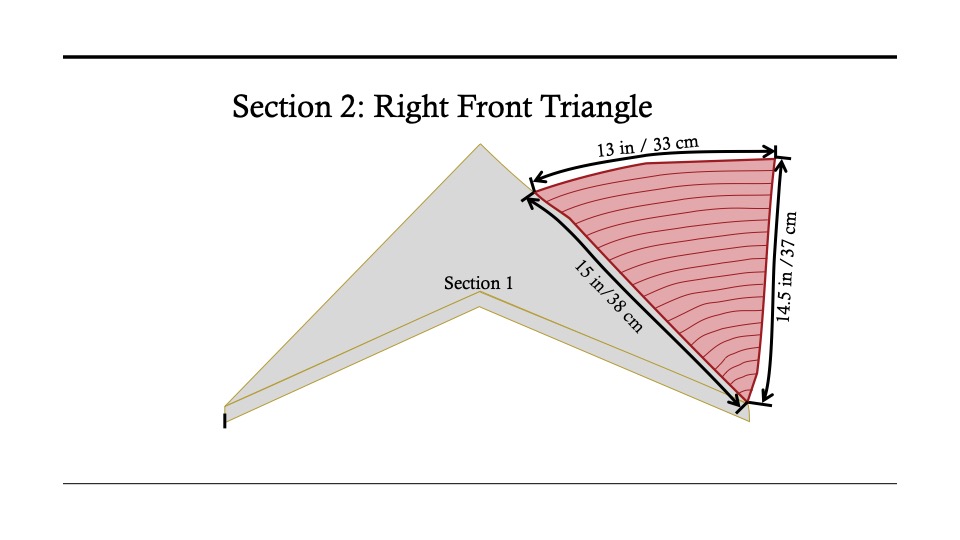
Section 2


Section 2B: Setting Up Section 3


Section 3
Section 3 makes up most of the back and left side. It will eventually join up and be continuous with Section 2B. The pattern repeat is alternating two rows of stockinette stitch in color 1 and six rows of reverse stockinette stitch in color 2 and at the same time working one additional stitch and a wrap and turn short row on every wrong side row.
Note: Remember when working wrap and turn short rows with the WS facing you, you should slip the stitch knit-wise before you wrap it. When working through these wrapped stitches, work them through the back of the loops to avoid twisting the stitches.

Section 4
Section 4 makes up the right front of the poncho. It is worked in two sections (4A and 4B) with a similar row pattern and a similar pattern of worked short rows.
Section 5
Section 5 is the bottom of the left side and back. It is the longest part of the poncho, so if you want to reduce the overall length, this is a good place to do it. Work your desired number of rows (use your gauge to calculate).
Section 6
Section 6 is a crescent-shaped section, worked between sections 4 and 6, with a row pattern repeat and short rows worked on both ends of each row. The short row pattern for part 6B changes at the intersection of parts 4A and 4B.
Section 7
Section 7 makes up the right shoulder and the right front and back sides. It is worked by picking up stitches along the edge of section 3 and the corner of section 1, casting on a few stitches, and then picking up stitches along the other corner of section 1, and then along the edges of sections 2 and part of section 4.

Border and Finishing
Finally, a garter stitch border is worked on all the edges. To begin the border, first you should transfer all the live stitches from the bottom of sections 4, 5, and 6 to your needle. You will then pick up stitches along each of the exposed edges, placing markers at each corner. I recommend using two different colors or types of stitch markers at the corners–one for working an inside corner (a double centered decrease) and one for working an outside corner (double centered increase).
