Small Diameter Tubes
Sleeve Cuffs, Socks, Mittens, and Hat Crowns


There are at least three methods for working small circumference tubes. They are:
- Using one circular needle with a long connecting cord, known as the “Magic Loop”.
- Using two circular needles.
- Using a set of 4 or 5 double pointed needles.
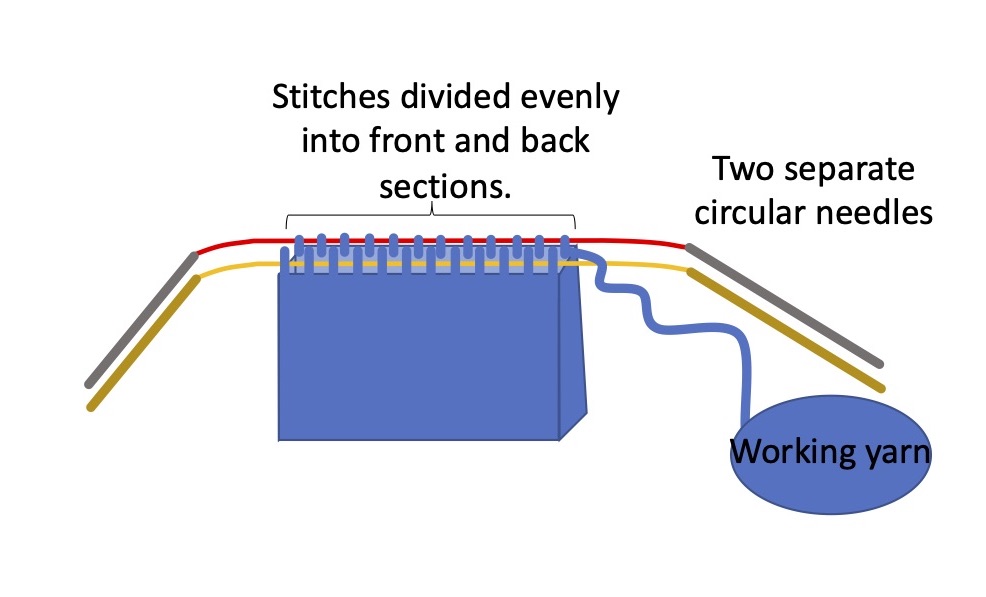
For all types of small circumference circular knitting, the stitches are divided into sets which are separated either by the flexible length of cord of the circular needle (magic loop), or on separate needles.
The thing to be wary of in this type of knitting is producing “ladders” at the intersections of the sets of stitches. Ladders are a gap between the stacks of stitches where you can see the yarn on the back of the work from the front side. Frustratingly, they don’t always disappear after blocking, especially when they are all stacked on top of each other, so it is best to try to avoid them. Ironically, ladders can form both from stitches that are too loose OR too tight, so you really need to pay attention to your stitch tension at the beginning and end of each set of stitches.
Magic Loop
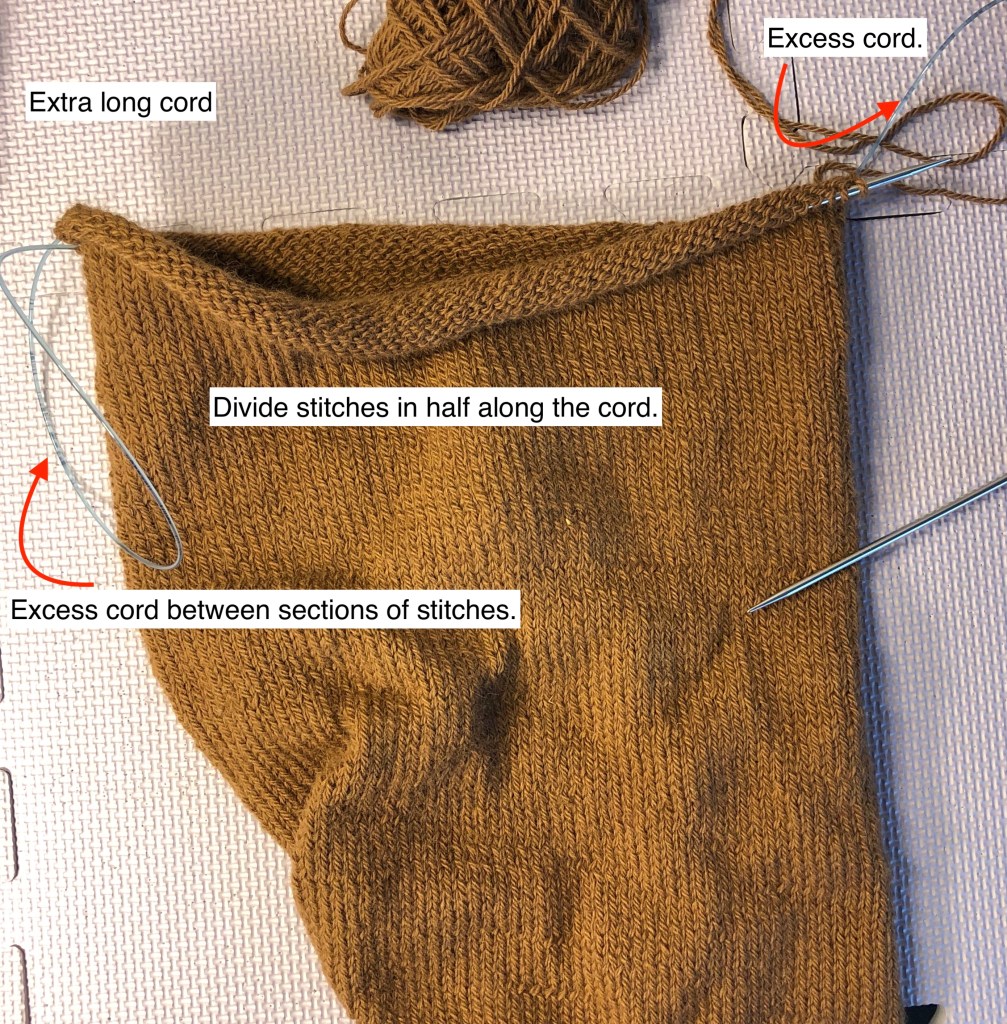
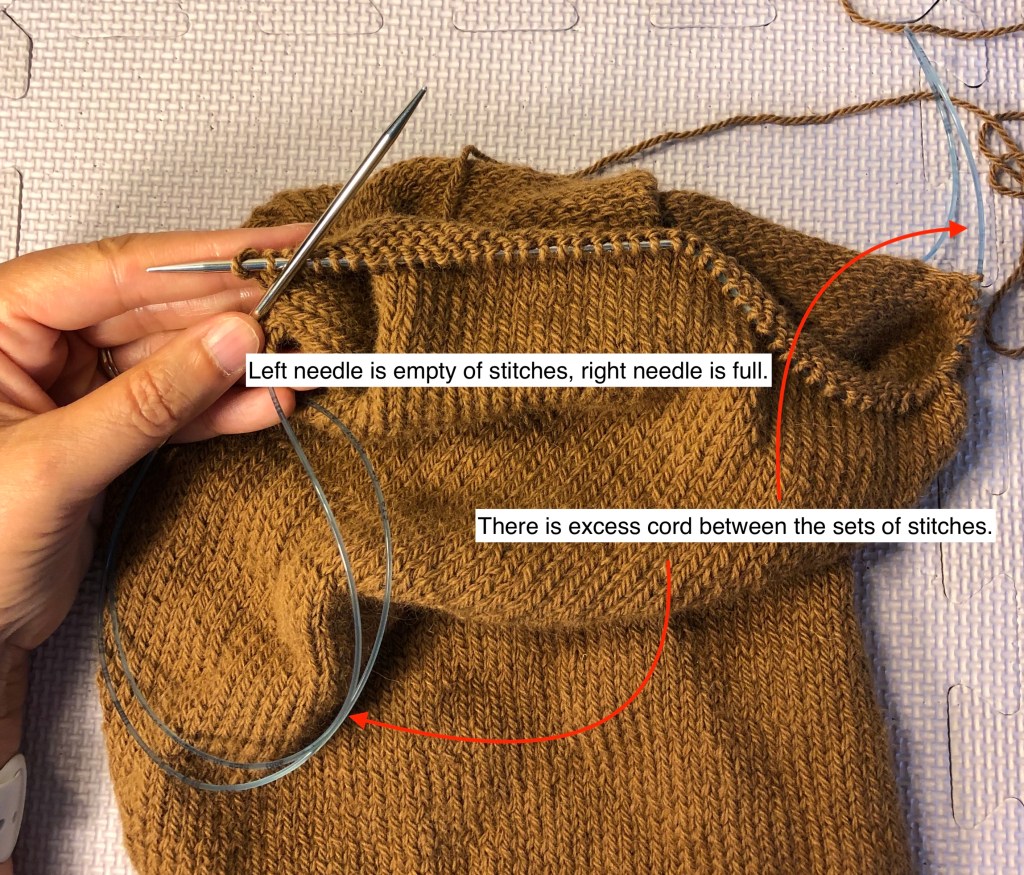
For the Magic Loop, you will need a very long, flexible cord on your circular needles. *Note: This is one reason to invest in a set of interchangeable needles, even though they are expensive. It’s easy to change the cord length while keeping your project on the same needles.* To work the magic loop, you divide up the stitches into two sections (front and back) with a loop of the excess cord separating them. The front set of stitches (those closest to your body) should be at the end of the left hand needle, ready to work. The back set of stitches (those farthest from your body) will be on the cord with the right hand needle extending out.
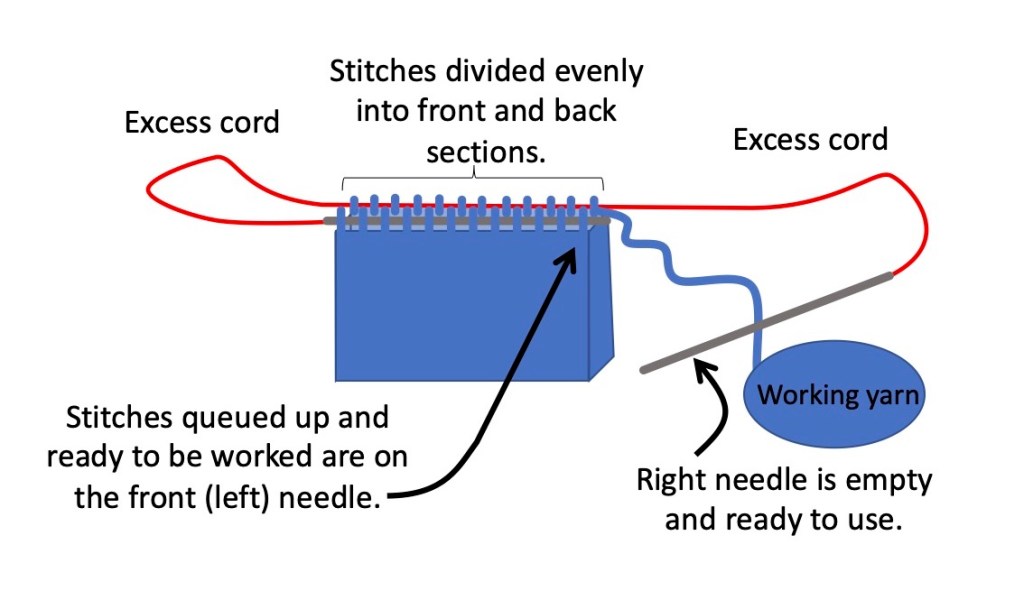
With the right hand needle, begin working the stitches off of the left hand needle using care not to pull the working yarn too tightly from the last stitch on the back set of stitches.

Work across the entire set of stitches on the left needle.
Gently pull the cord through the back set of stitches (pull to the right) so that they are loaded onto the needle. Be careful not to pull the needle out of the stitches.

Turn the work. Now slide the back set of stitches off the needle and onto the cord so that the right hand needle is available for new stitches.

Now you are ready to work the second set of stitches (now on the front needle). Continue working and sliding stitches. Be aware and careful of the tension at the stitches between the front and back sets of stitches.
Two Circular Needles

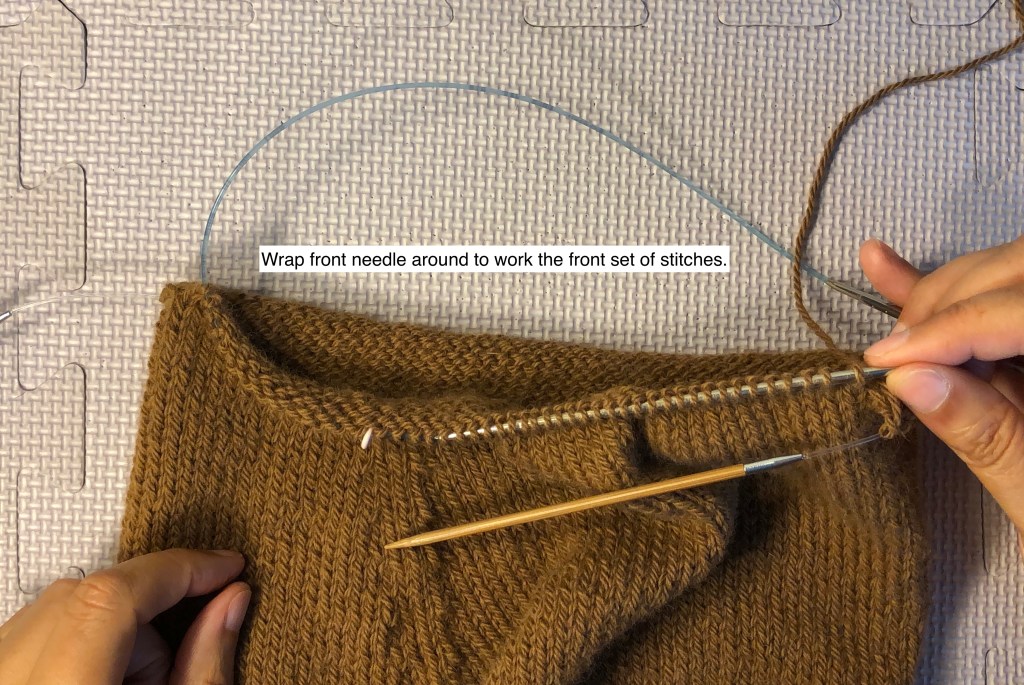
The technique is almost the same, except now you have two needles rather than excess cord. When working, you will always use the same needle for the same set of stitches. In the photos below, the front set of stitches is on the aluminum needles and the back set of stitches is on bamboo needles. I will always use the aluminum needles to work the stitches on the aluminum needles. I push all of the stitches up onto the left hand aluminum needle then wrap the right hand needle around to work the first stitch. The bamboo needles are hanging, or held out of the way. Be sure to check the tension of the first stitches. Once the set of stitches on the aluminum needles are worked, turn the work and use the bamboo needles to work that set of stitches.
Aluminum needles 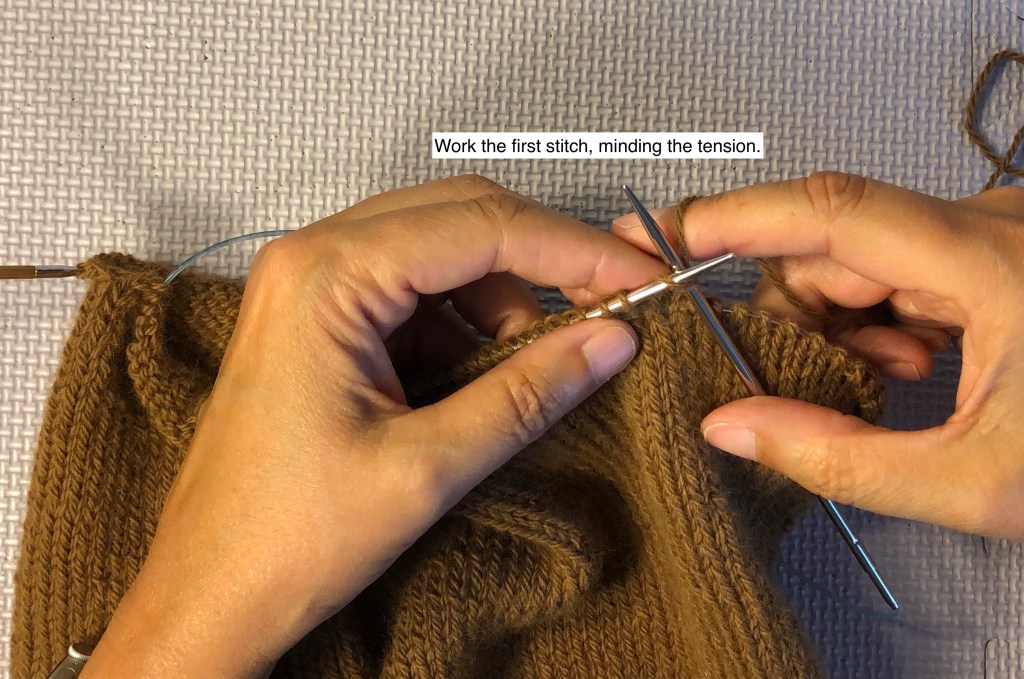
Aluminum needles 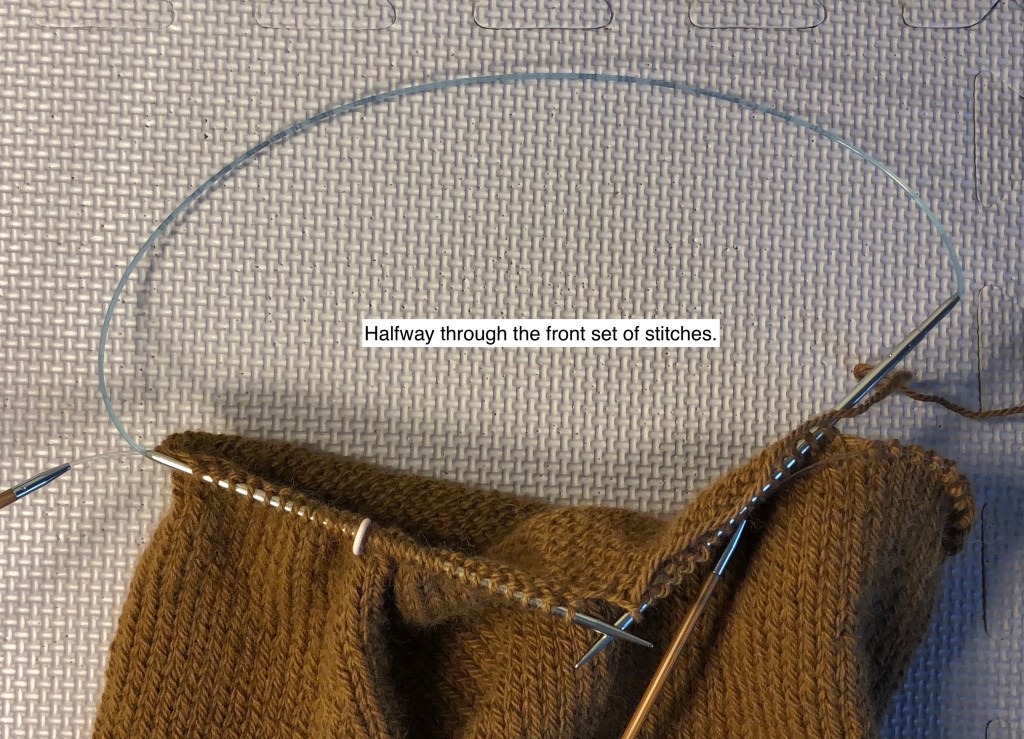
Aluminum needles 
Bamboo needles 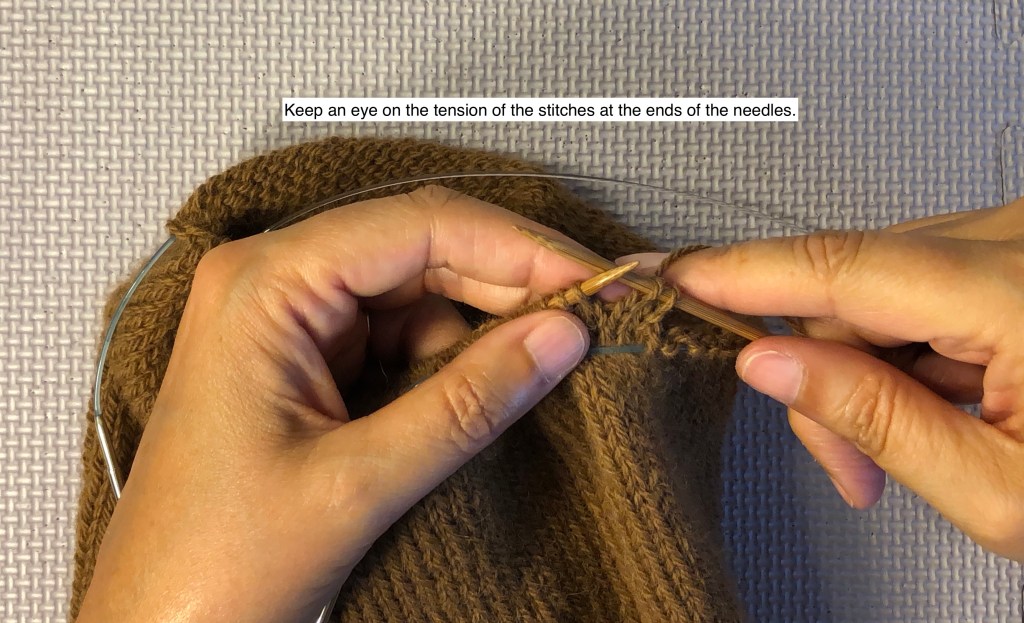
Bamboo needles
Double Pointed Needles
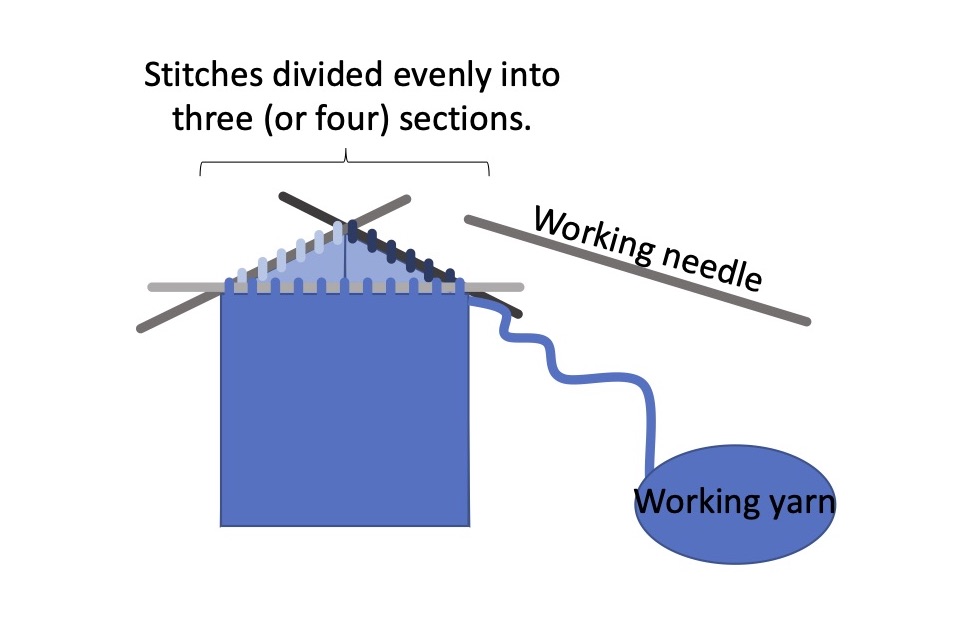
Double pointed (DP) needles come in sets of 4 or 5. If you have a set of 4 DP needles, you will divide the stitches evenly over three needles to set up. If you have a set of 5 DP needles, you will divide the stitches evenly over four needles. The technique to work the stitches is exactly the same as above: check the tension at the first stitch on the new needle. It should not be too tight or too loose. The advantage of DP needles is that there is not a sharp turn (180o) between needles, so I think it is easier to control the tension of those first stitches. The disadvantage is that since you are dividing up the stitches into more than two sets, there are more intersections of needles to work with, potentially more opportunity to create ladders in your knitting, and working with the needles can be a bit fussier (that is, there can be a lot of fiddling with stitches and needles as you work around the tube). And, because the DP needles tend to be shorter than circular needles, you may find that stitches fall off the ends while you are working or removing from storage. This is easily fixed with needle tip protectors, but those can make the DP even fussier to use.
There are a couple of EASY ways to prevent ladders with DP needles that you can’t use with the magic loop or with two circular needles. But there is no easy way (that I have found) to prevent the fussiness of DP needles. However, I learned to knit using DP needles, and I don’t hate using them.
The following video shows some of the strategies I use for handling the DP needles and preventing ladders.
