Hi Friends!
Once you have knit your swatch and it is blocked and dry, you can measure it to calculate your gauge.
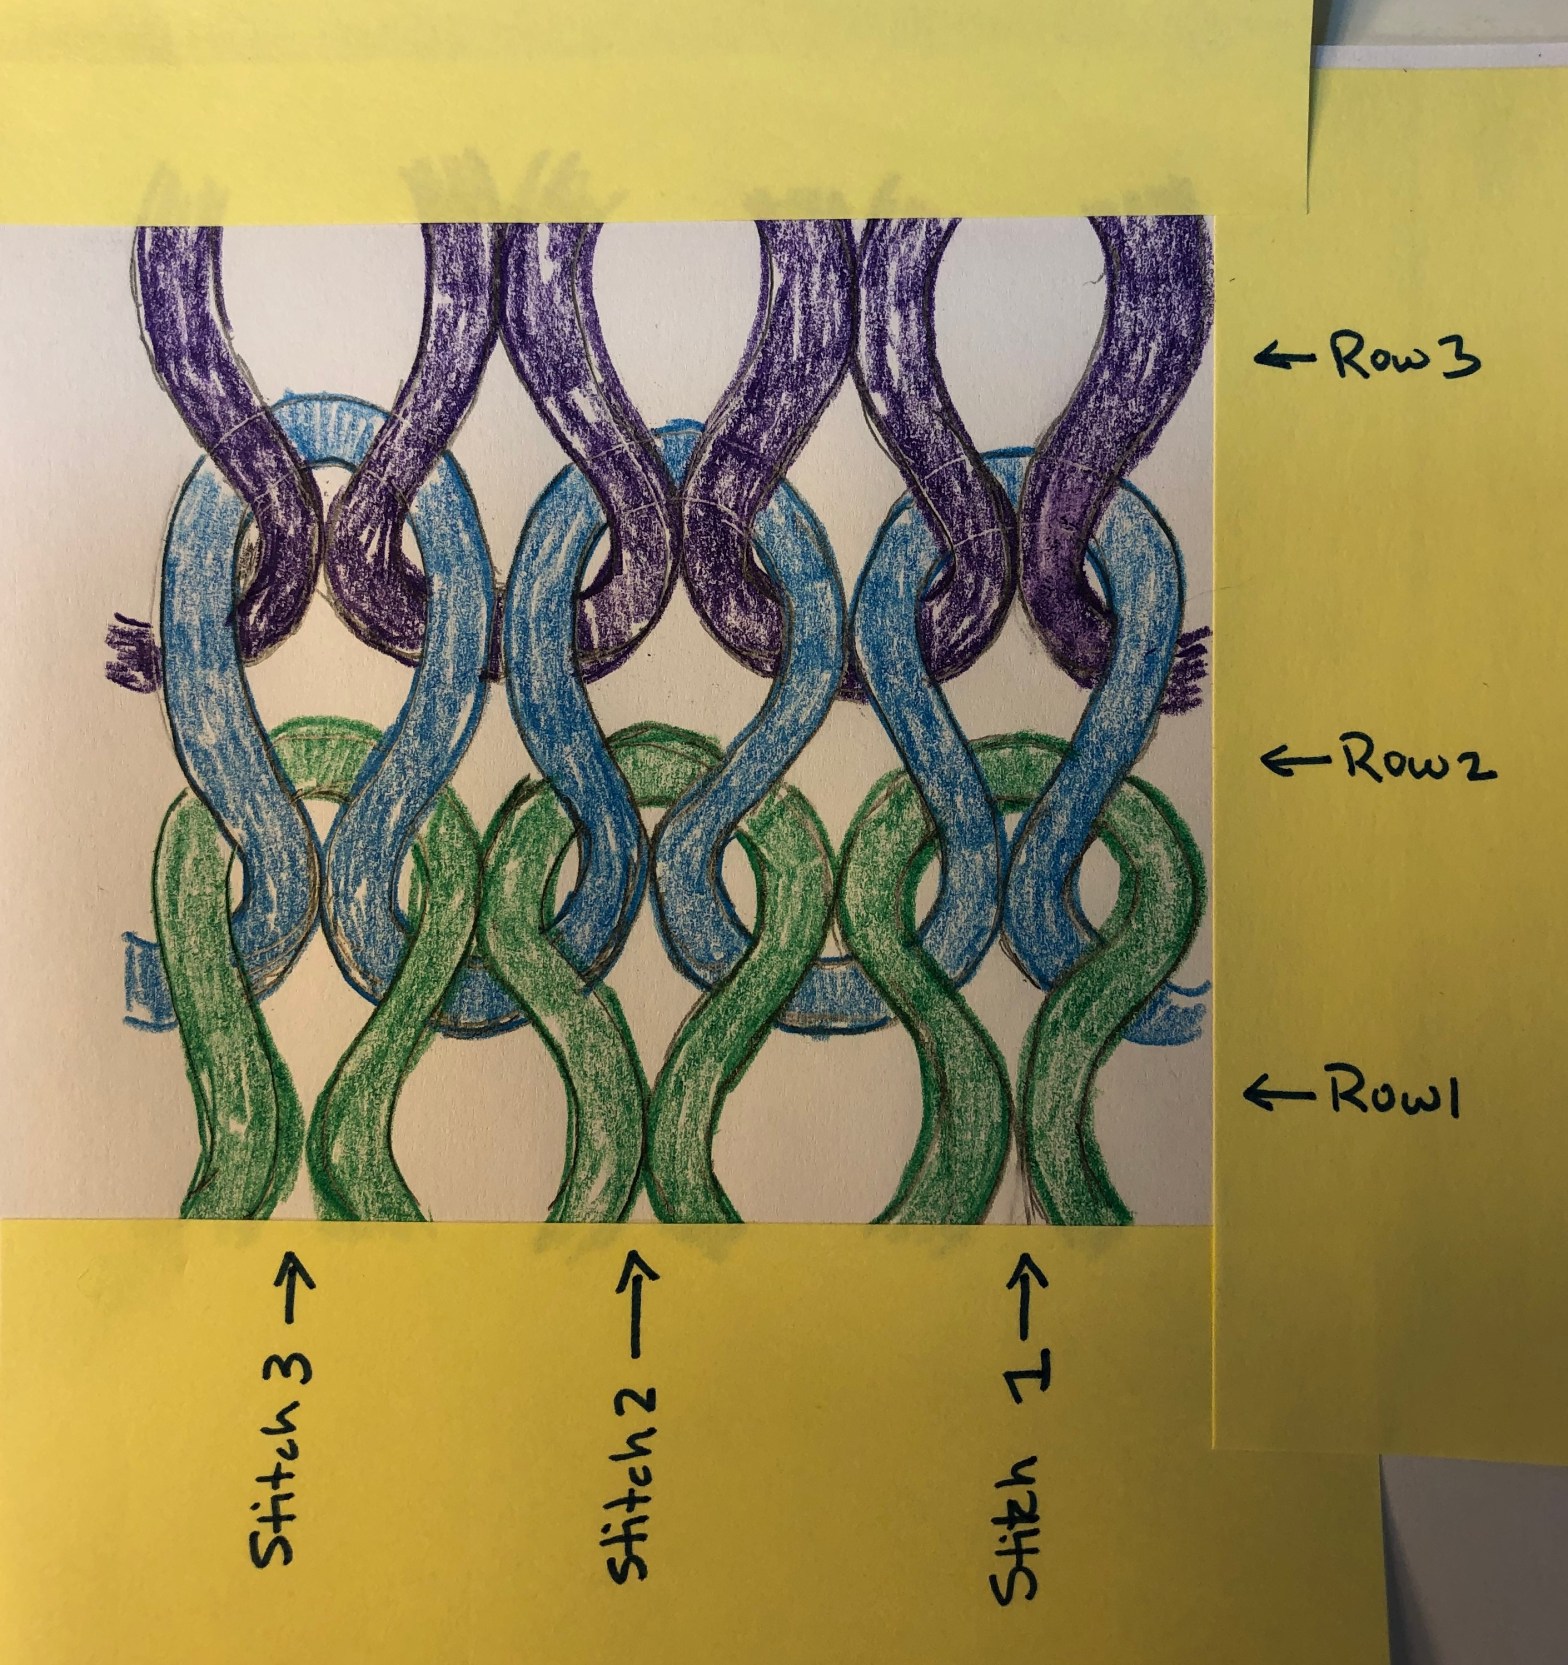
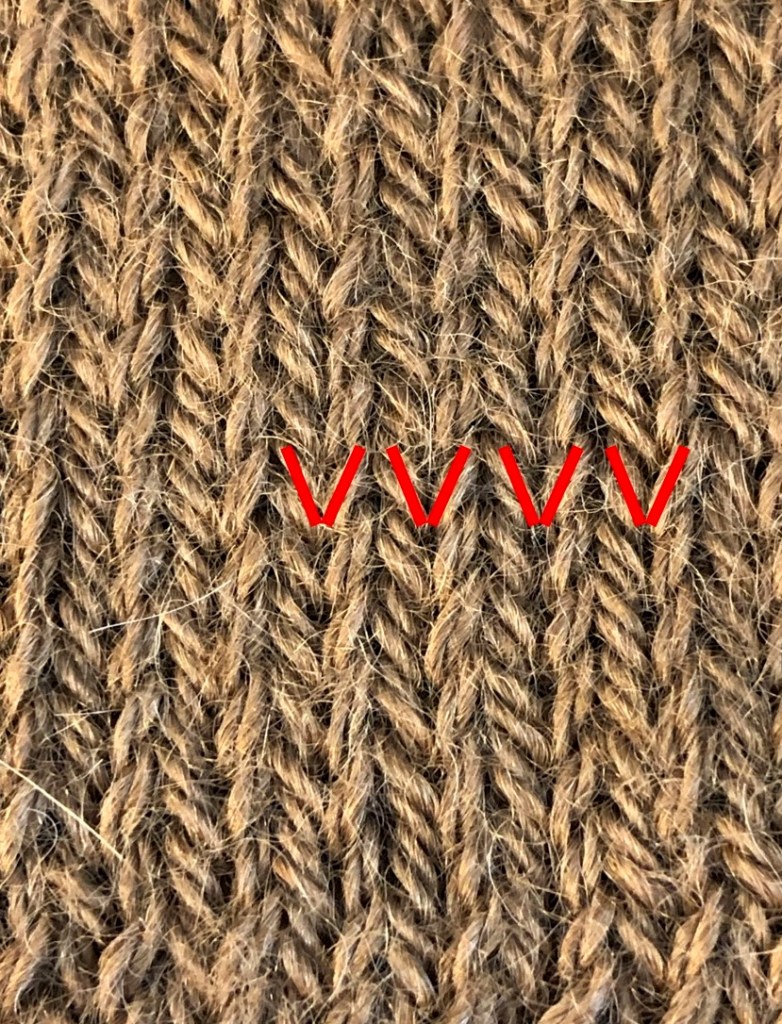
First, let’s look at the anatomy of a knit stitch to make sure we know what to look for on the stockinette stitch swatch. In the cartoon figure below, there are three stitches and three rows of stockinette stitch. Row 1 is in green, Row 2 in blue, and Row 3 in purple. The right side (public side) of stockinette stitch is made up of what looks like row-upon-row or stacks of V-like stitches. Can you identify the stitches in the photo of the swatch? The sides of the V are known as the “legs” of the stitch. They are highlighted in red in the third photo below. Don’t get confused by the plies that make up the yarn. You can see some of the plies making up the legs in the stitches below.


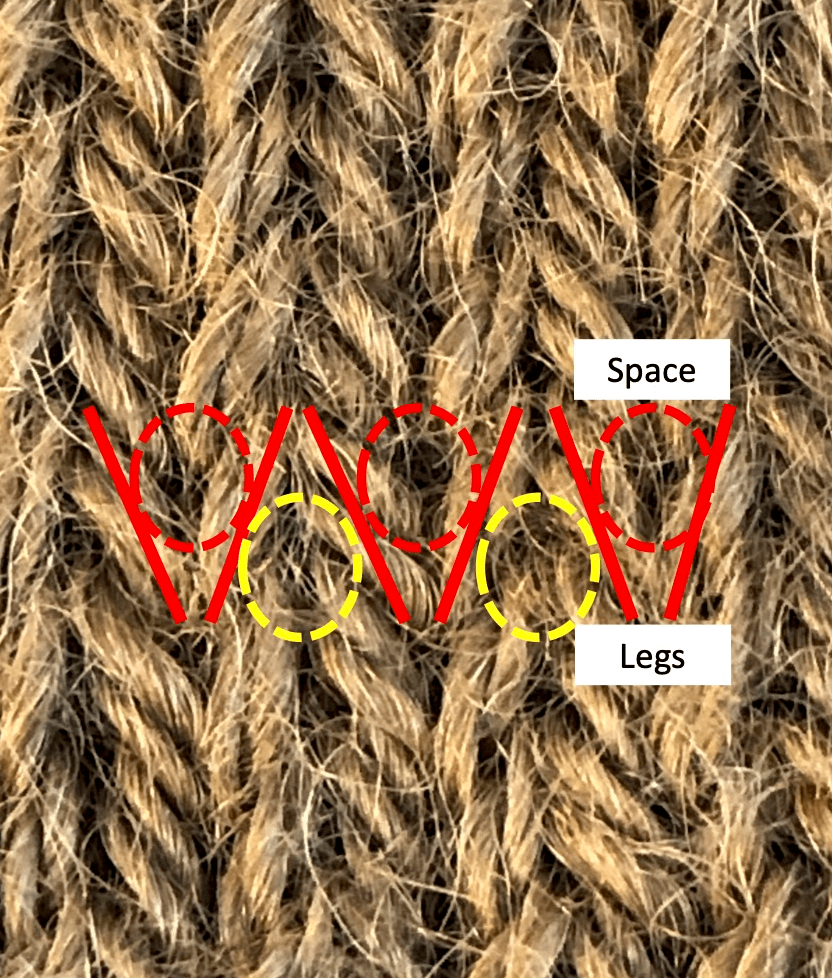
In addition to identifying the legs of the stitch, we also want to identify the three different spaces associated with each stitch. There is one space in the center of the stitch (shown in red oval below), and one space on each side of the stitch (each shown in yellow ovals below). These spaces will be our points of reference for measuring.

Since the gauge is the measure of the average size of the stitch, the more stitches you measure, the more accurate your average stitch size measurement will be. This is the reason we make our swatch larger than a 1 x 1 inch square. If you are only measuring a few stitches, the probability of having one wonky stitch changing the average size of the stitches increases. So, we want to measure as many stitches as possible, which is why I measure across the entire body of the swatch. I know the number of stitches in the body of the swatch (because I know how many stitches I’ve cast on) and I often know the number of rows in the body of the swatch (because I’ve hopefully remembered to keep track), and that means there is little to no counting of stitches. This is especially helpful when you are working with dark colored yarns, because all the parts of the stitches are harder to see, so there ends up being less guessing.
Stitch Gauge
When you measure to obtain the stitch gauge, you want to measure from the side space on the left side of the far left stitch to the side space on the right side of the far right stitch, as shown in the last photo below. Note: In real life, you will be measuring across more the three stitches!
Stockinette Stitches 
V-shaped legs of stockinette stitches. 
Spaces in stitches: red are center spaces, yellow are between stitches. 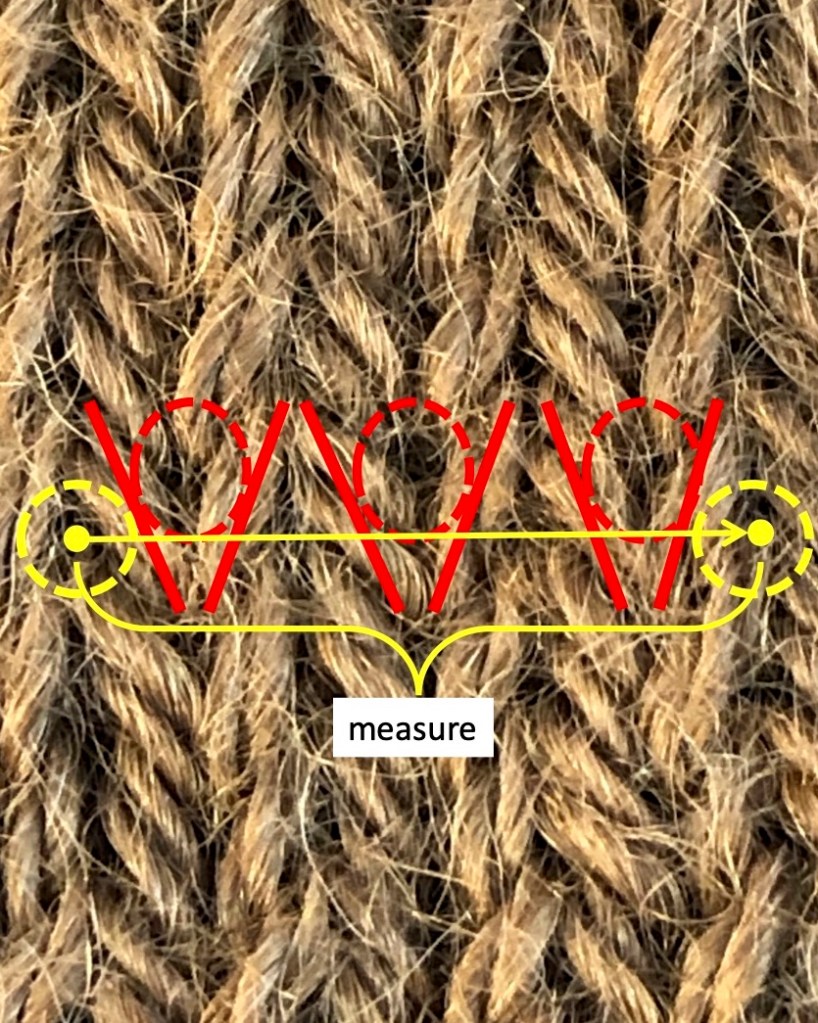
In my swatch, I cast on 40 stitches. There are 2 edge stitches on each side of the swatch (remember each right side row begins with a K1, P1 and ends with a P1, K1). That means we have 36 stitches across the body of the swatch. I find the easiest way to measure the stitch gauge is to simply measure across the body of the swatch (not including the edge stitches).

Place a pin in right side space of a row of stitches. Follow the row across the swatch. 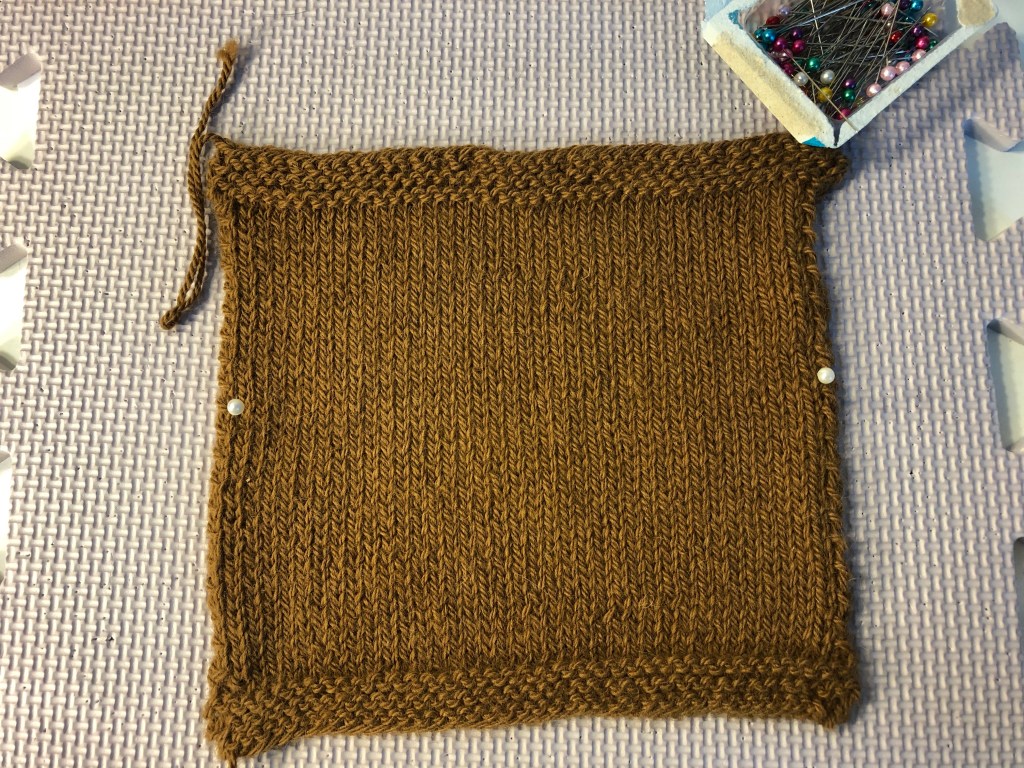
Place a second pin in the left side space on the left side of the swatch. 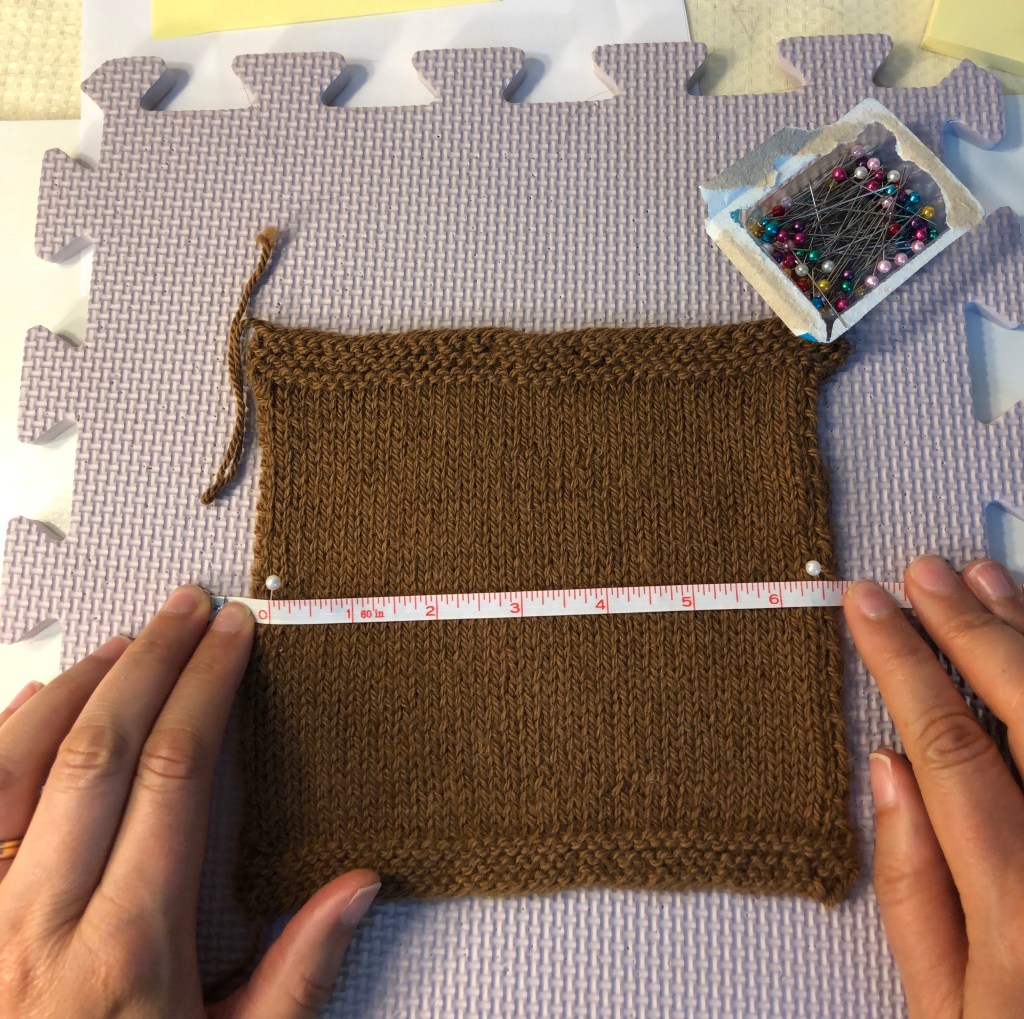
Measure from the base of one pin to the other.
Hold on to your hats, because here comes the math! To calculate the stitch gauge, divide the number of stitches that you are measuring (36 sts) by the width (6.44 in) = 5.6 sts/in. The gauge is given for 4 inches, so multiply this number by 4 = 22.4 sts in 4 inches.


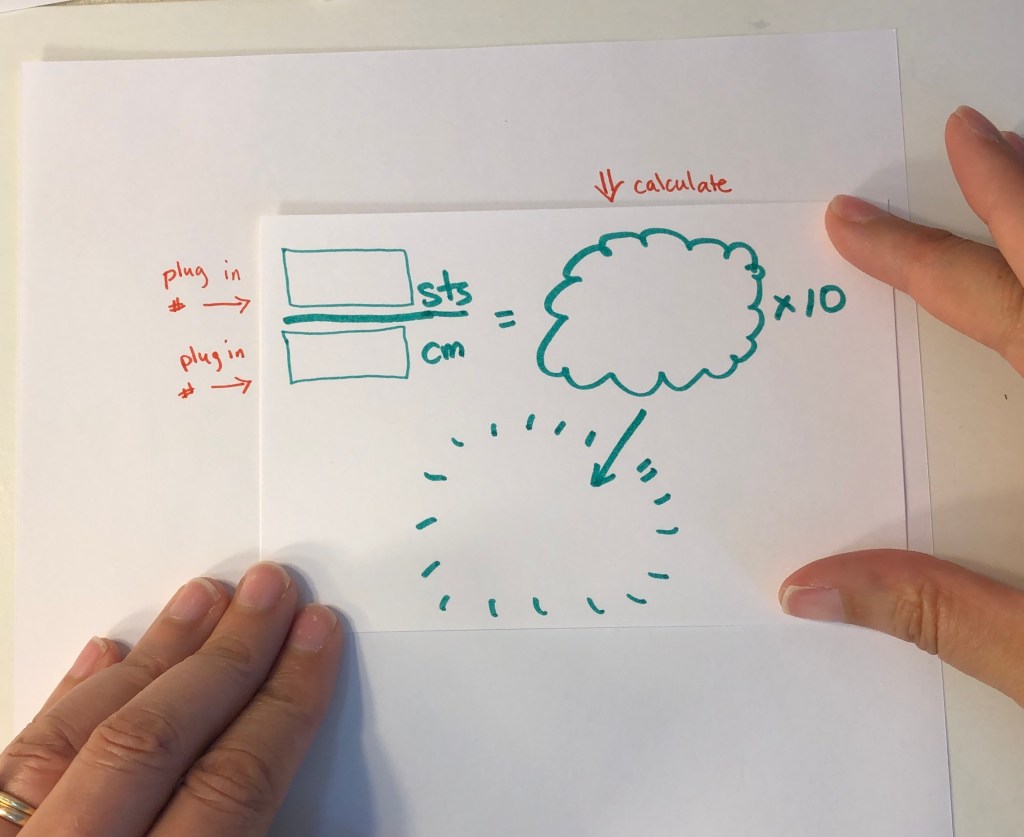

Note: I usually use centimeters because the math is easier and I find it to be more accurate. The math is similar: 36 sts divided by the width in cm (16.4) = 2.195 sts/cm X 10 cm = 21.95, or 22 sts in 10 cm.
Row Gauge
For row gauge, you will measure from the center space to center space in the same column of stitches. The center spaces are marked with the red circles in the photos below.

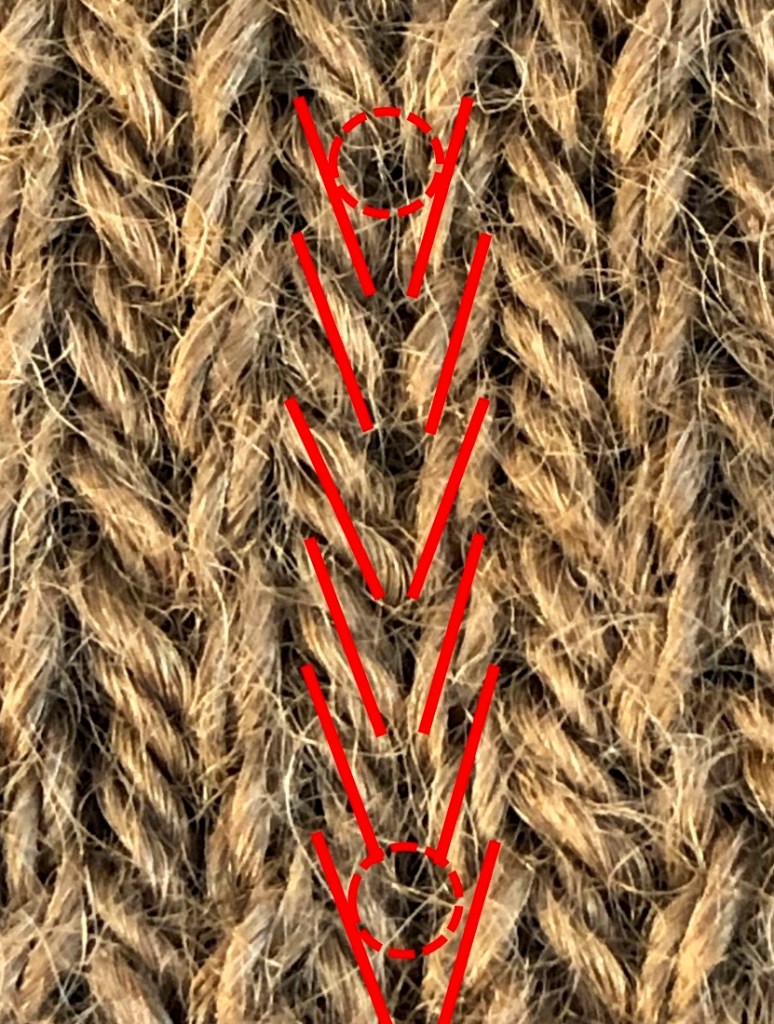
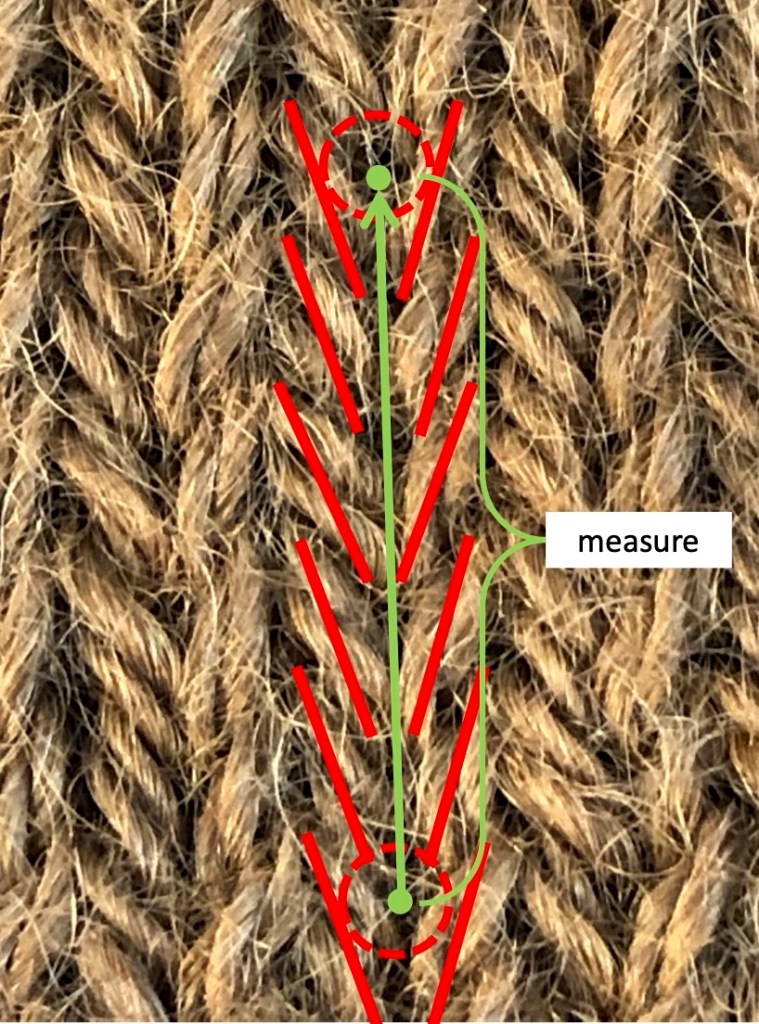
I’ve worked 40 rows between the garter stitch edges of my swatch. I locate the center spaces of the stitch at the bottom row of the body of the swatch. I follow the column of stitches up to the top and place a pin in the center space of the stitch in the last row of stockinette stitches. Measure between the pins and calculate.

Mark the top and bottom center spaces. 
I measure 5 1/8 (5.125) inches or 13.1 cm from top to bottom pin. 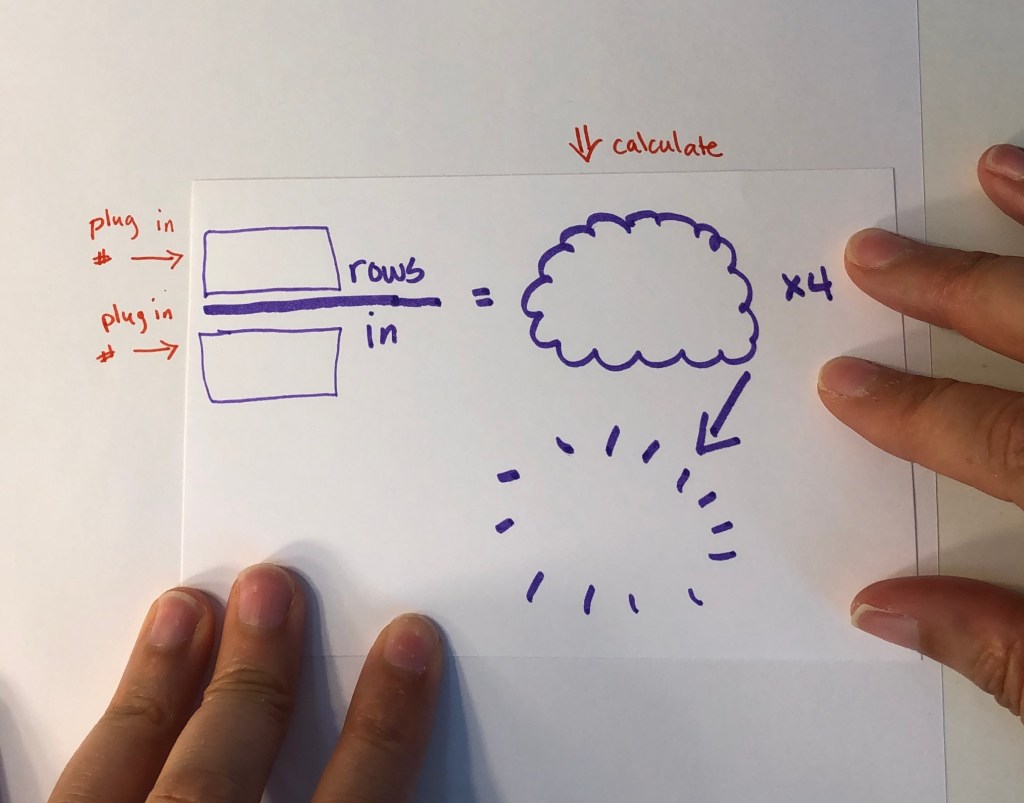
Divide number of rows by length and multiply by 4 to get the number of stitches in 4 inches. 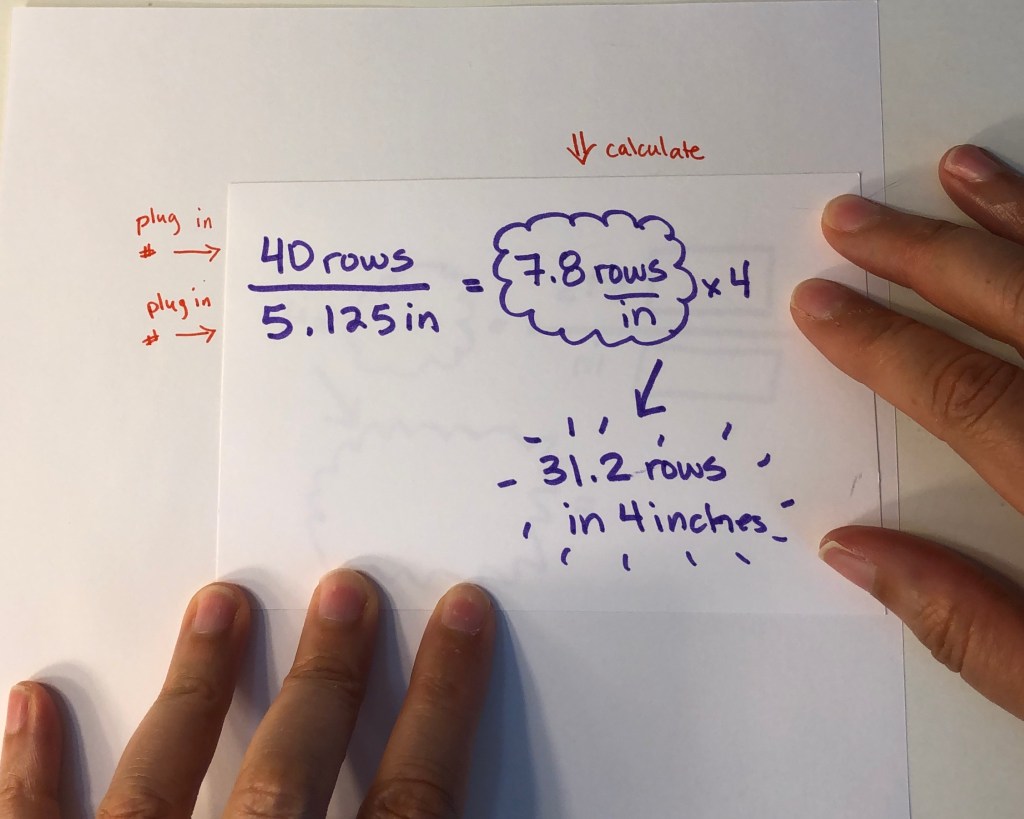
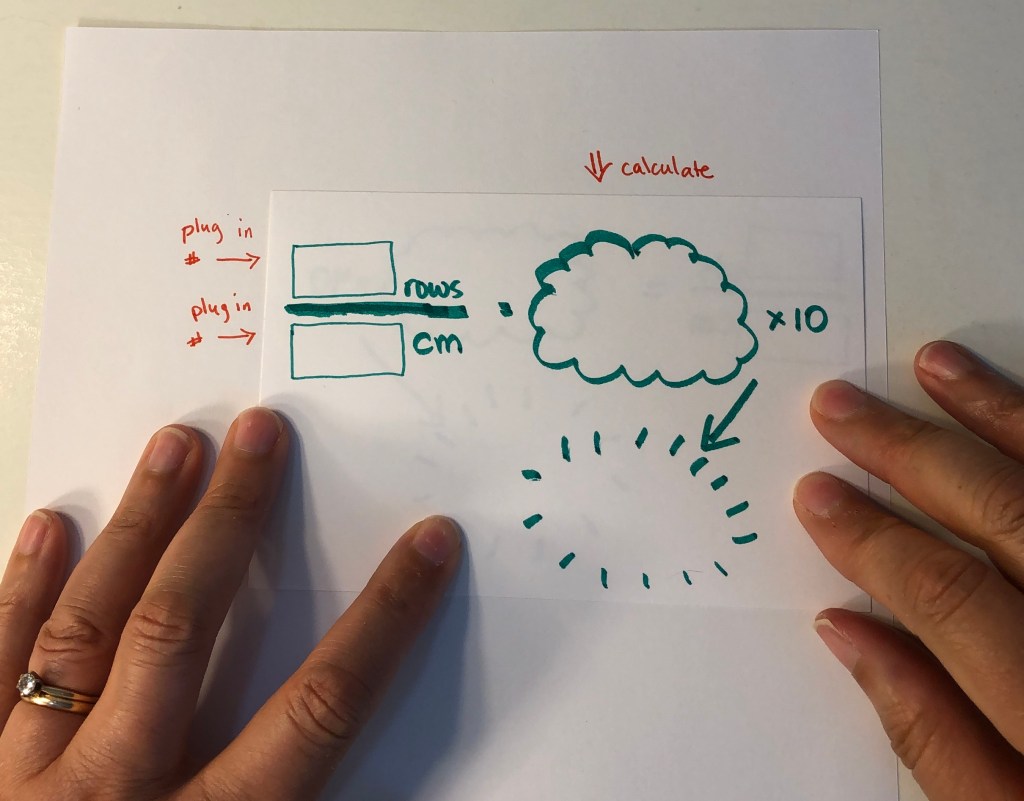
Divide the number of rows by the length (in centimeters) and multiply by 10 to get the number of stitches in 10 cm. 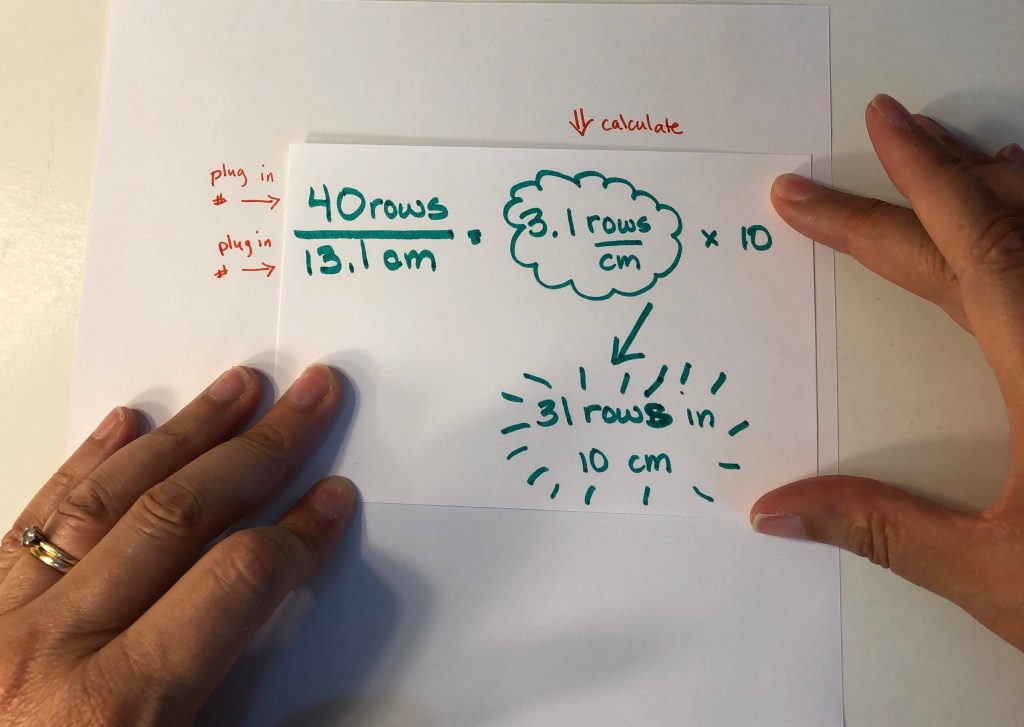
My calculated gauge is 22.4 sts x 31.2 rows in a 4 x 4 inch swatch, or 22 sts x 31 rows in a 10 x 10 cm swatch.
Cheers,
Mindy
