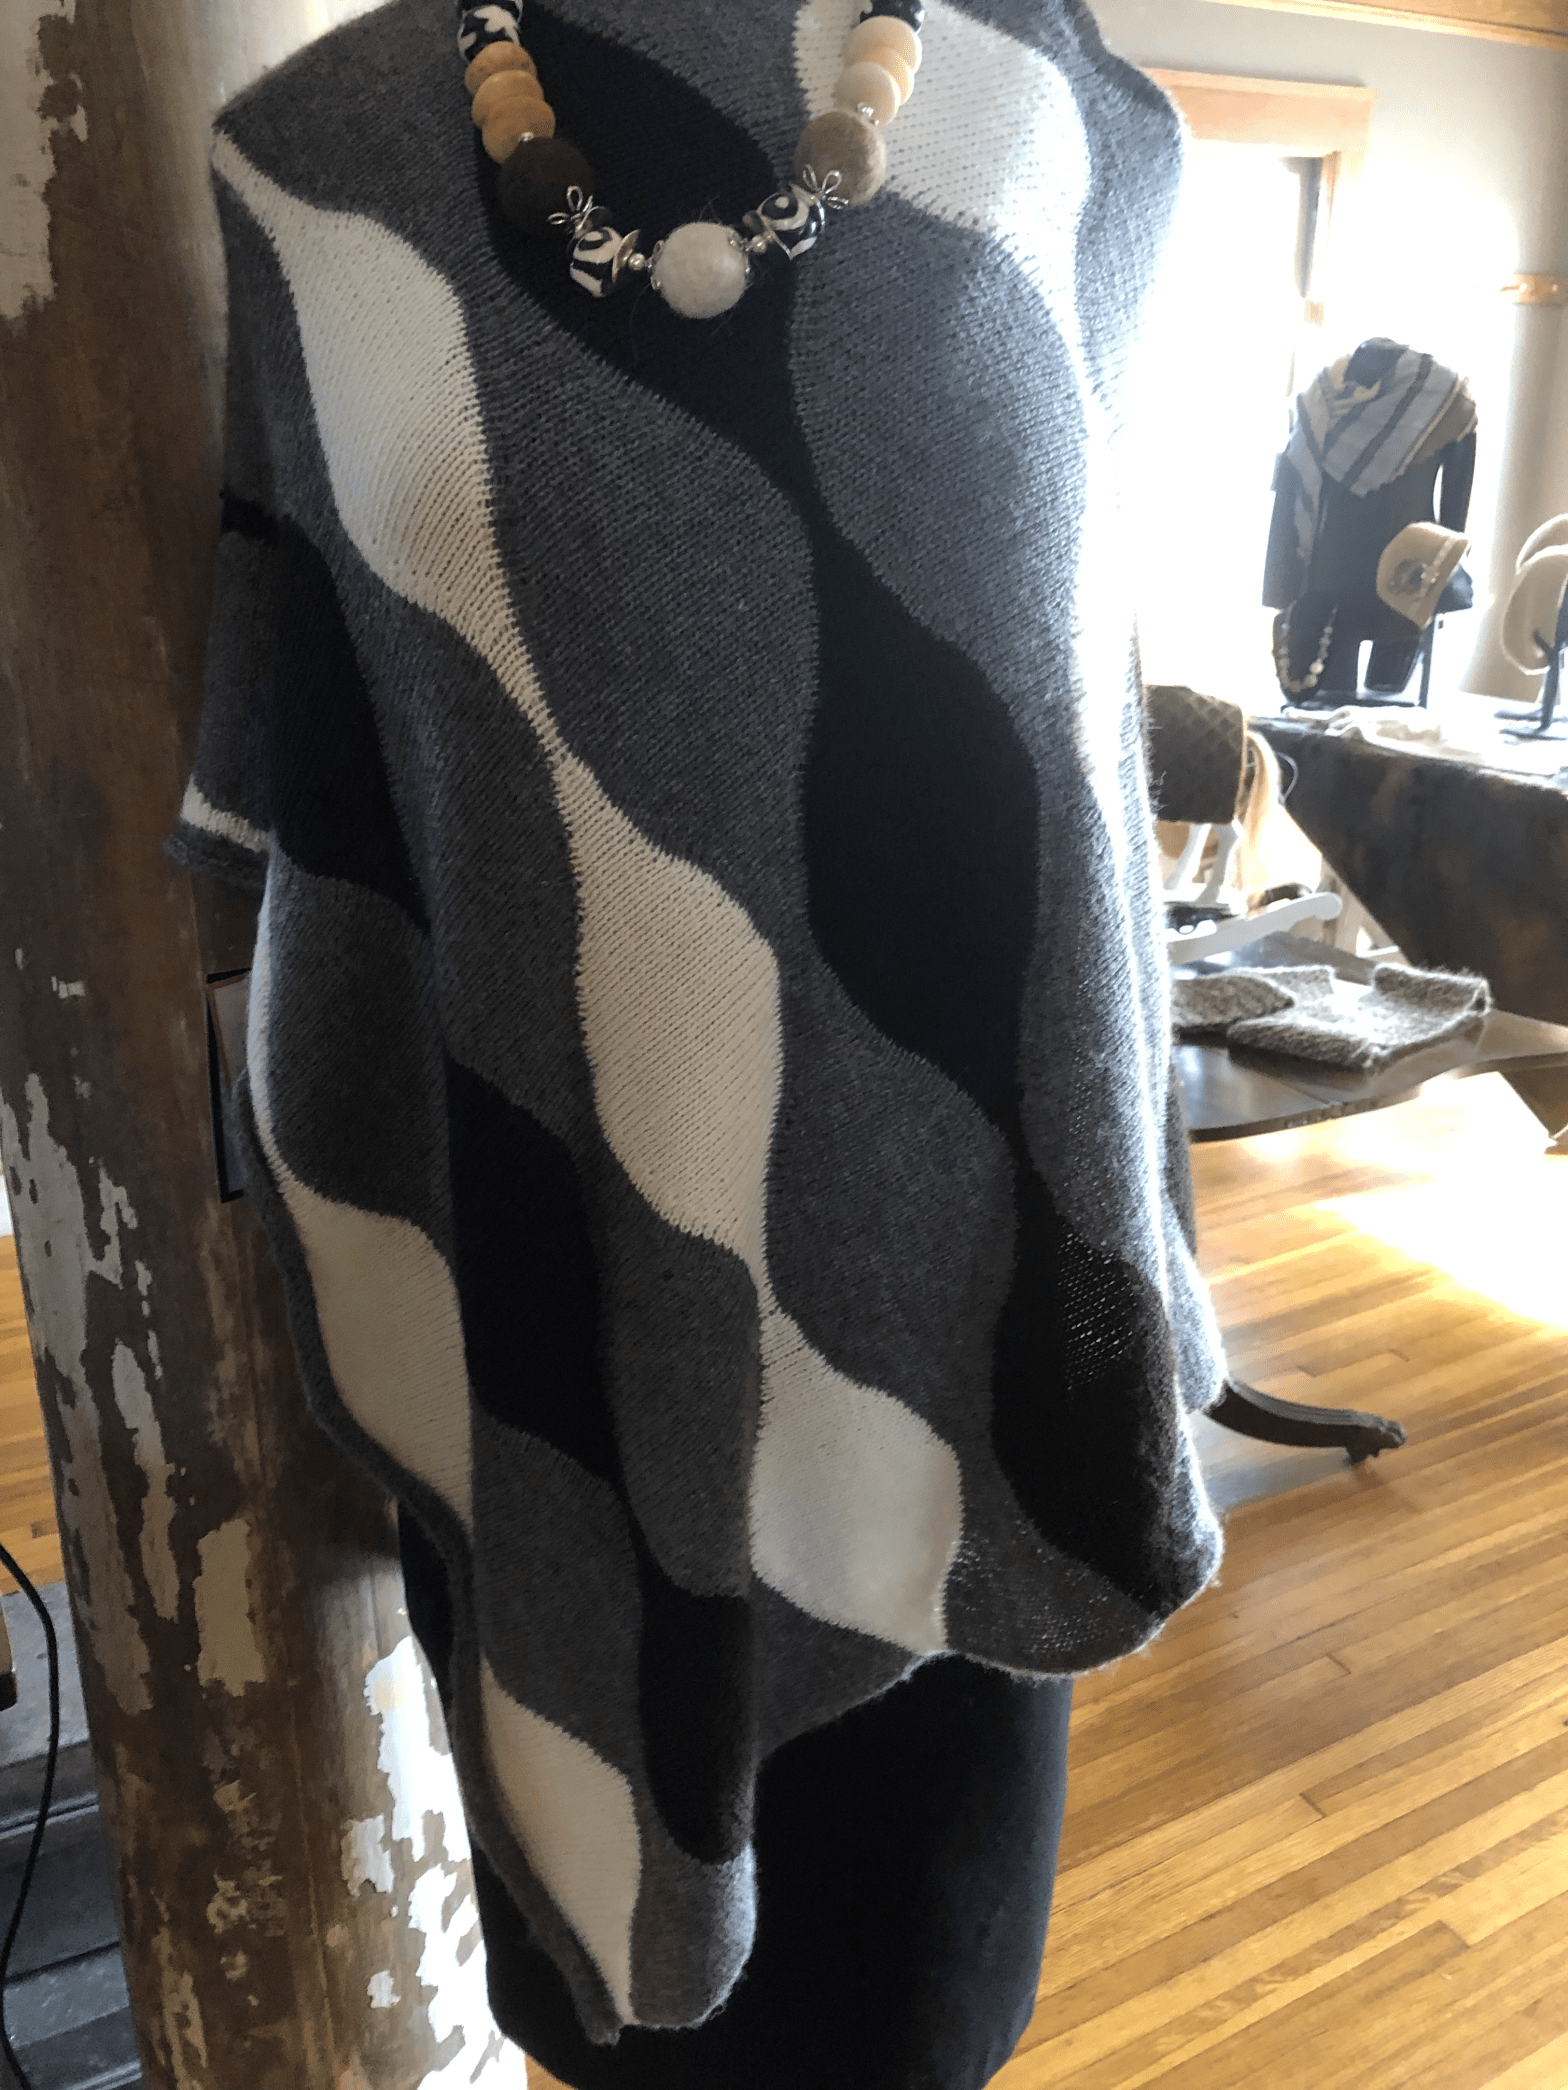
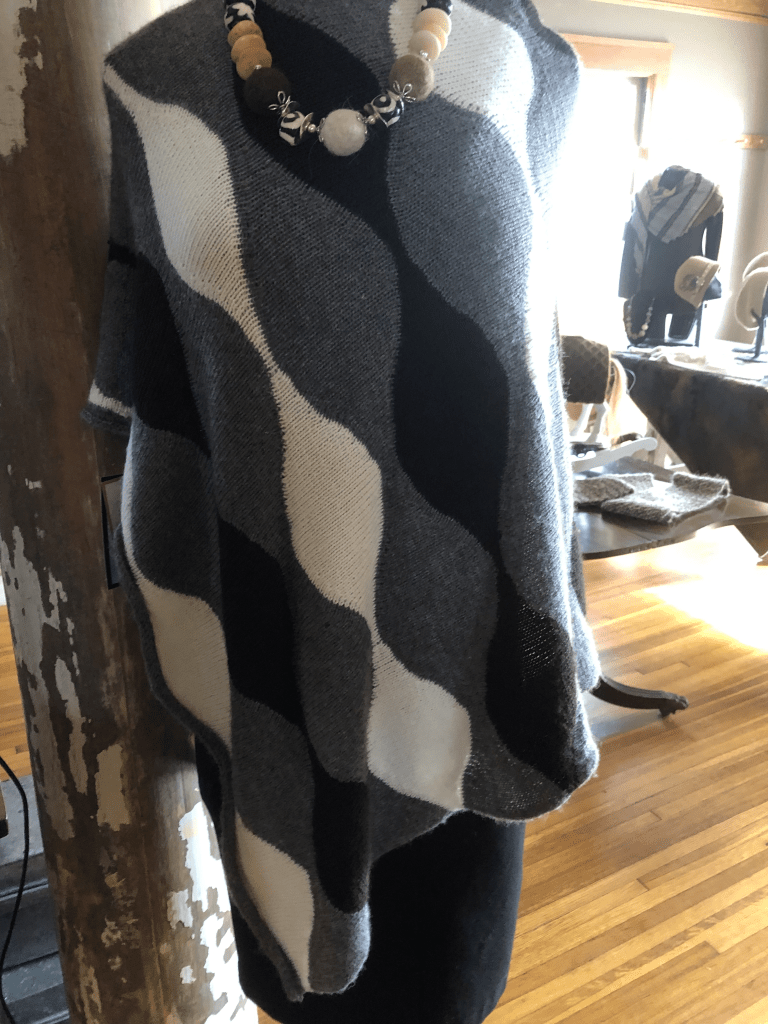
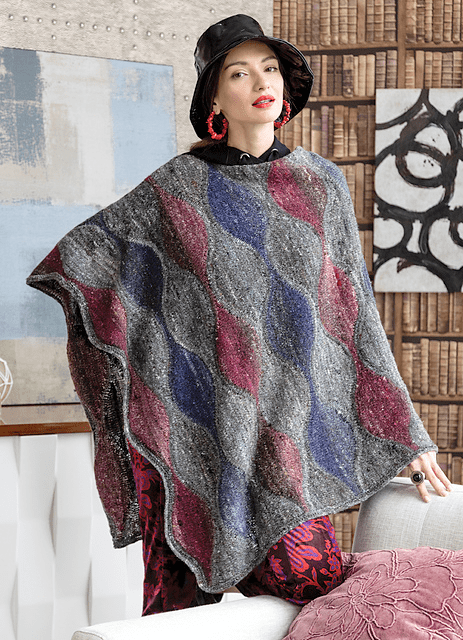
These blocks of color are incorporated into the poncho using short rows.
Short rows are commonly used to incorporate a slope or extra fabric in an object. For example, you can use short rows at the shoulder slope for easier shoulder seaming and on sleeve caps for nice, even shaping at the top of the sleeve cap. Short rows can also be used for incorporating extra fabric where you need it and blocks of color in wavy patterns as shown in the poncho above.
Simply turning and working back will produce a small hole at the turn. This can be used as part of the design, but usually you want to avoid a hole at the turn, especially on pieces that are not lacy to begin with (like a stockinette stitch sweater). There are several techniques for working a short row that eliminate the hole, including Wrap and Turn, German, and Japanese methods.
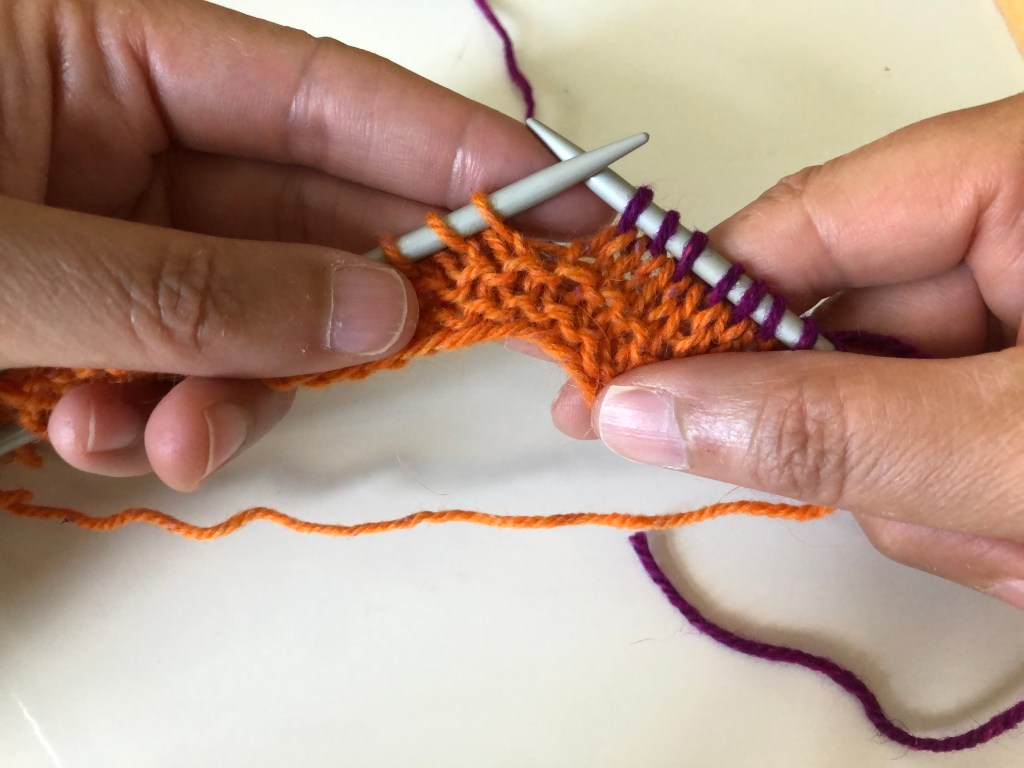
There are two parts to working every short row: 1) working the turn, and 2) working through the turn. If you are using short rows at the sleeve cap or shoulders of a sweater, you will work some with the right side facing you and some with the wrong side facing you. Both the right-side and wrong-side methods for working a wrap and turn short row in stockinette stitch are shown below.
In the videos and photos below, the short row is worked in a contrast color (purple) so that you can see where the wrap ends up and how visible it is on the front side of the work. Some methods of working short rows are more visible than others. It’s good to have a couple of different strategies for working short rows, depending on your project.
It might seem like there are a lot of steps to work a short row, but once you have practiced and have some muscle memory, the turns go quickly. Picking up the wrap and slipping the stitches can become one fluid movement. The pattern for wavy poncho shown above is available in the Fall/Winter 2019, Issue 15, #12 of Noro Knitting magazine. It’s a great project to practice short rows because there are a LOT of them!
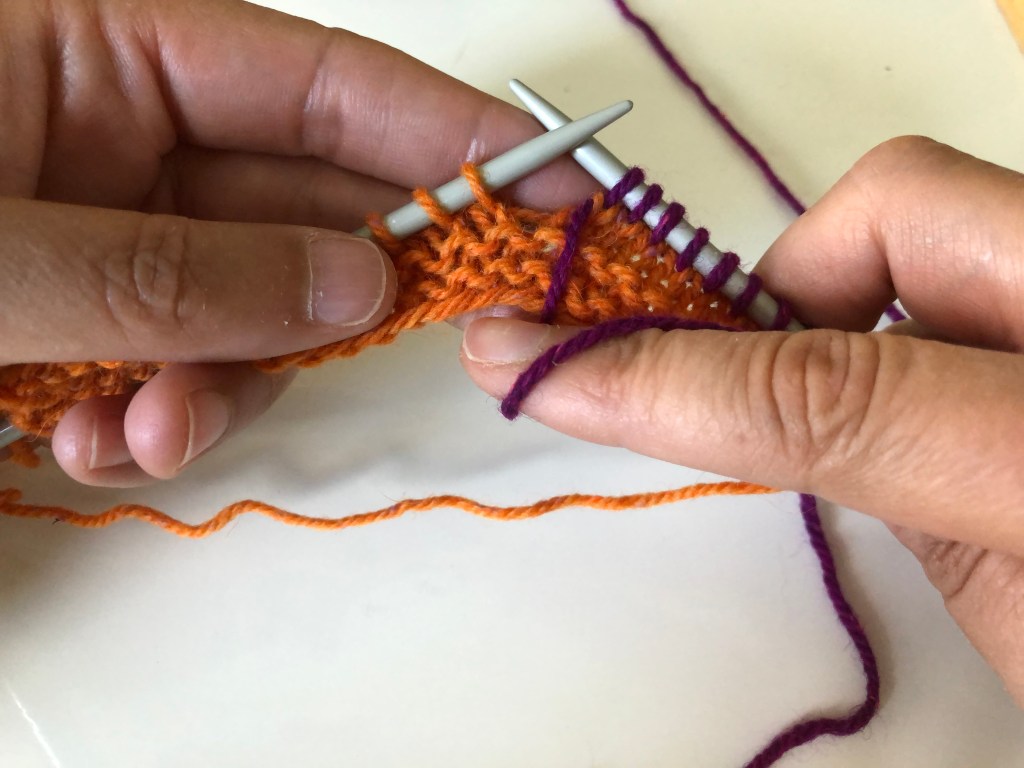
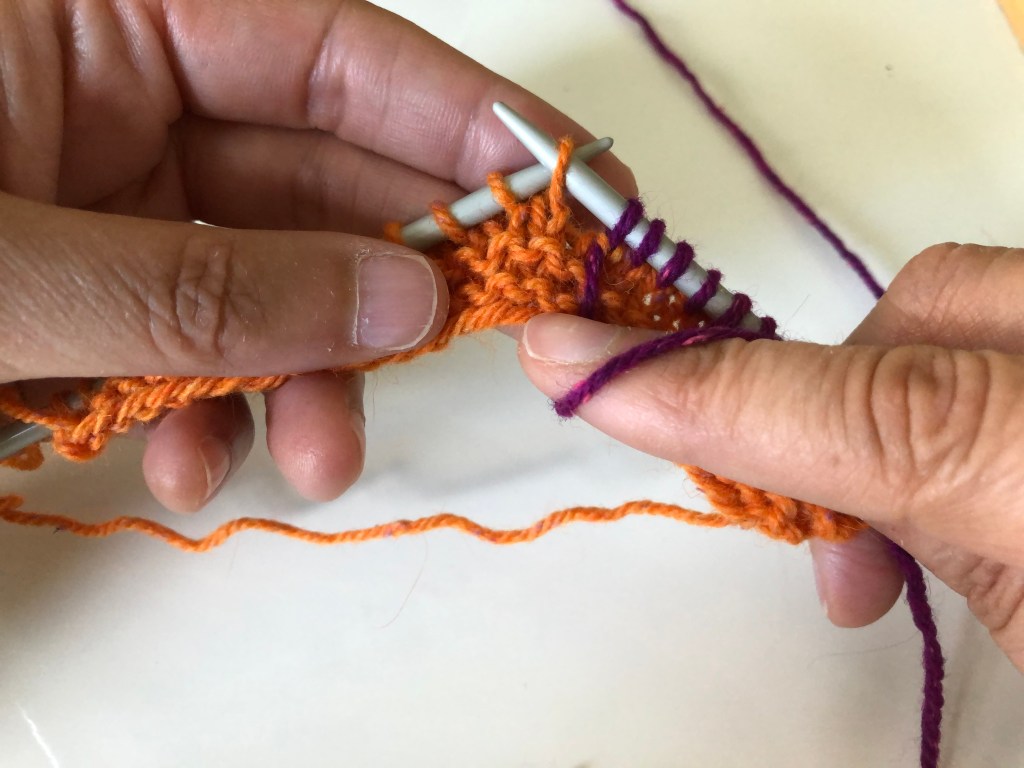
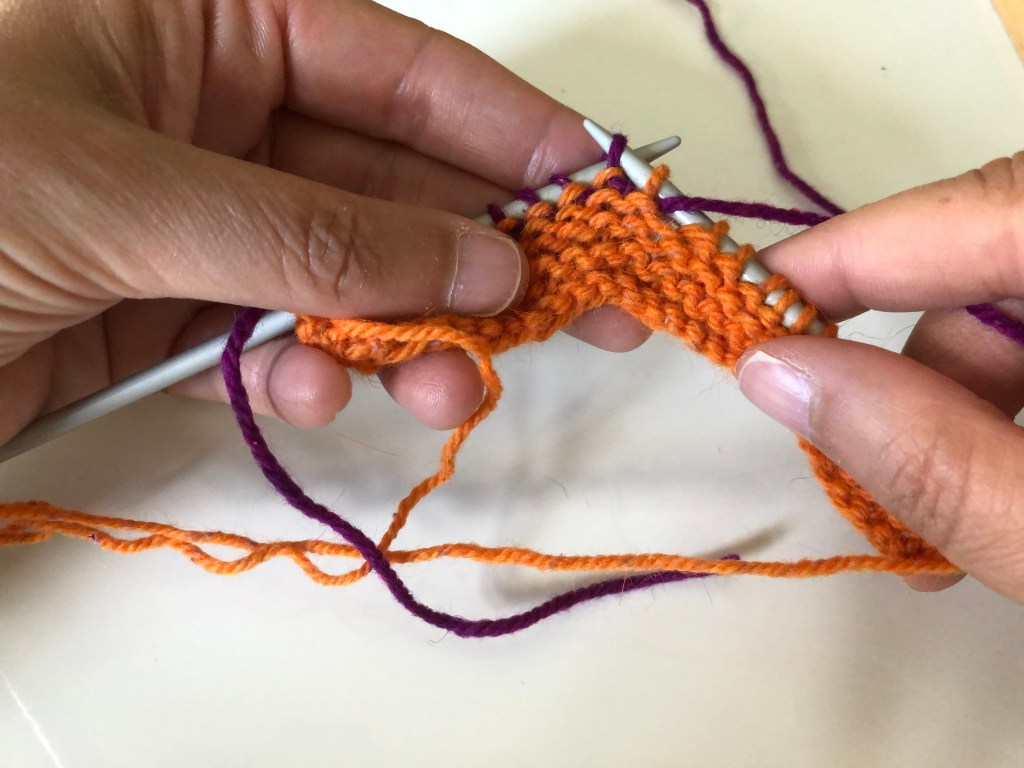
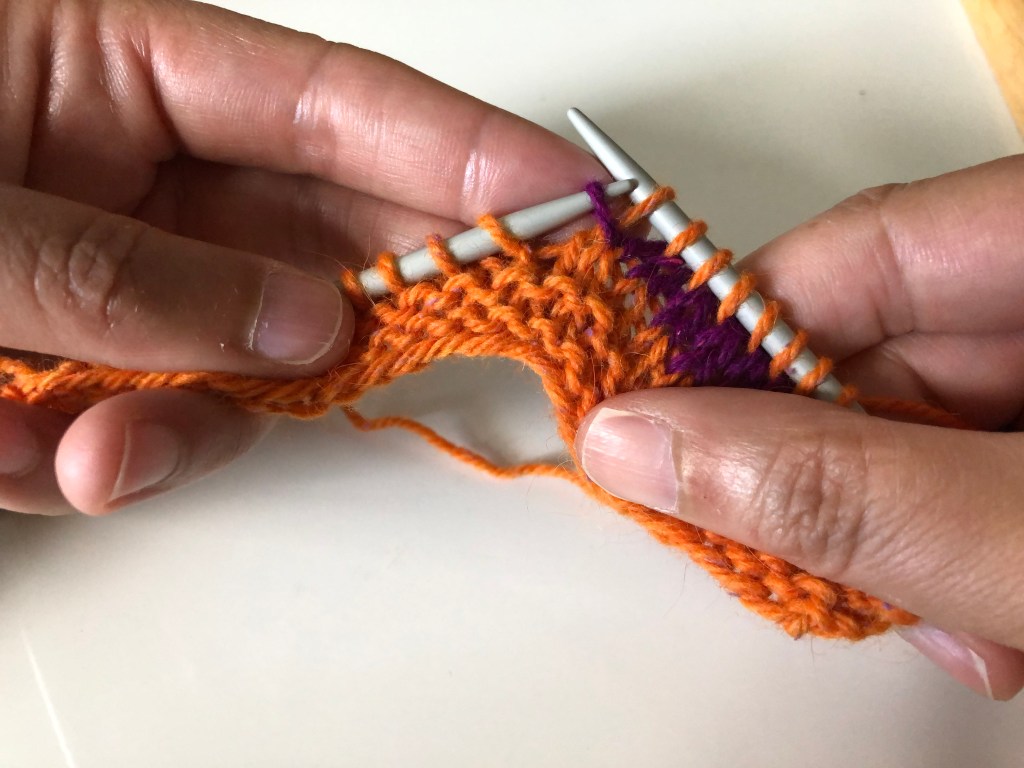
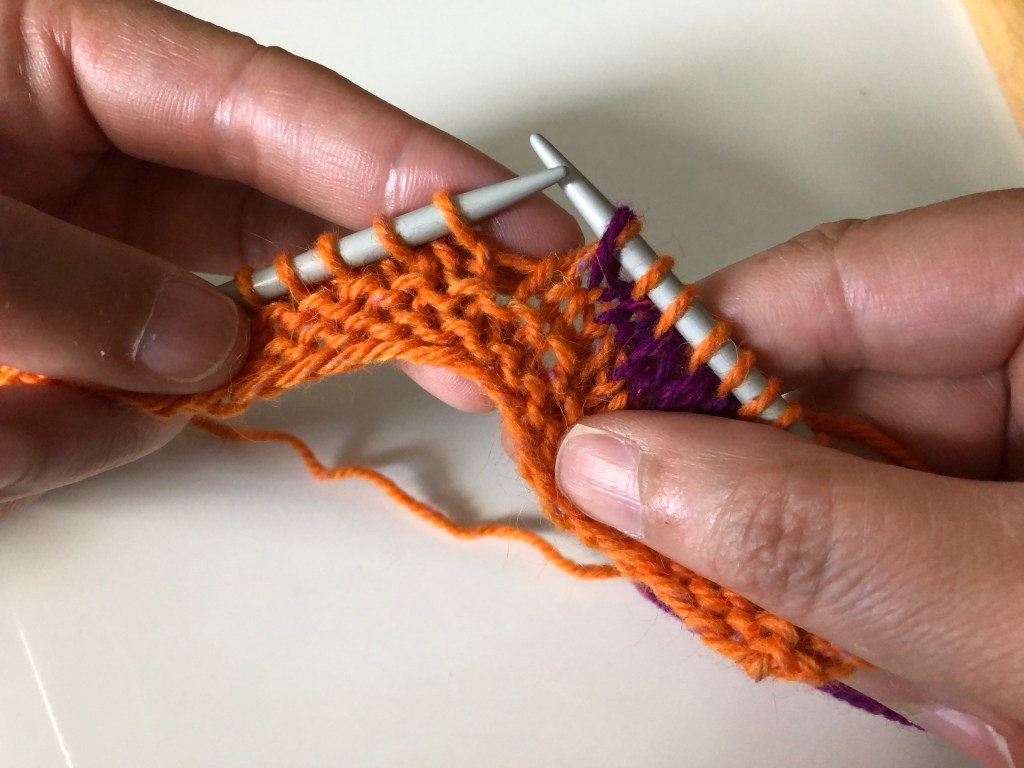
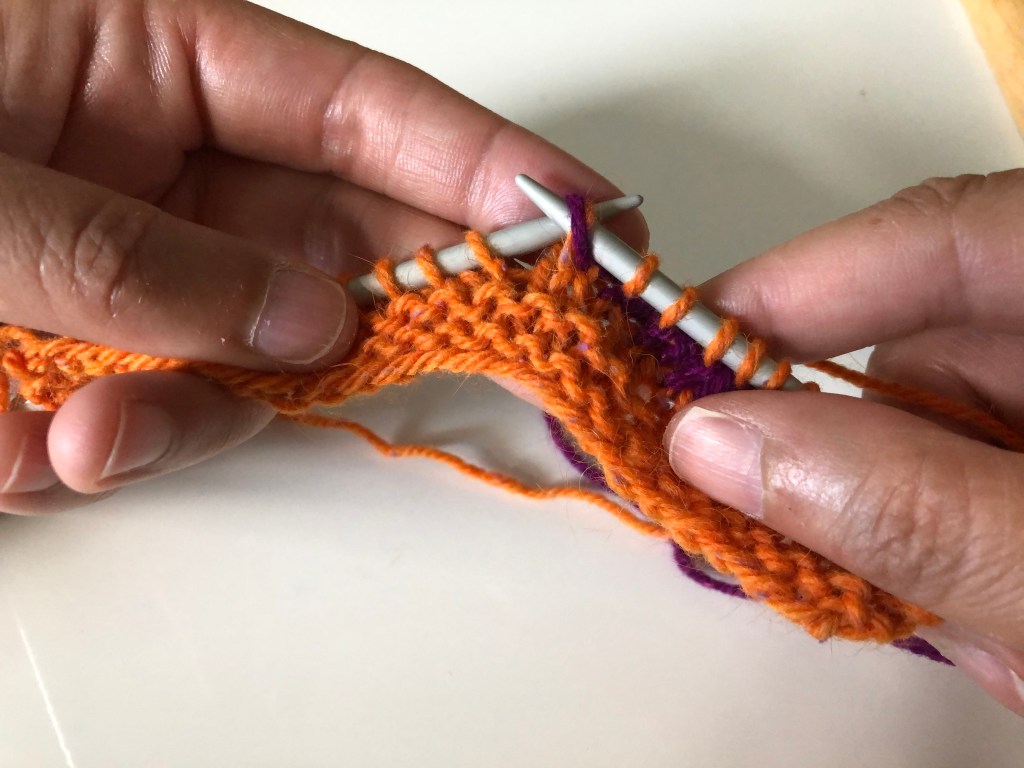
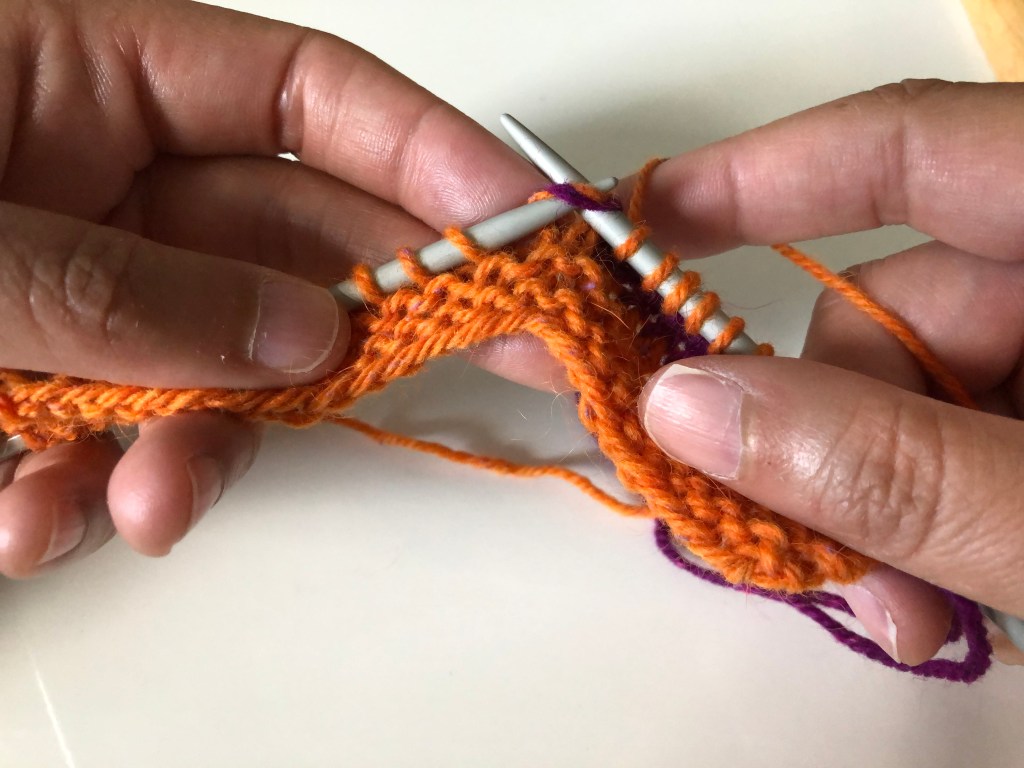
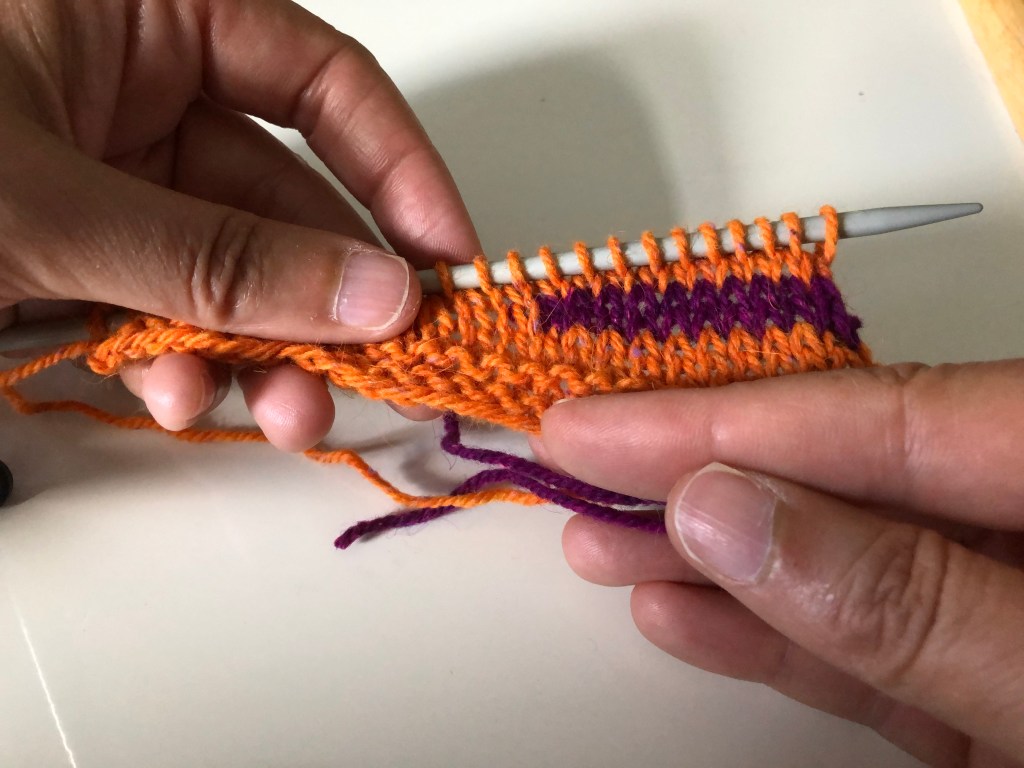
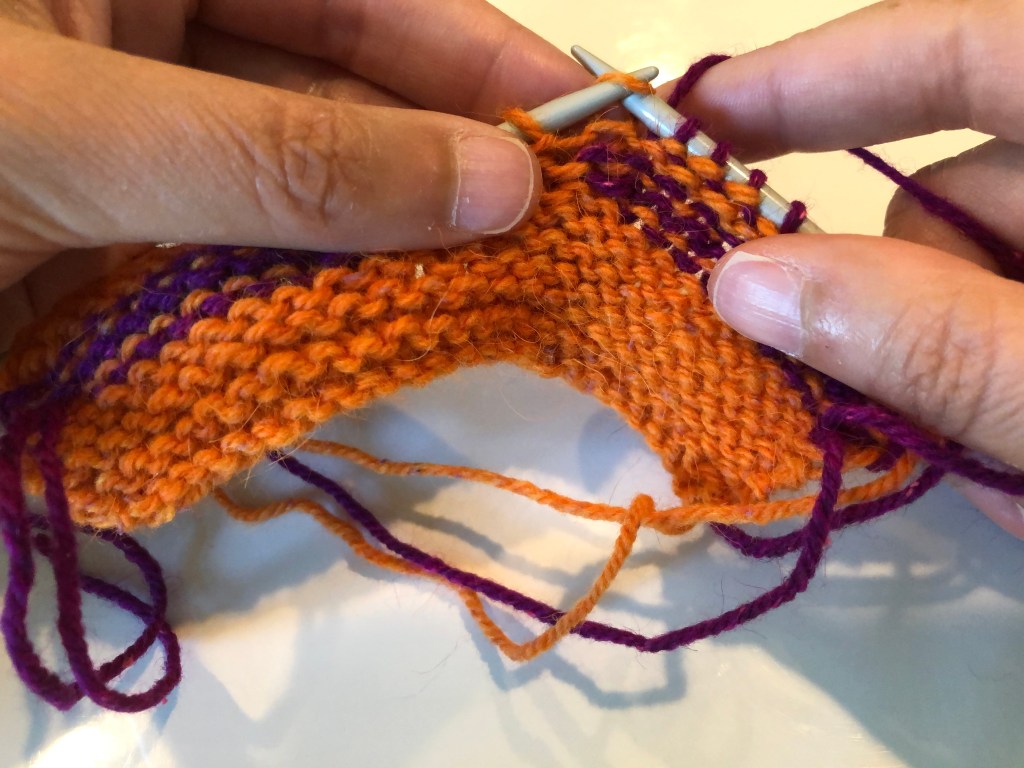
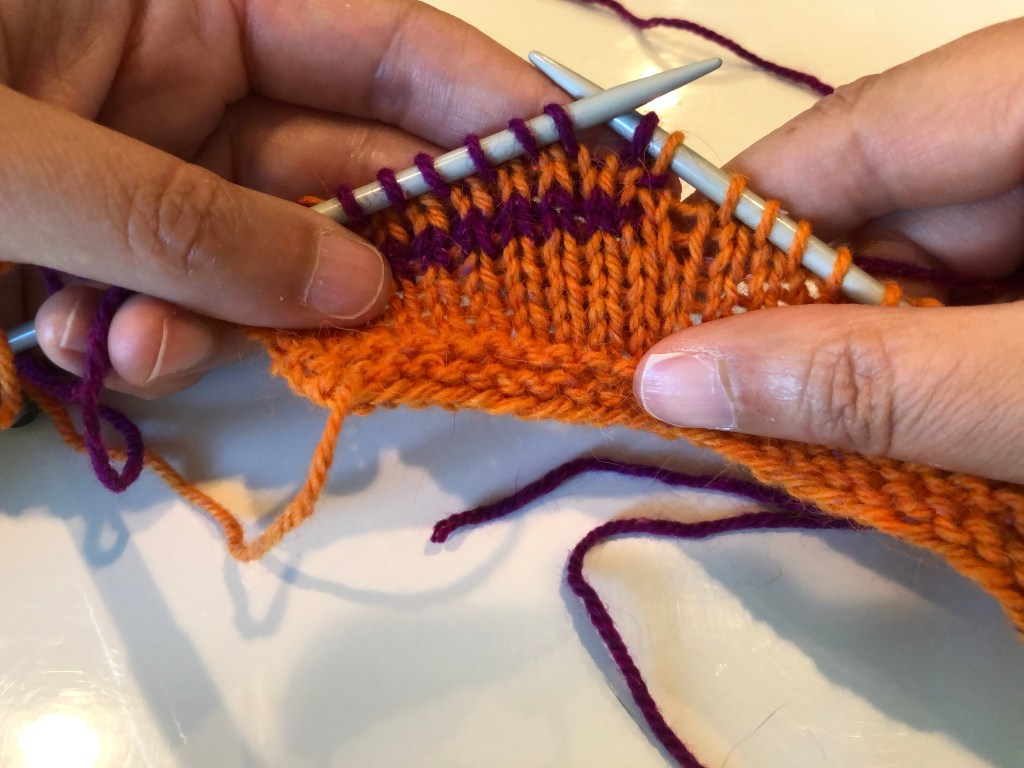
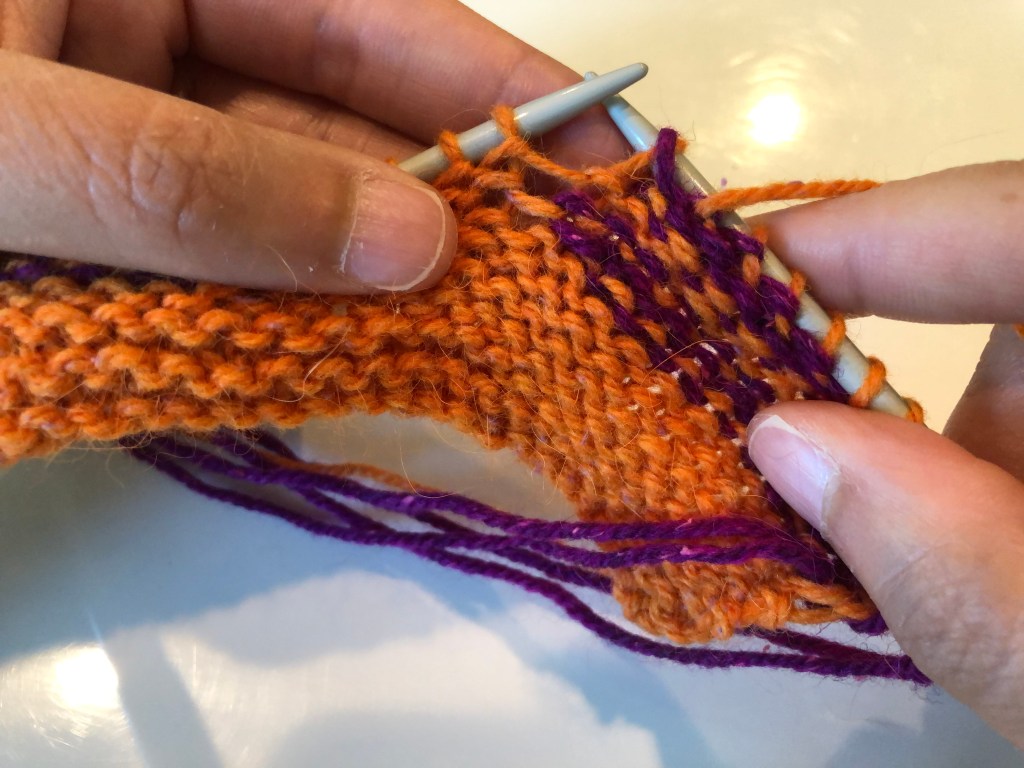
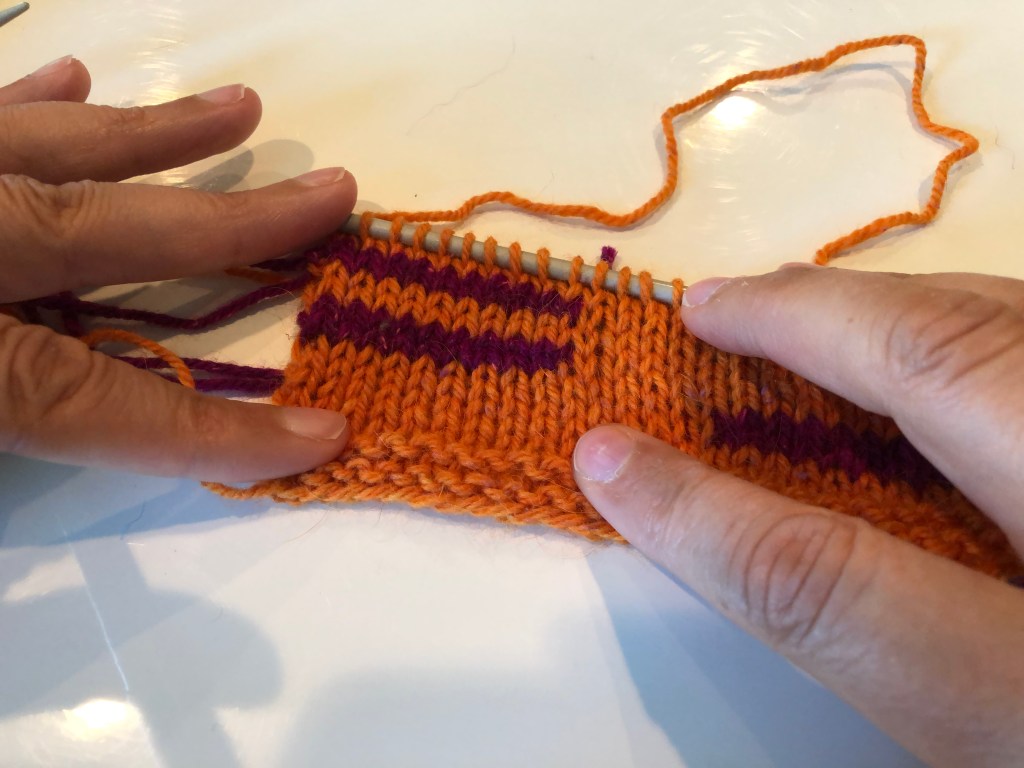
Step 1: Work up to the turning point.Step 2: Bring the yarn to the front of the work.Step 3: Slip the next stitch, purlwise, to the right needle.Step 4: Bring the yarn to the back of the work, in front of the slipped stitch.Step 5: Return the slipped stitch back to the left needle.Step 6: Turn the work so the wrong side is facing you. Step 7: Purl the next stitch and continue working the row.
Working the turn of a wrap and turn short row (stockinette stitch).
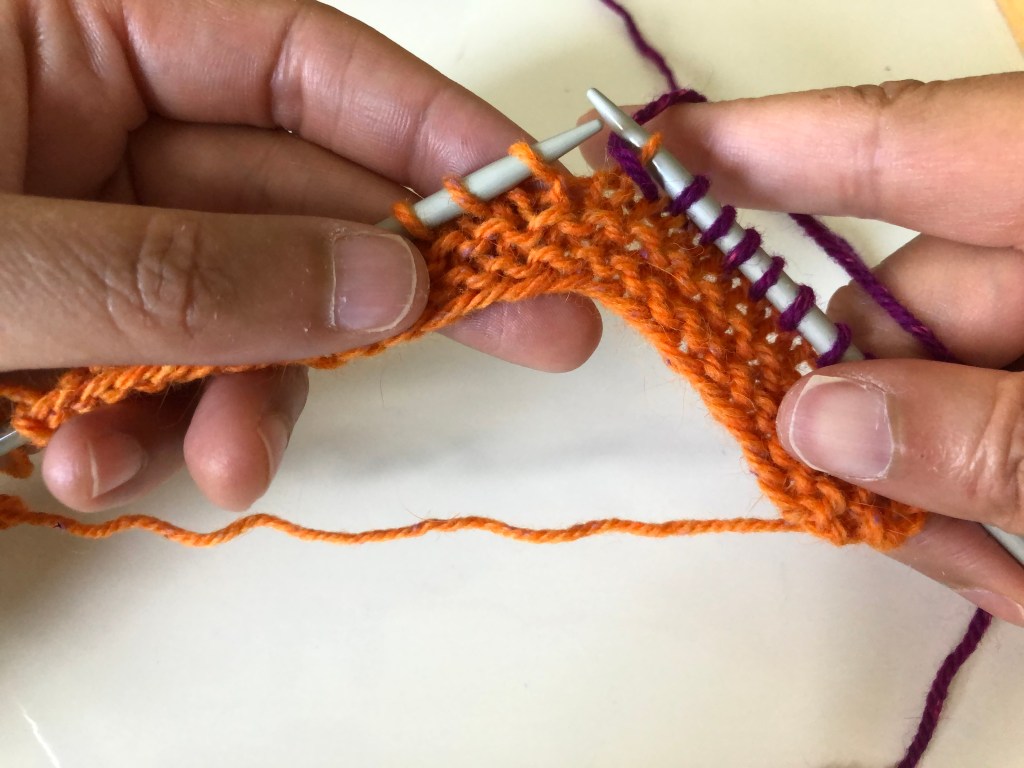
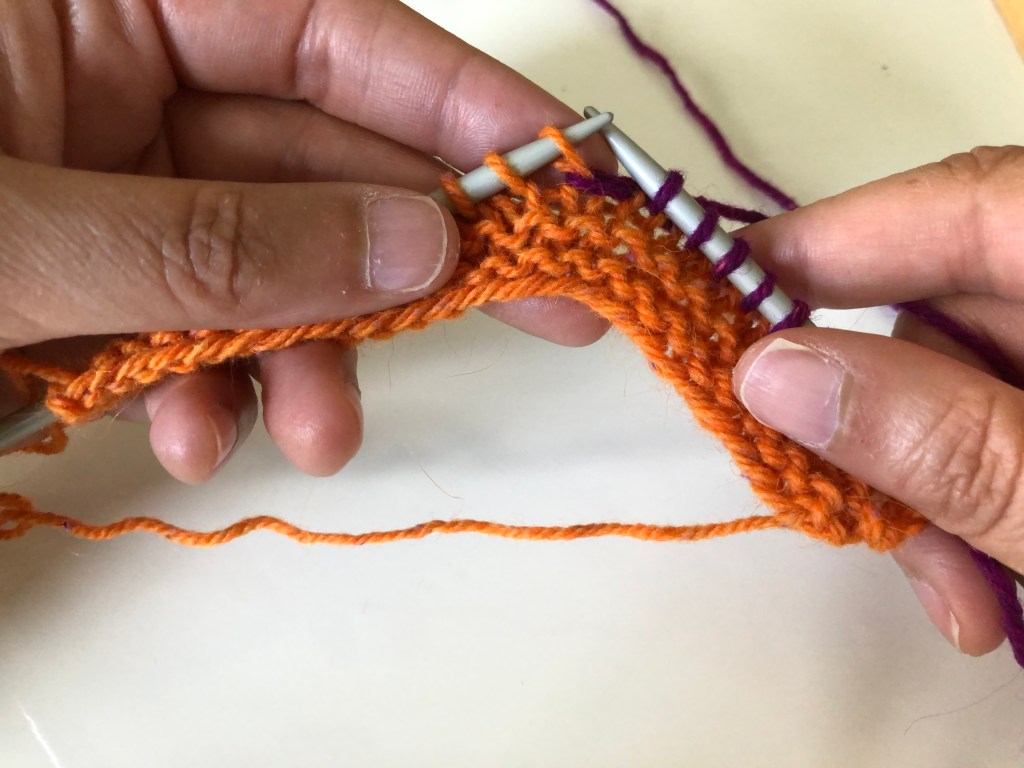
Part 2: Working Through the Turn, Right Side Facing You
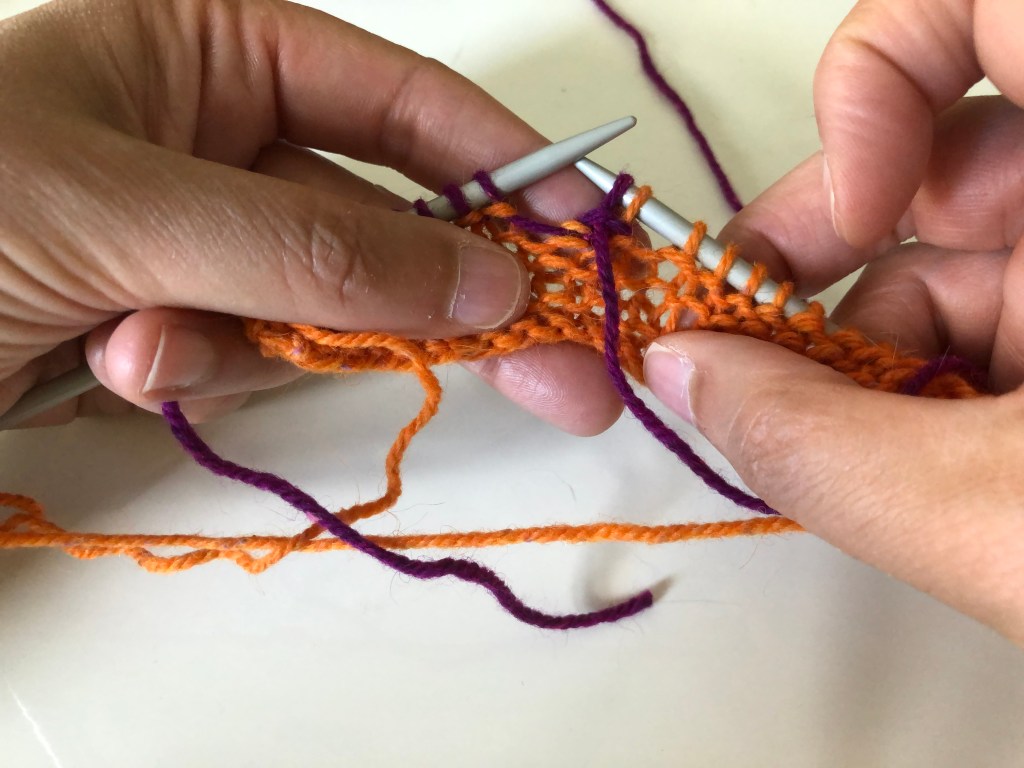
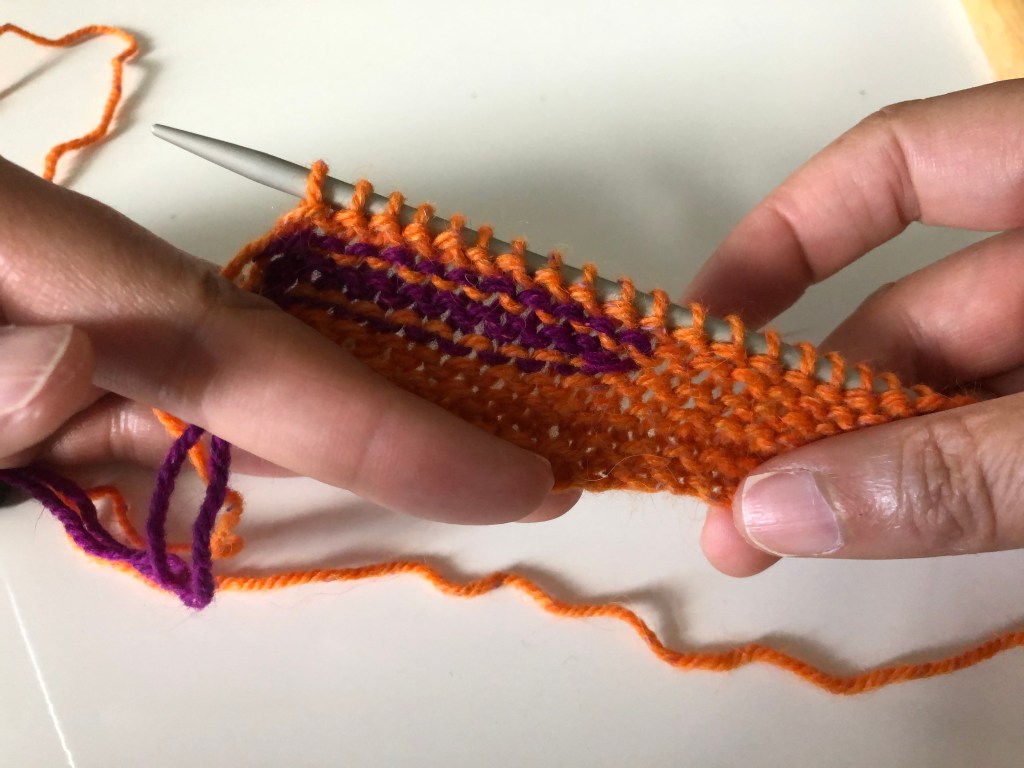
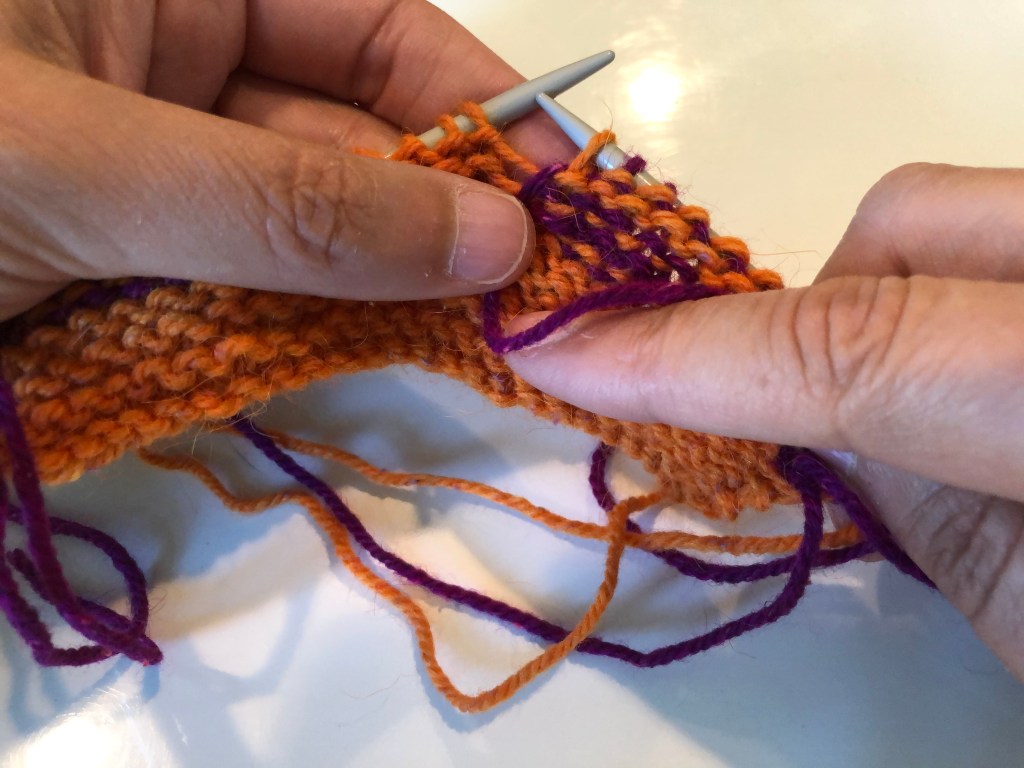
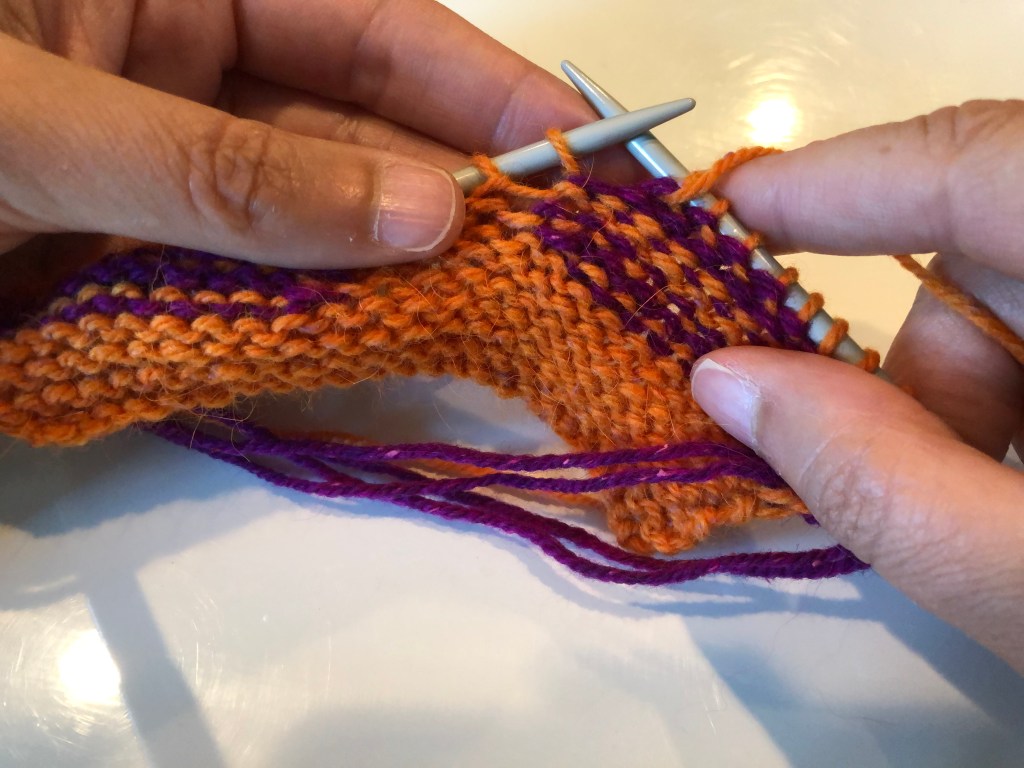
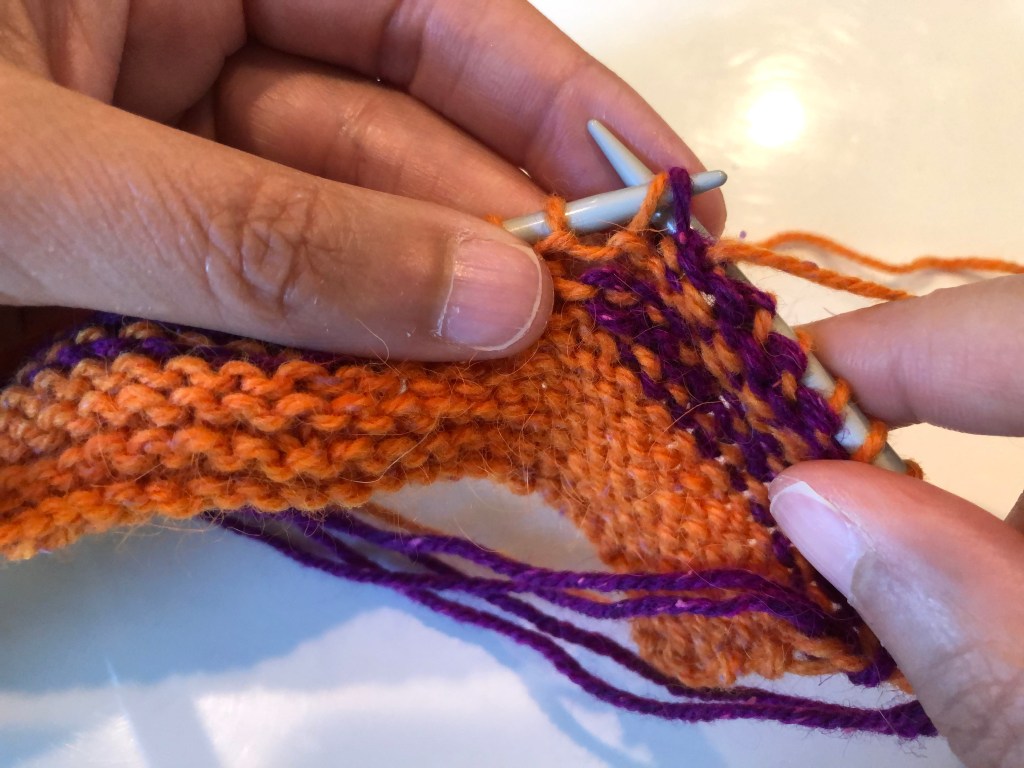
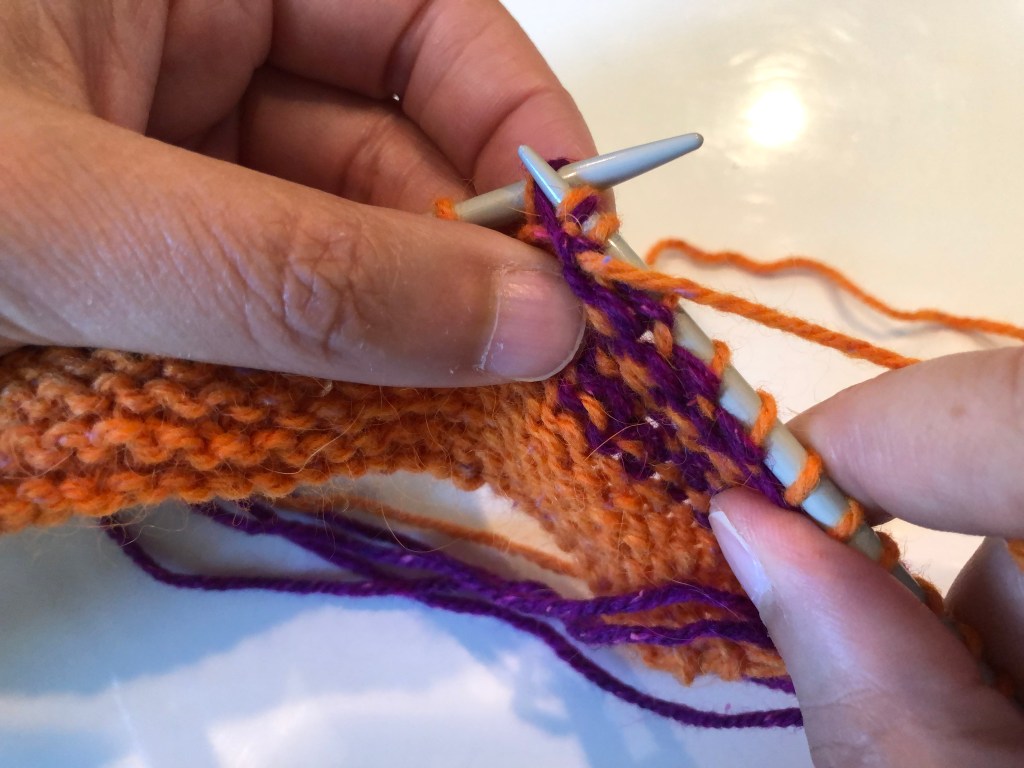
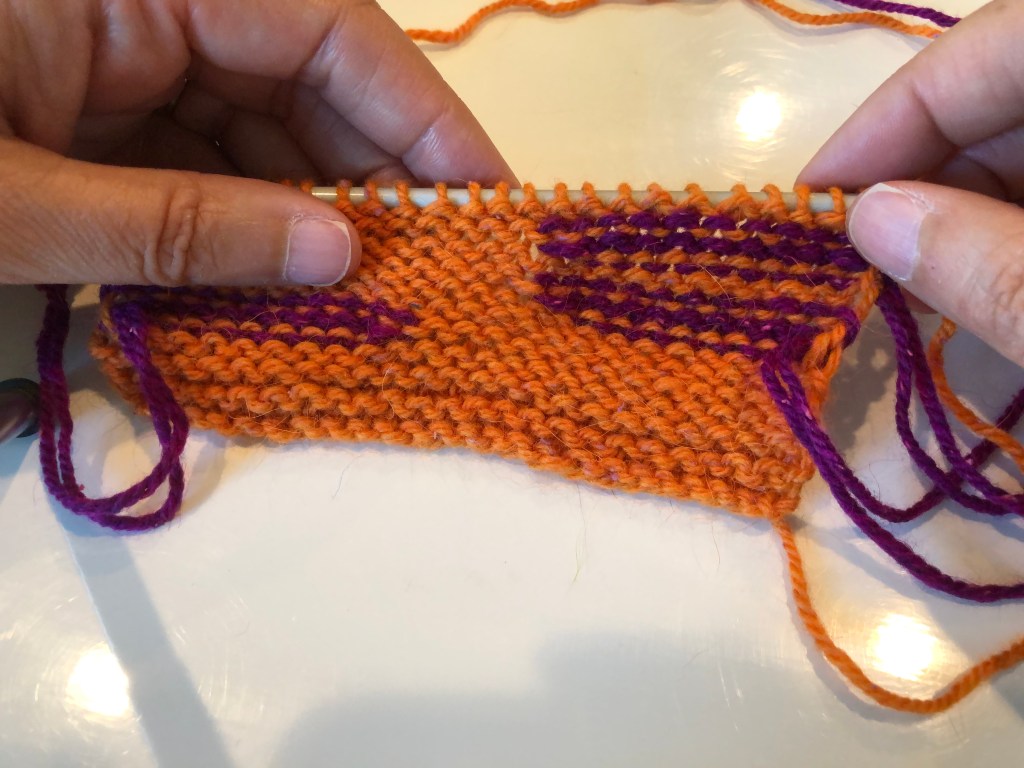
Step 1: Work up to the wrapped stitch.Step 2: Slip the wrapped stitch, purlwise, to the right hand needle.Step 3: Using the tip of the left-hand needle, bring the wrap up onto the right needle and onto the slipped stitch.The wrap is on top of the slipped stitch.Step 4: Transfer both the wrap and the stitch back to the left needle (purlwise).Step 5: Knit the wrap and the stitch together. Step 6: Continue working the row.
Working through the turn of a wrap and turn short row (right side).
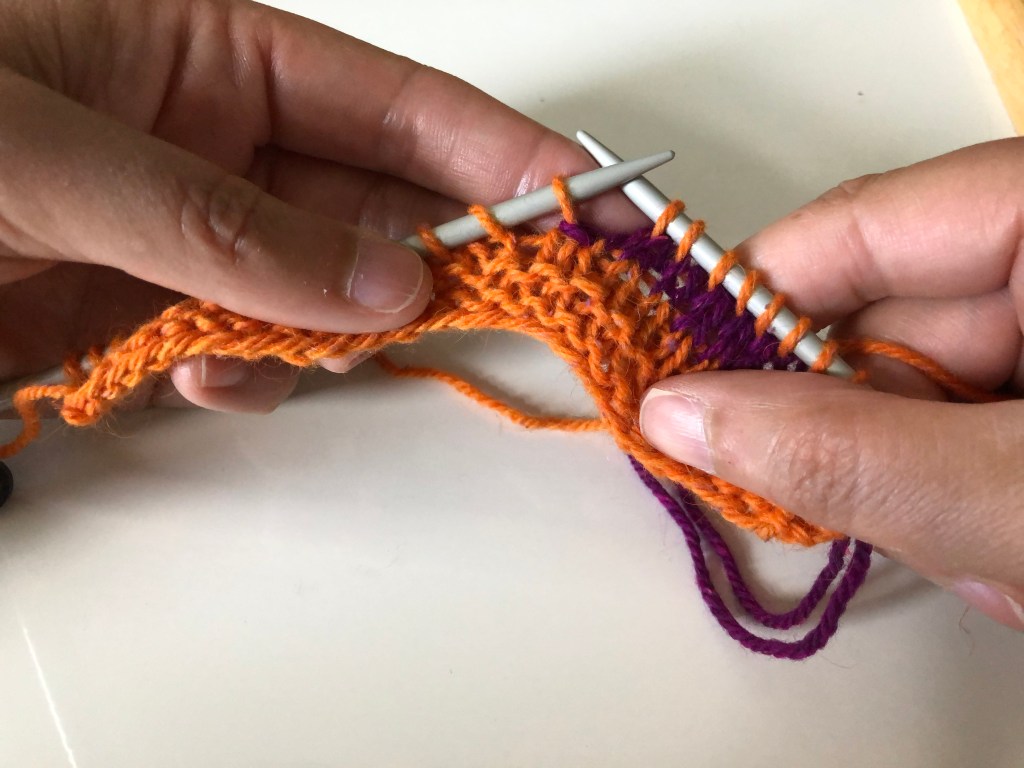
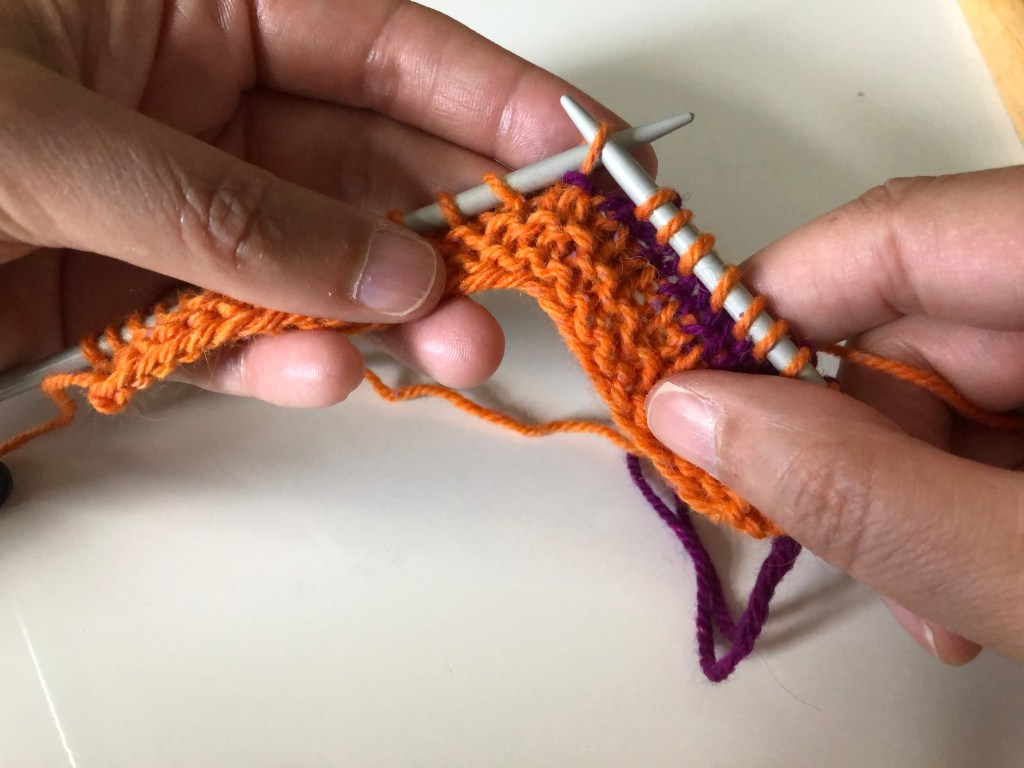
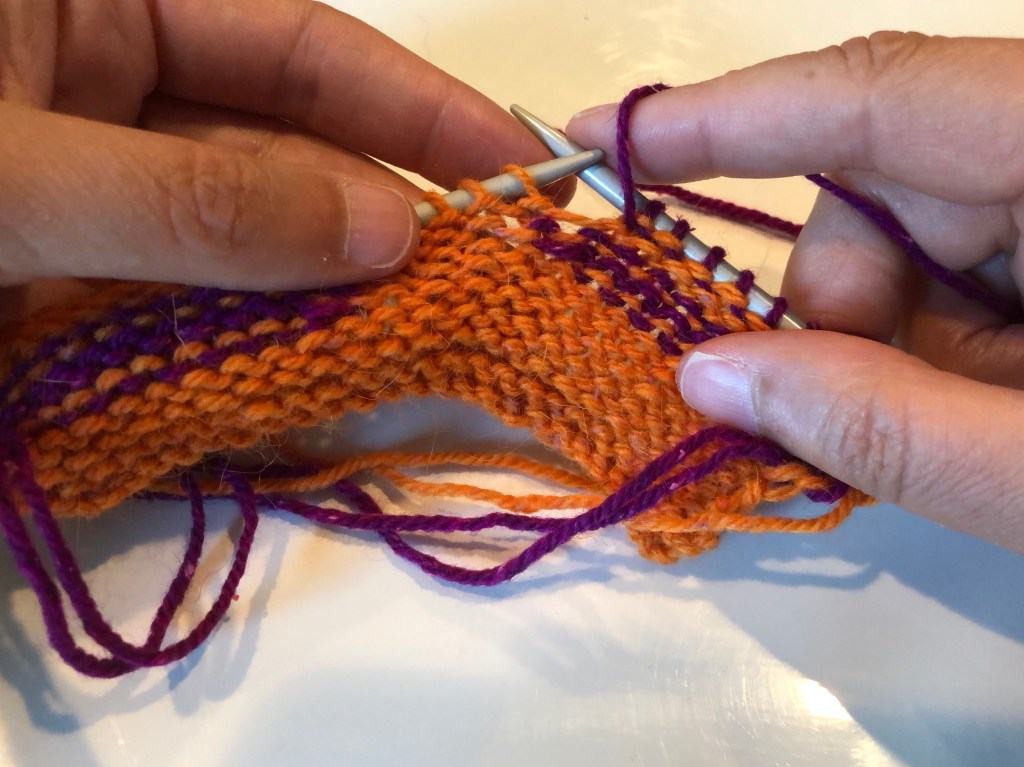
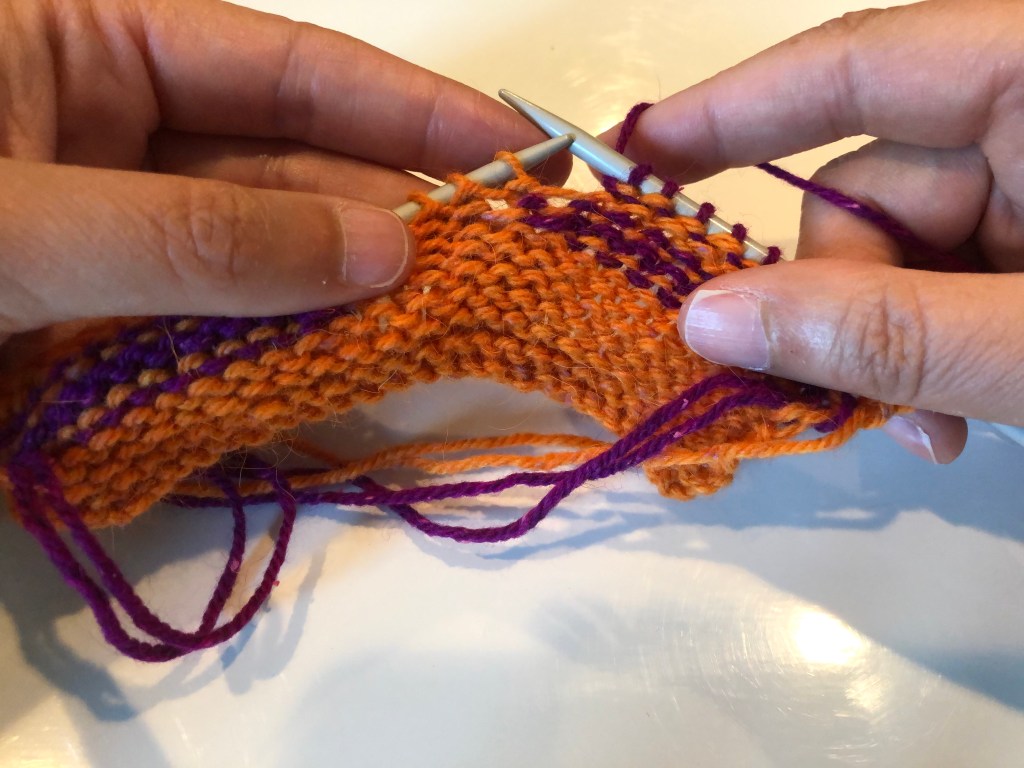
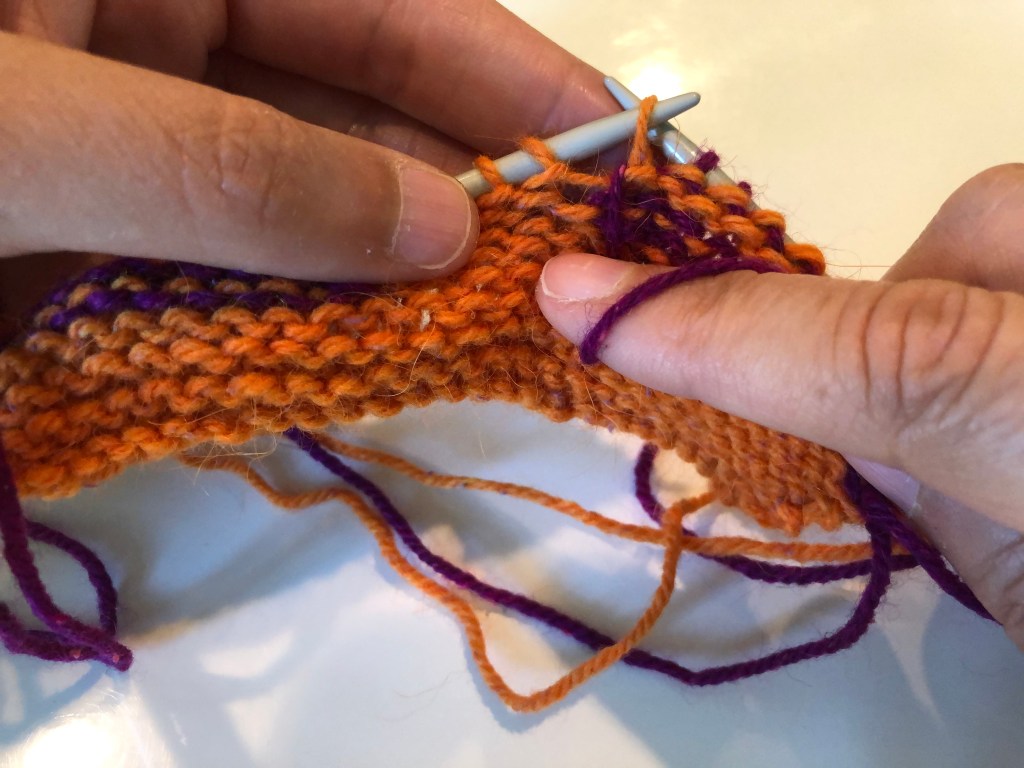
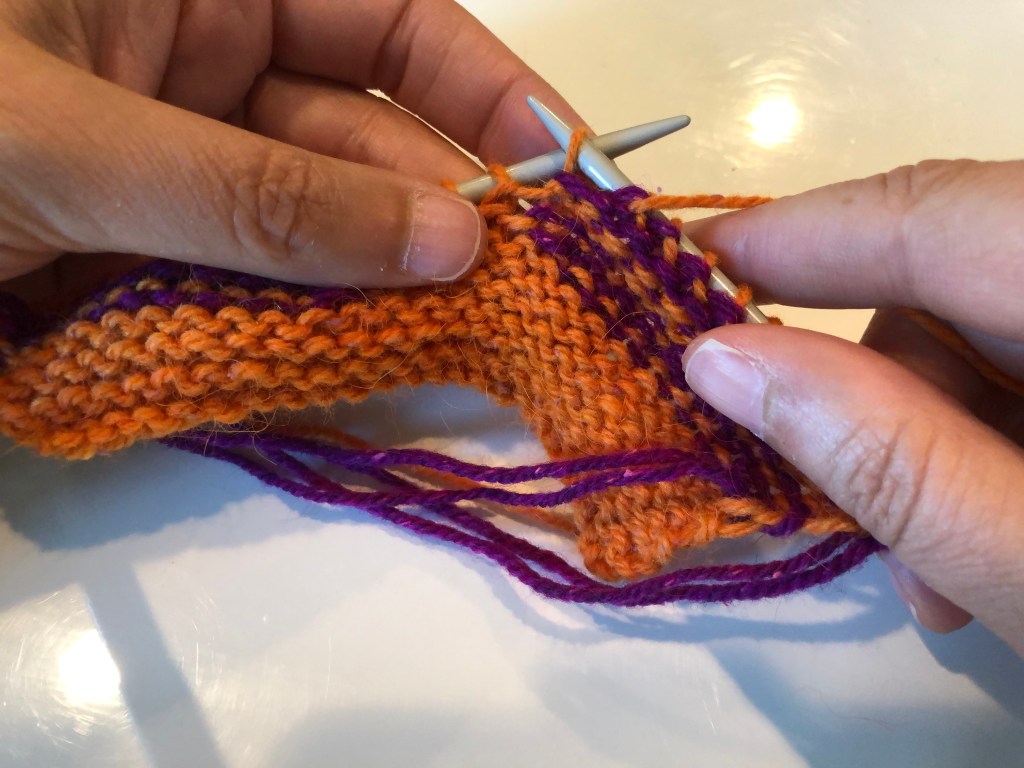
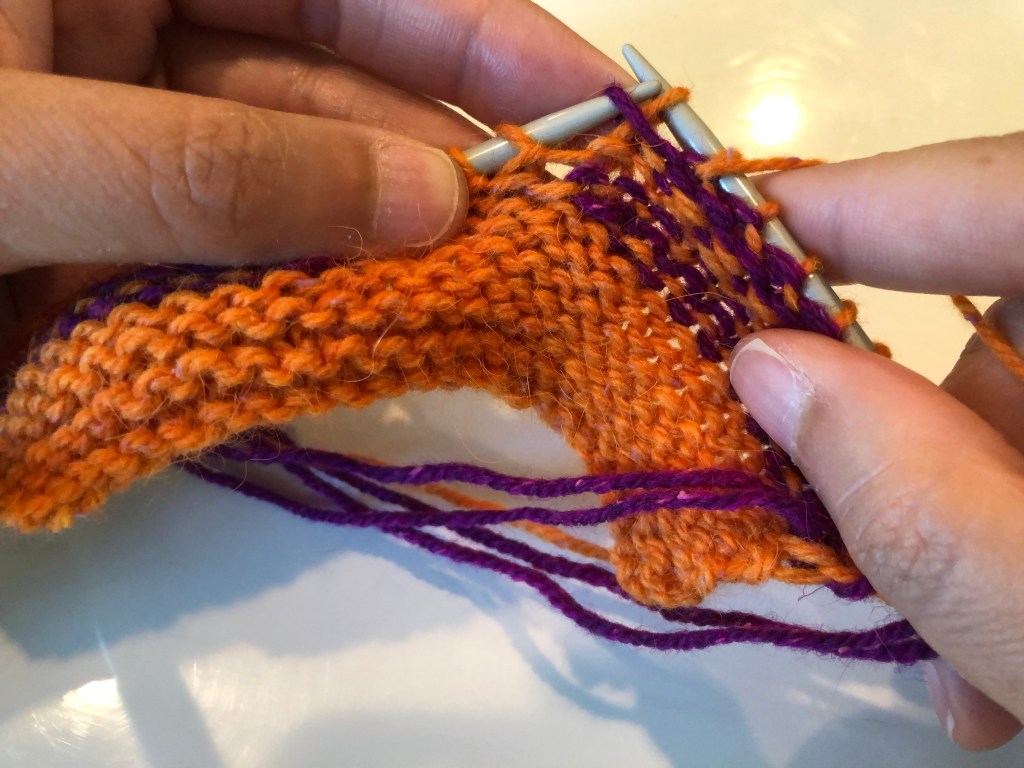
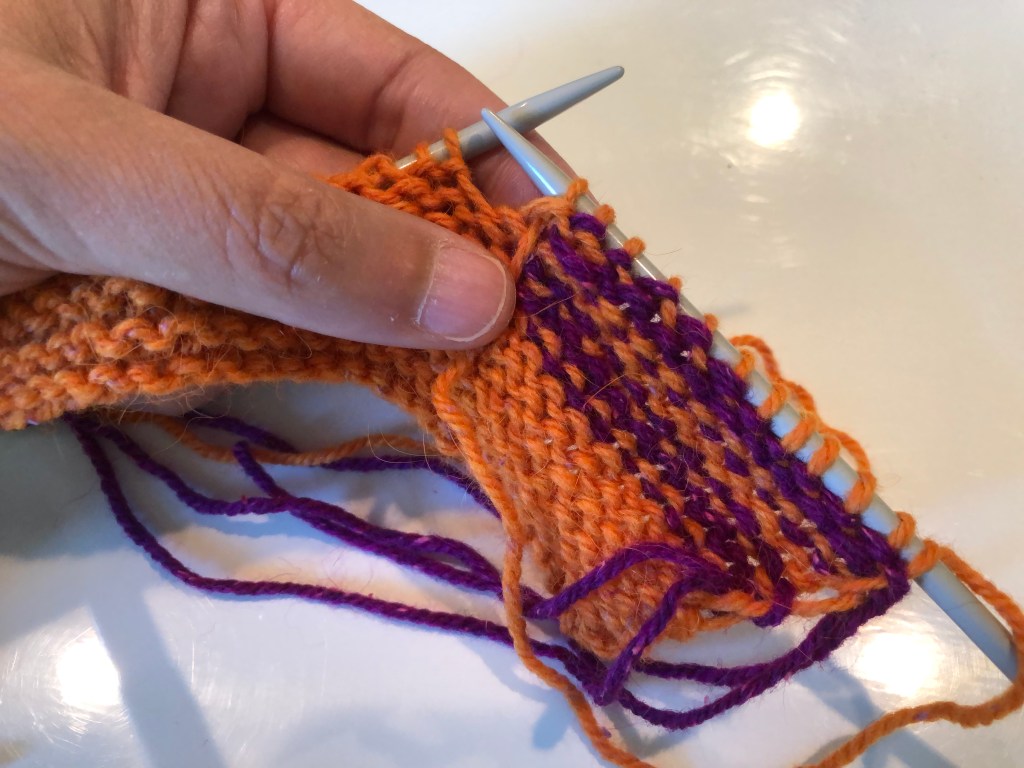
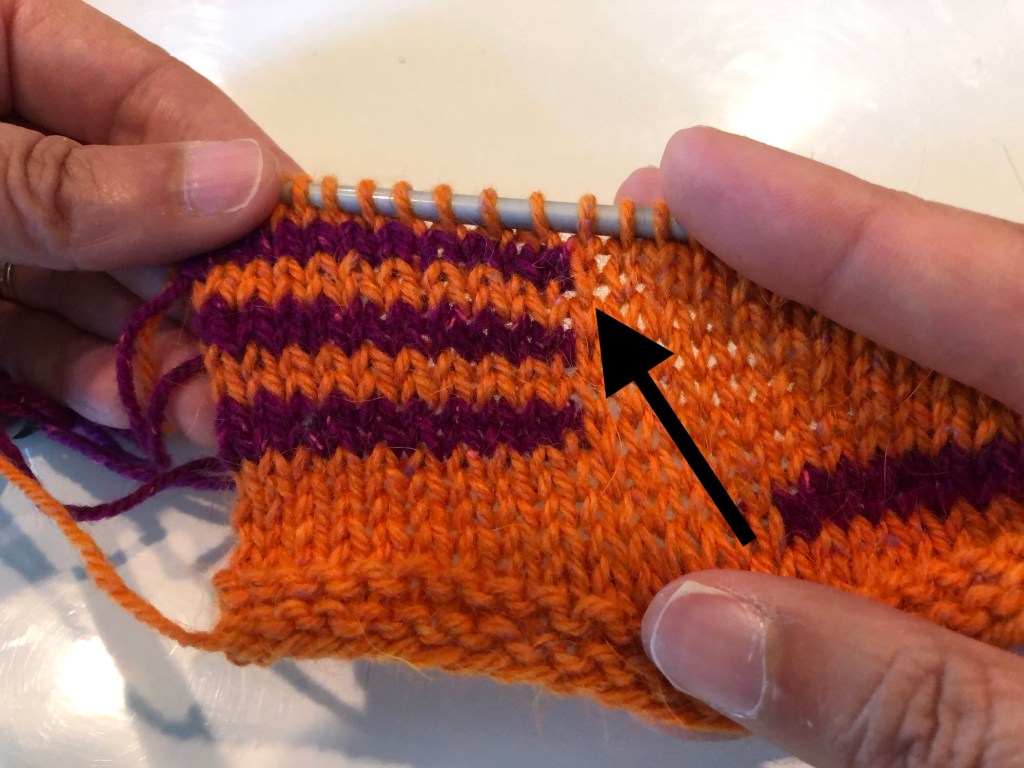
Wrap and Turn Short Row Finished Views
Notice that you can barely see the wrap, even if it is a different color.Backside (wrong side) view of the wrap and turn short row. You can see the wrap on the back side of the work.
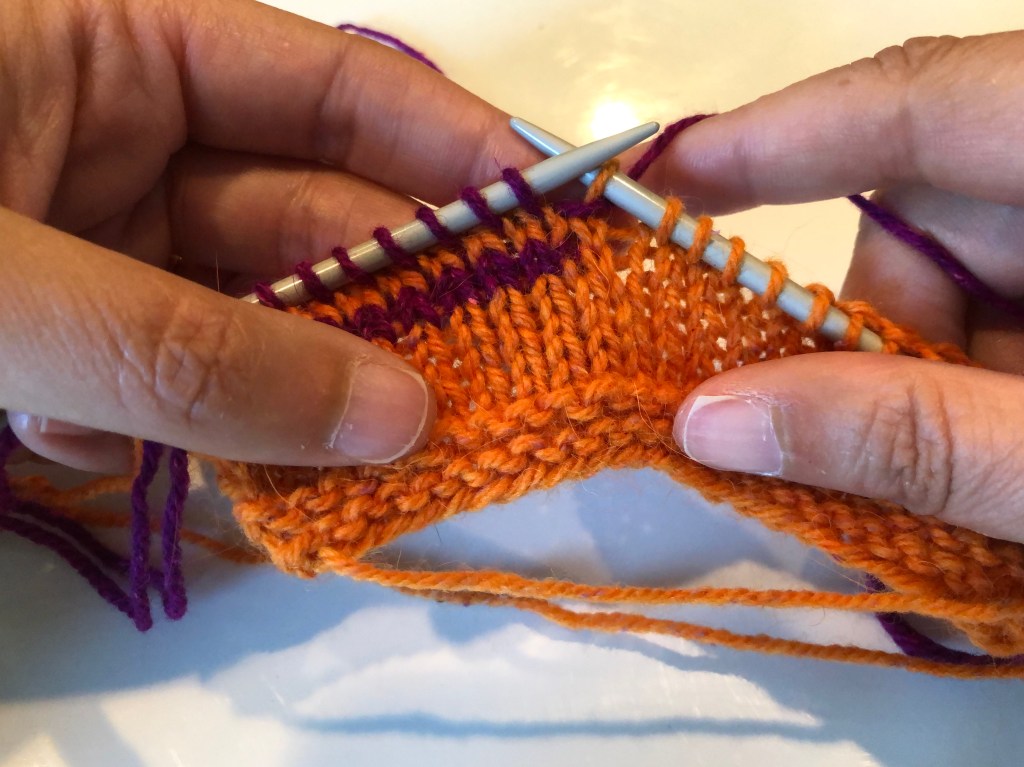
Part 3: Working the Turn, Wrong Side Facing You
Step 1: Purl up to the turn.Step 2: Move the yarn to the back.Step 3: Slip the next stitch KNIT-WISE Step 4: Bring the yarn to the front. The knitwise slip looks twisted, but it will end up not twisted when you work through the wrap. Step 5: Slip the wrapped stitch back to the left needle.
Step 6: Turn the work. The wrap should be in front of the slipped stitch, and the working yarn in the back of the work.
Step 7: Knit across the row.
Working the turn from the wrong side in stockinette stitch.
Part 4: Working Through the Turn, Wrong Side Facing
Step 1: Work up to the wrapped stitch.Step 2: Slip the wrapped stitch (purl-wise this time).Step 3: With the tip of the left needle, move the wrap to the right needle, placing it on top of the slipped stitch.Note how the wrap is on top of the slipped stitch on the right-hand needle.Step 4: Transfer both the wrap and the slipped stitch back to the left hand needle.Step 5: Purl THROUGH THE BACK of the loops. This will keep the wrap on the back of the work and untwist the stitch that you slipped knit-wise.Purl through the remaining stitches to the end of the row or to the next turn.
Working through the turn on the wrong side of stockinette stitch.
Finished Views
View from the right side. Note the wrap is on the back side and barely visible and the stitches next to the short row are not twisted.
View from the back side. You can see the wraps from the back.
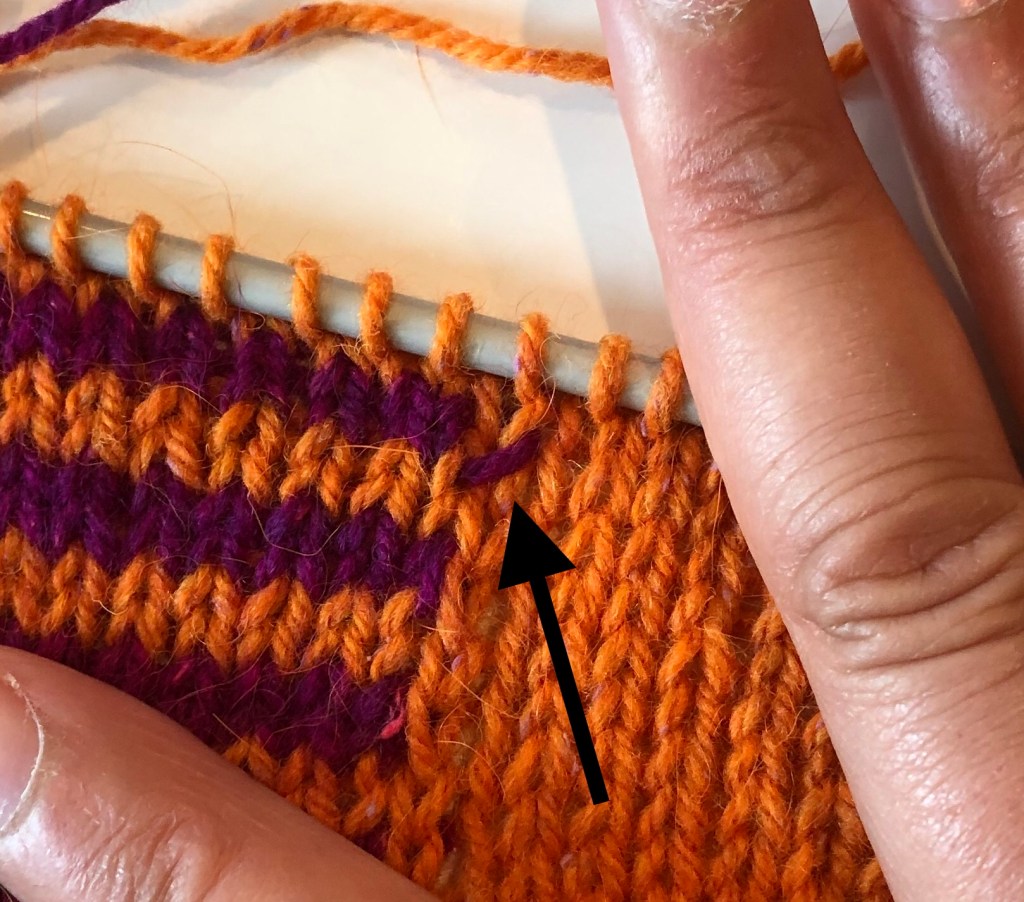
What happens if you slip the stitch purl-wise in Part 3, Step 3 or if you don’t purl through the backs of the loops (Part 4, Step 5)? If you slip the stitch purl-wise, the stitch next to the short row stitches will be twisted. You probably won’t notice it unless you are looking for it. If you don’t purl through the back of the loops, the wrap will show on the front of the work as shown in the second photo below.
Notice the twisted stitch at the end of the arrow, next to the short row stitches. It is not immediately obvious, so I wouldn’t worry if you forget to slip knit-wise instead of purl-wise.Part of the wrap shows on the front of the work if you don’t purl through the back of the loops. It would not be as obvious in the same color, but many of them together (like at the top of a sleeve cap) can draw the eye.
The next post will show how to work a wrap and turn in garter stitch.